
Game: Silent Hill f
Peripherals: –
Time to Platinum: 30-40 hours
Difficulty: 8/10
Missable trophies: All trophies not related to the story (36 in total)
Trophies: 1 ![]() , 1
, 1 ![]() , 9
, 9 ![]() , 46
, 46 ![]()
Author: Siralja
Welcome to the trophy guide for Silent Hill f. This can also be considered a walkthrough and may be used for PlayStation 4, 5, Xbox One, Series X and Steam. Achievements for Steam and Xbox are in almost all cases the same as the PlayStation 4/5 Trophies. A roadmap is provided in the stages below.
Follow us on Bluesky for the latest news and giveaways. Feel free to join our Discord server if you have questions!
Stage 1 – Complete the game on Story Mode / Story puzzle.
Welcome to the trophy guide for the game Silent Hill f, a game by “NeoBards Entertainment” and published by Konami.
There are a total of 93 different collectibles to collect, as well as lots of items with which you have to increase your Faith and then upgrade your character together with “Emas”, as well as summon Omamoris. For the platinum, at least three runs are mandatory, as the puzzle difficulty trophies are not stackable. The action difficulty level can be selected as desired, the “Lost in the Fog” difficulty level is suitable for the third run, as you are already very well equipped. Each boss also has a task for a trophy. The game has 5 different endings, you need to get them all.
Just follow the collectibles guide below to not miss all the important things, trophies are also listed there.(Ending 1)
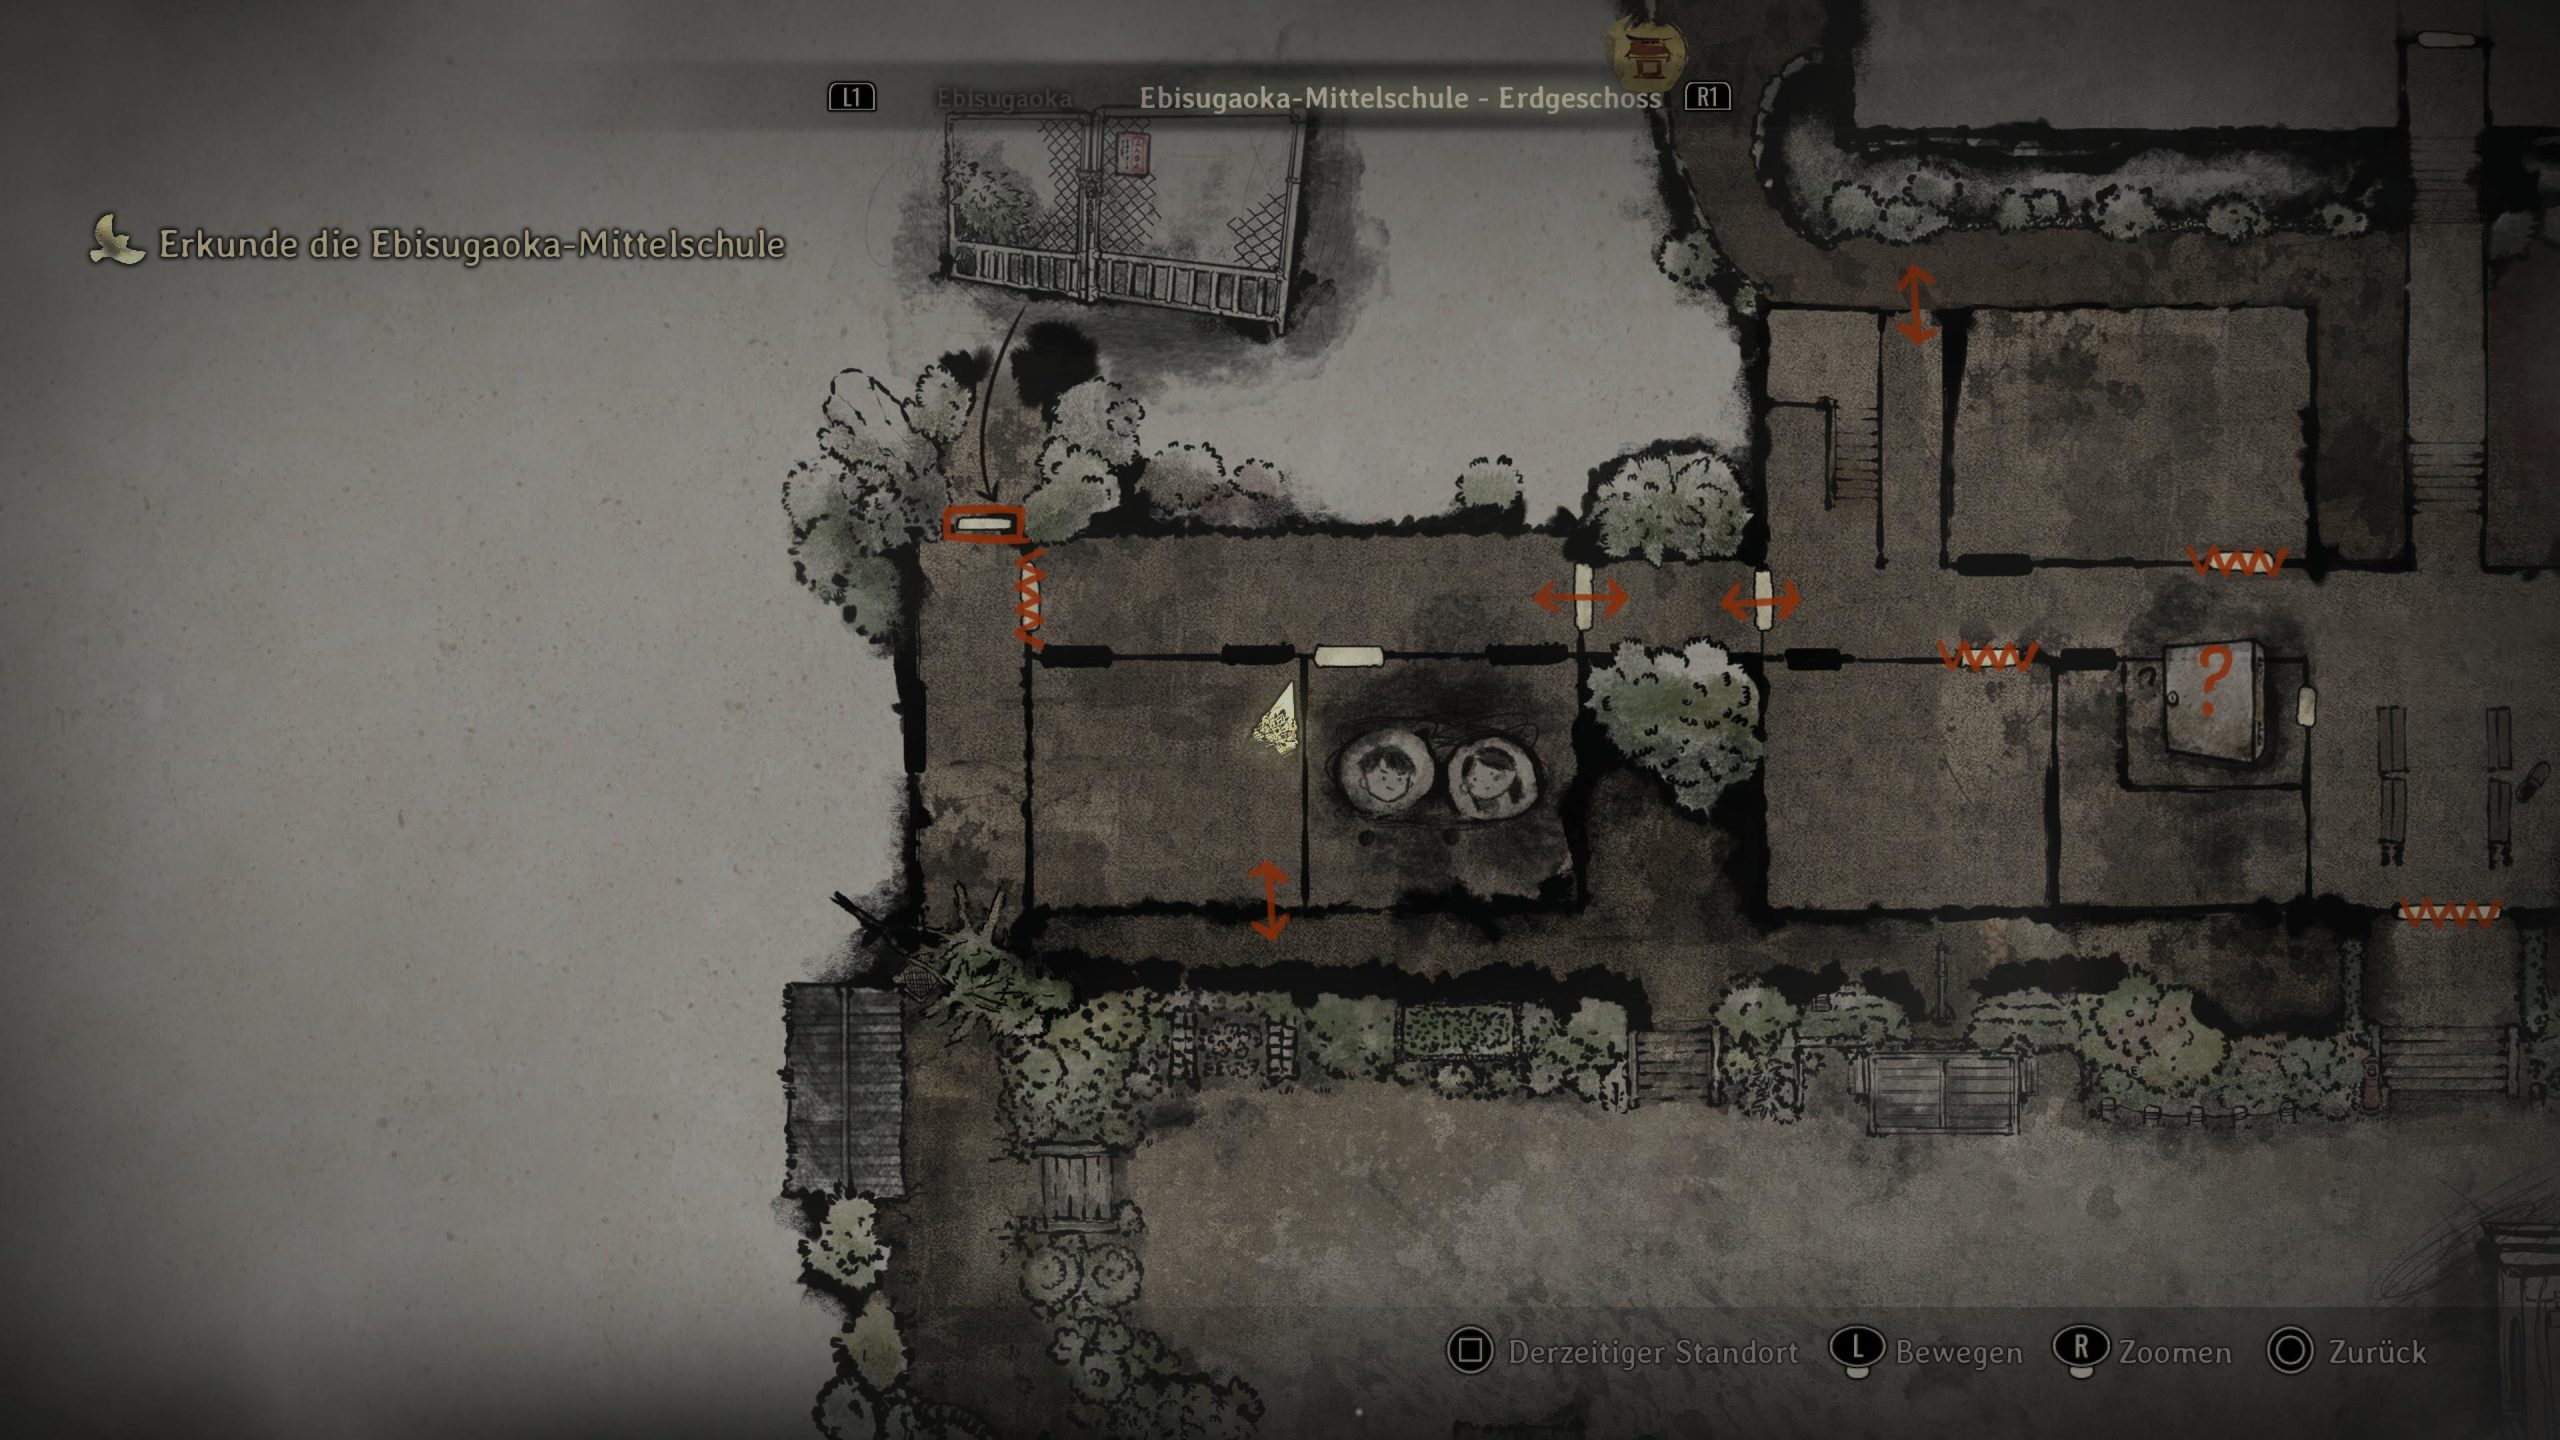
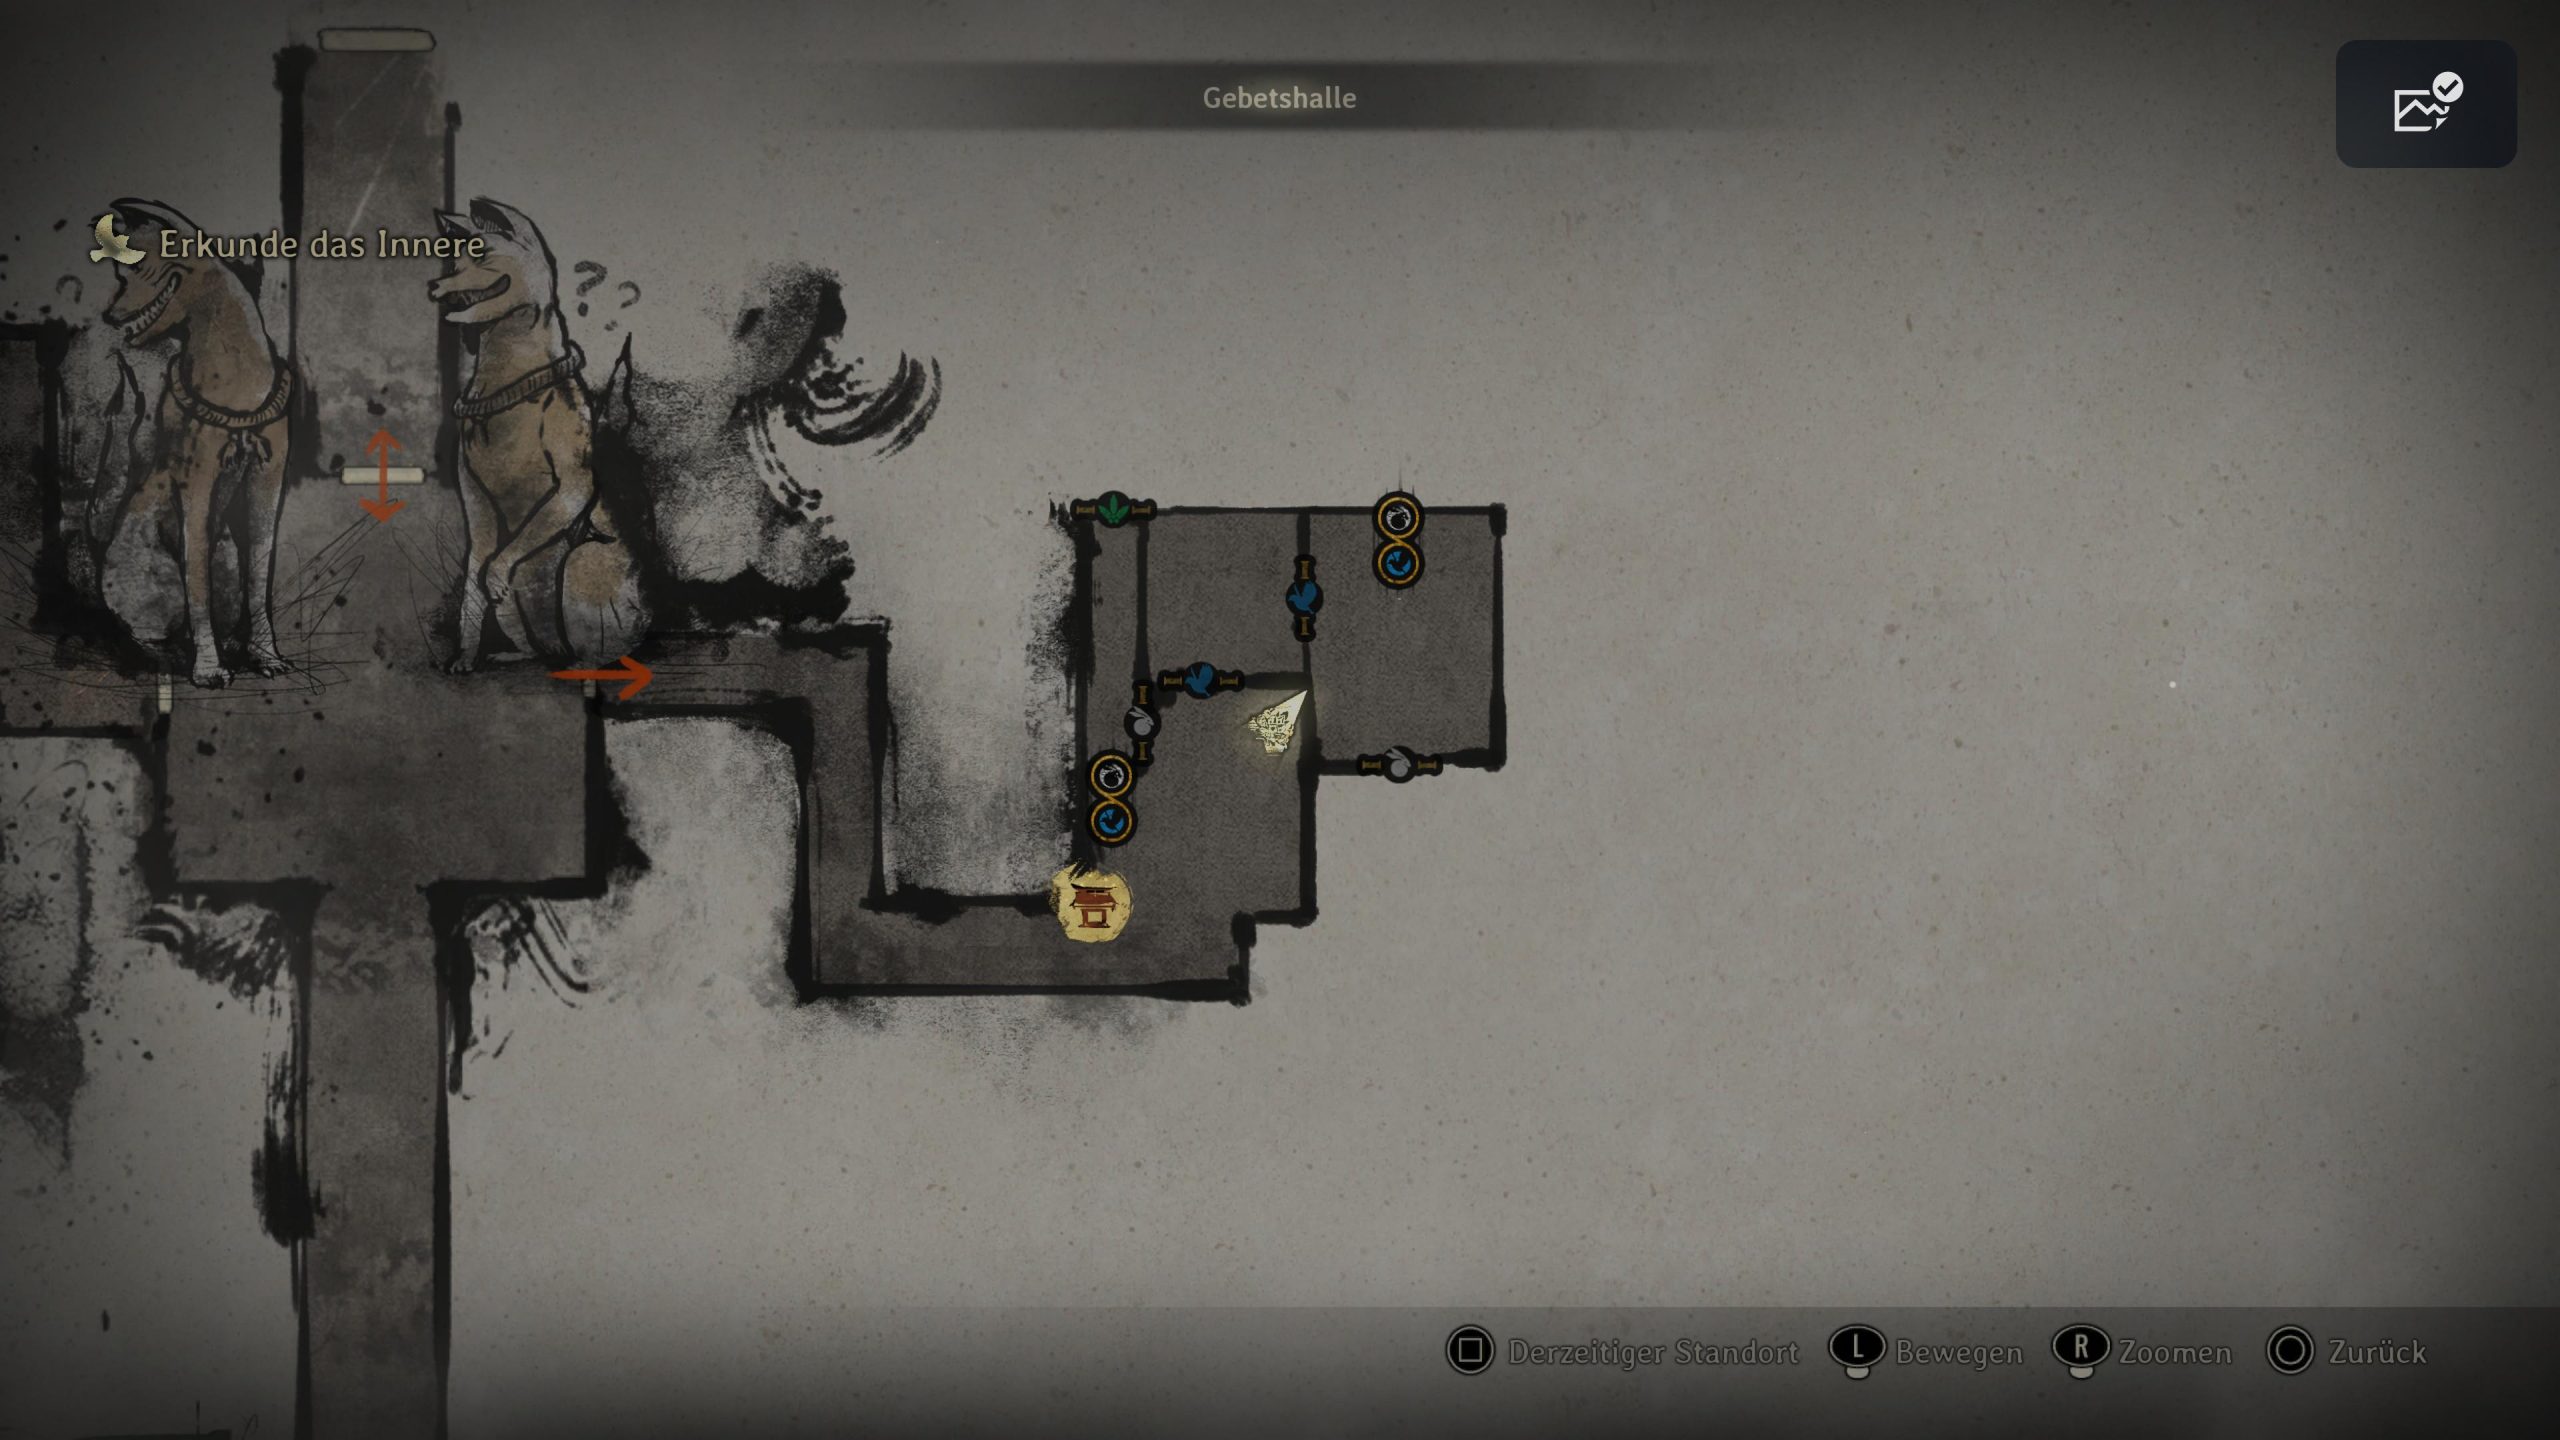
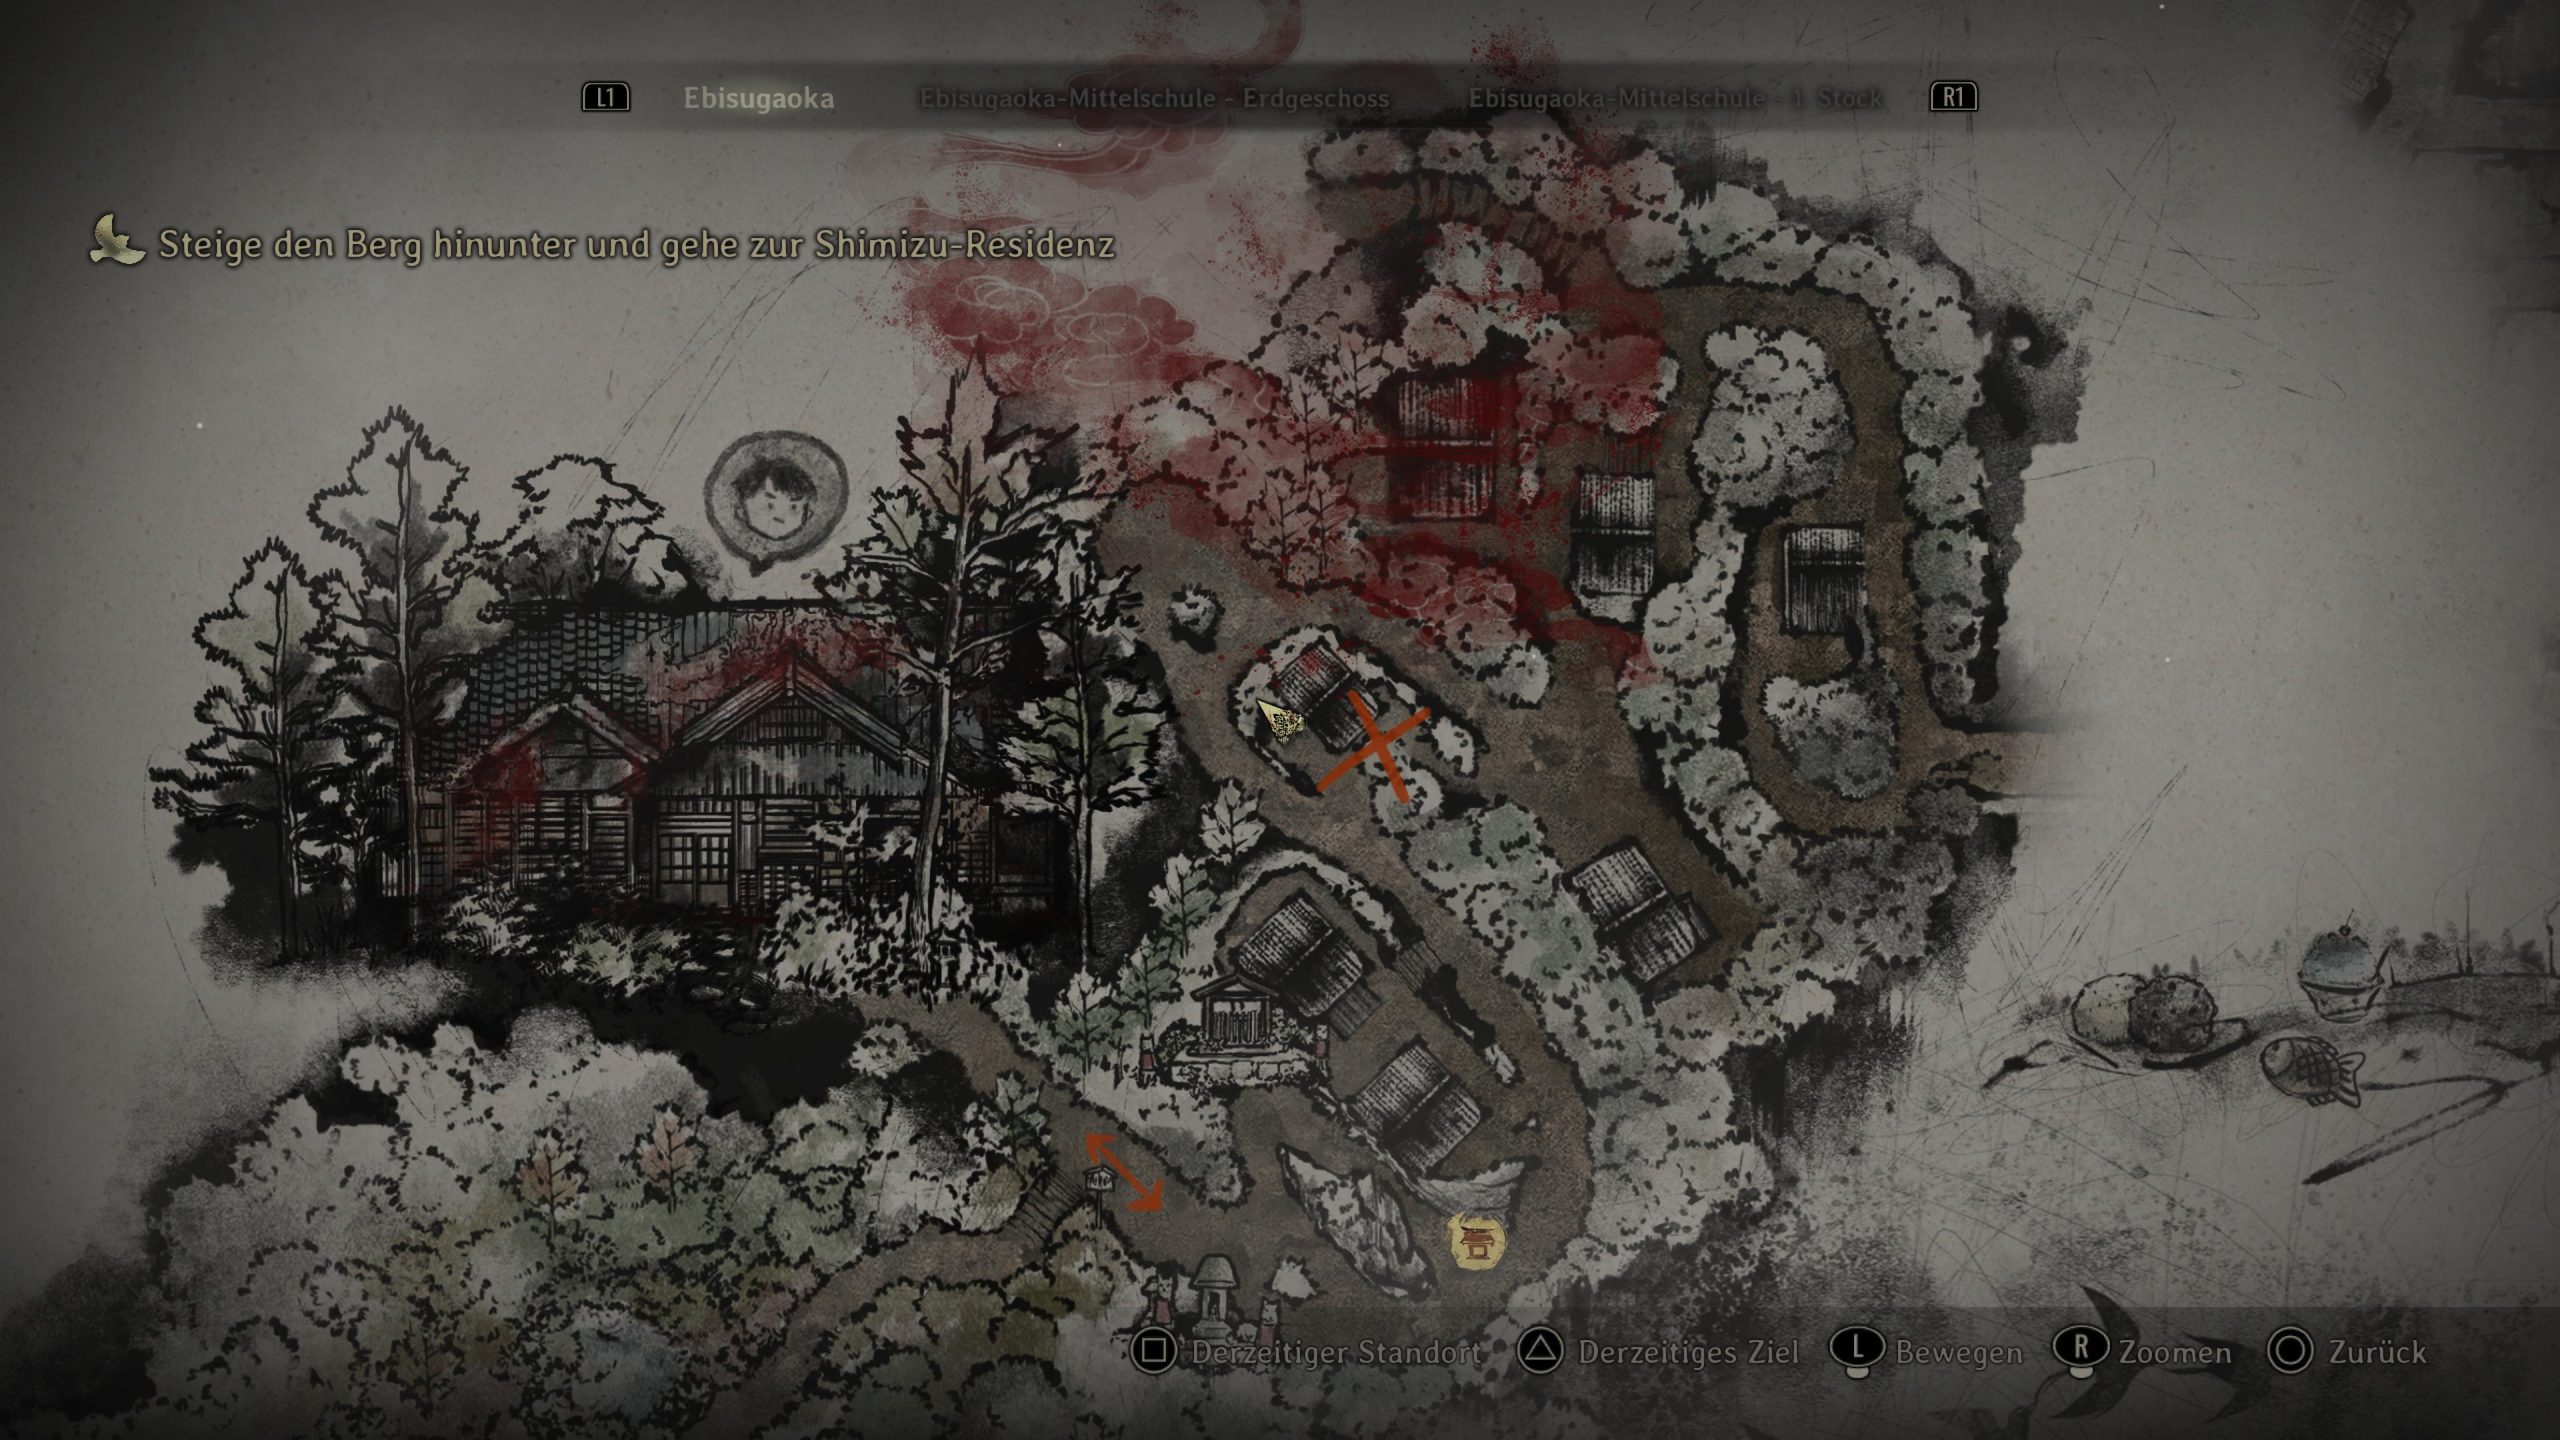
Ebisugaoka First Visit Shrine Path Ebisugaoka Second Visit Corridors Ebisugaoka Third Visit Ebisugaoka Middle School Worship Hall Ebisugaoka Fourth Visit Main Hall Ebisugaoka Fifth Visit Shimizu Residence Treasure Hall Ebisugaoka Sixth Visit Dark Shrine In this playthrough, the puzzle difficulty level is set on hard. Here, endings 2,3 & 5 can be unlocked. It is important in this run to NEVER take one of the red pills. If you ever pick one up, throw it away right away. Ebisugaoka First Visit Shrine Path Ebisugaoka Second Visit Corridors Ebisugaoka Third Visit Ebisugaoka Middle School Worship Hall Ebisugaoka Fourth Visit Main Hall Ebisugaoka Fifth Visit Shimizu Residence Treasure Hall Dark Shrine Shimizu Residence Treasure Hall Dark Shrine This is the last playthrough. Start a new game+ with 2 endings completed on the save and play both the Action Difficulty and the Puzzle difficulty on Lost in the Fog. In this run, there are significantly fewer healing items, significantly increased damage received and no more healing at the shrine. Again, never take one of the red pills, if you do pick one up, throw it away immediately. Shrine Path Altar puzzle: Ebisugaoka Second Visit Scarecrow puzzle: Worship Hall Ebisugaoka Fifth Visit Shimizu Residence Treasure Hall Dark Shrine You brought the trophy out of the deepest fog. Congratulations! Ending 4: Ebisugaoka in Silence is only available on New Game+2. Before starting, ensure your save file has completed at least two full endings (Ending 5 does not count). To successfully achieve this ending, you must meet the following three in-game conditions: Ending 3: The Fox Wets Its Tail is achievable only on New Game+. To unlock it, be sure to meet these three specific conditions: To earn the associated trophy, you must complete the game on each puzzle difficulty setting. These requirements do not stack, meaning you must complete a full playthrough for each difficulty level. The Lost in the Fog puzzle difficulty is available immediately on your first playthrough. This fight is exclusive to Ending 1 (First playthrough), and a trophy is awarded only if you defeat the boss without dying. The fight is long, so bring plenty of healing items. Story difficulty is ideal, as First Aid Kits and Bandages are abundant. Equip the Blessed Hand Mirror if you have it; it provides a free, full-stat revival from a fatal blow. The fight is mostly manageable by simply focusing on hitting the boss aggressively when possible. Watch out for the phase where the boss covers the floor in red flowers. Your health will chip away for 10 seconds, followed by a heavy damage explosion. Heal while the health is chipping to survive the blast. If you are downed, QUIT TO THE MAIN MENU and then Continue your game. Never click “Continue” on the death screen, as this may invalidate the trophy requirement. This boss fight occurs during the Ending 3 path (New Game+). To secure the associated trophy, you must ensure you clear all spawned enemies before delivering the final blow to the main boss. The boss will become weak and spawn enemies three times during the fight. When this happens, stop all attacks on the boss and focus 100% on eliminating every smaller enemy before proceeding. To unlock the Lost in the Fog action difficulty, you must first complete the game once. This setting introduces stronger enemies, new enemy placements, and removes all free healing from Hokora Shrines. The best time to attempt this trophy is during New Game+2, as you will have all character upgrades and can equip a 5th Omamori. If the game offers to lower the difficulty after death, DO NOT ACCEPT. This will void the trophy and cannot be undone. Remember that many fights can be skipped entirely by running past the enemies. This boss fight occurs during the Ending 2: Fox’s Wedding path (New Game+). The boss will eventually teleport far away and begin shooting golden arrows. Your goal during this phase is to run forward and reach the boss, using constant dodging to avoid the arrows. Other attacks that create waves can be dodged, but only being hit by an arrow will invalidate the trophy requirement. The boss uses three distinct arrow attacks you must watch for: The Boar and the Suzuran Omamori are recommended for this boss because it helps you get by with your stamina. This trophy requires you to defeat both Kyubi and Tsukumogami at the Dark Shrine (Ending 4, NG+2) in under 10 minutes of active combat time. The timer stops when you die. Use this to your advantage: die as much as needed to learn each phase perfectly, then execute them quickly. Checkpoints occur after every two phases. Bring Sanity-restoring items (Ramune, Divine Water, etc.) to quickly charge your Bestial Form. This is essential for speeding through the Kyubi phases (Fox Arm). Recommended 5-Slot Omamori Build: This build maximizes passive defense and high-damage counters, making the fight manageable even on the highest difficulties. If you struggle with time, you can lower the action difficulty to Story after multiple deaths. To unlock this trophy, you must reach Shu’s House without ever using a Red Capsule. You can pick them up, but you must not use them. Once at Shu’s House, enter the workshop, and do not pick up the Red Capsules found there. Grab the letter on the desk. Note that you must repeat this clean run for Endings 2, 3, and 4. Ending 2: Fox’s Wedding is achievable only on New Game+. To unlock it, be sure to meet these three conditions: This takes place during your New Game+2 playthrough, and is mandatory for Ending 4. In your Fifth Visit in Ebisugaoka, after clearing the forced fight in the park, head up the stairs. Before ascending fully, look to the right for a new side path leading to the Ancient Jizo Statue. Simply approach the statue and hold the X button to offer your Brooch. Collect all 14 unique documents during your New Game playthrough. You’ll need to find: 4 Housemaid’s Notes 5 Family Physician’s Logs 5 Strict Mother’s Letters During the fourth visit to Ebisugaoka, after successfully escaping from the Fog Monster, you can go up a flight of stairs to the left of the shrine. Walk up the stairs to the top. At the end of Shimizu Residence, you will fight Hinako’s parents. To win quickly, ignore the smaller boss entirely. Focus all damage on the giant boss with the blade; defeating it will instantly end the fight. You must successfully find all three crests within the Treasure Hall without making a single mistake. A mistake is defined as entering an incorrect door in the rooms with multiple choices. During the initial sequence of the Ebisugaoka Sixth Visit, you will chase the Fog Monster. You need to catch up to it three separate times to unlock the trophy. The monster’s appearance is tied to specific spots on the path, so once you see it, ignore the surrounding enemies and sprint at it. If you reach it quickly, it will teleport and create a barrier, counting as a successful interception. If you allow the monster to walk too far into the fog without teleporting, you have failed that attempt. You must ensure you successfully force the teleport three times across this area’s path. In your New Game+2 playthrough, a total of 5 Rinko’s Diary pages can be found within the Worship Hall area. See the collectibles guide above. You will collect a total of 8 Sakuko’s Diary pages in the Worship Hall across your first three playthroughs (New Game, New Game+, and New Game+2), broken down as follows: New Game: New Game+: New Game+2: During your New Game+ playthrough, you can find 6 Diaries of Revenge. All of these are hidden inside Inari-sama boxes. Starting in New Game+, your Brooch can be used as a key to access previously locked areas. You’ll need to open a total of 4 Inari-sama Doors and 7 Inari-sama Boxes in this playthrough. This crucial sequence, necessary for achieving Endings 2 and 4, is completed during your New Game+ playthrough. You can find a total of 17 Omamoris across your New Game and New Game+ playthroughs. These are valuable equippable items that grant your character various boosts and buffs. See the collectibles guide above where to find them. You can acquire Omamoris by drawing them at Hokora Shrines. The process is: Enshrine Offerings to gain Faith, then Draw Omamori using that Faith. There are 23 Omamoris in total to draw, costing a cumulative 20,200 Faith. The initial cost is 300 Faith, increasing by 100 Faith after each pull until it maxes out at 1,000 Faith. The Omamori received is not truly random. It is predetermined for a short time. This means if you save your game before drawing one, reloading the save will give you the exact same Omamori—it won’t change. Faith is gained by enshrining items. Prioritize the high-value items for faster accrual: To maximize your carrying capacity, seek out the six inventory-expanding items scattered across New Game and New Game+. See the collectibles guide above where to find them. To fully upgrade your character’s Health, Sanity, and Stamina, you must spend two primary resources: Faith and Ema (Character Upgrades). Collect 18 Ema and 22,500 Faith across your first three playthroughs to completely maximize these core stats. See the collectibles guide above where to find them. During the fourth visit to Ebisugaoka, you have to run away from the Fog Monster again without getting a hit. Watch out for the red spots on the ground and also for the monsters that lurk along the way this time. If necessary, dodge them in time to avoid being hit and wait for the screaming monsters until they are done before you continue running. In addition, it makes sense to equip the horses Omamori during the run so that you can run continuously. To obtain the Sacred Sword (required for Endings 2, 3, and 4), you must be on New Game+. The quest requires you to find a specific Key Item and offer it to a Jizo Statue during each of your five visits to Ebisugaoka. See the collectibles guide above where to find them. After successfully offering all five items to the five Jizo Statues, return to the Thousand Year Cedar to claim the Sacred Sword. To find the Agura no Hotei-Sama for Ending 2 in New Game+: This boss takes place in Main hall, after the three Rituals to became a fox. It will occasionally spawn slow-moving puppets that become explosive if hit by fire. To earn this trophy, finish the fight without taking damage from them. Attack the puppets as soon as they appear—they die in 1–2 hits and can be Soul Siphoned with the cross button to recharge your ability. If the boss prepares a fire attack, keep away from the puppets. If they ignite, stop attacking, regain stamina, and dodge when they rush you. As soon as you visit Ebisugaoka for the second time, walk all the way up to the northeast. There you will find a grave near a large gate, where keys for a mailbox are located. Then go back to the general store to open Sakuko’s mailbox there. Within the “chapter” Main Hall, right after middle school, there are 2 areas to explore at the beginning. On the right side (east) there are blue lanterns in some rooms. Kill 8 enemies inside the blue light (in story mode. On higher difficulty levels, there are more). The enemies glow blue as soon as they are within range of the lantern. There are enemies in these rooms: Story related. Cannot be missed. Story related. Cannot be missed. Story related. Cannot be missed. Story related. Cannot be missed. Story related. Cannot be missed. Story related. Cannot be missed. Story related. Cannot be missed. Story related. Cannot be missed. Story related. Cannot be missed. Story related. Cannot be missed. Story related. Cannot be missed. Story related. Cannot be missed. During your third visit to Ebisugaoka, a cutscene comes just before the general store where monsters walk along it. The characters say that you should ignore them, just don’t do this. Defeat the big monster. Kill the smaller, weaker ones first. Story related. Cannot be missed. Ending 5: The Great Space Invasion! is available on New Game+. Note that this ending is considered non-canonical and does not count toward full ending completion or any difficulty trophies. To unlock it, you must: For more information about this trophy, see “Clear Skies“. For more information about this trophy, see “Clear Skies“. For more information about this trophy, see “Puzzle Master“. For more information about this trophy, see “Puzzle Master“. Just run by pressing R3 and dont get hit by the red tendrils. If you do get hit or caught, die and press continue. There are several ways to achieve this: At the end of your second visit to Ebisugaoka, you will go with Shu to fields with Scarecrows. Always choose the right one. Story related. Cannot be missed. This boss is waiting for you in the corridors. It has a bell attack that starts when it teleports away from you and it gets dark. Then run to him as fast as you can (you can see him through his glowing weapon) and attack him. He does this attack 6 times, so you don’t get hit by it. If you do get hit, get defeated or reload your last save. You’ll need to complete three playthroughs (New Game, New Game+, and New Game+2) to find all 3 Clinical Trial pages. A single page is located in Ebisugaoka Fifth Visit during each playthrough.Trophy Like the Fleeing Hare Starts as soon as you reach the general store. – – Key Item Bloody Key As soon as you enter the first house, go upstairs and right through the door. 

Key Item Back Door Key After getting the Bloody Key, enter the room opposite the stairs. You’ll find the item on the coffee table. 

Omamori Whale First, ignore the current door and go downstairs to use the Back Door Key.After using the key, climb down the ladder and immediately turn around to collect the Omamori. With that done, you can head back upstairs and unlock the door with the Bloody Key. 

Offering Antique Comb Back on the street, go up the stairs (avoid the enemy). The offering is on the low wall directly beside them. 

Puzzle Altar You need to place the five offerings on the altar pedestals. The key is to match the knot image on each pedestal with the corresponding image on the offering. Front Left: Kimono
Back Left: Rat
Front Middle: Vase
Back Right: Fish
Front Right: Paper Fan
Trophy Untouchable Start as soon as you have interacted with the puppet at the shrine where the sword was. – The following three collectibles must be collected while this trophy is running, because once you enter the shrine, they can no longer be collected. Omamori Cat Go west of the map and look for a cat in the pictures. The cat looks different from the others. 

Offering Dried Carcass The dried carcass is also lying on a stone in the west, just before the picture panels. 

Puzzle Shrine Vault Find the wooden ema at shrines featuring a crane, serpent, or tortoise. On the last one, there will be the Missing piece from the door. 

Offering Dried Carcass After the first cutscene, walk east and go into the first alley on the right. Follow the path until you reach a small red box on the ground. 

Inventory Upgrade Shoulder Bag Walk the path back to the main road. Now follow it to the north, left until the end and Fight two enemies. 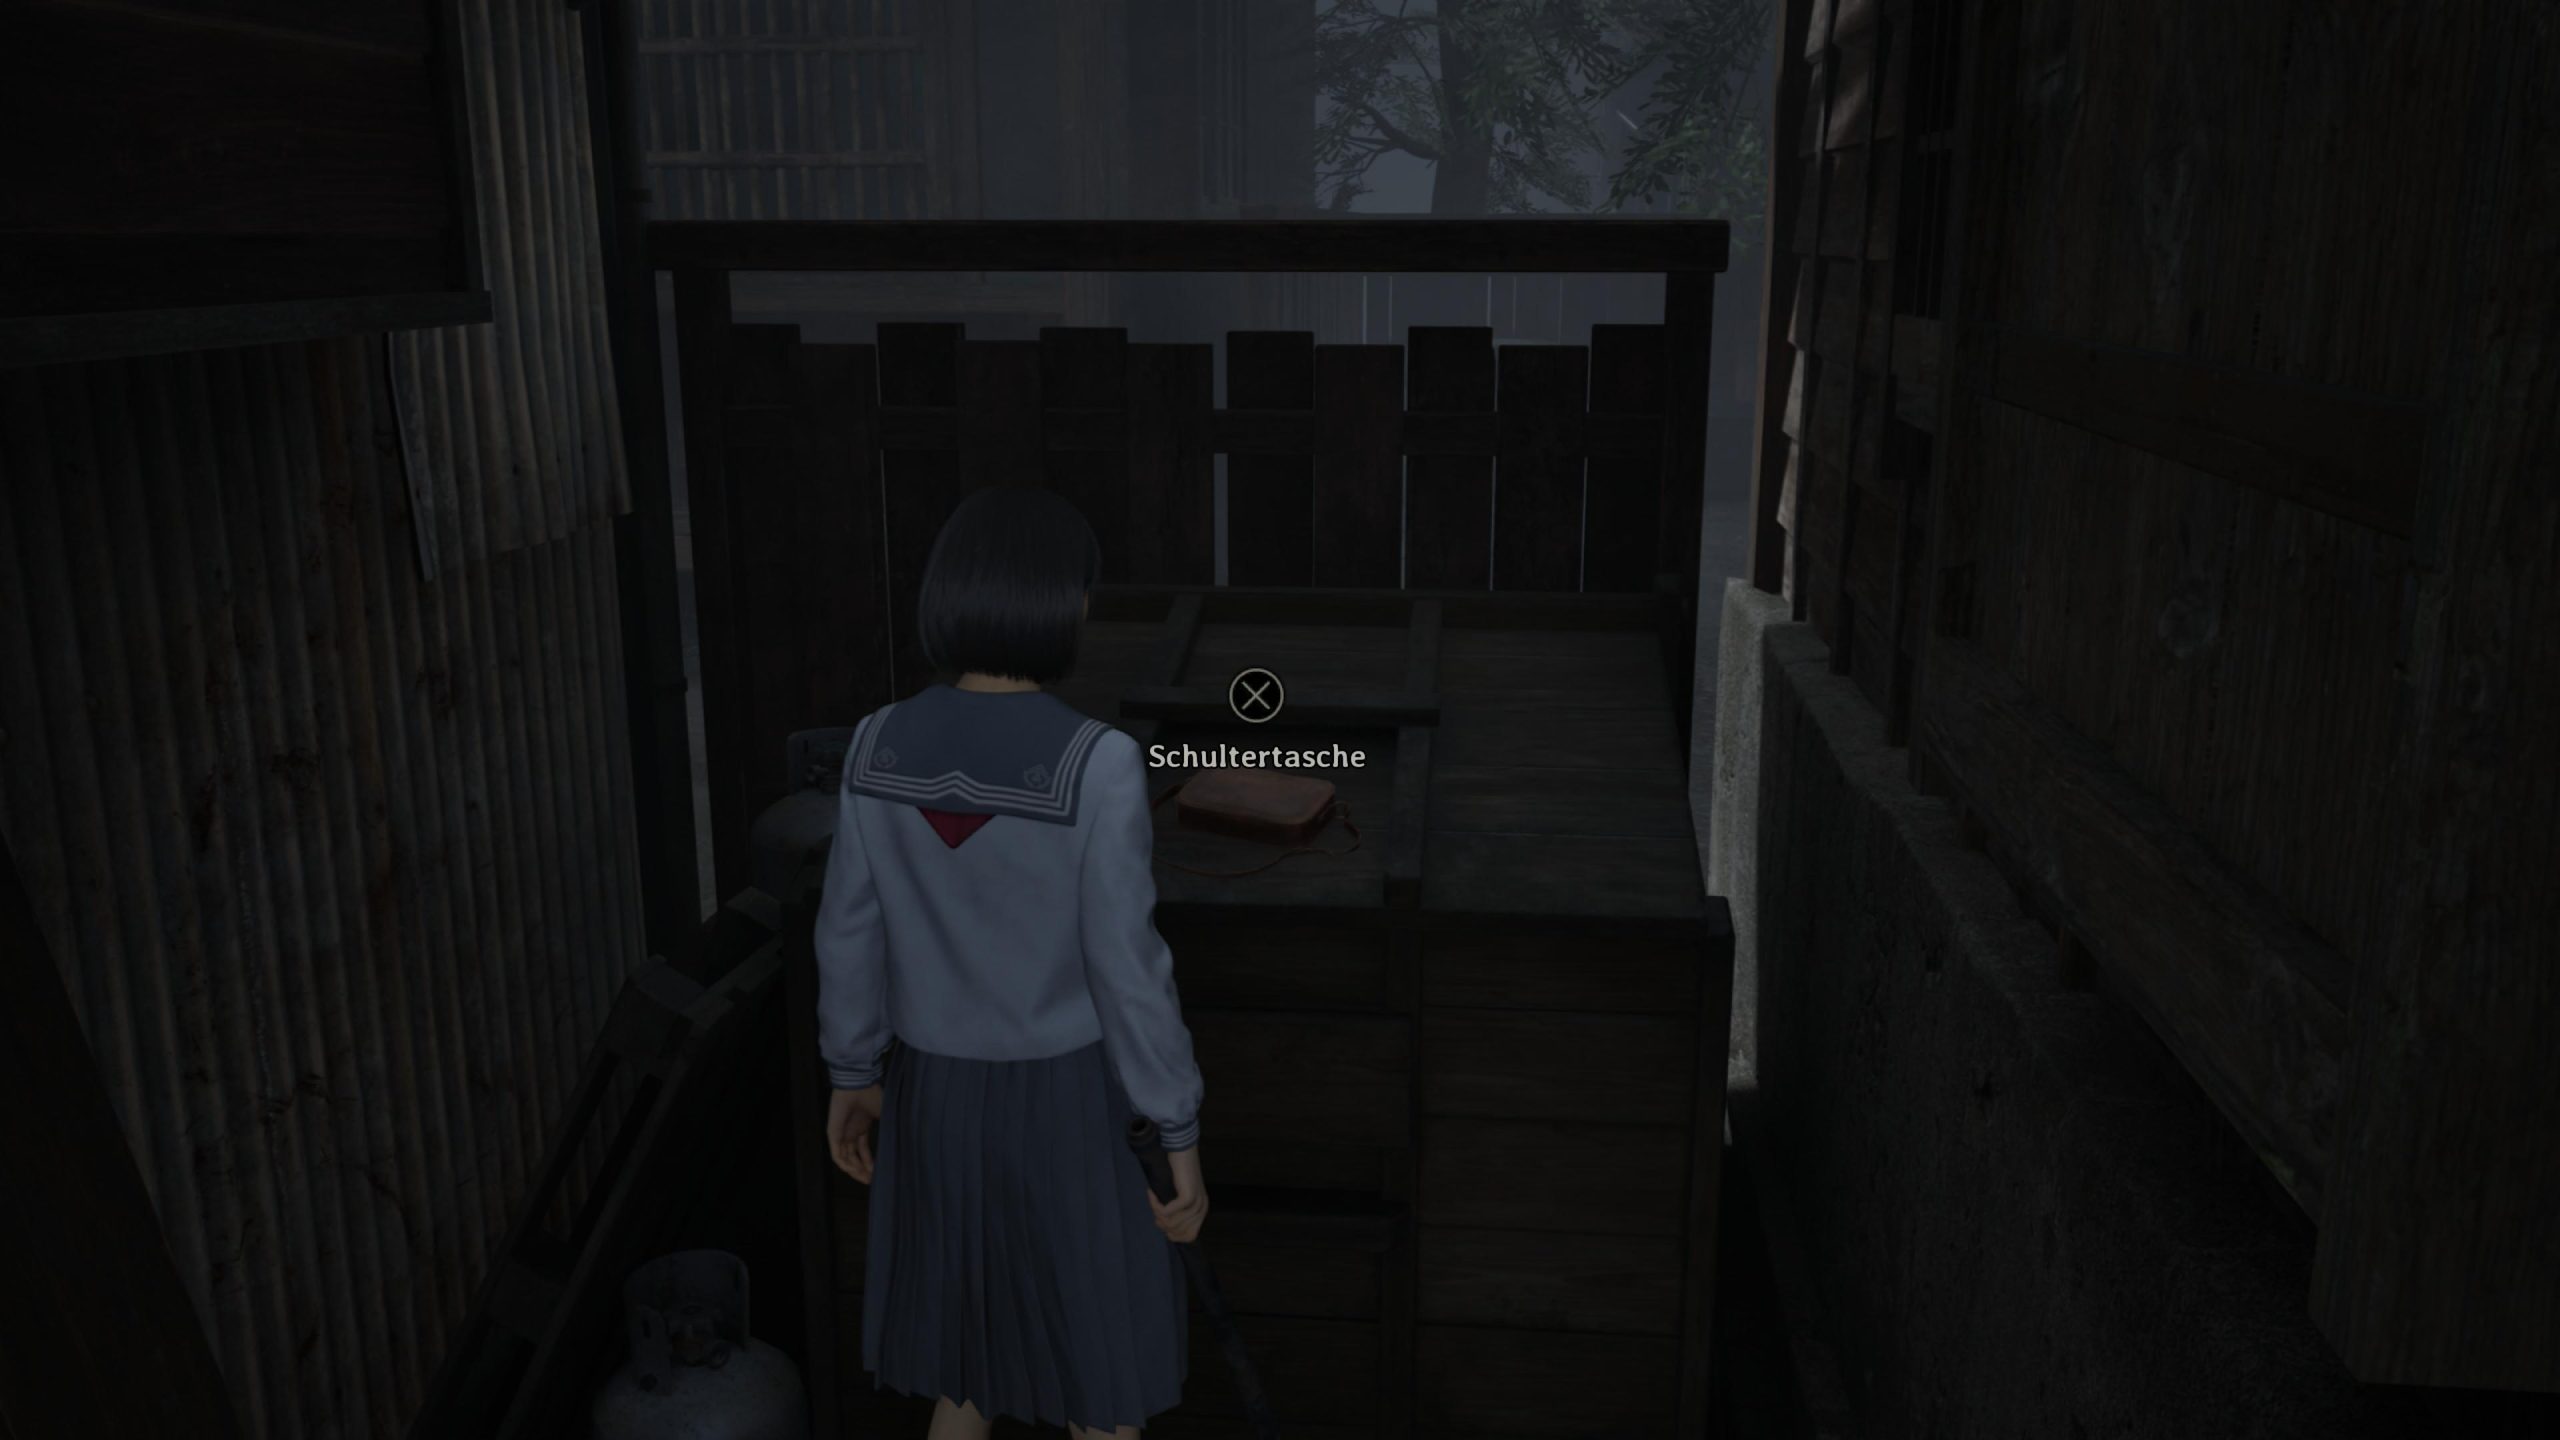

Character Upgrade Ema Go back to the Scarecrow and continue north. On the main road then turn right, until you reach a house by a shrine. 

Key Item Drawer Key Keep running and head north again. There is the doctor’s house. Walk around the house to enter the house via a ladder. Go downstairs and get the key out of a chest. 

Omamori Pine Go back upstairs and open the drawer there and then go to the room next door for the ema. 
Key Item Key to Sakuko’s Mailbox Continue north until you reach a gate. Shortly before a grave lies the key. 

Offering Antique Comb Just a few meters away you will find this offering. 

Trophy A Federal Offense Starts as soon you’ve grabbed the key to Sakuko’s Mailbox. – – Offering Dried Carcass Go into the Fields to find this one. 

Character Upgrade Ema Further north, after the fight with a large monster, comes a shrine. A few meters further on the right side in the front garden of a house is the Ema. 

Trophy Acupuncture Specialist Starts as soon as you reach the Fields after talking to Shu. – There is always a box in each of the 5 areas. In one of them hides an offering item. Character Upgrade Ema Head northwest to find it on a crate. 

Offering Shriveled Abura-age Continue northeastern to find it behind a japanese-styled wall. 

Omamori Hawk From the Sacred Door, go east into the room the enemy came from. It’s on a chest by the window. 

Document Housemaid’s Note (1) You’ll find it on the floor inside the Library, the very next building you enter. 

Document Family Physician’s Log (1) Just past the previous document, look on the coffee table to the left. 

Document Family Physician’s Log (2) Further down the hall, it’s on the floor to the right. 
Offering Dried Carcass After shimmying past the bookcases, enter the room with strewn books. It’s on a bench in the corner. 

Omamori Blessed Hand Mirror After opening the Sacred Door, you’ll be in a room with a Hokora Shrine and supplies. This breakable Omamori is next to a Medkit. 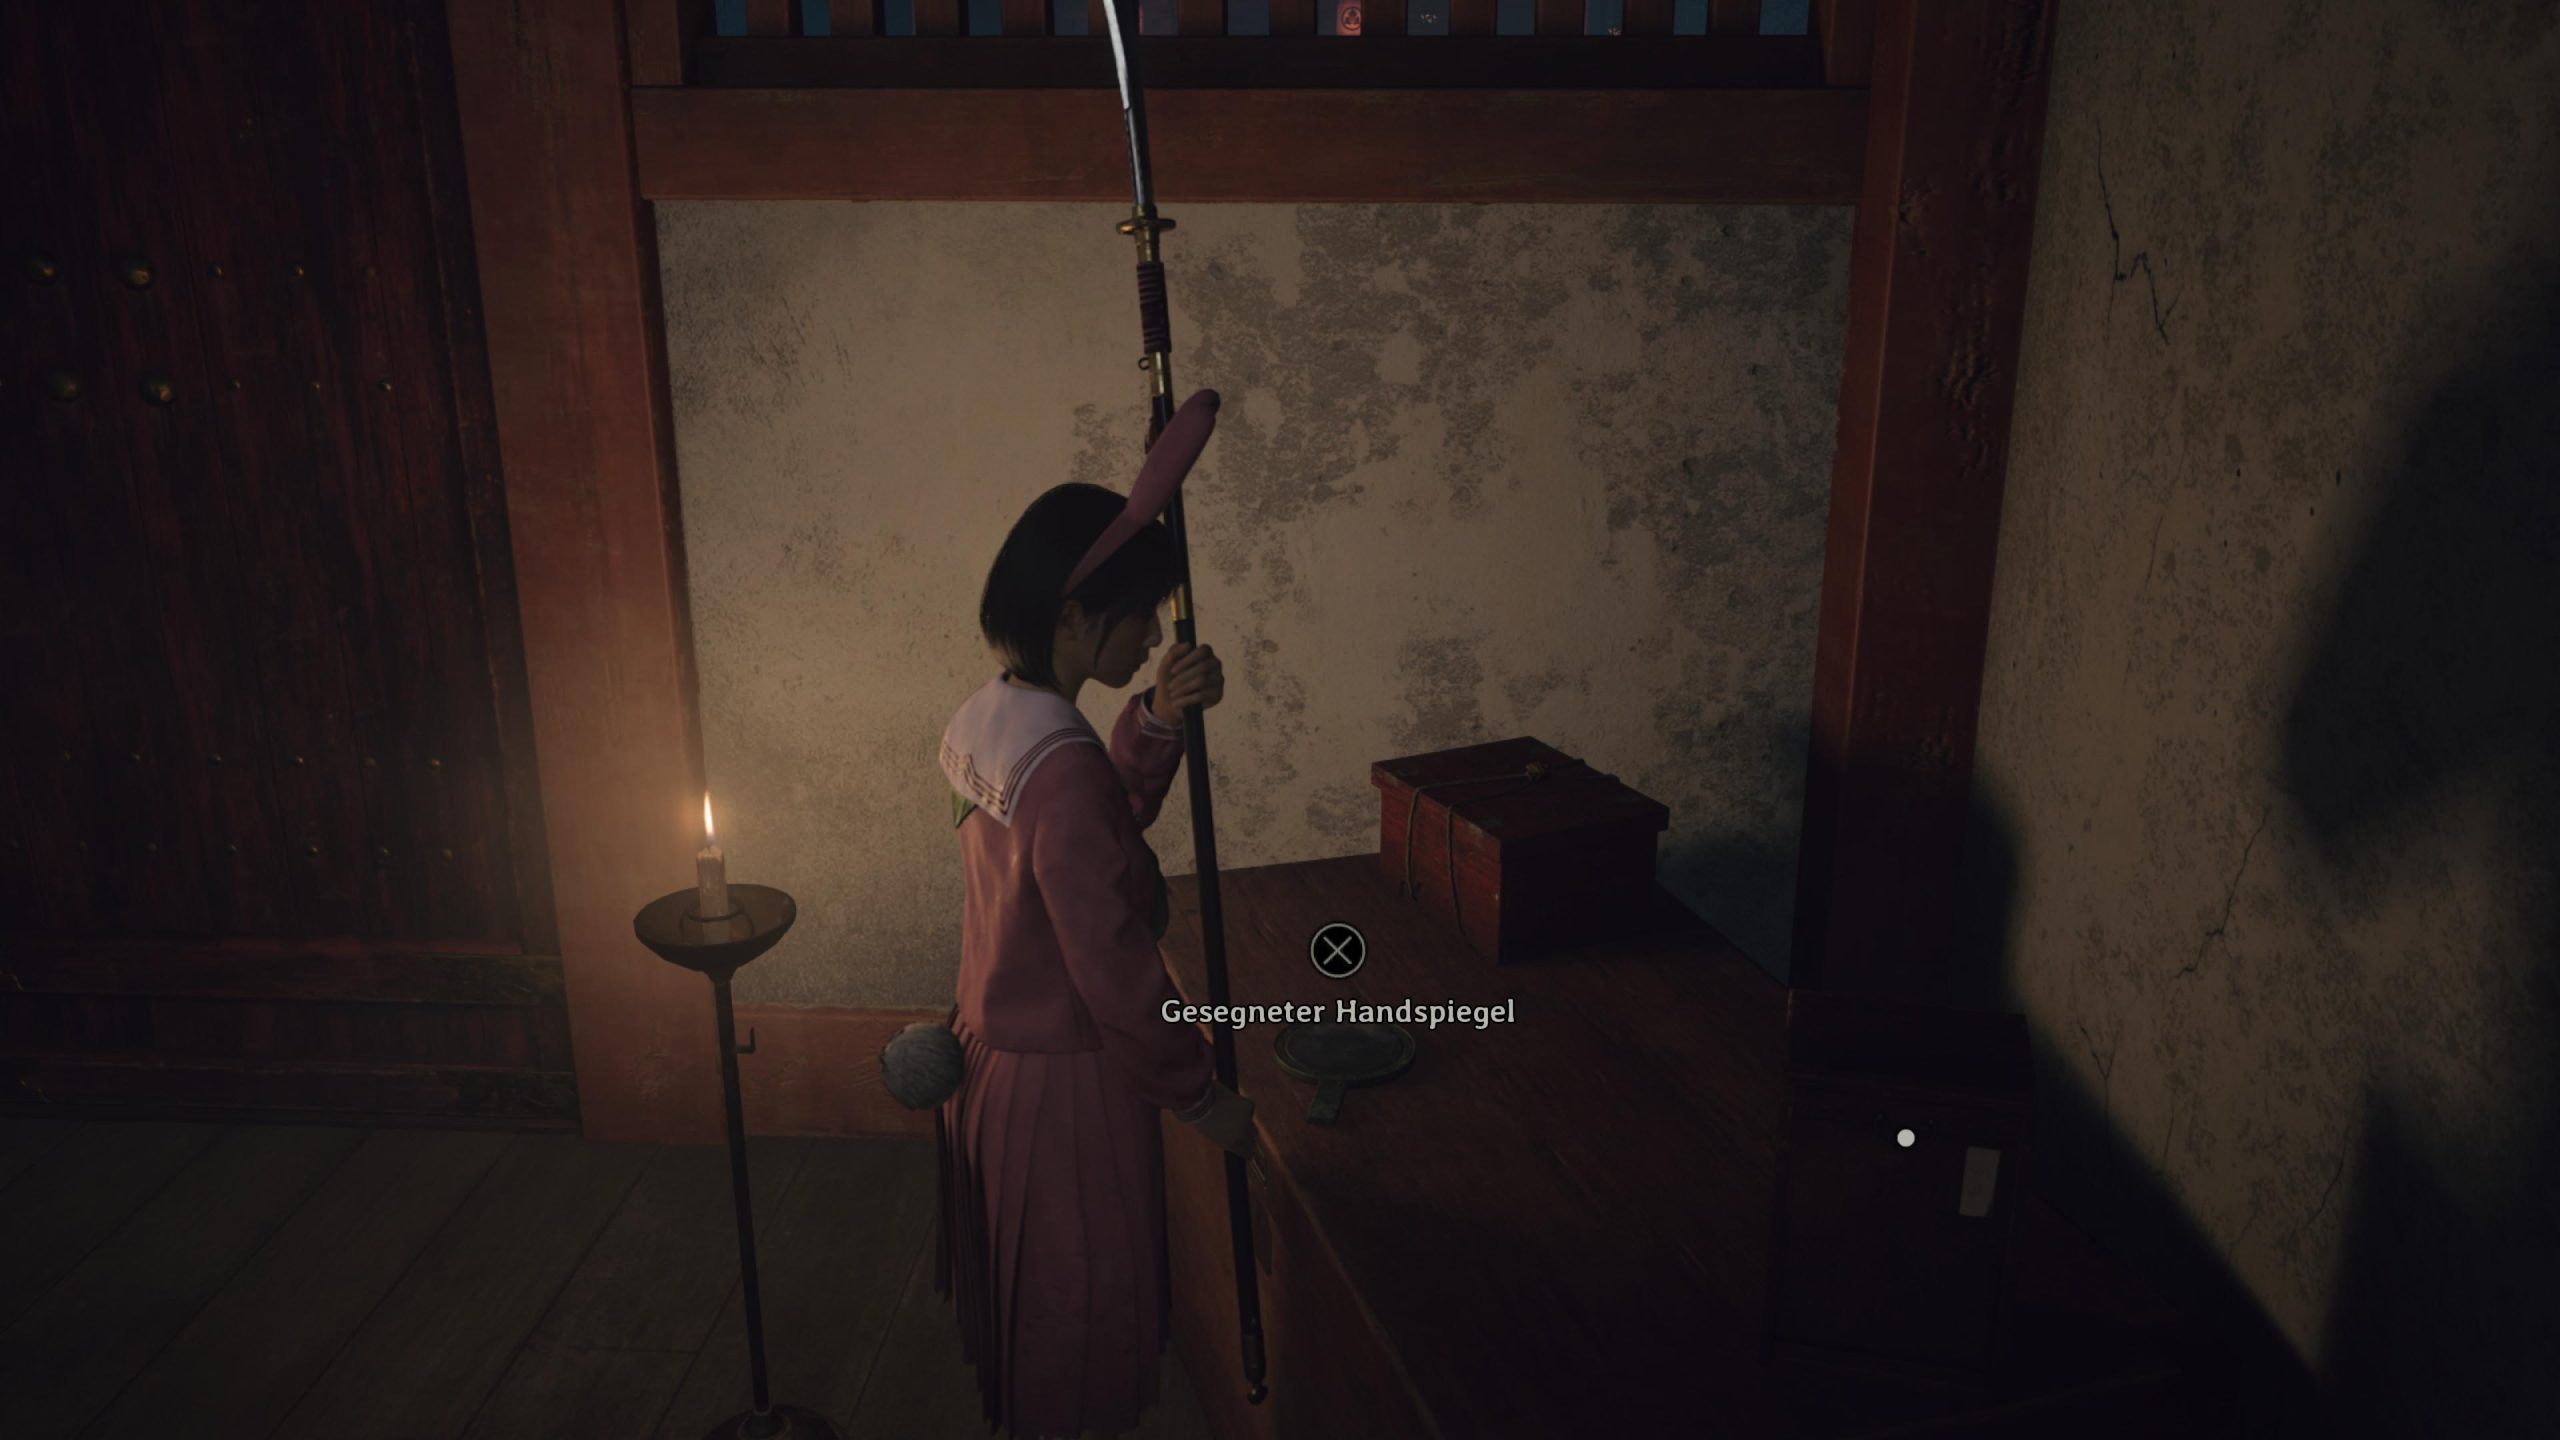
Trophy The Sound of Silence Starts as soon as you enter the boss fight. – – Trophy Go Away! You’ll Ruin the Shop’s Reputation! Start as soon as you meet up with Shu and Hinata near the general store. – Offering Antique Comb After meeting a new enemy in the southern alleys, head up the left stairs and cross to the balcony to find it in a crate. 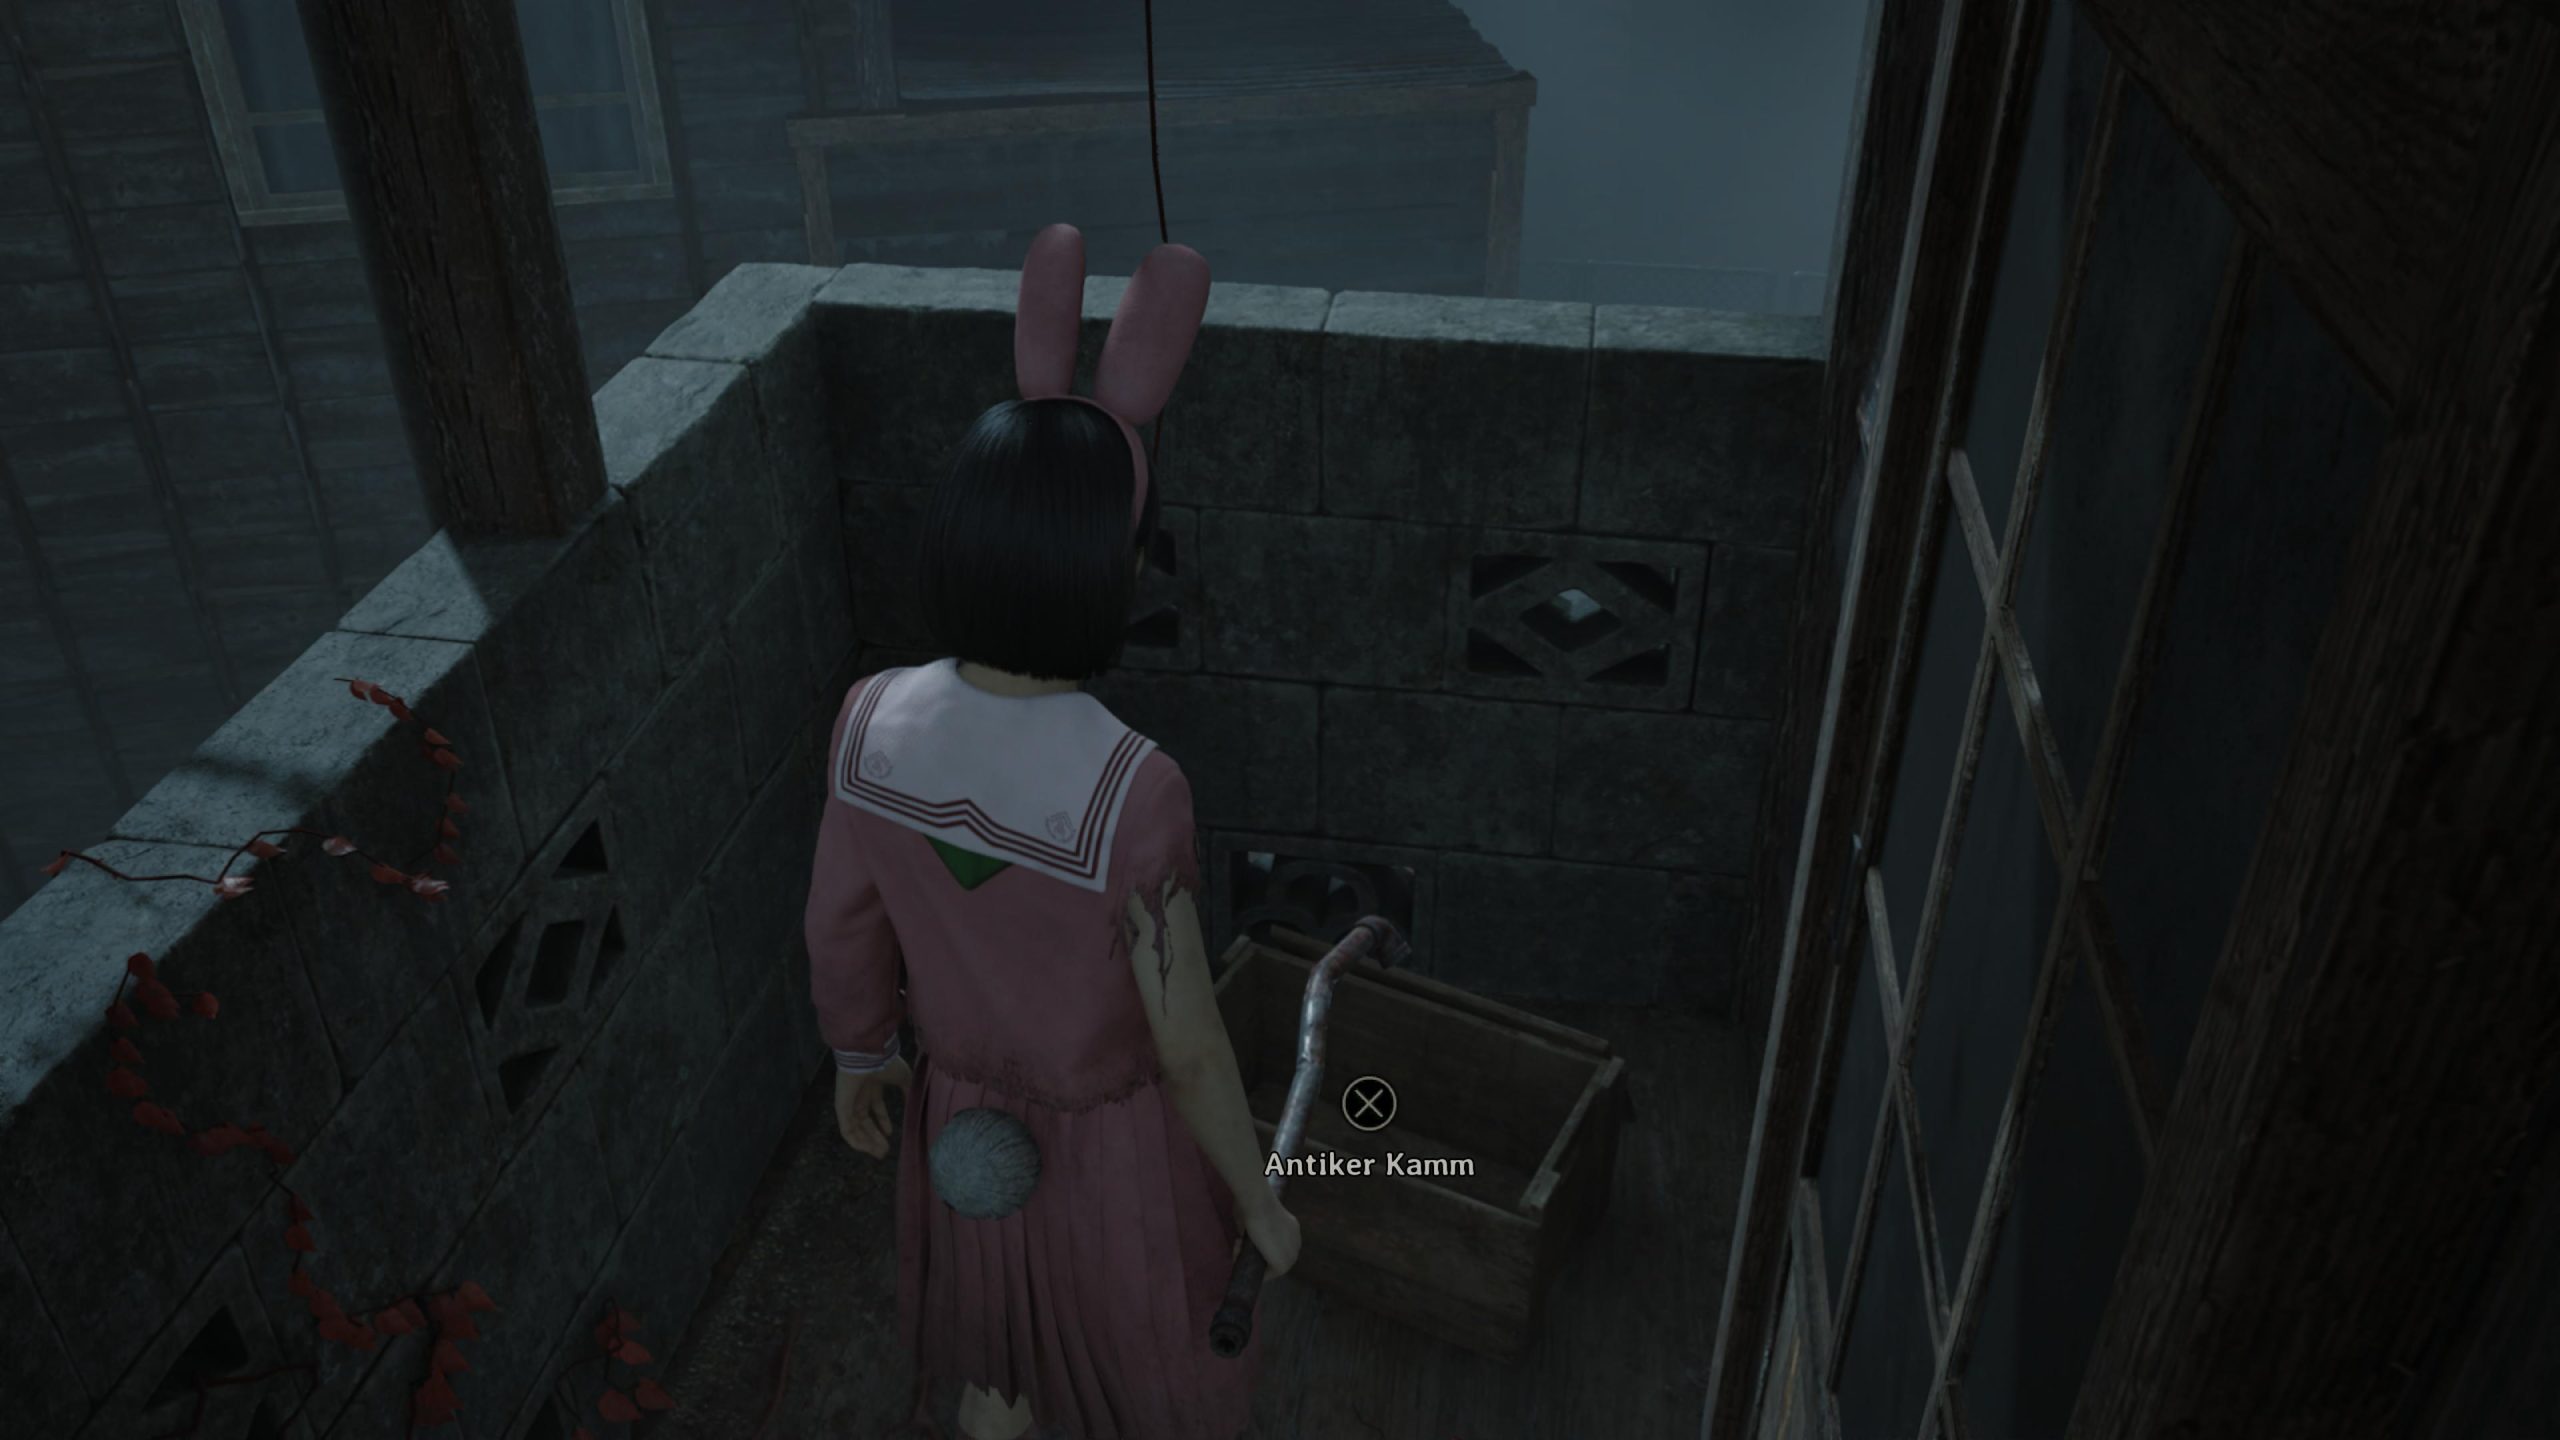

Character Upgrade Ema After passing through a house, skip the right path to the Hokora Shrine. Cross the bridge, take the left path, defeat the enemies, and find it on a low wall. 

Offering Dried Carcass After reuniting with your friends, enter the new area, go through the left gate, and find it in a basket. 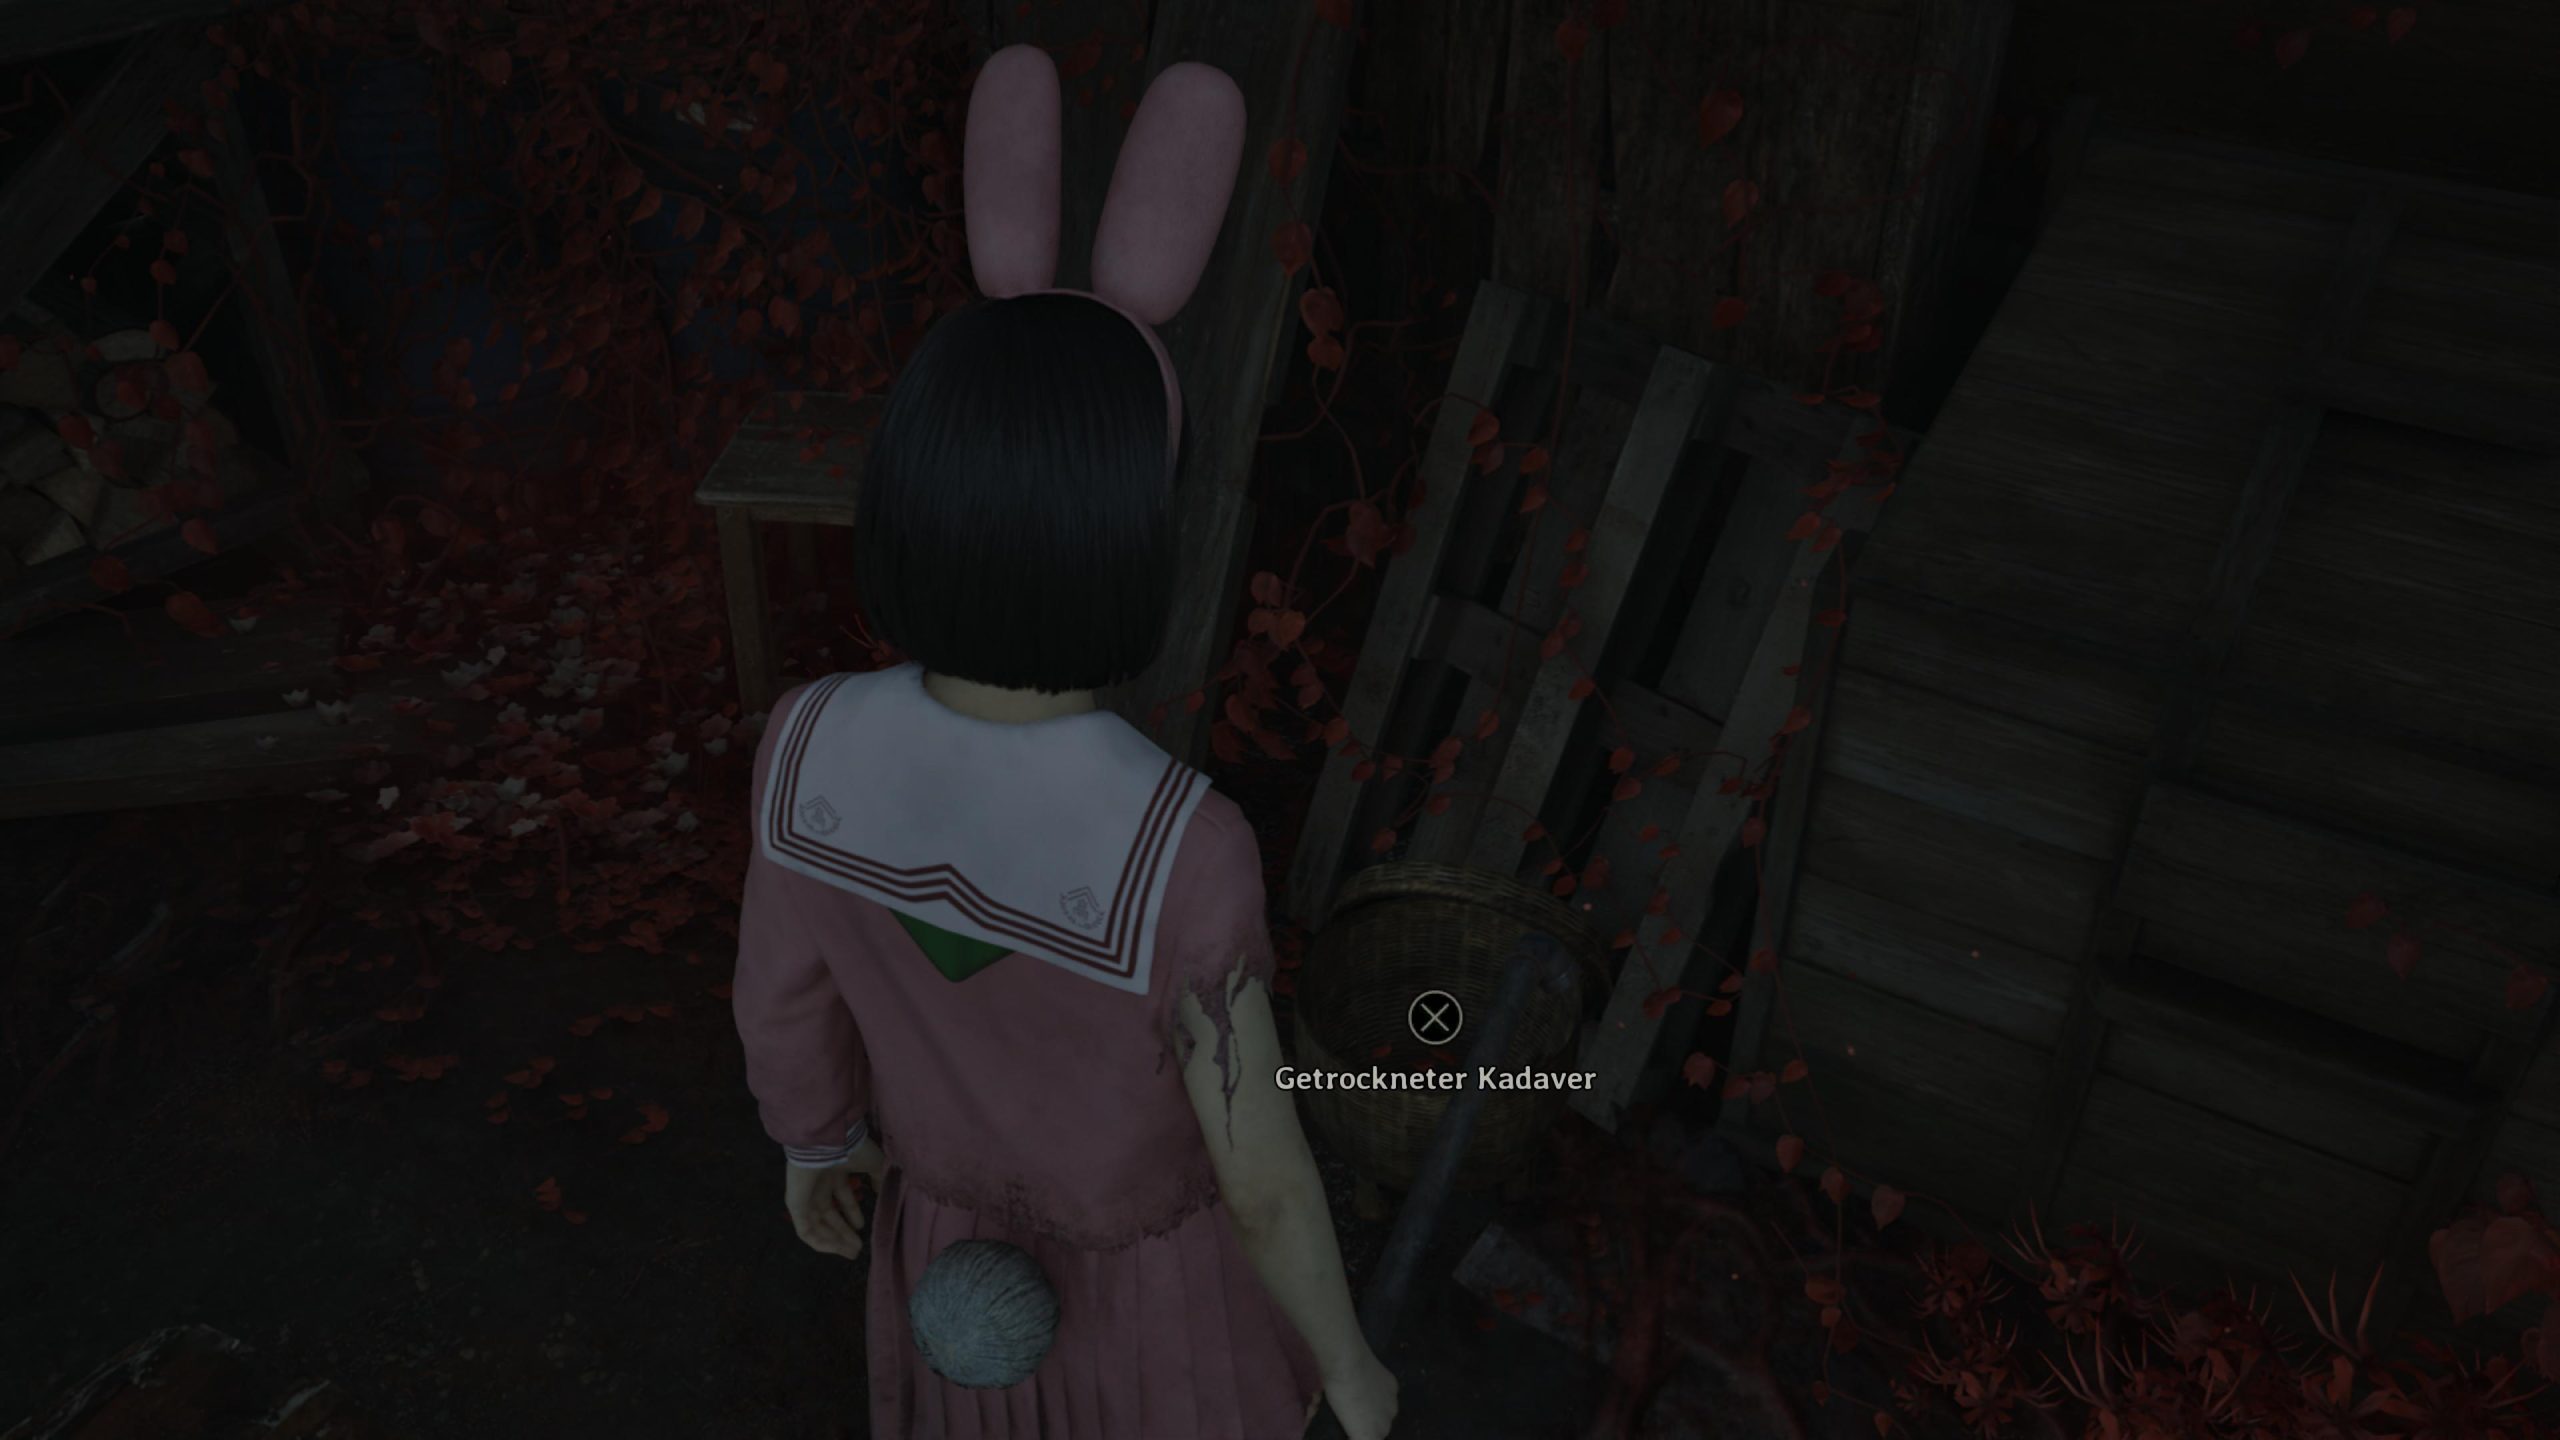

Offering Dried Carcass Go outside, head up the stairs past the Hokora Shrine, and find the offering on a crate in the corner. 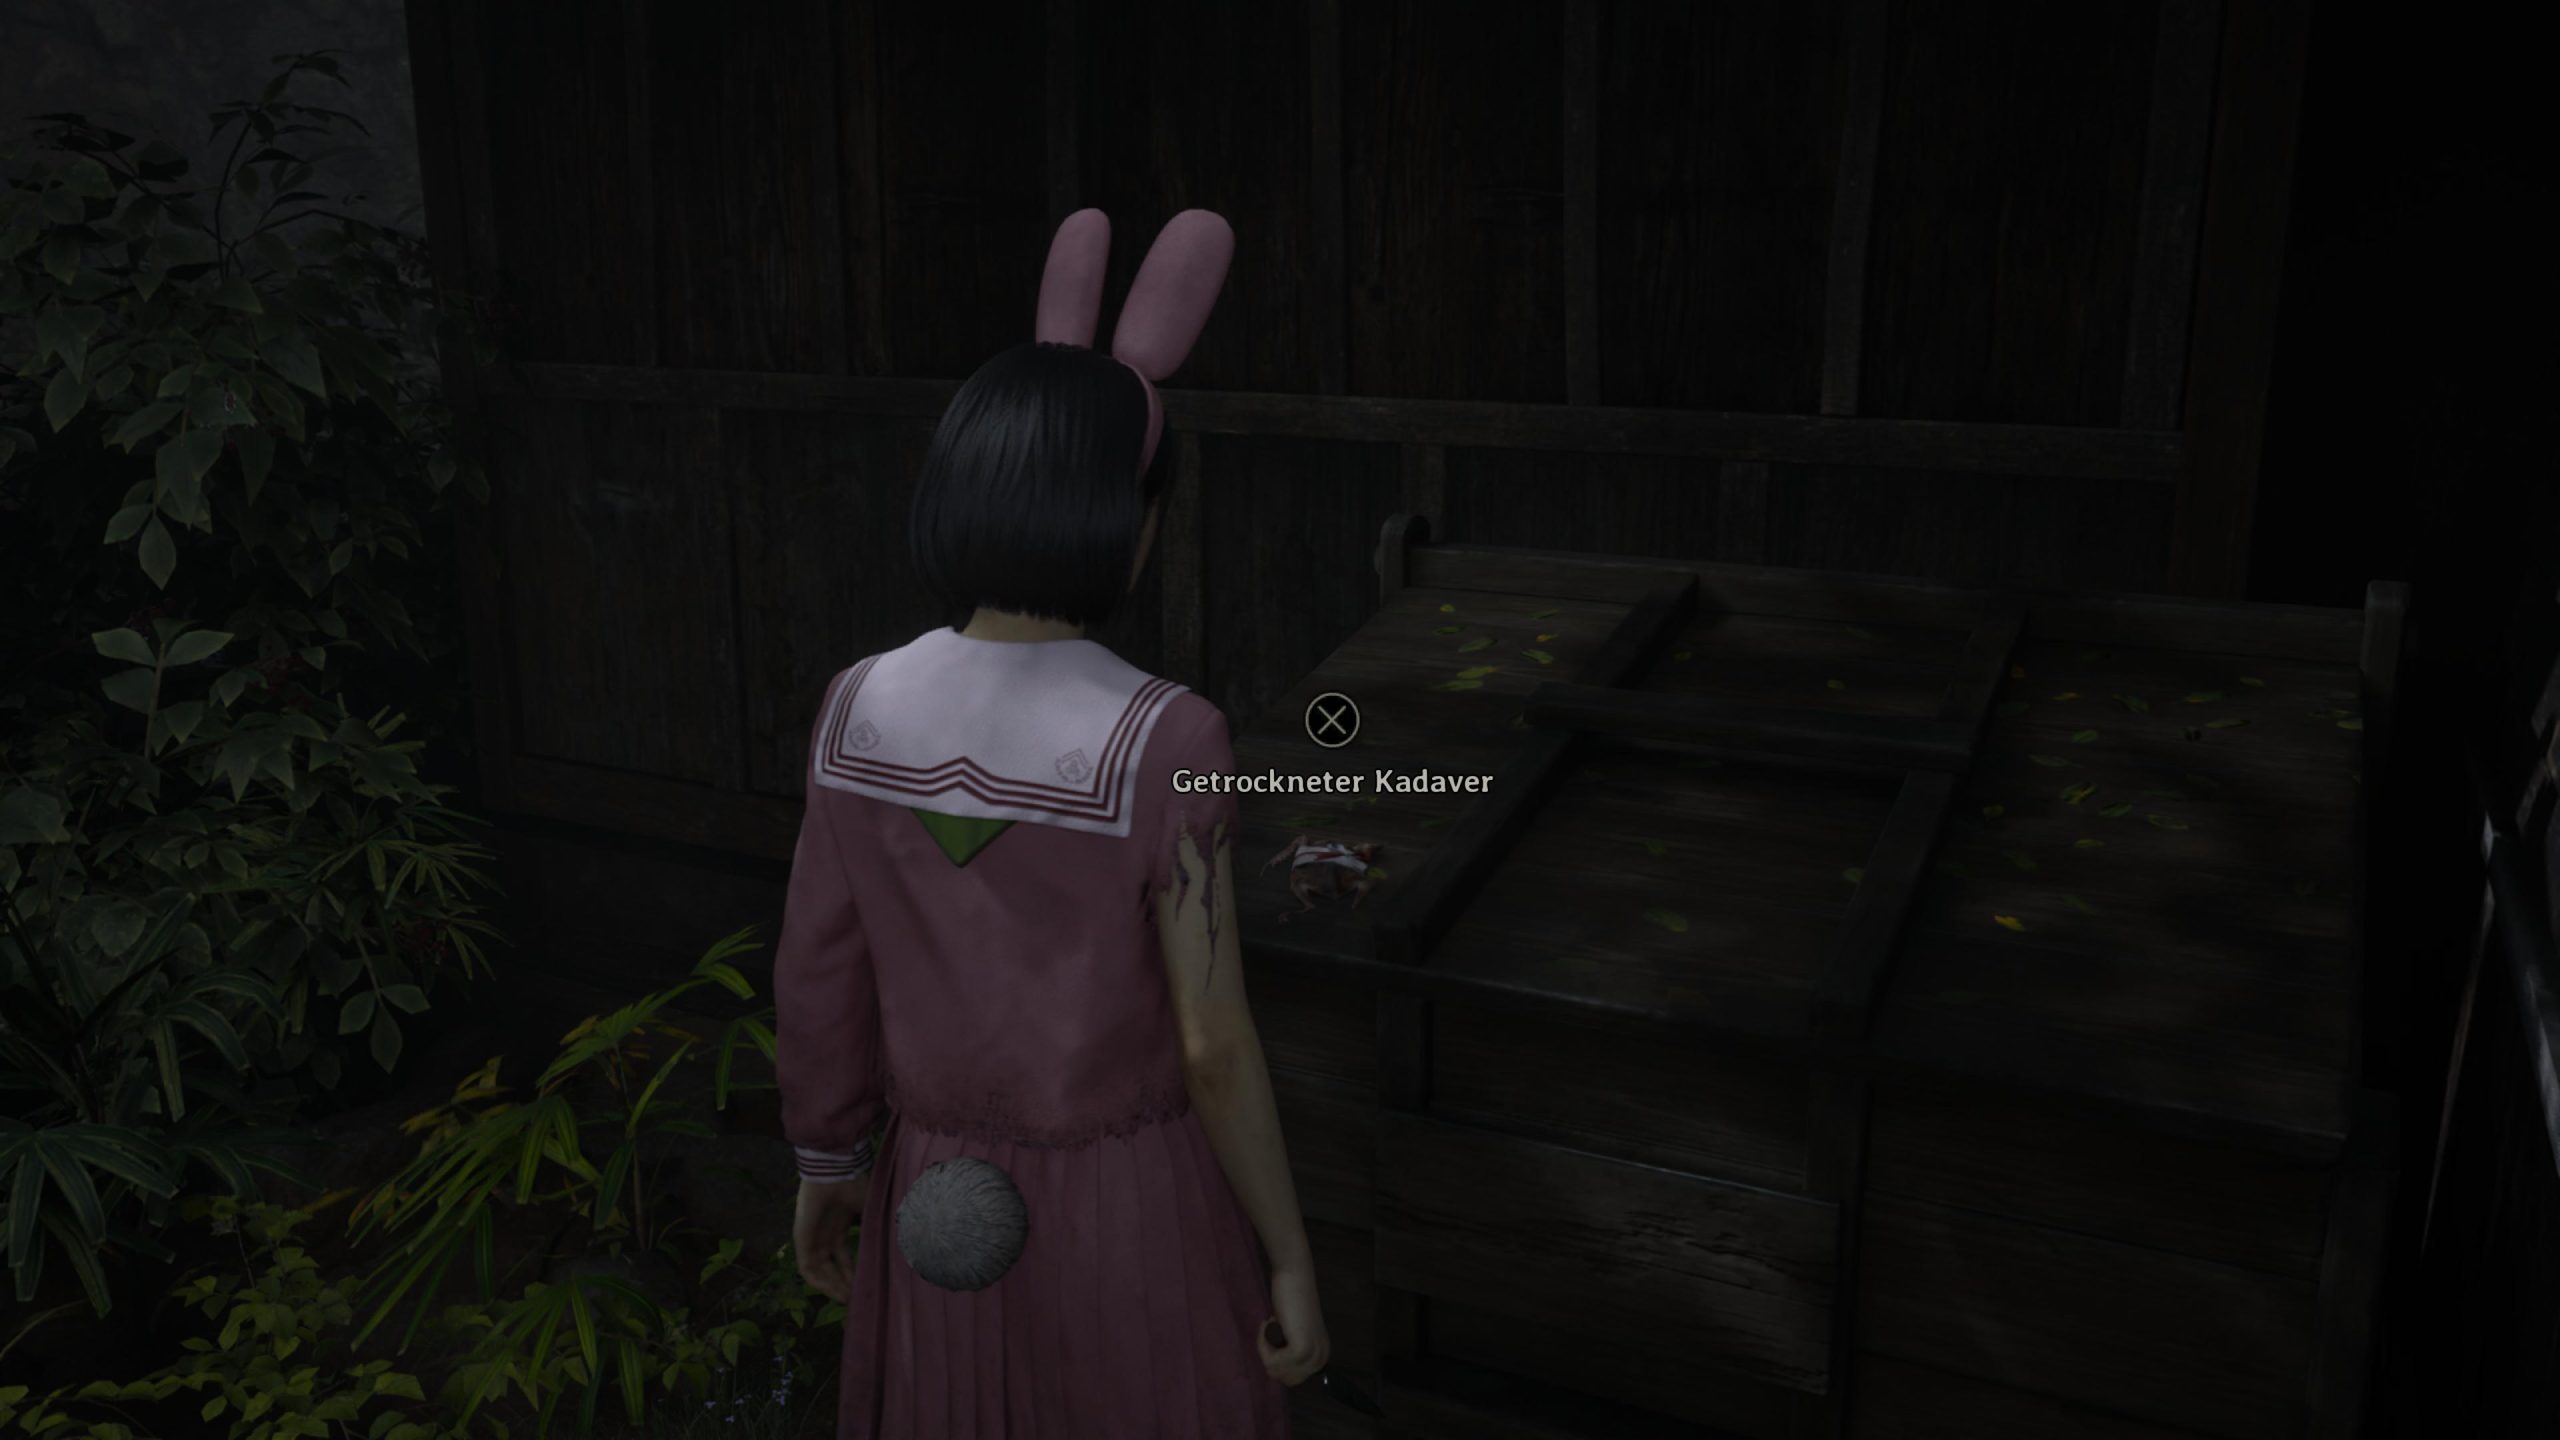

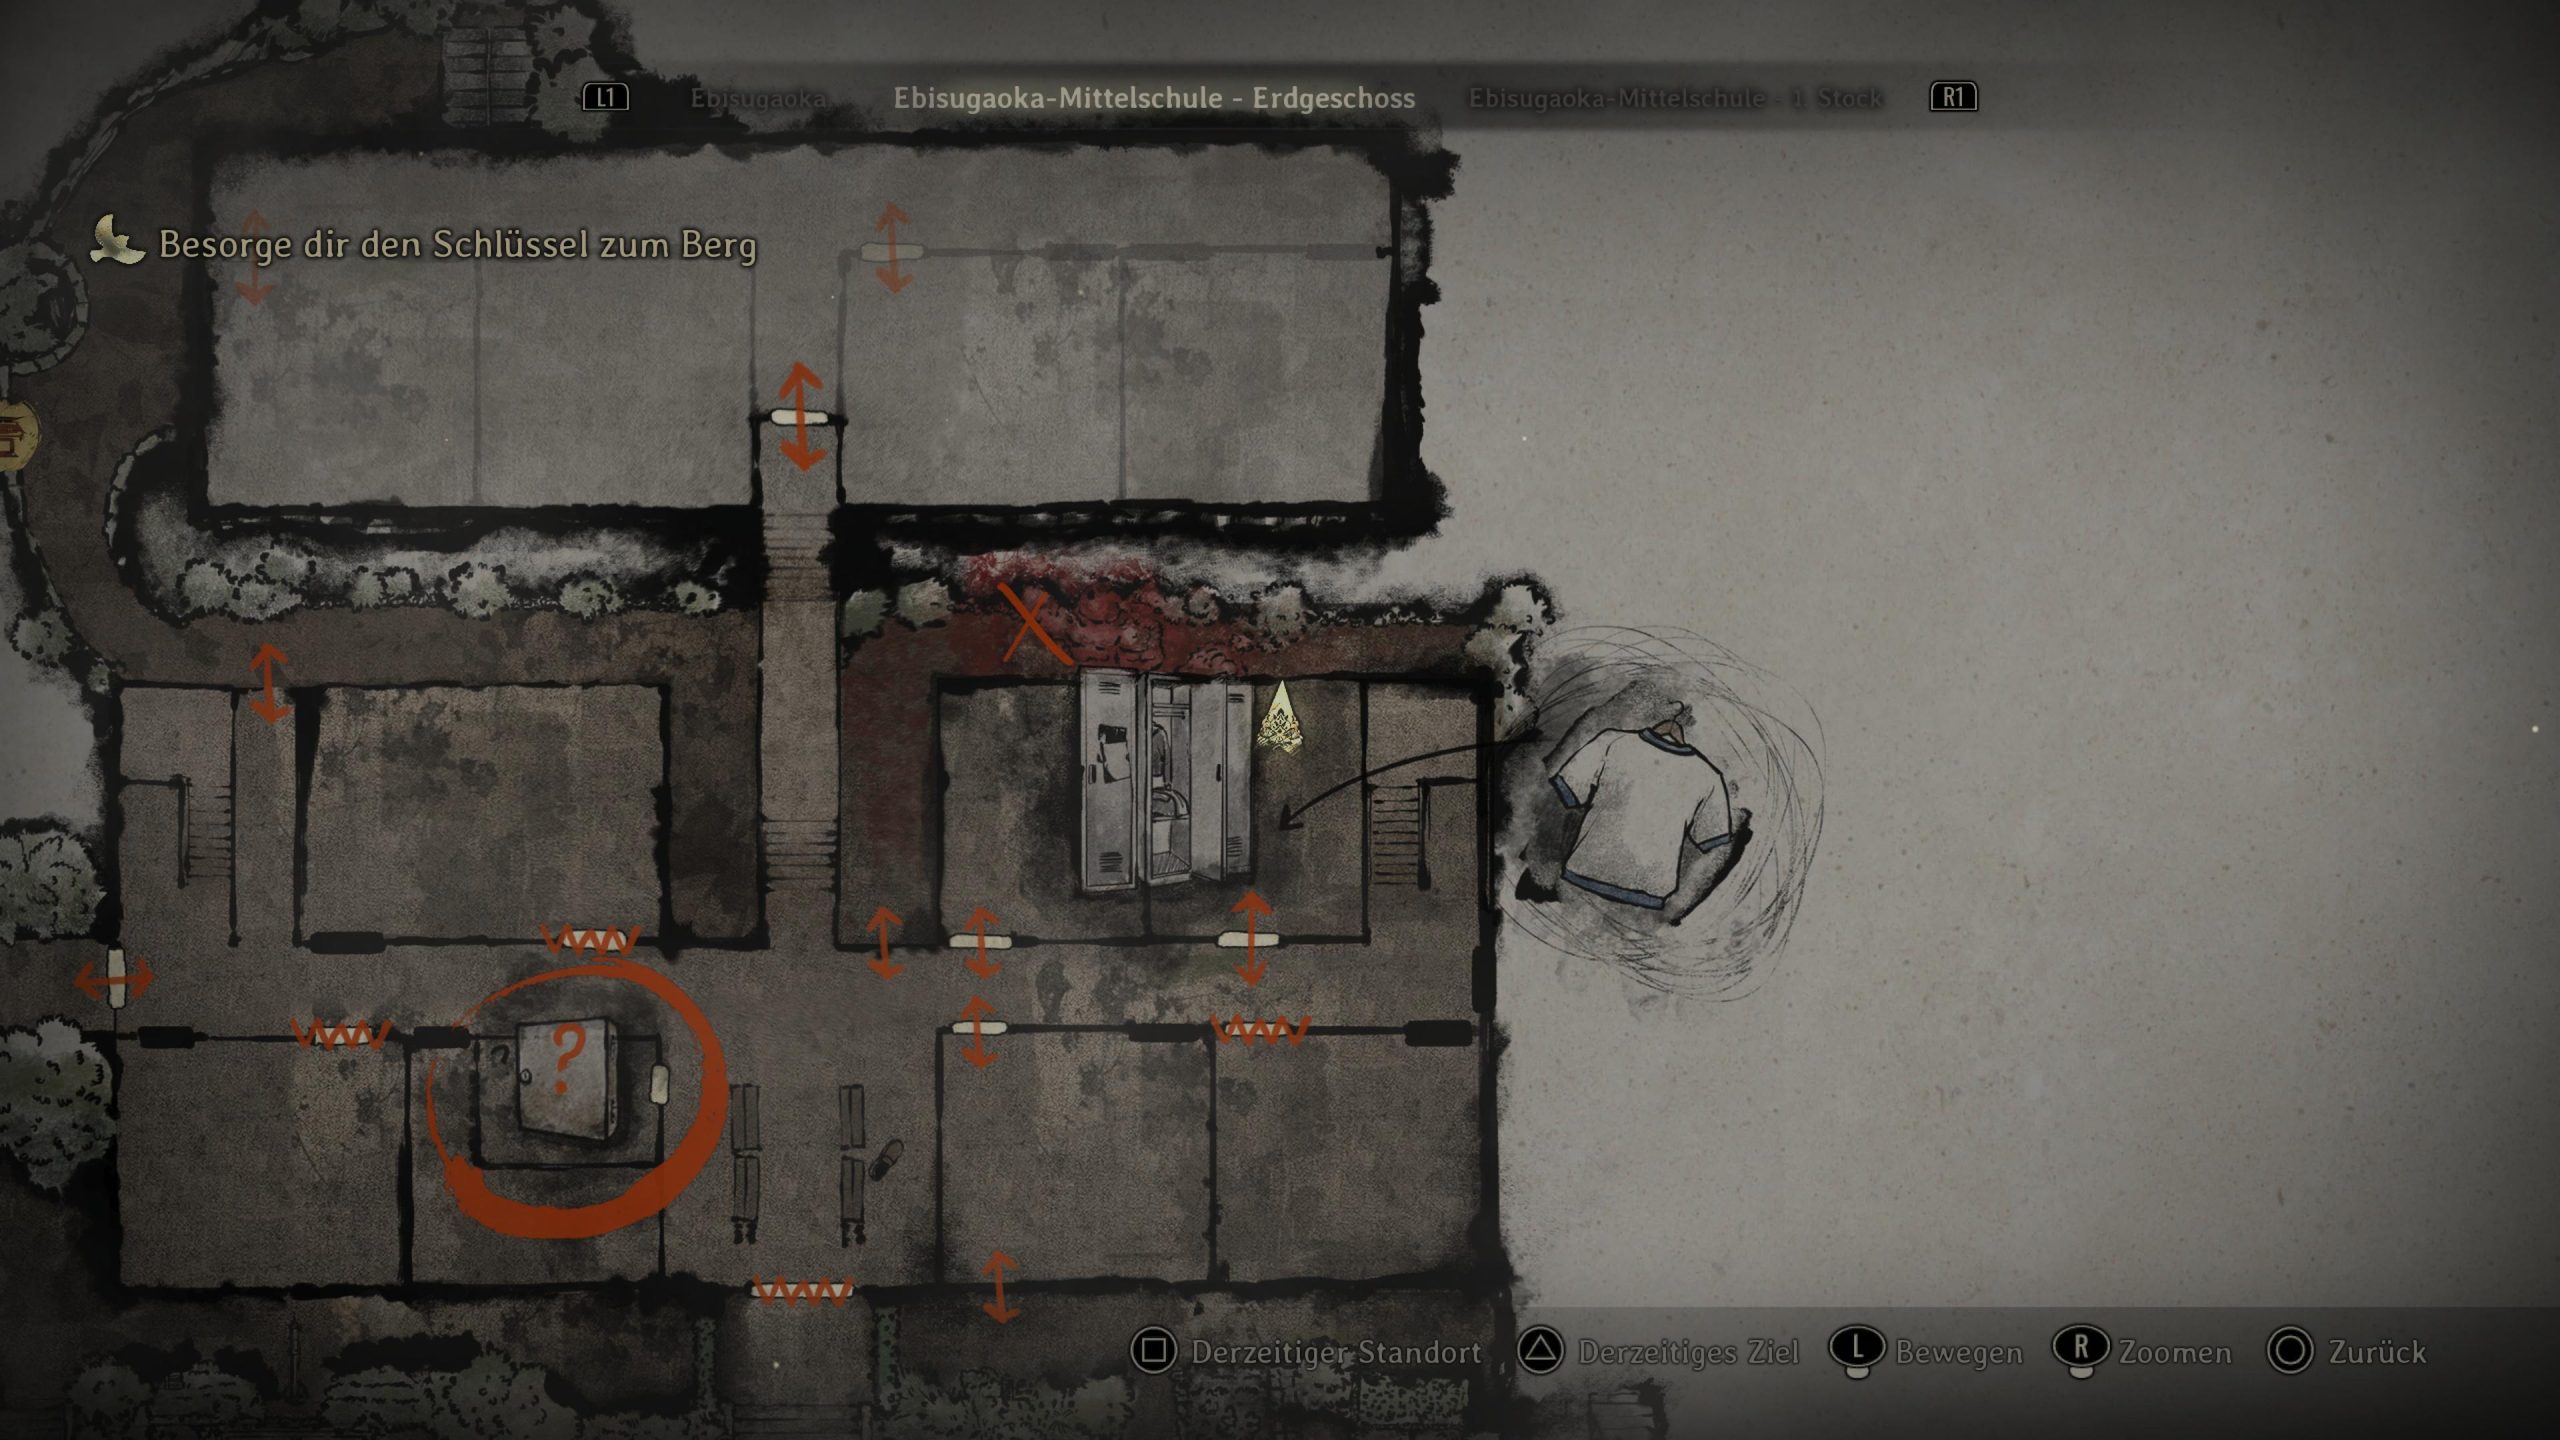
Puzzle Stairwell To open the locked drawer in the teachers’ storage room, first grab the scrunched paper from the open classroom. Climb out the window, crawl into the rabbit hutch, and take the hairpin from the basket. Use it to unlock the drawer and get the Second Floor key. 

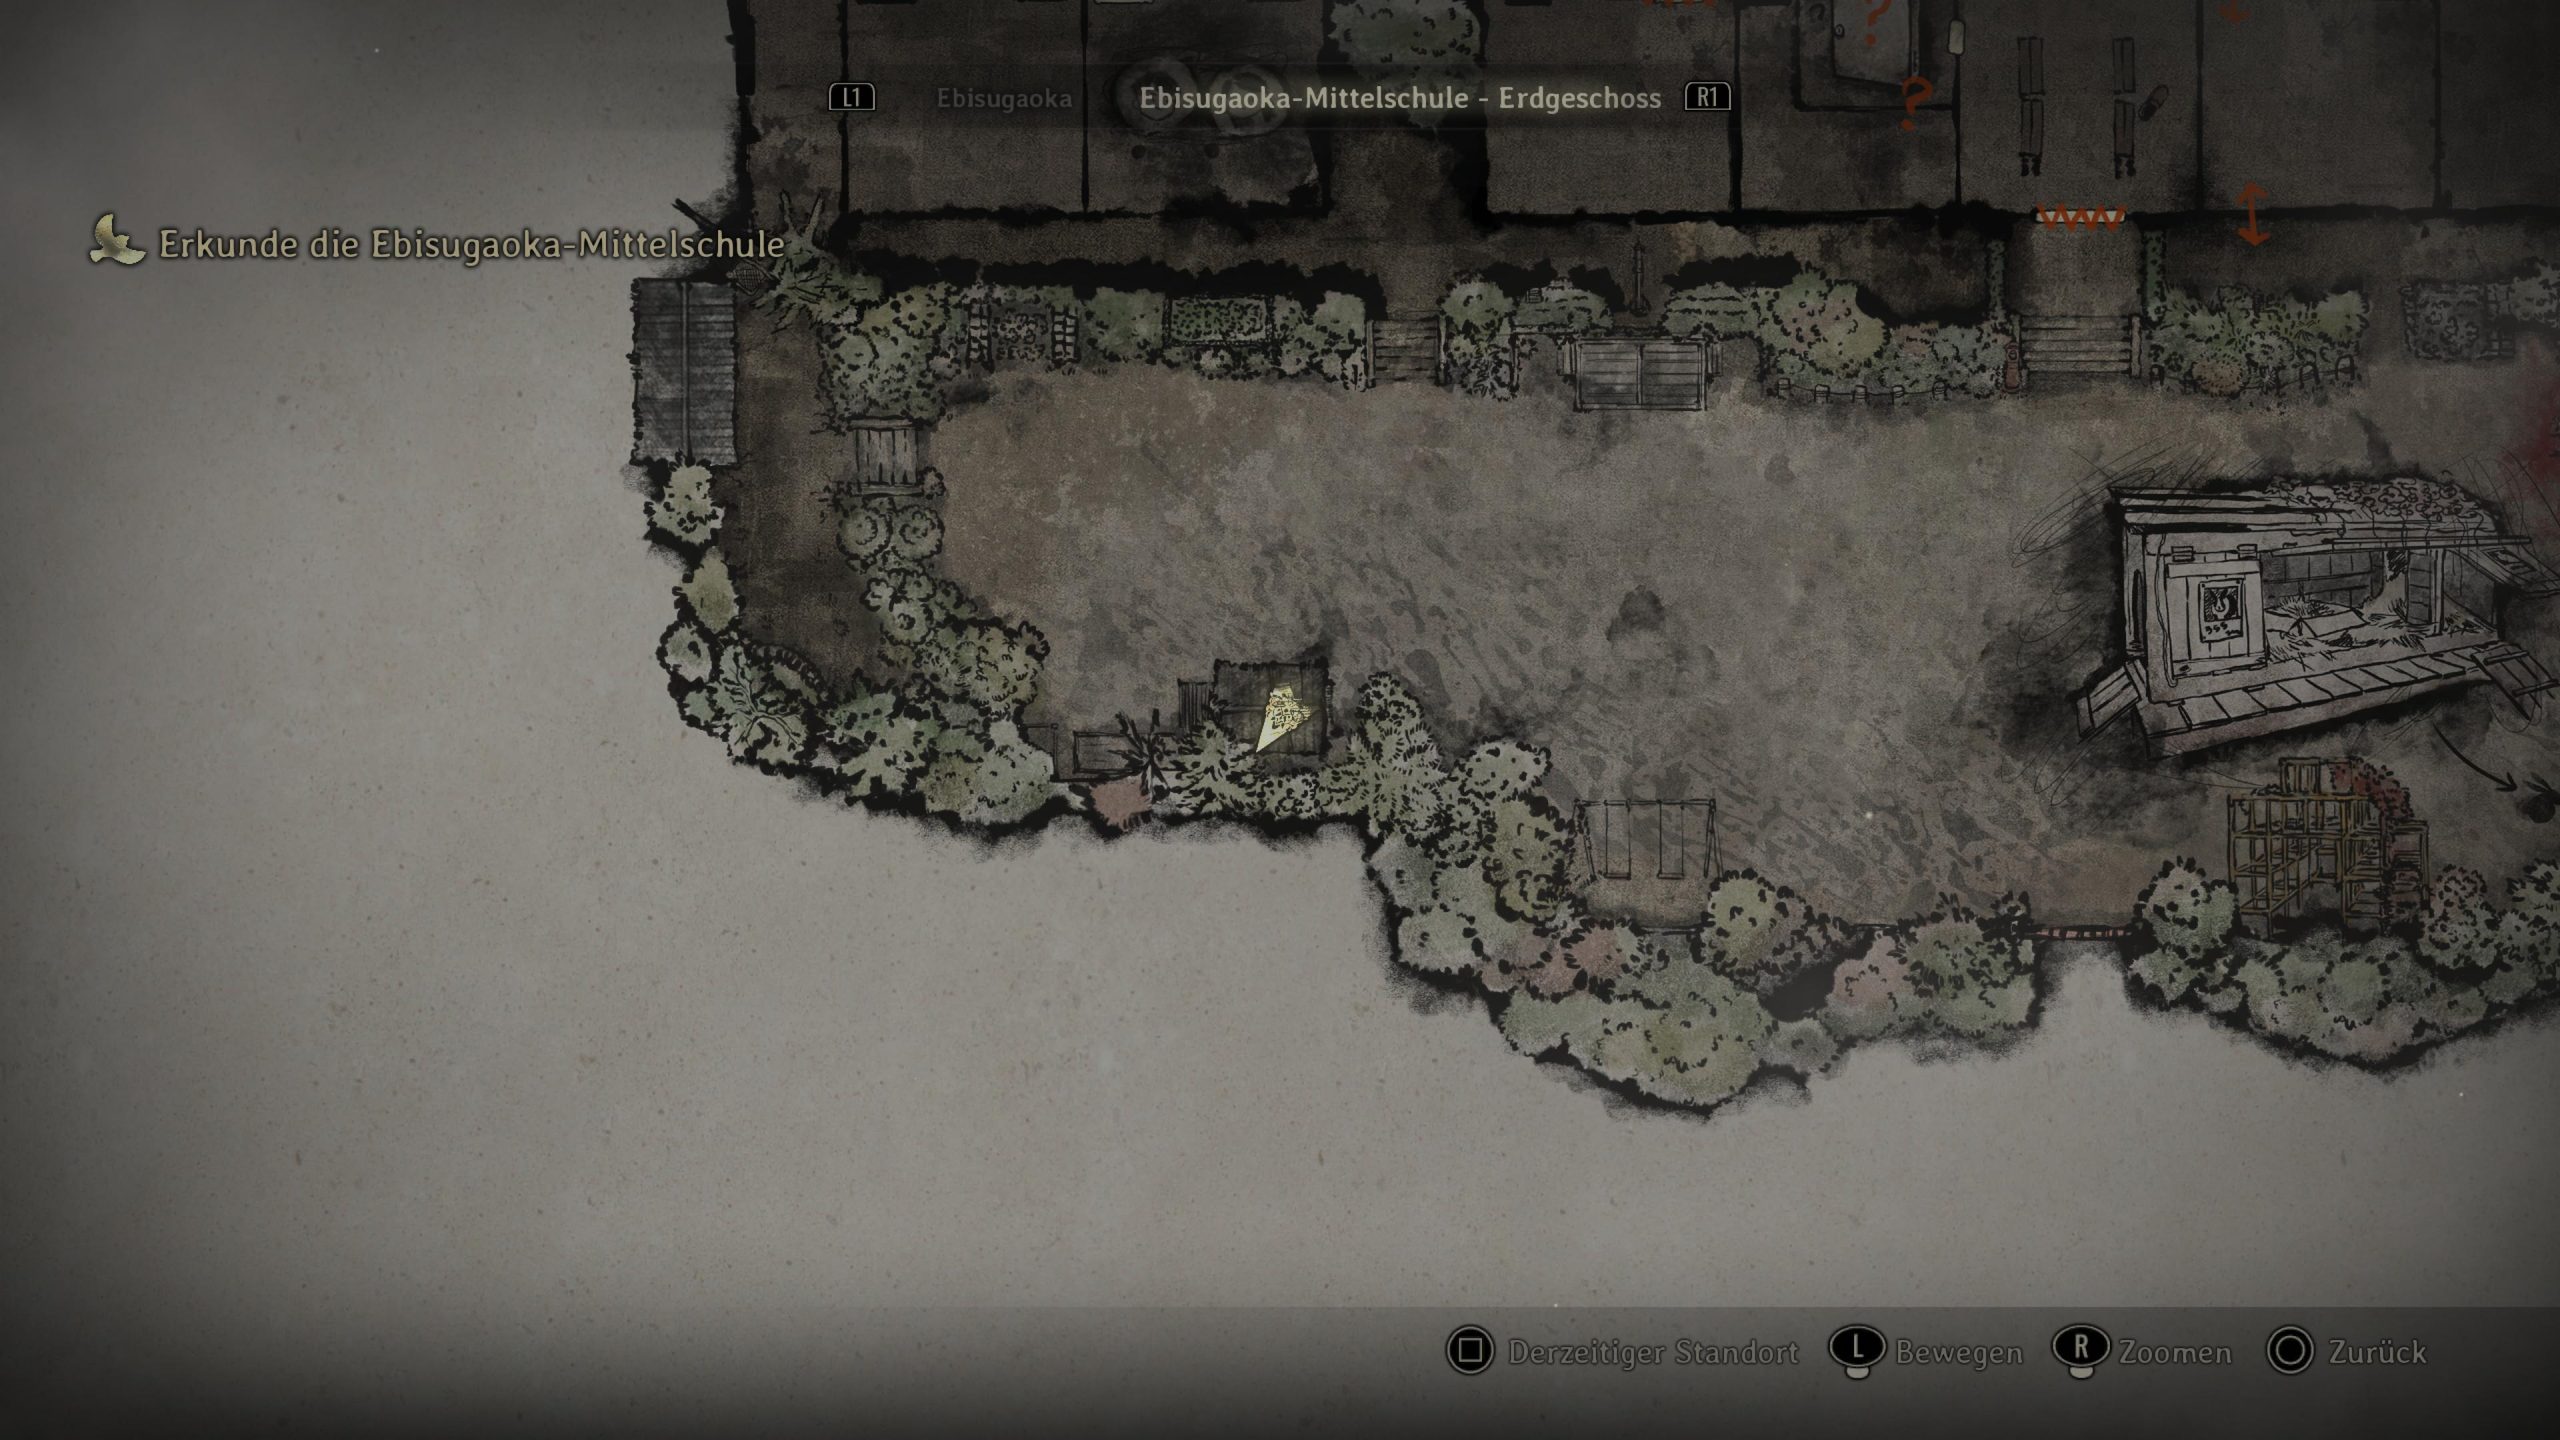
Offering Dried Carcass Enter the small shed across the area to find it. 
Offering Antique Comb After unlocking the upstairs door, enter the central room to find it on a cardboard box on a corner table. 

Puzzle Secret Box For this puzzle, use the letter hints to unlock three tiers of the Secret Puzzle Box. Each tier reveals a new letter with another hint. Side 1 is the starting side. Puzzle 1: Slide one panel on each side to reveal the sweet and tart fruits.
Side 1: Bottom row
Side 2: Top row
Puzzle 2: Reveal all the journals.
Side 1: Second and third rows
Side 2: Second row
Puzzle 3: Show the single Sakura in full bloom.
Side 1: No change
Side 2: Third rowPuzzle Locker The locker codes are deciphered using notes found throughout the Annex. Each letter corresponds to a number (e.g., A = 4, I = 1). Aoi Takeshi: 401
Asakura Ayumi: 534Omamori Wolf Inside Tsuchiya Taiko’s locker (code: 377). 

Inventory Upgrade School Bag Inside Suga Yosie’s locker (code: 505). 
Offering Dried Carcass From the main hall, enter the western area. Open the red and green doors, go through, then open the white door to the west. It’s on a table at the corridor’s end. 

Trophy No One Left Behind This starts as soon as you enter the east side of the main hall. There are blue lanterns. – – Document Sakuko’s Diary (1) Flip the lever in the Hokora Shrine room to open the blue doors, then the next lever to open the white door. In the locker room, it’s on a bench. 

Document Sakuko’s Diary (2) Flip the lever in the locker room to open the green door, then crawl through to the next lever. It’s on the side of the room. 

Offering Shriveled Abura-age In the adjoining room with the red door, where the screaming enemy is; flip the lever, grab it when you’re inside, flip the lever back. 

Document Sakuko’s Diary (3) In the room with the second Hokora Shrine, on a bench. 

Puzzle Light Left: Fox and Rabbit facing each other.
Right: Fox and Rabbit facing each other. – – Omamori Bull After getting the Light Puzzle key, don’t return to the main hall. Enter the locker room again; the back-right room is now open. Inside, you’ll find this Omamori. 

Character Upgrade Ema In the area with Shu’s Memories Puzzle, enter the left room and pull the blue/red lever. Go through the blue door. 

Offering Dried Carcass At the first Hokora Shrine on the mountain path, go down the left hill and behind the shed to find this offering. 

Offering Antique Comb Continue to the hut with two enemies. After defeating them, go left behind the hut to find this on a rock. 

Offering Antique Comb After passing the pond and climbing the stairs, walk under the small bridge to find this on a ledge. 
Omamori Horse After crossing the bridge, take the right path to find this in front of a shrine. 

Character Upgrade Ema Crawl under the broken tree into the area with enemy corpses. Halfway up, where enemies start attacking, there is an Ema on a rock between the trees. 

Offering Shriveled Abura-age At the mountain hut with the gate key, go behind it to find this on a table. 

Trophy Agile Escape This trophy starts as soon as you collect the key to the small gate and then jump down from the elevation. – – Offering Dried Carcass From the Hokora Shrine, take the left stairs to find this by a shrine on the right. 

Trophy O Divine Tree Continue up the stairs to reach the Thousand-Year Cedar. – – Document Family Physician’s Log (3) After opening the first door, turn left to find it on a bench. 

Offering Antique Comb Northwest of the Hokora Shrine, on some boxes in the corner of a room. 

Offering Dried Carcass Once upstairs, go through the first room to find this on a set of drawers in the second room. 

Offering Shriveled Abura-age On the altar after the first ritual. 

Omamori Crow Back on the first floor, go one room south and open the metal door. 

Document Housemaid’s Note (2) Same as above 

Offering Dried Carcass On the altar after the second ritual. 

Inventory Upgrade Dirty Drawstring Bag Take the stairs up and go around the broken floors to find this on a chest. 

Offering Antique Comb Same as above 

Offering Antique Comb On the altar after the third ritual. 

Document Family Physician’s Log (4) In the main hall, go slightly north and open the wall to find a document on the left inside. 

Offering Shriveled Abura-age Same as above. 

Character Upgrade Ema Same as above. 

Offering Dried Carcass Return to the Inventory Upgrade spot after the second ritual. Reveal the fox wall with L2 to find an offering inside, next to an Inari-sama Door. 

Trophy Echoes of Jealousy Starts as soon as the boss fight against Rinko starts. – – Document Clinical Trial (1) Continue down the mountain path until an enemy spawns from a flesh clump. Just past it on the right, near a house, you’ll find this document on a blue crate. 

Omamori Suzuran After fighting the new enemy and heading down, you’ll see a house on the left. An enemy will rush out from the right—kill it, then check where it came from to find this in a crate. 

Document Strict Mother’s Letter (1) At the split path, take the left route up to the Inari-sama Shrine. The document is sitting in front of it. 

Offering Dried Carcass After passing through the town park, head south to the back of a house to find this inside a crate. 

Document Strict Mother’s Letter (2) From the park, head north to find this on a house porch. 
Document Strict Mother’s Letter (3) Around the corner from the house, at the edge of the fence line next to a Hokora Shrine. 

Character Upgrade Ema Near your house, spot the Hokora Shrine from the game’s start. Instead of heading up, go down the streets, turn left at the truck that once blocked your way, and find an Ema on a bench at the path’s end. 

Offering Antique Comb Take the first left; it’s in a nook just past the first room. 

Offering Dried Carcass In a northern room, on a pillow. 

Offering Dried Carcass After using the Calendar to reach the second area, enter the first room on the left to find this on a crate. 

Character Upgrade Ema Head south down the hallway into the next room to find this. 

Offering Shriveled Abura-age Down the eastern hallway, beside the enemy. 

Puzzle Scales Left Scale: Headless Doll
Right Scale: All other dolls
– Offering Shriveled Abura-age After using the Calendar to reach the third area, take the eastern path and enter the room to find this on a corner shelf. 

Offering Dried Carcass Found in a chest of drawers in the third northern room. 

Character Upgrade Ema Located in the northwest corner of the hallway, behind a watering can. 

Inventory Upgrade Furoshiki In the southwest kitchen, it’s located to the right immediately upon entering. 

Puzzle Ominous Photo To secure the White Bird and Fox Plate needed for Ending 1, return to the first area and visit the Photo Room. First, place Hinako’s photo in the empty spot. Then, rotate every photo in the room to be upright, with the single exception of Hinako’s photo, which must be rotated upside down. – – Omamori Cuckoo Go through the Calendar doors into the third area.Head right down the main hallway, past the Hokora Shrine.Look for a section of the wall that is now open.Proceed down this new hallway and through the doors to find the item sitting on a bloody desk. 

Puzzle My Room Place the three collected crests onto the plaque outside Hinako’s Room in the first area.
The Left side must show Swords.
The Right side must show the Fox.
The Top side must show Heavens.
The Bottom side must be cleared. (With square button) 
– Offering Antique Comb This item is next to the Hokora Shrine, immediately after opening the red door with the Pine Tree Emblem. 

Trophy Just Shut Up for Once, Dad! This starts as soon you meet your parents. – – Trophy Sly Like the Fox This trophy starts as soon as you enter the room with the shrine with several doors. – – Document Family Physician’s Log (5) Located at the back of the first room to the left of the Treasure Hall main room. 

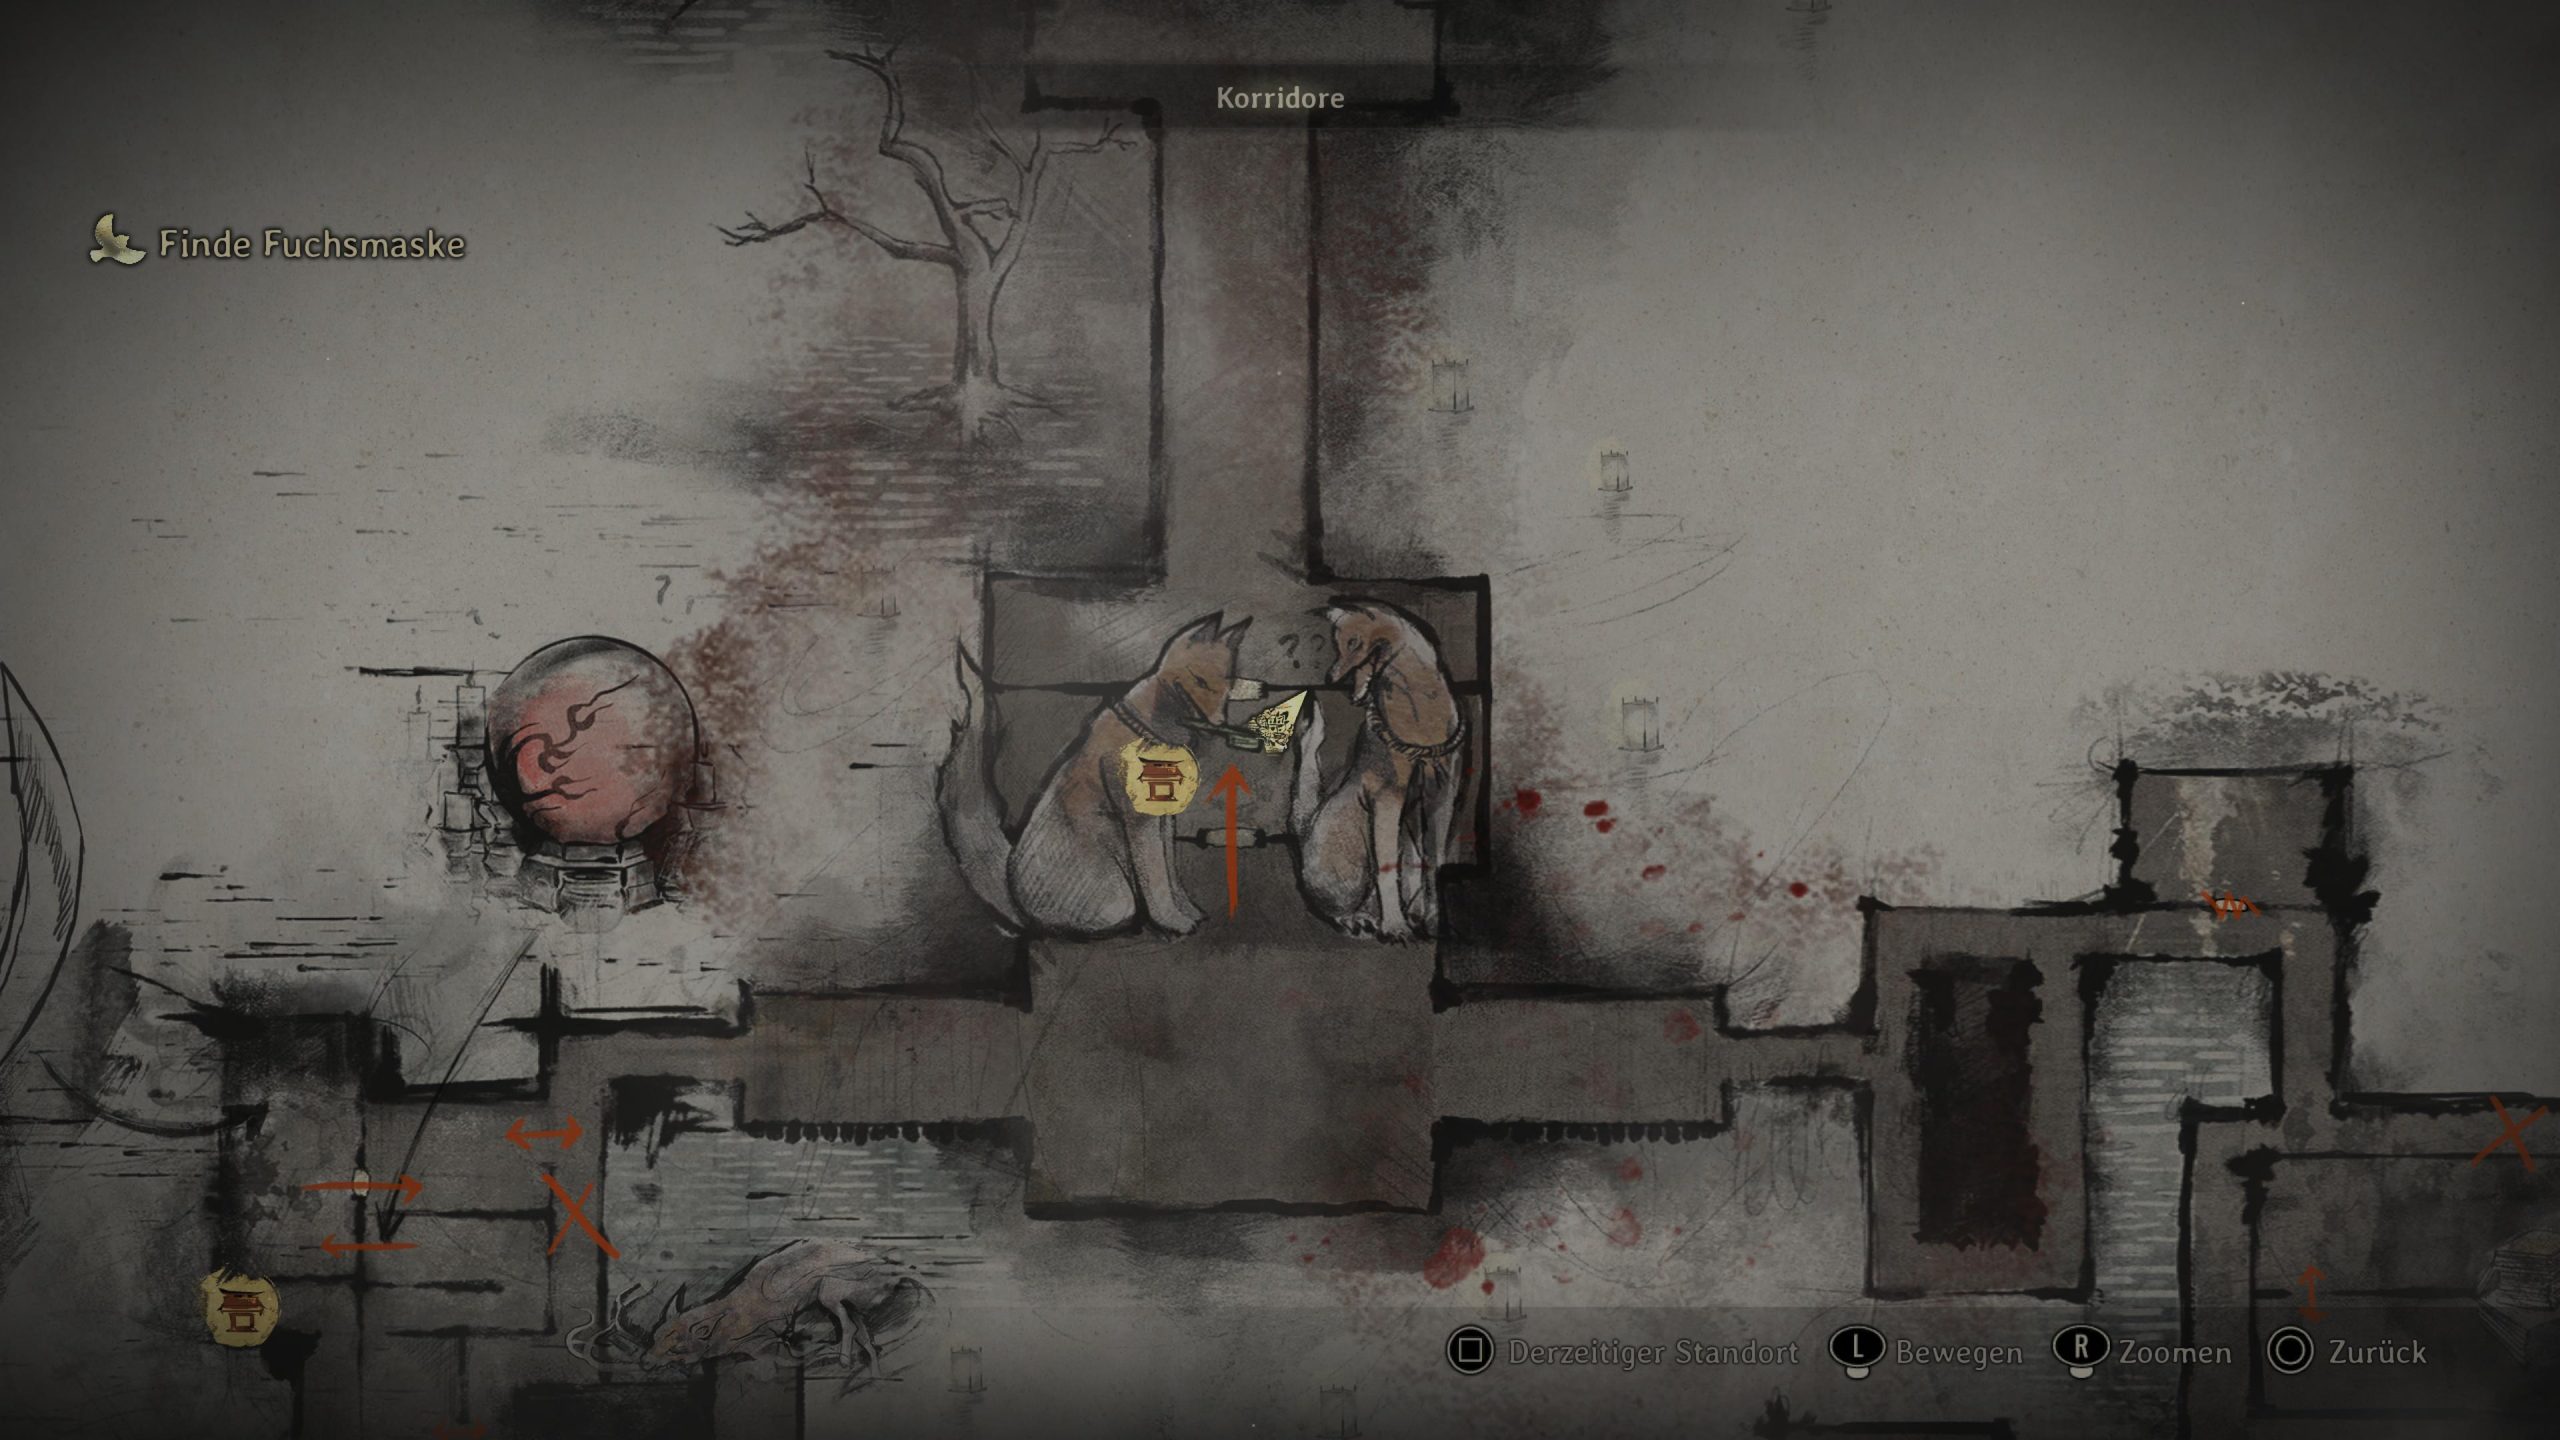
Omamori Hound Found through the first door on your right after going through the Fox Statue’s indicated exit. 
Offering Shriveled Abura-age Found in a small adjoining room, immediately left after going through the first door on the left. 
Document Housemaid’s Note (3) Located in the last room on the left, after the area where the Black Sparrow Crest was found. 
Document Housemaid’s Note (4) Located at the back of the first room immediately after leaving the Treasure Hall main room. 
Document Strict Mother’s Letter (4) Found on the floor, immediately in front of you upon entering the second room. 
Offering Antique Comb Found on a shelf inside the hidden room on the left of the next room containing enemies. 
Document Strict Mother’s Letter (5) Located in the first room after leaving the Treasure Hall main room, sitting on drawers to the right. 
Puzzle Mural The placement is determined by the image shown in each spot:
Place the Fox Mask Crest in the far left slot (the image of a Fox with a fan).
The White Sparrow Crest goes into the top middle slot (the image of a Fox pulling a lantern).
Finally, place the Black Sparrow Crest in the slot immediately to the right of the top middle slot (the image of a Fox pulling a rope).https://youtu.be/birFWugl1Iw Trophy Where Are You Going? Starts as soon as you enter the chapter. – – Offering Dried Carcass Found inside a crate just past the Hokora Shrine, around the corner of the house, following the first forced fight. 

Character Upgrade Ema Found on a red barrel opposite the Hokora Shrine, immediately after the second forced fight when you turn right at the blue truck. 

Offering Antique Comb Found in a box next to a Missing Persons board, just past the blue truck. 

Offering Dried Carcass As you start heading back toward your house, enter the alley containing Sakuko’s house. You’ll find this item opposite her mailbox. 

Offering Antique Comb Continue traveling up the hill. You will find this item inside an open shed located directly across from a vegetable garden. 

Offering Dried Carcass In the room that contains the Hokora Shrine, look for these items on a chest located right next to a doll. 

Offering Antique Comb Same as above. 
Trophy The Bird that Flies Highest This is the last boss fight. – – Stage 2 – Complete the game on Story difficulty (or hard) / hard puzzle.
Key Item Research Journal Photo 1 East of the first Hokora Shrine, you’ll notice a building. Go inside and find this item sitting on a table. 

Key Item Balcony Key Head upstairs in the same building and open the back room. You will find this item inside an open box. 

Inventory Upgrade Packing Tips Head out onto the balcony and use the Balcony Key to open the next room. You’ll find this item inside a box sitting on the desk. 

Key Item Treasure Hunting Game Key Pick up the document in this same room to obtain the key. 

Key Item Faded Bride Doll Look around the house for five small chests that can be opened with the key. While most chests contain only notes, the one in the storage room next to the kitchen holds this doll. 

Jizo Statue 1/5 Head down the hill and enter the garden of the house on the left. Approach the Jizo Statue sitting next to a tree and offer the Faded Bride Doll to it. 

Trophy Winners Don’t Do Drugs Starts as soon you’ve chased by the Fog Monster. Red Capsules become available after the Fog Monster chase. For Endings 2 and 3, you must complete the entire game without ever using one. This “clean run” is also required for the Winners Don’t Do Drugs trophy, which means you must reach Shu’s House without using a Red Capsule or picking up those in his workshop. Since accidental use voids these requirements, it is best to avoid picking them up entirely. If you do pick one up, discard it immediately by opening your inventory and pressing the discard Button to eliminate any risk. Radio Broadcast Ending 5 Immediately after you see the first two enemies, turn left and look for a gap in the wall. You will hear a distinctive radio crackling sound signaling the hidden spot. Crawl through the gap, go to the back of the room, and listen to the radio broadcast. The message about the unidentified object destroying the bridge confirms you’ve completed this step. 

Inari-sama Box + Document Diary of Revenge (1) + Character Upgrade After activating the first Hokora Shrine, walk down the stairs and immediately take a right turn. You will spot an openable shoe box that contains both the document and Ema. 

Puzzle Altar Back Left: Fish
Front Left: Paper Fan
Front Middle: Vase
Front Right: Rat
Back Right: Kimono
– Character Upgrade Ema Once the southeast section of the Shrine Vault is open, take the left path inside. You will find the Ema sitting on a rock. 

Inari-sama Box + Omamori Shrew Mole Cross the bridge leading to the large tree. Walk behind the tree to find a shoebox that you can open. 

Puzzle Vault Lightning: Circle with two vertical lines inside it
Decayed Tree: Circle with a cross through it
Kudzu: Square with a T through the middle
– Key Item Research Journal Photo 2 As soon as you reach the northern horizontal road, check outside the first house on the left to find this item. 
Inari-sama Box + Document Diary of Revenge (2) + Character Upgrade Immediately past the Hokora Shrine, turn left to find this in a garden. 

Key Item Rusted Flask Travel all the way north up the hill to reach the Sennensugi Shrine. 

Jizo Statue 2/5 Go back down the hill. Take the first left, then quickly turn left again into the open area. Go behind the building there to find the next Jizo Statue and offer the Rusted Flask to it. 

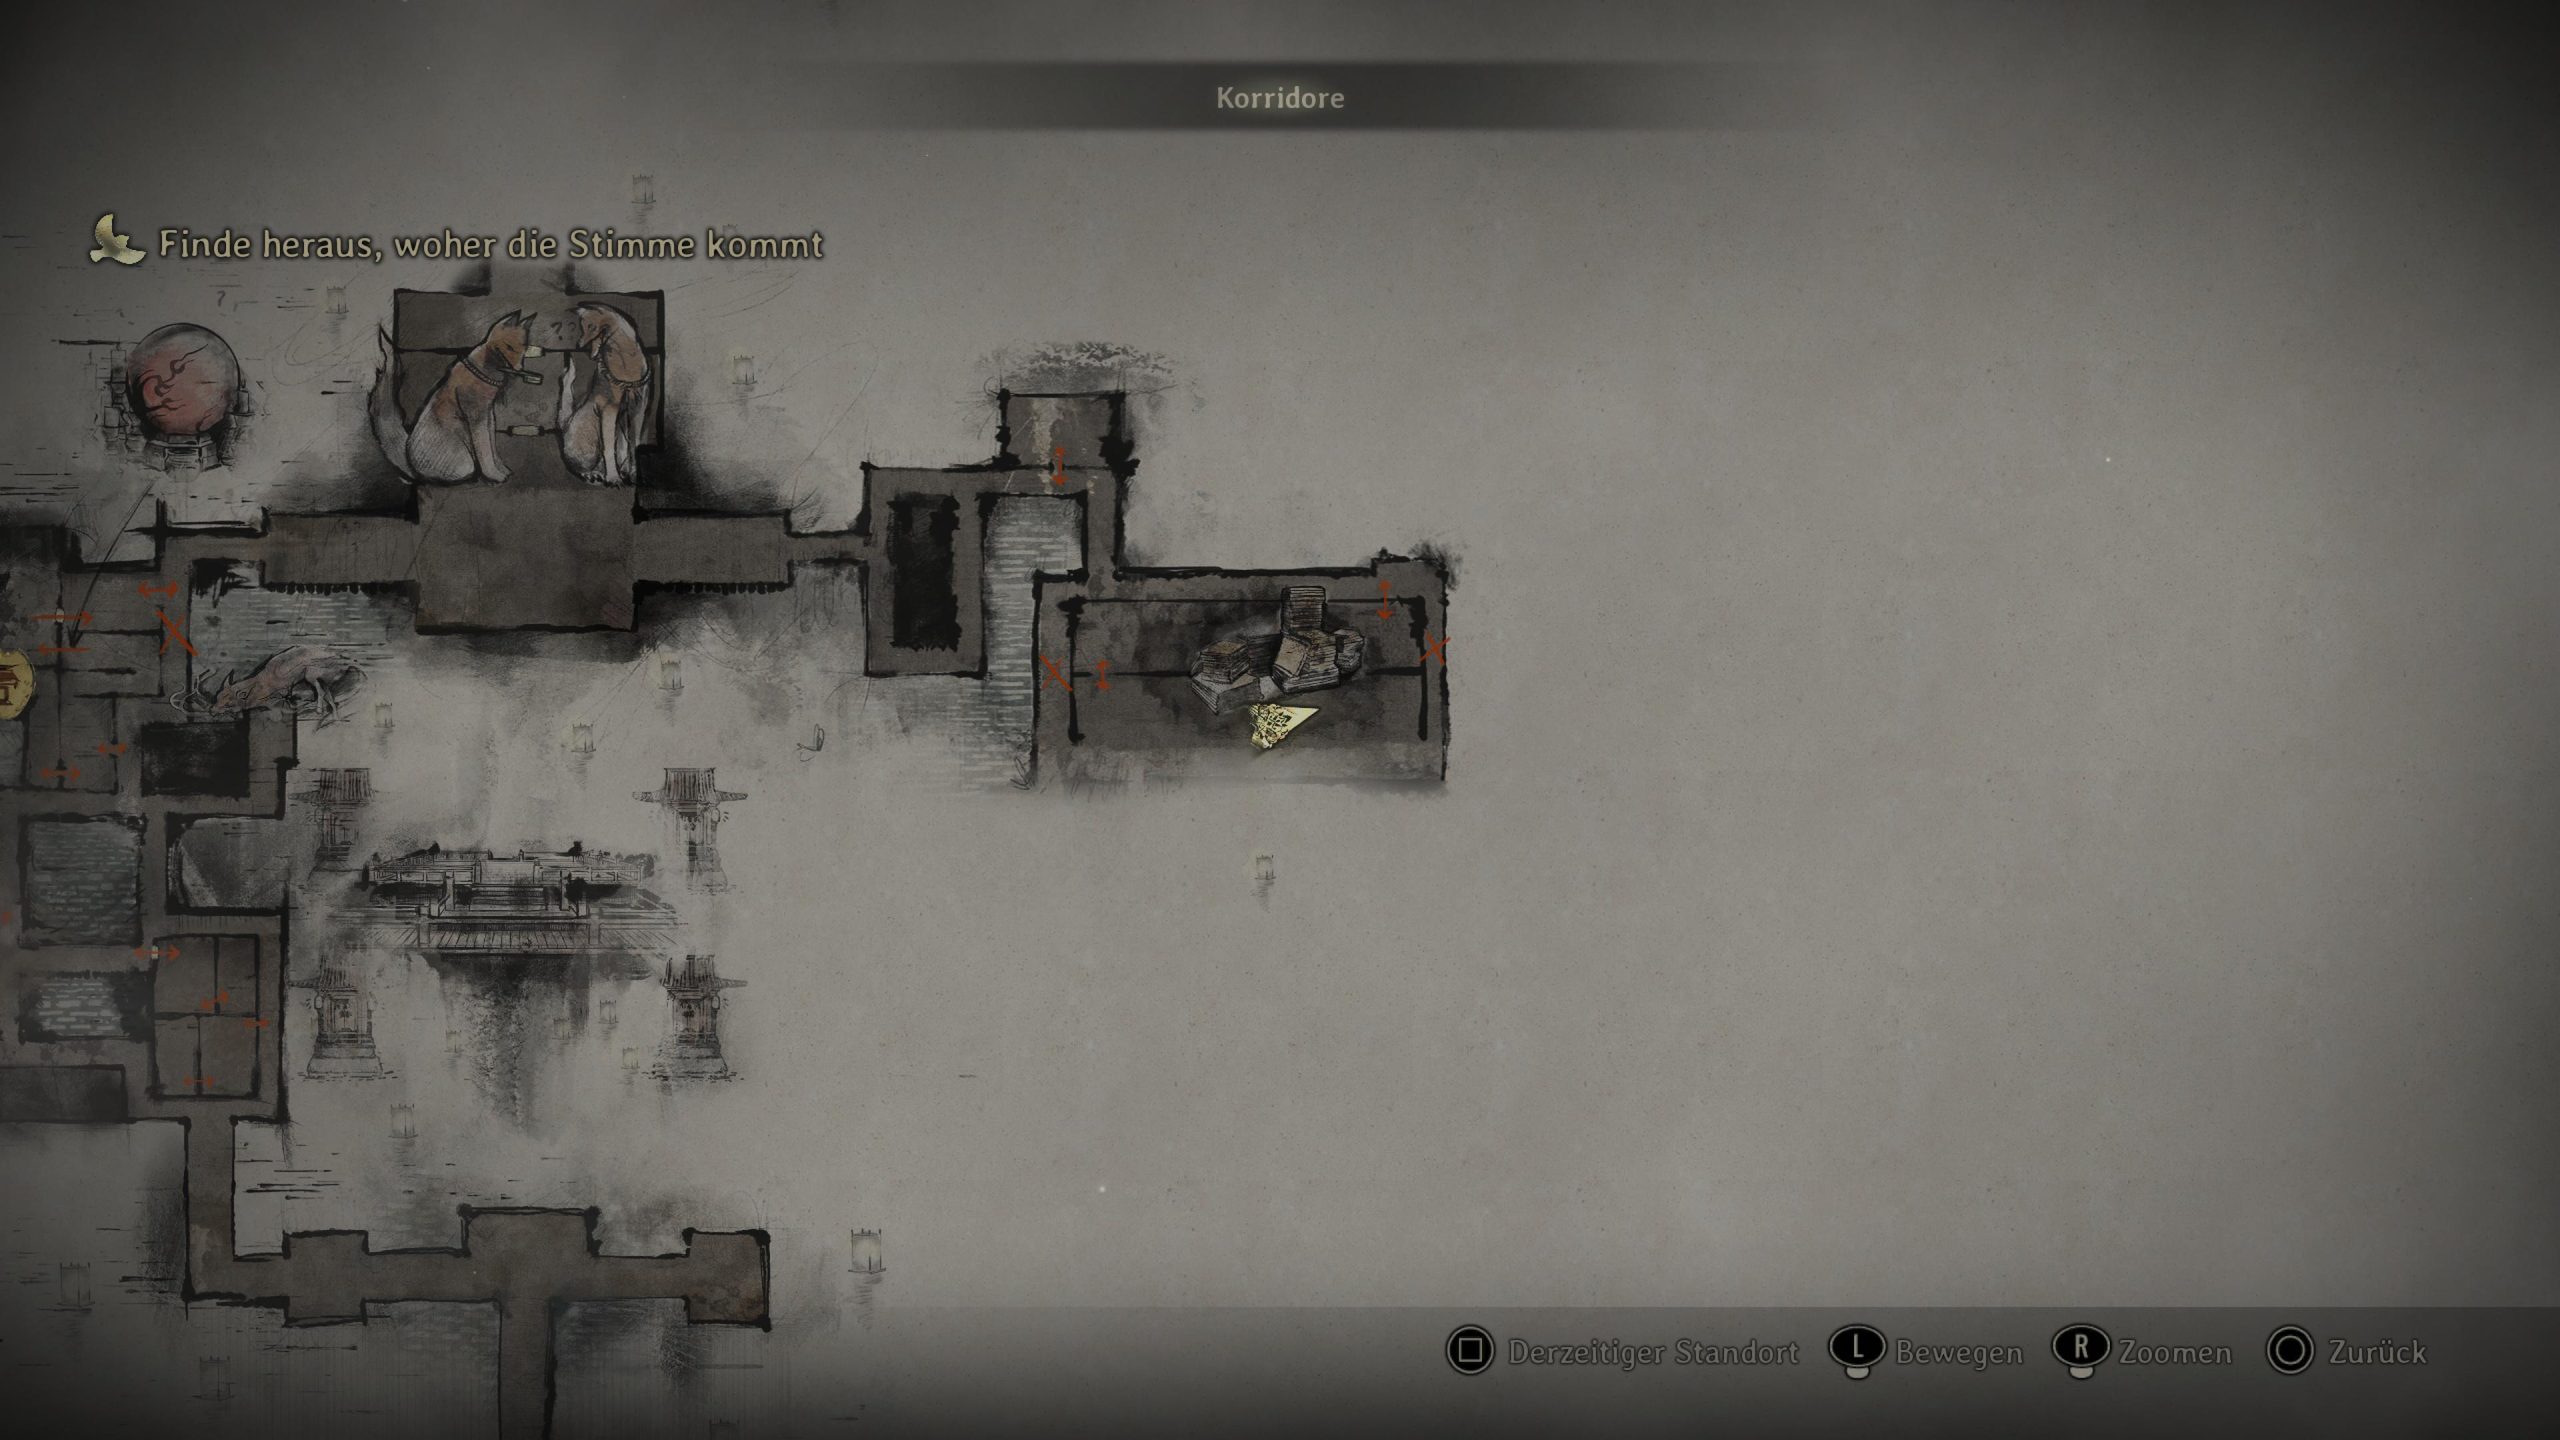
Inari-sama Door + Inventory Upgrade Embroidered Drawstring Bag Proceed northwest through the corridors to find and open the previously locked door. The Inventory Upgrade is located on the shelf in the back left of the room. Collecting it will award you the Fervent Collector trophy. 

Ending 5
Make a manual save before Hunting the Posters for Ending 5. “The Great Space Invasion” Movie Poster 1 Proceed through the fields to a house. Once you move the planks and go inside, you’ll find the poster on the wall. 

Ending 5 “The Great Space Invasion” Movie Poster 2 Proceed to the southeastern part of town. Move through the alleyways and look for the poster displayed on a wall near the Hokora Shrine. 

Ending 5 “The Great Space Invasion” Movie Poster 3 Return northwest by following the alleyway near the Chizuruya General Store. The final poster will be on the wall of the building here. 

Ending 5 The Great Space Invasion! Head back through the alleyway and listen for the UFO sound cue. At the front of the general store (walking east), look for a seat where a toy UFO is placed next to the final item: a movie review. 

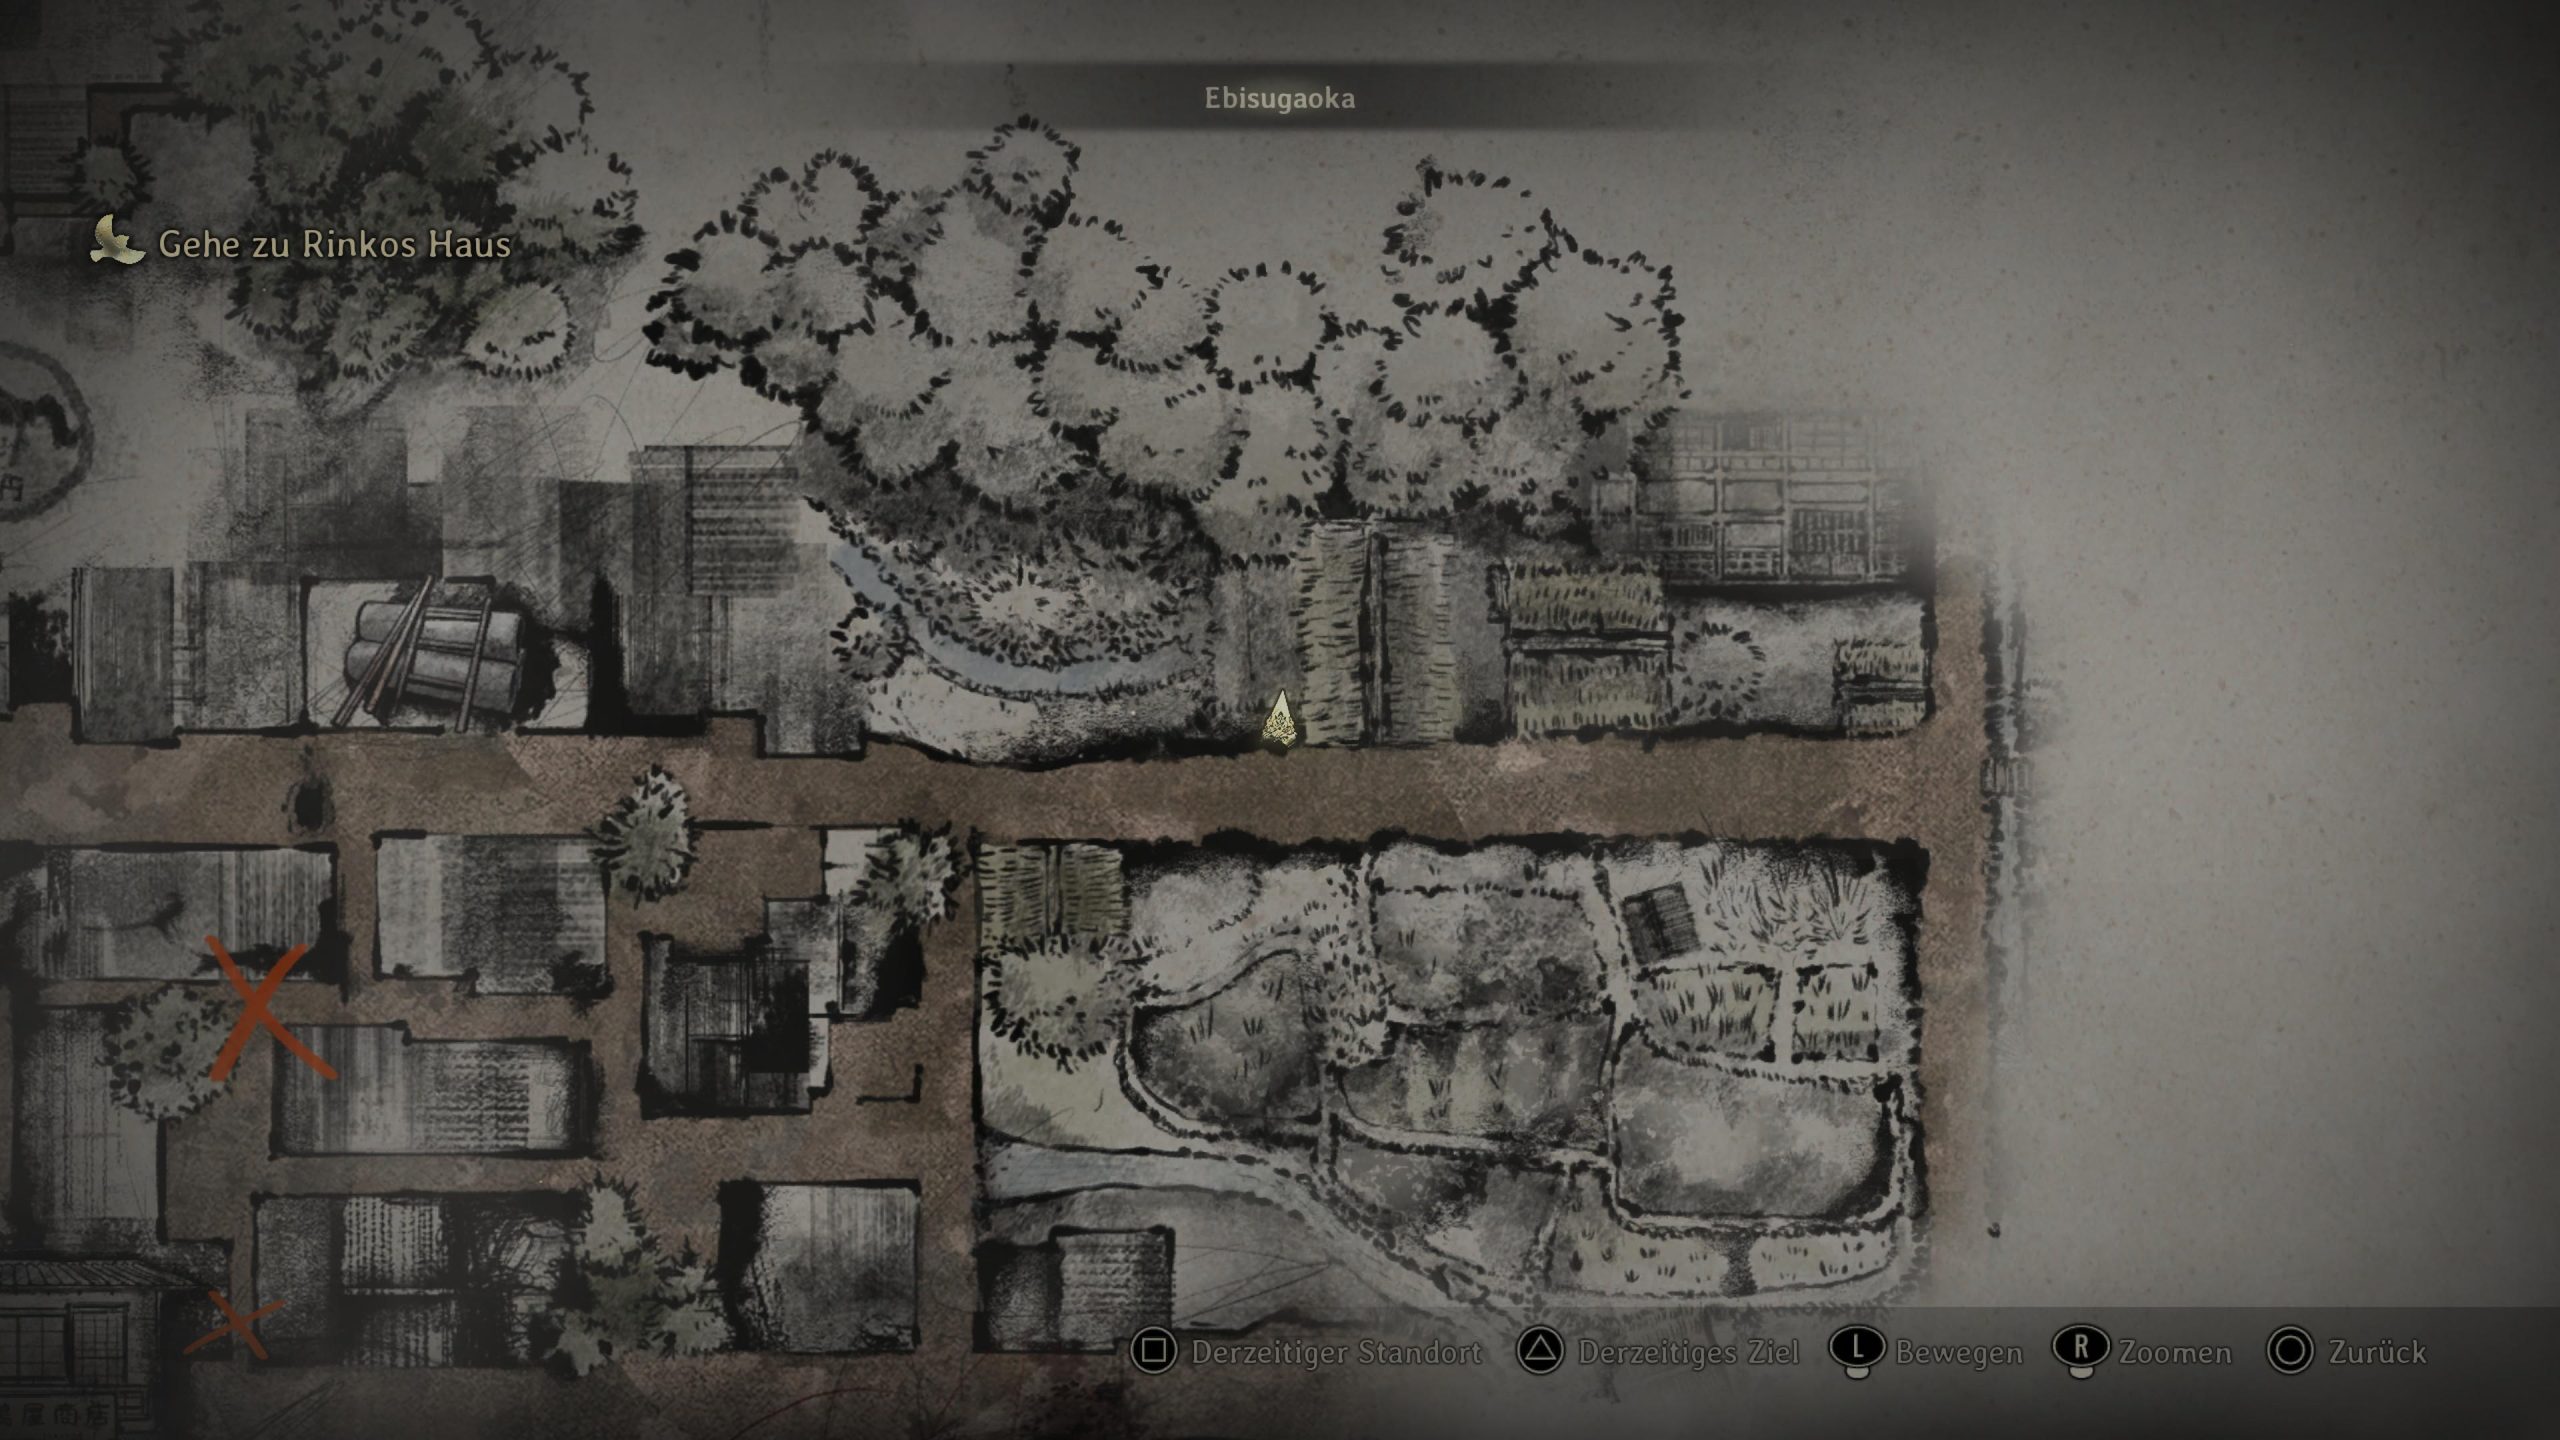
Load the previous save game and continue with the following collectibles. Key Item Research Journal Photo 3 At the end of the alleyways on the west side of town, look for this item on a red barrel. 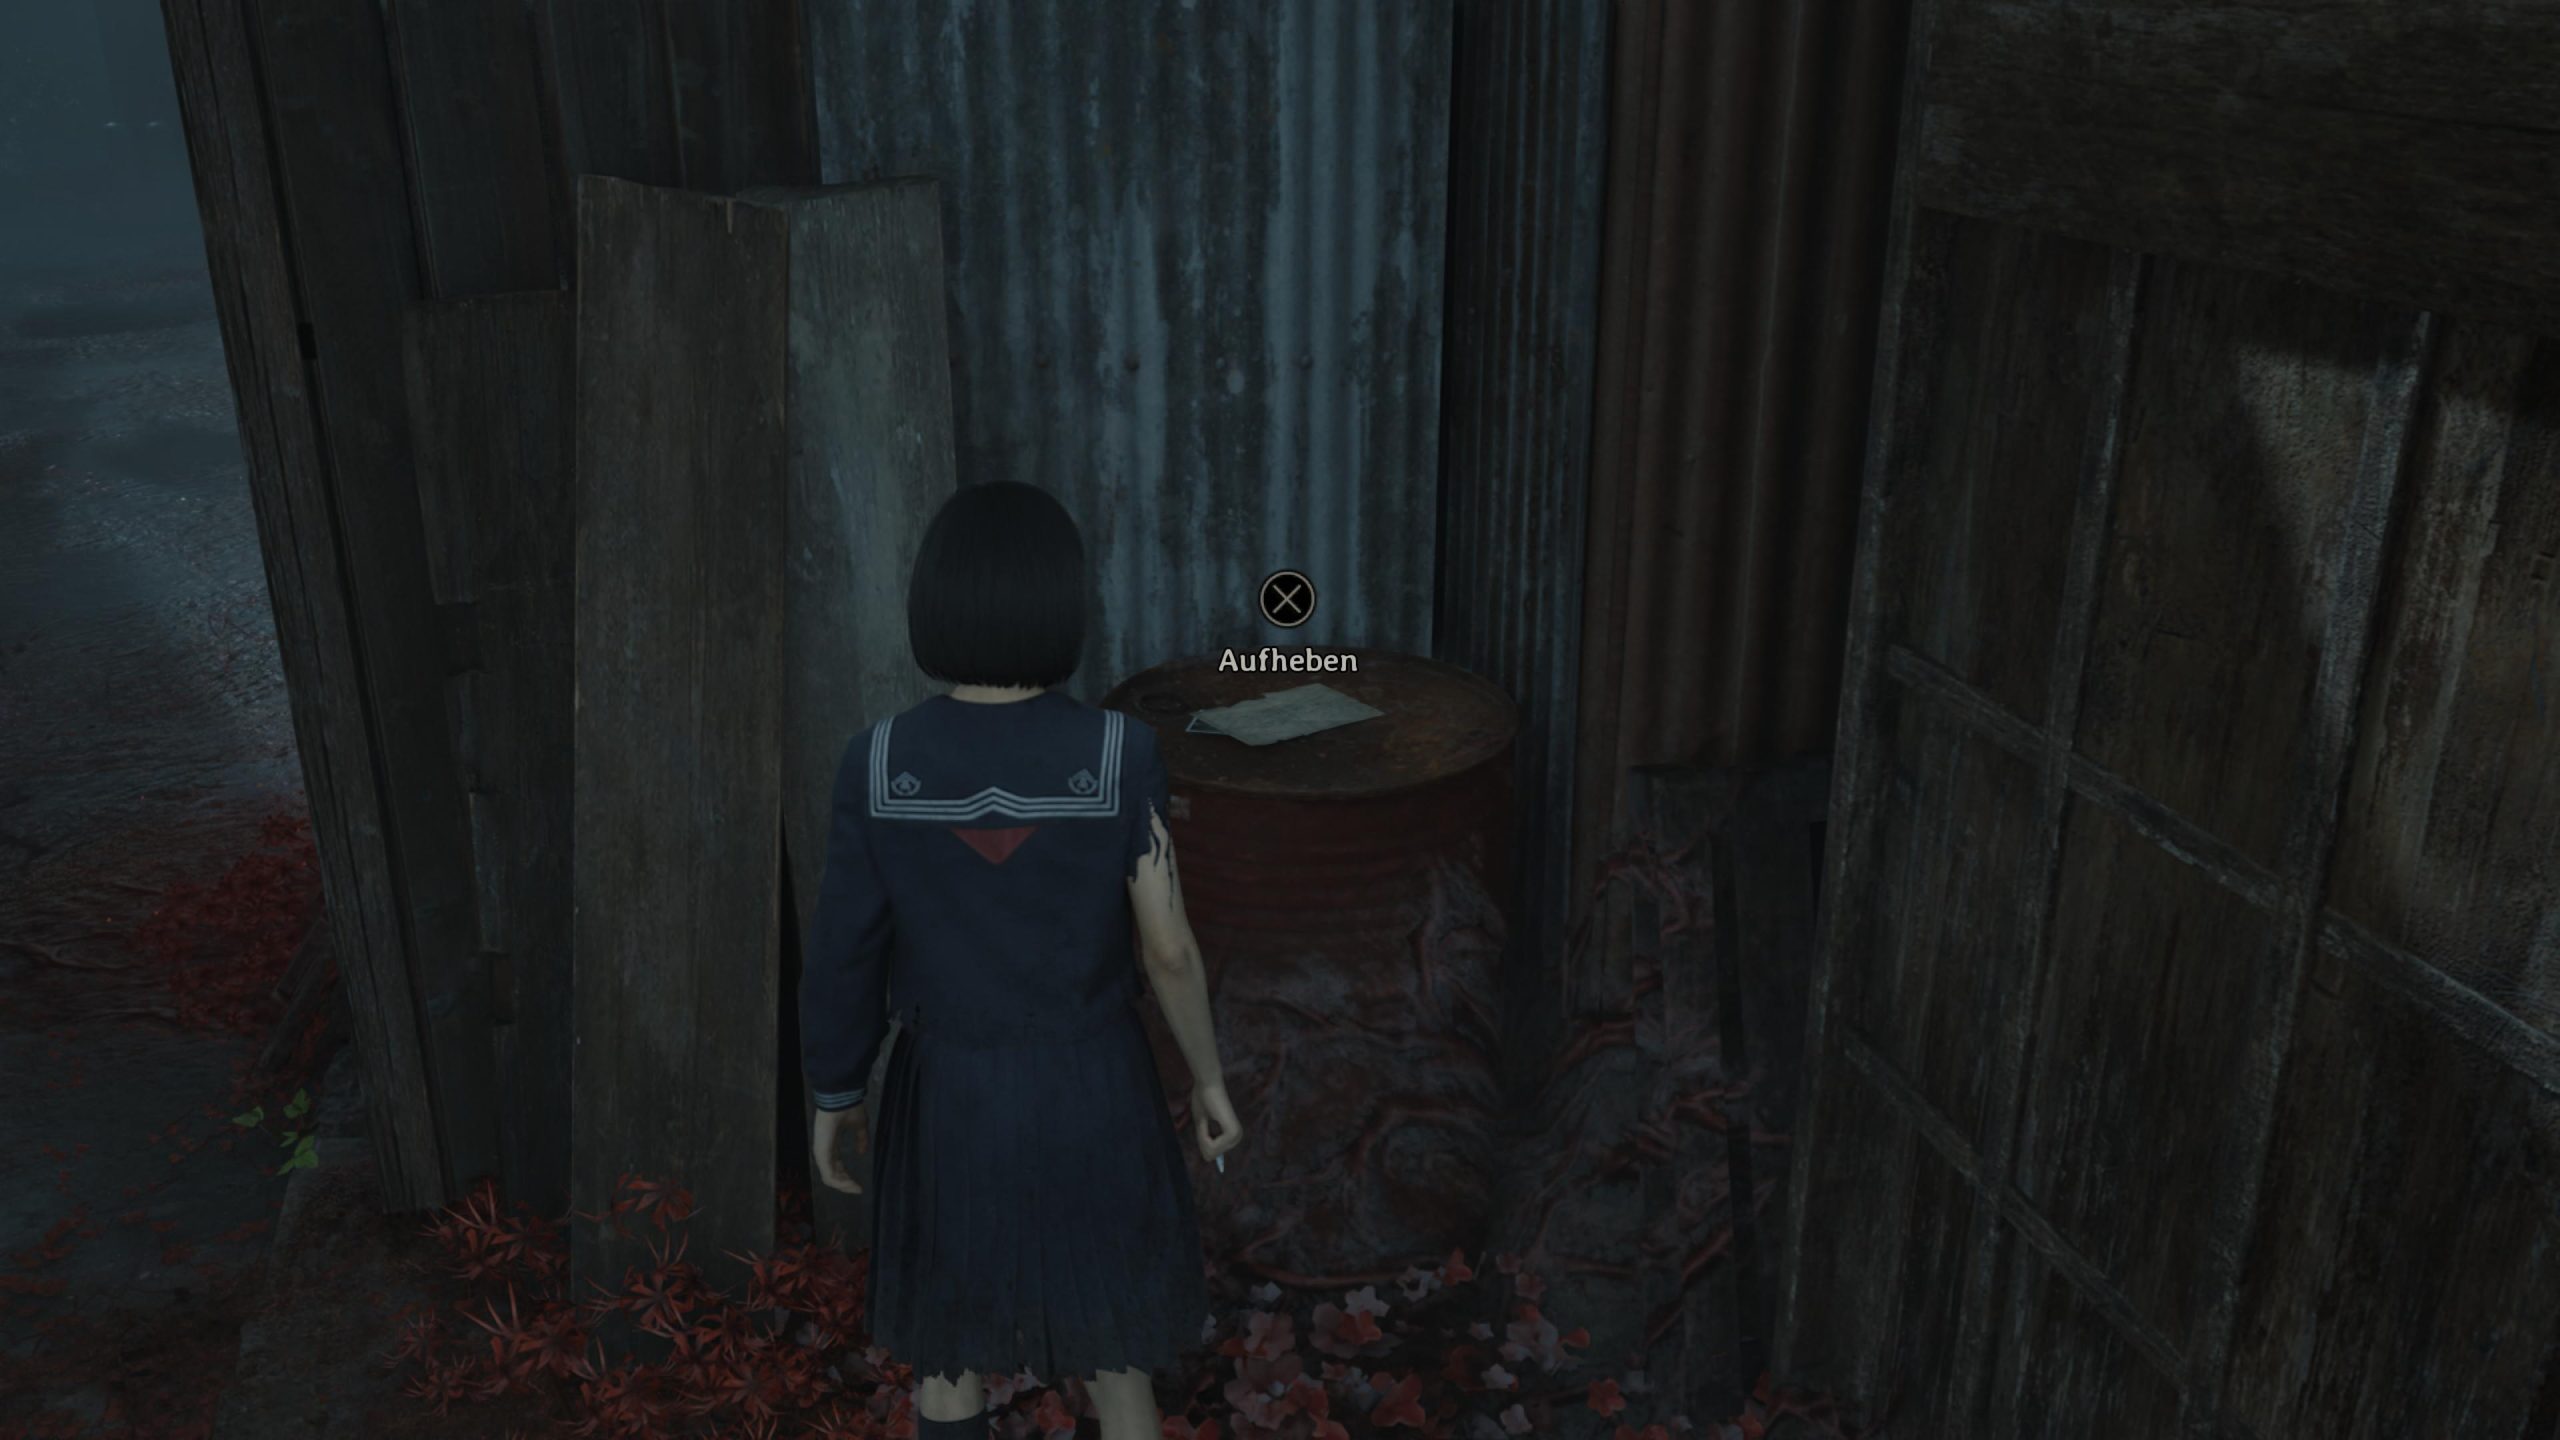

Character Upgrade Ema Go up the stairs past the Hokora Shrine, pivot left, and check the stool by the back door behind the building to find the item. 

Key Item Broken Japanese Geta Sandal Once the Middle School cutscene ends, go south, bypassing the gate. Check the ground near the blockade on this path to find the item. 

Jizo Statue 3/5 The next Jizo Statue is located behind the house on the left, at the top of the long stairs near the Hokora Shrine (east side). 

Inari-sama Box + Document + Omamori Diary of Revenge (3) + Rabbit Once outside, go to the western side of the building. Climb through the window to enter a classroom. You’ll hear the crackling of a radio in here, but the shoebox you need is in the back of the room. 
Puzzle Locker Asakura Ayumi 865 
Inari-sama Door + Omamori + Character Upgrade Swallow, Ema In the western area, pass through the gap in the south wall. This leads you to a door; open it to collect both items waiting inside. 

Document Sakuko’s Diary (4) When you reach the eastern area, check the shelf inside the room with the Hokora Shrine to retrieve this item. 
Document Sakuko’s Diary (5) On a bench in the locker room. 

Document Sakuko’s Diary (6) In the room with the third Hokora Shrine, on a bench in the corner. 

Puzzle Light Left Platform: Fox and Rabbit facing away from each other
Right Platform: Fox and Rabbit facing away from each otherInari-sama Box + Document + Character Upgrade Diary of Revenge (4), Ema Follow the path up the stairs until you reach a gazebo. Walk around the gazebo to find this box sitting on the ground. 

Omamori Goat Use the gate key to access the mountain hut. Upon entering, the item is immediately visible, sitting directly before you. 

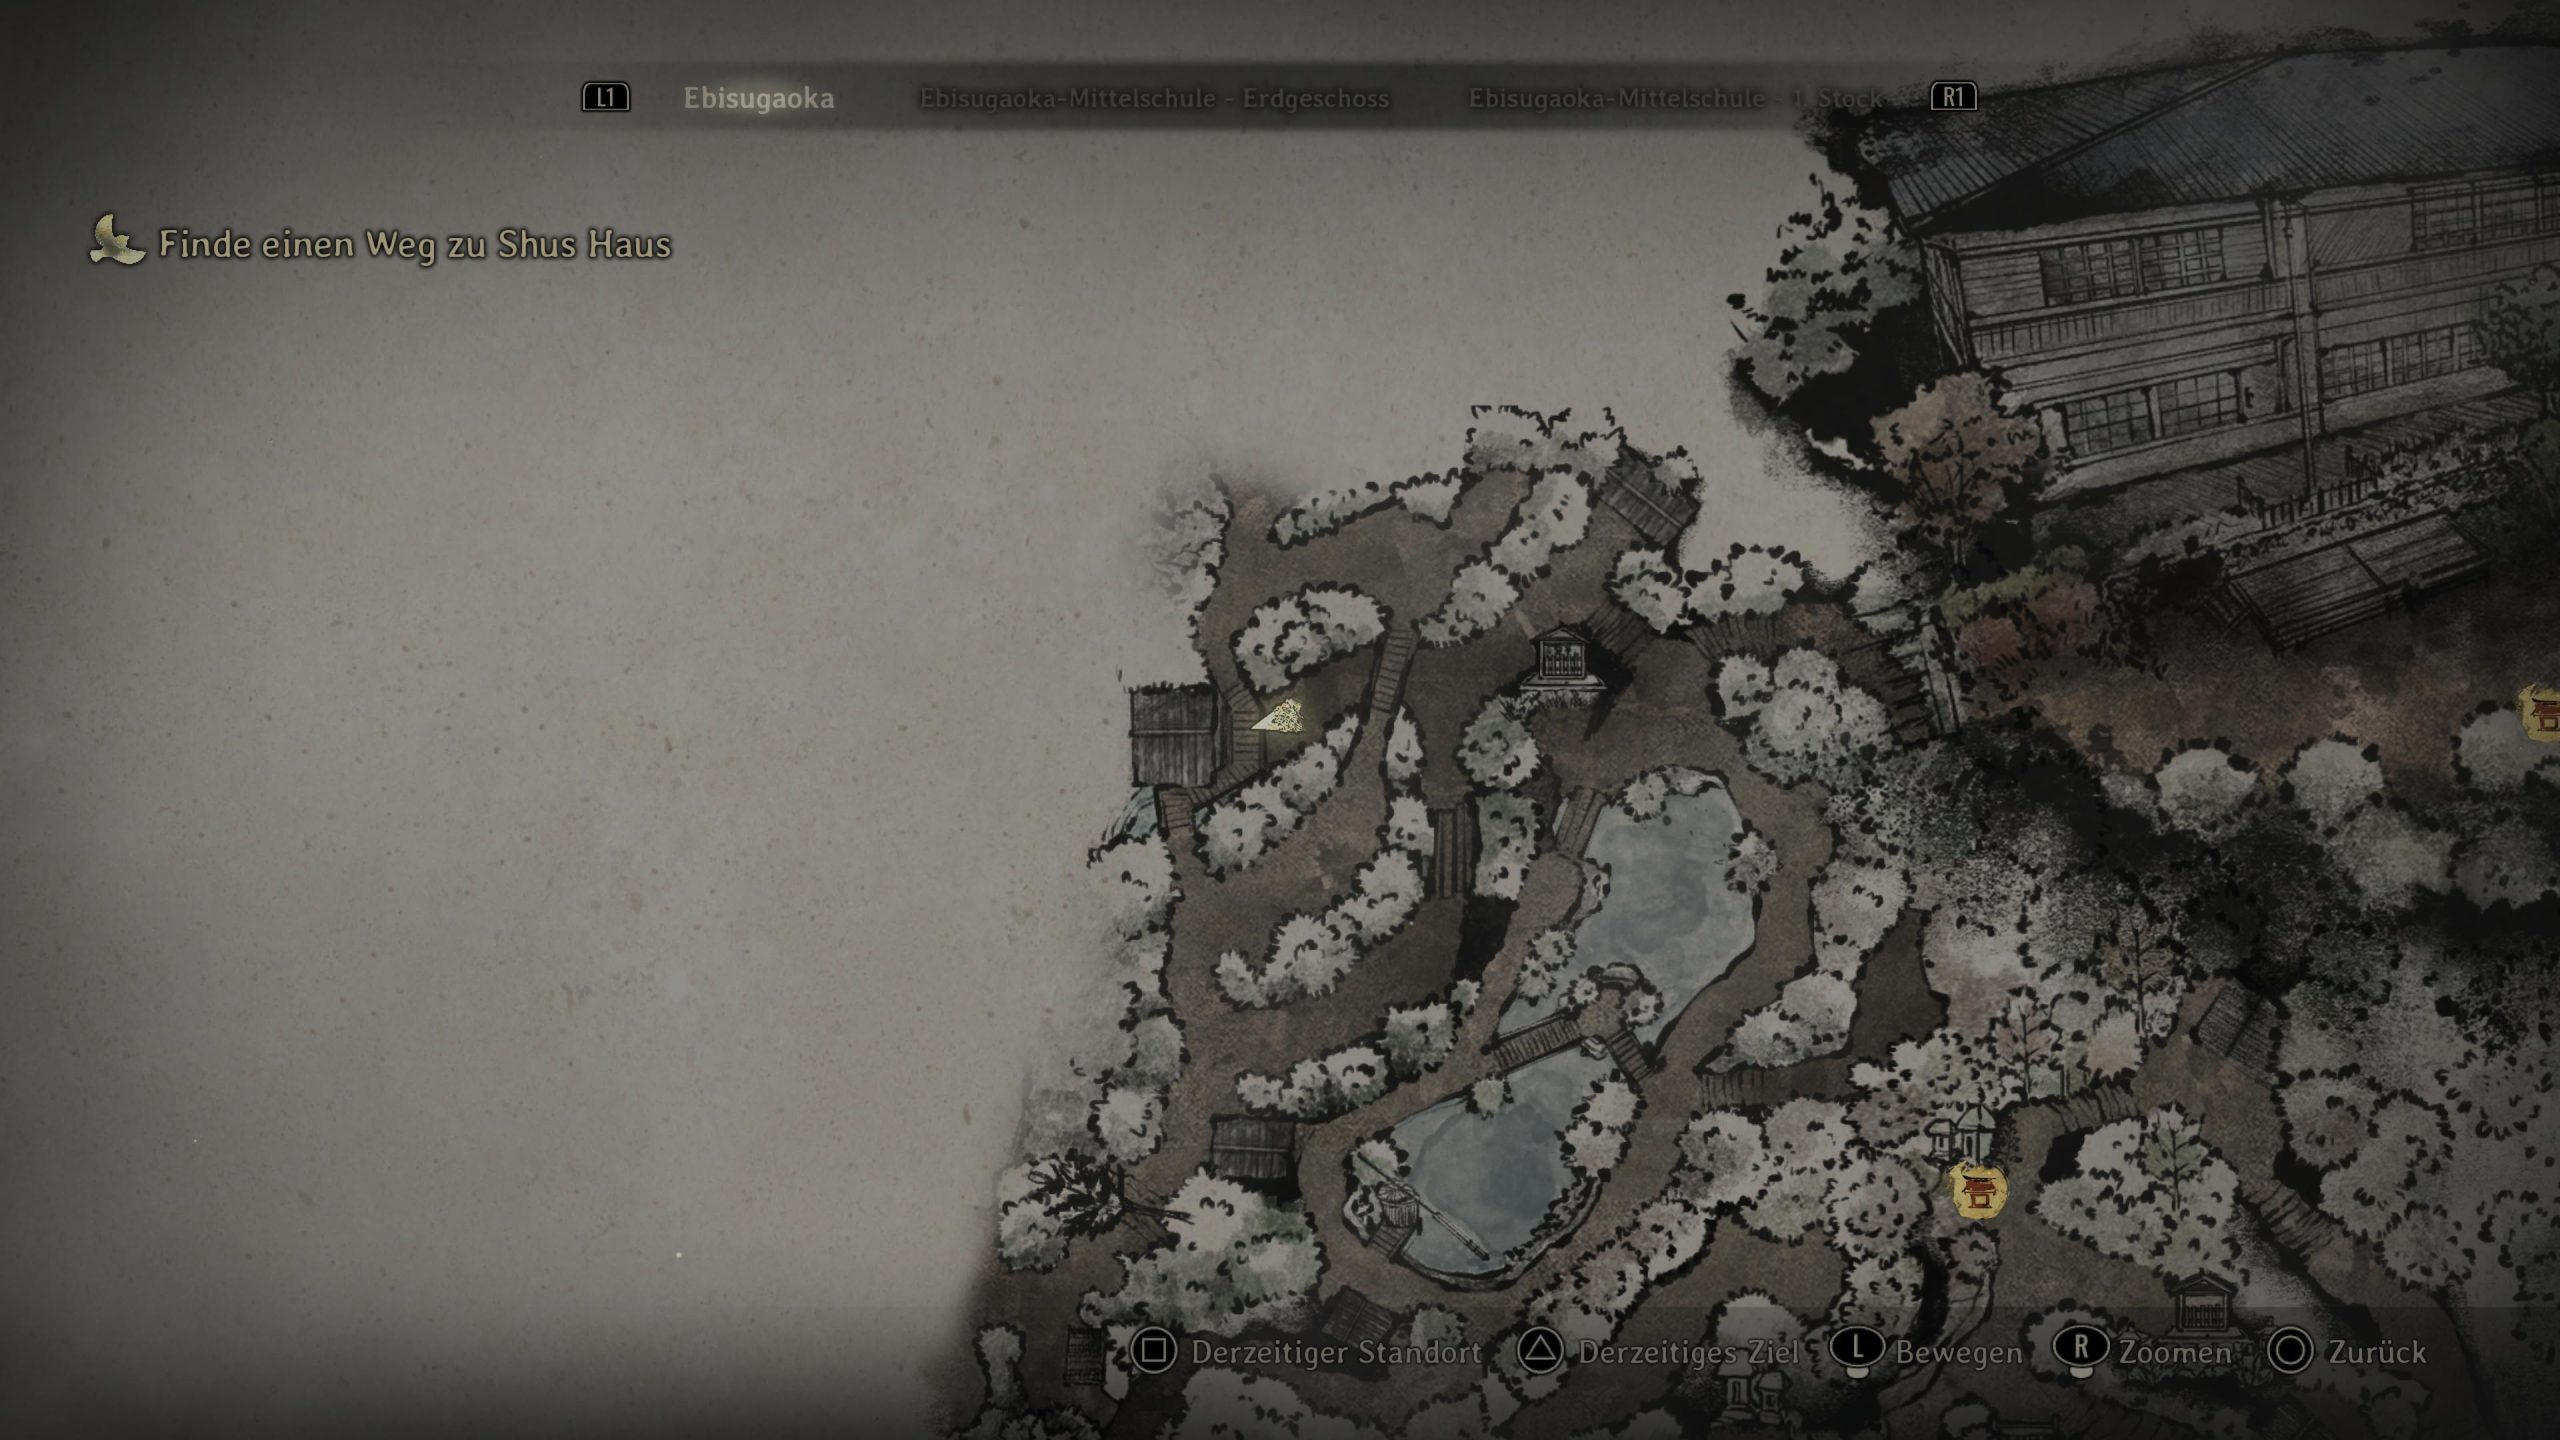
Key Item Research Journal Photo 4 After completing the chase sequence, head up the stairs. You will find this item sitting on the stone shrine located on the left. 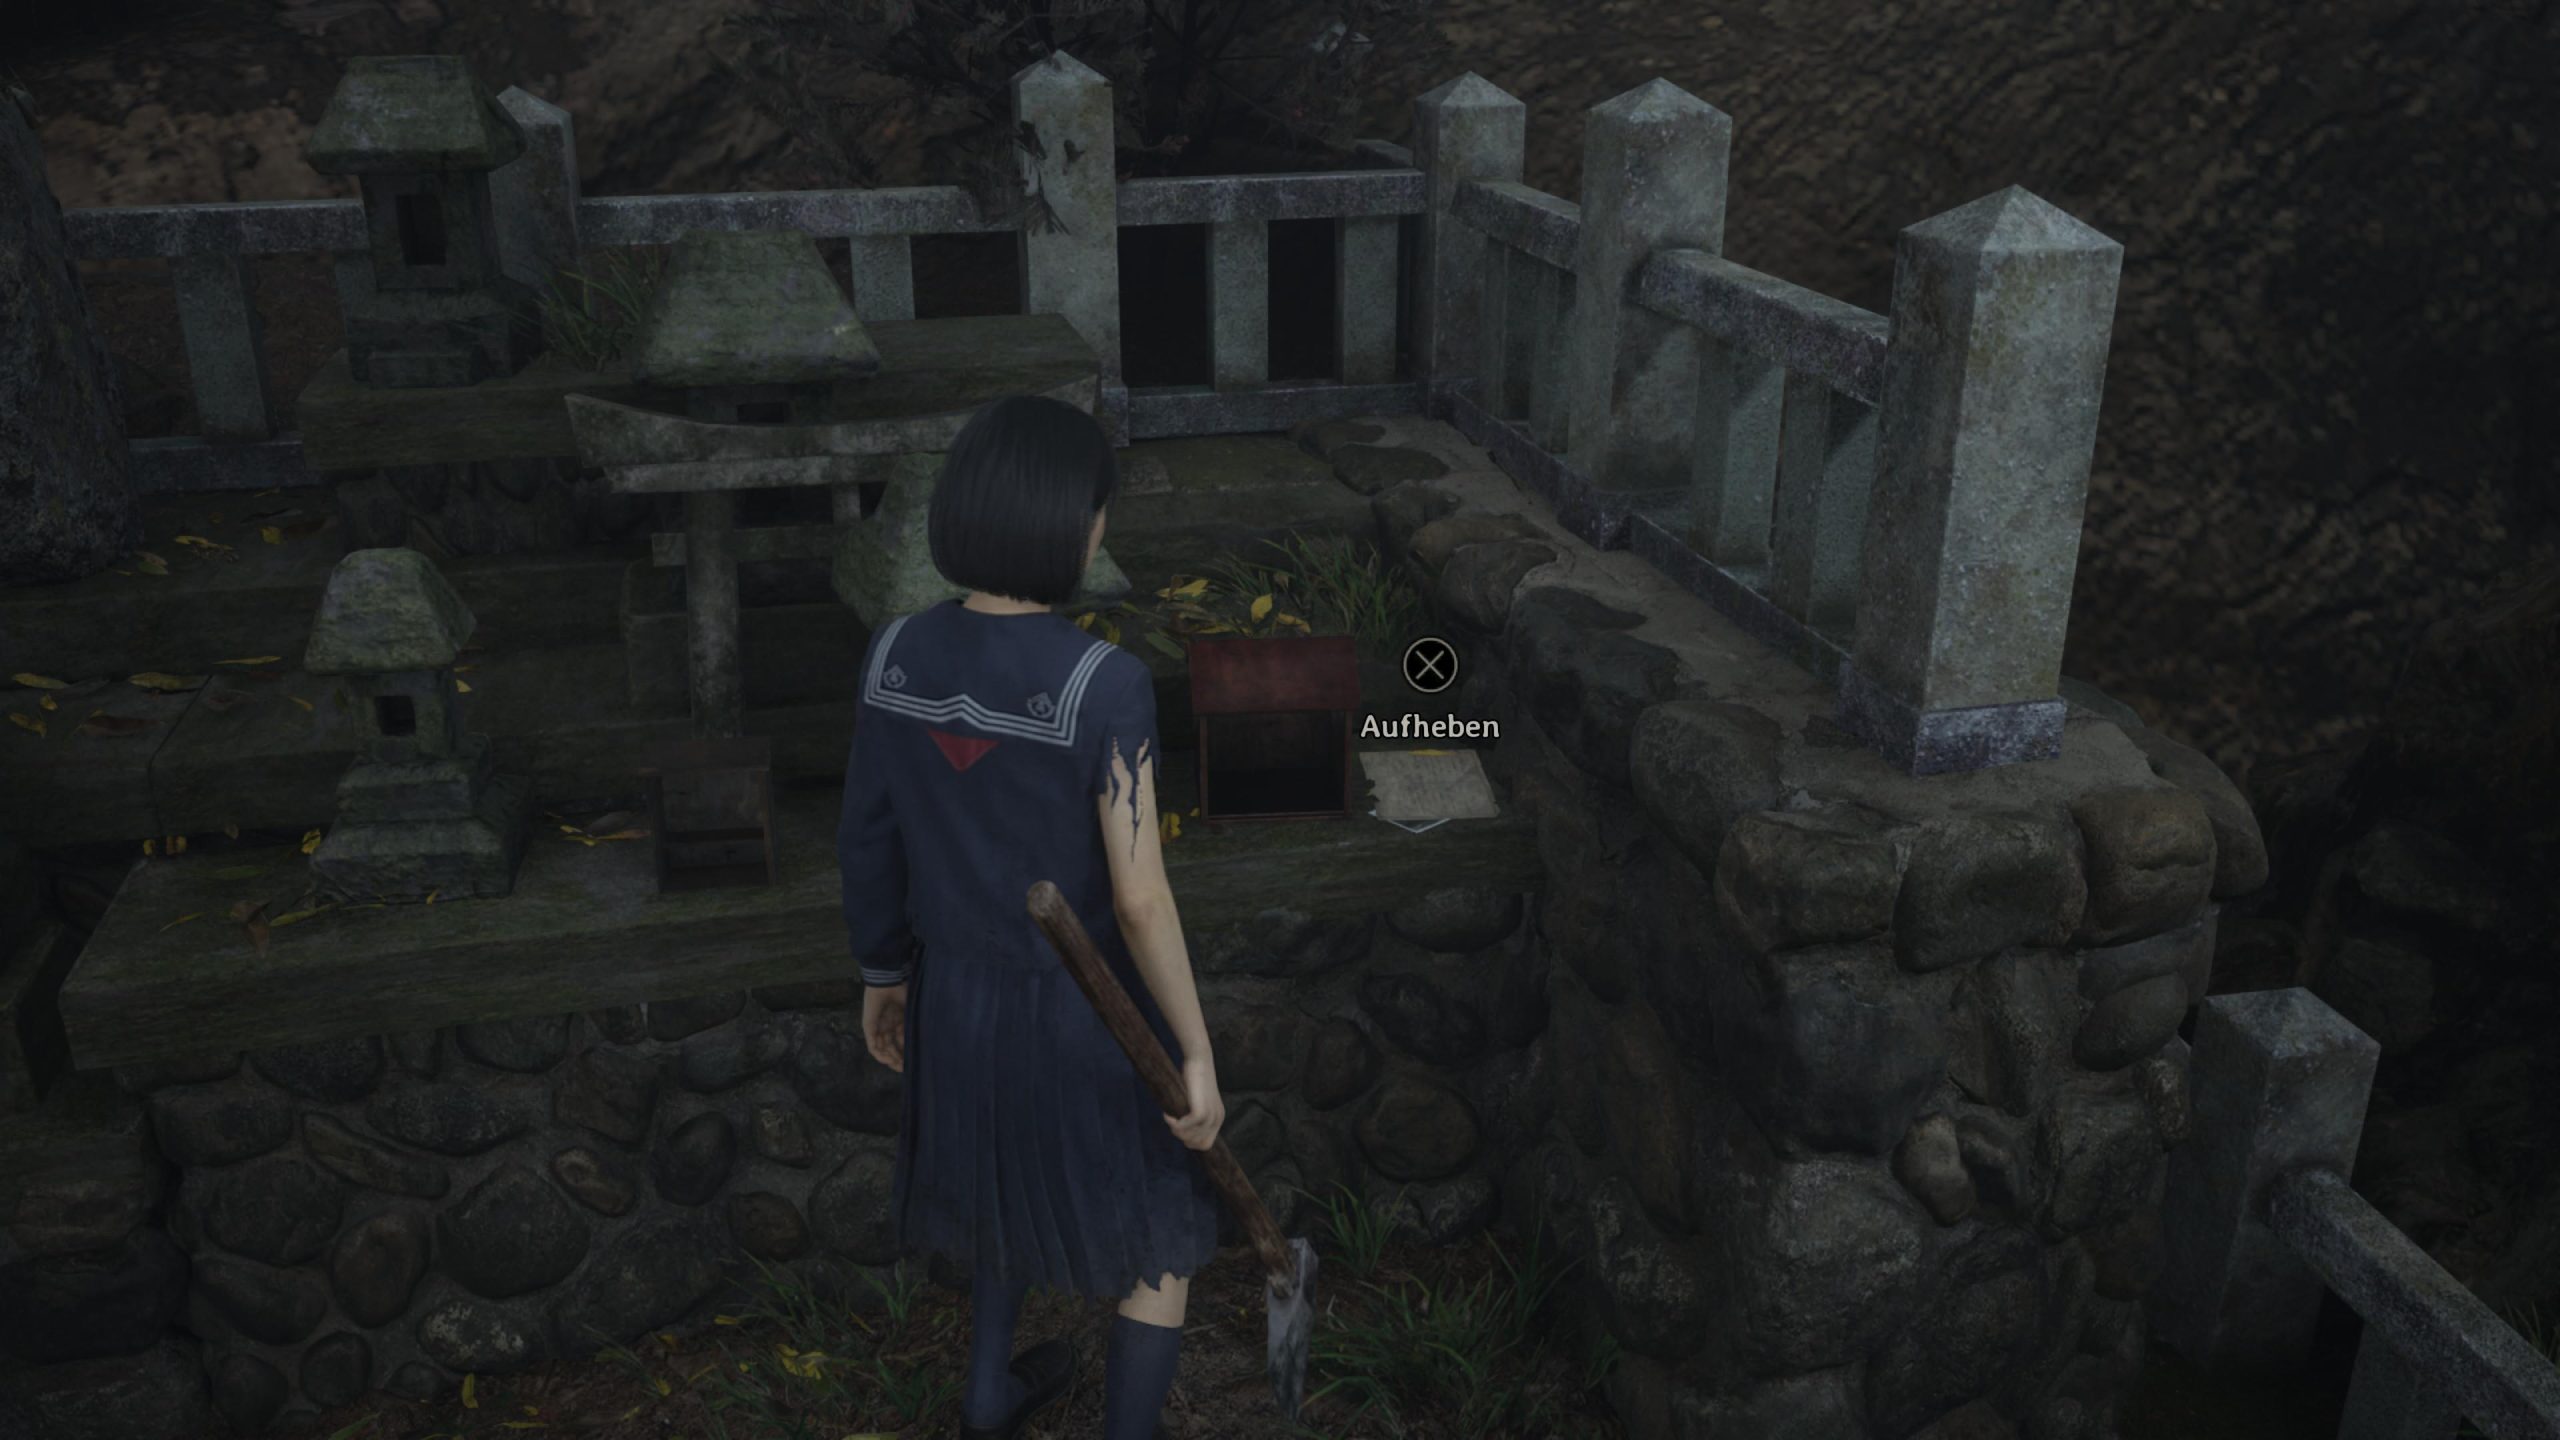

Key Item Cracked Hibachi Brazier Continue to Shu’s house and walk around behind it to find his workshop. Walk around the side of the workshop to find this item lying on the ground. 

Trophy Winners Don’t Do Drugs Ensure you have NOT used any Red Capsules prior to this point.
Enter Shu’s Workshop and DO NOT pick up any of the Red Capsules found inside.
Grab the letter on the desk to unlock the trophy.– – Jizo Statue 4/5 Head back up the path towards the Hokora Shrine. You will find a Jizo Statue off to the left of the path. Offer the Hibachi Brazier to it. 

Inari-sama Door Use the power of the Fox Arm to go through the southeast doors of the Main Hall. After climbing two sets of stairs and defeating the enemies, reveal and open the hidden door. 

Key Item Hotei-sama Sitting Cross-legged (for Ending 2) After passing through the Inari-sama door, proceed up to the temple. This bottle will be sitting on the table inside. 

Character Upgrade Ema Check the cabinet on the left side of the temple to find this. 
Puzzle Crimson Water (requirement for Endings 2 + 4) This puzzle is located on a stone by the water and is required to fill the trough with crimson water, which is necessary for purifying the Sacred Sword later on.
You must ring 3 of the 5 bells in the area in a specific sequence.
Crucial Timing
You must ring the bells one at a time, timed perfectly with the fountain: only ring the next bell after the water fountain tips and makes a loud clacking sound.
The three bells to be rung are identified by the symbols on the lantern hanging next to them:
First Bell (Volcano Symbol): Located up near the temple entrance.
Second Bell (Water Symbol): Located on the small island next to the puzzle stone.
Third Bell (Tree Symbol): Located on the stone bridge on the right path.
Successfully completing this sequence will turn the water crimson.


Key Item Research Journal Photo 5 As you proceed down the hill, look for the third house. You will find this item sitting on a table in its yard. 
Document Clinical Trial (2) Continue further down the hill until you spot a house on your left with an outdoor staircase. Go up the stairs to find this item sitting right next to the fifth Jizo Statue. 

Key Item Dad’s Old Kitchen Knife Continue a bit further down to the next house (where you’ll encounter some enemies). Go around the house to find the knife embedded in a tree nearby. 

Jizo Statue 5/5 Return to the previous house and go up the stairs. 

Weapon Sacred Sword (for Endings 2 + 3) With all 5 Jizo Statues completed, battle your way back up the mountain path past Shu’s house to the Thousand Year Cedar.
Create a manual save for the 3rd ending! 

Weapon Purified Sacred Sword (for Ending 2) Go back down the mountain, then head up the stairs in the northwest to the Inari-sama Shrine. If you completed the Crimson Water puzzle earlier, the trough will be filled. Interact with it to Purify the Sacred Sword. Be warned: the purified sword loses its sheathed durability recovery; hitting zero durability results in severely reduced damage. 

Inari-sama Box + Document + Character Upgrade Diary of Revenge (5), Ema After traveling through the park, look for this item sitting in the yard of the house located just before the Hokora Shrine. 

Inari-sama Box + Document + Character Upgrade Diary of Revenge (6), Ema In the first area of the residence, take the west corridor and head north two rooms. In the room immediately before the Photo Room, you will find this box sitting to the side. Opening it will unlock the Fate of the Apostate trophy, provided you have successfully collected all 6 Diary of Revenge documents up to this point in the game. 

Puzzle Scales To successfully balance the scales for Ending 2, place the five available dolls as follows: Left Scale: Headless Doll, Half Mask Doll
Right Scale: All other dolls (The remaining three dolls should be placed here.)
Puzzle Ominous Photo To complete the puzzle in the Photo Room and receive the next key item for Ending 2, follow these steps: First, place the photo of Hinako on the single empty space in the display.
Next, adjust the rotation of all photos based on the subject:
Upright: Hinako and both of her parents.
Upside Down: Hinako’s friends (Shu, Sakuko, and Rinko).– Puzzle My Room Once you have acquired all three crests, return to the first area and place them on the plaque directly in front of Hinako’s Room.
To correctly configure the plaque for Ending 2: Fox’s Wedding:Left Spot: Set to the Scales symbol.
Right Spot: Set to the Black Bird symbol.
Top Spot: Set to the Fox symbol.
Bottom Spot: This spot must be empty (“Nothing”).
Inari-sama Door In the third crest puzzle room (fox statues and six doors), the door on your immediate right has the Inari-sama design. Opening this door will unlock the Inari-sama’s Secrets trophy, but only if you have opened all prior Inari-sama doors and boxes. 

Character Upgrade Ema Same room as above. 
Puzzle Mural To unlock the next step for Ending 2, place your three acquired crests into the correct slots on the mural: Place the Fox Mask Crest in the far left slot (the image of a Fox with a fan).
The Black Sparrow Crest goes into the slot directly next to the Fox Mask Crest (matching the image of a lantern dangling from a red-roofed cage).
Finally, place the White Sparrow Crest in the bottom middle slot (the image of a resting Fox).– Trophy Puppetmaster Starts as soon as you enter the boss fight. – – Puzzle Scales To successfully balance the scales for Ending 3, place the five available dolls as follows: Left Scale: Hinako Doll (the one wearing the blue shirt)
Half Mask Doll
Right Scale: All other dolls (The remaining three dolls should be placed here.)
Puzzle Ominous Photo To solve the Photo Puzzle for Ending 3, first place the photo of Hinako into the empty space. Then, arrange the photos so that the following five subjects are in the specified orientation:
Upright: Hinako, Shu, and Sakuko
Upside Down: Hinako’s Parents and Rinko– – Puzzle My Room Once you have acquired all three crests, return to the first area and place them on the plaque directly in front of Hinako’s Room. Left Spot: Set to the White Bird symbol.
Right Spot: Set to the Scales symbol.
Top Spot: Set to the Swords symbol.
Bottom Spot: This spot must be empty (“Nothing”). 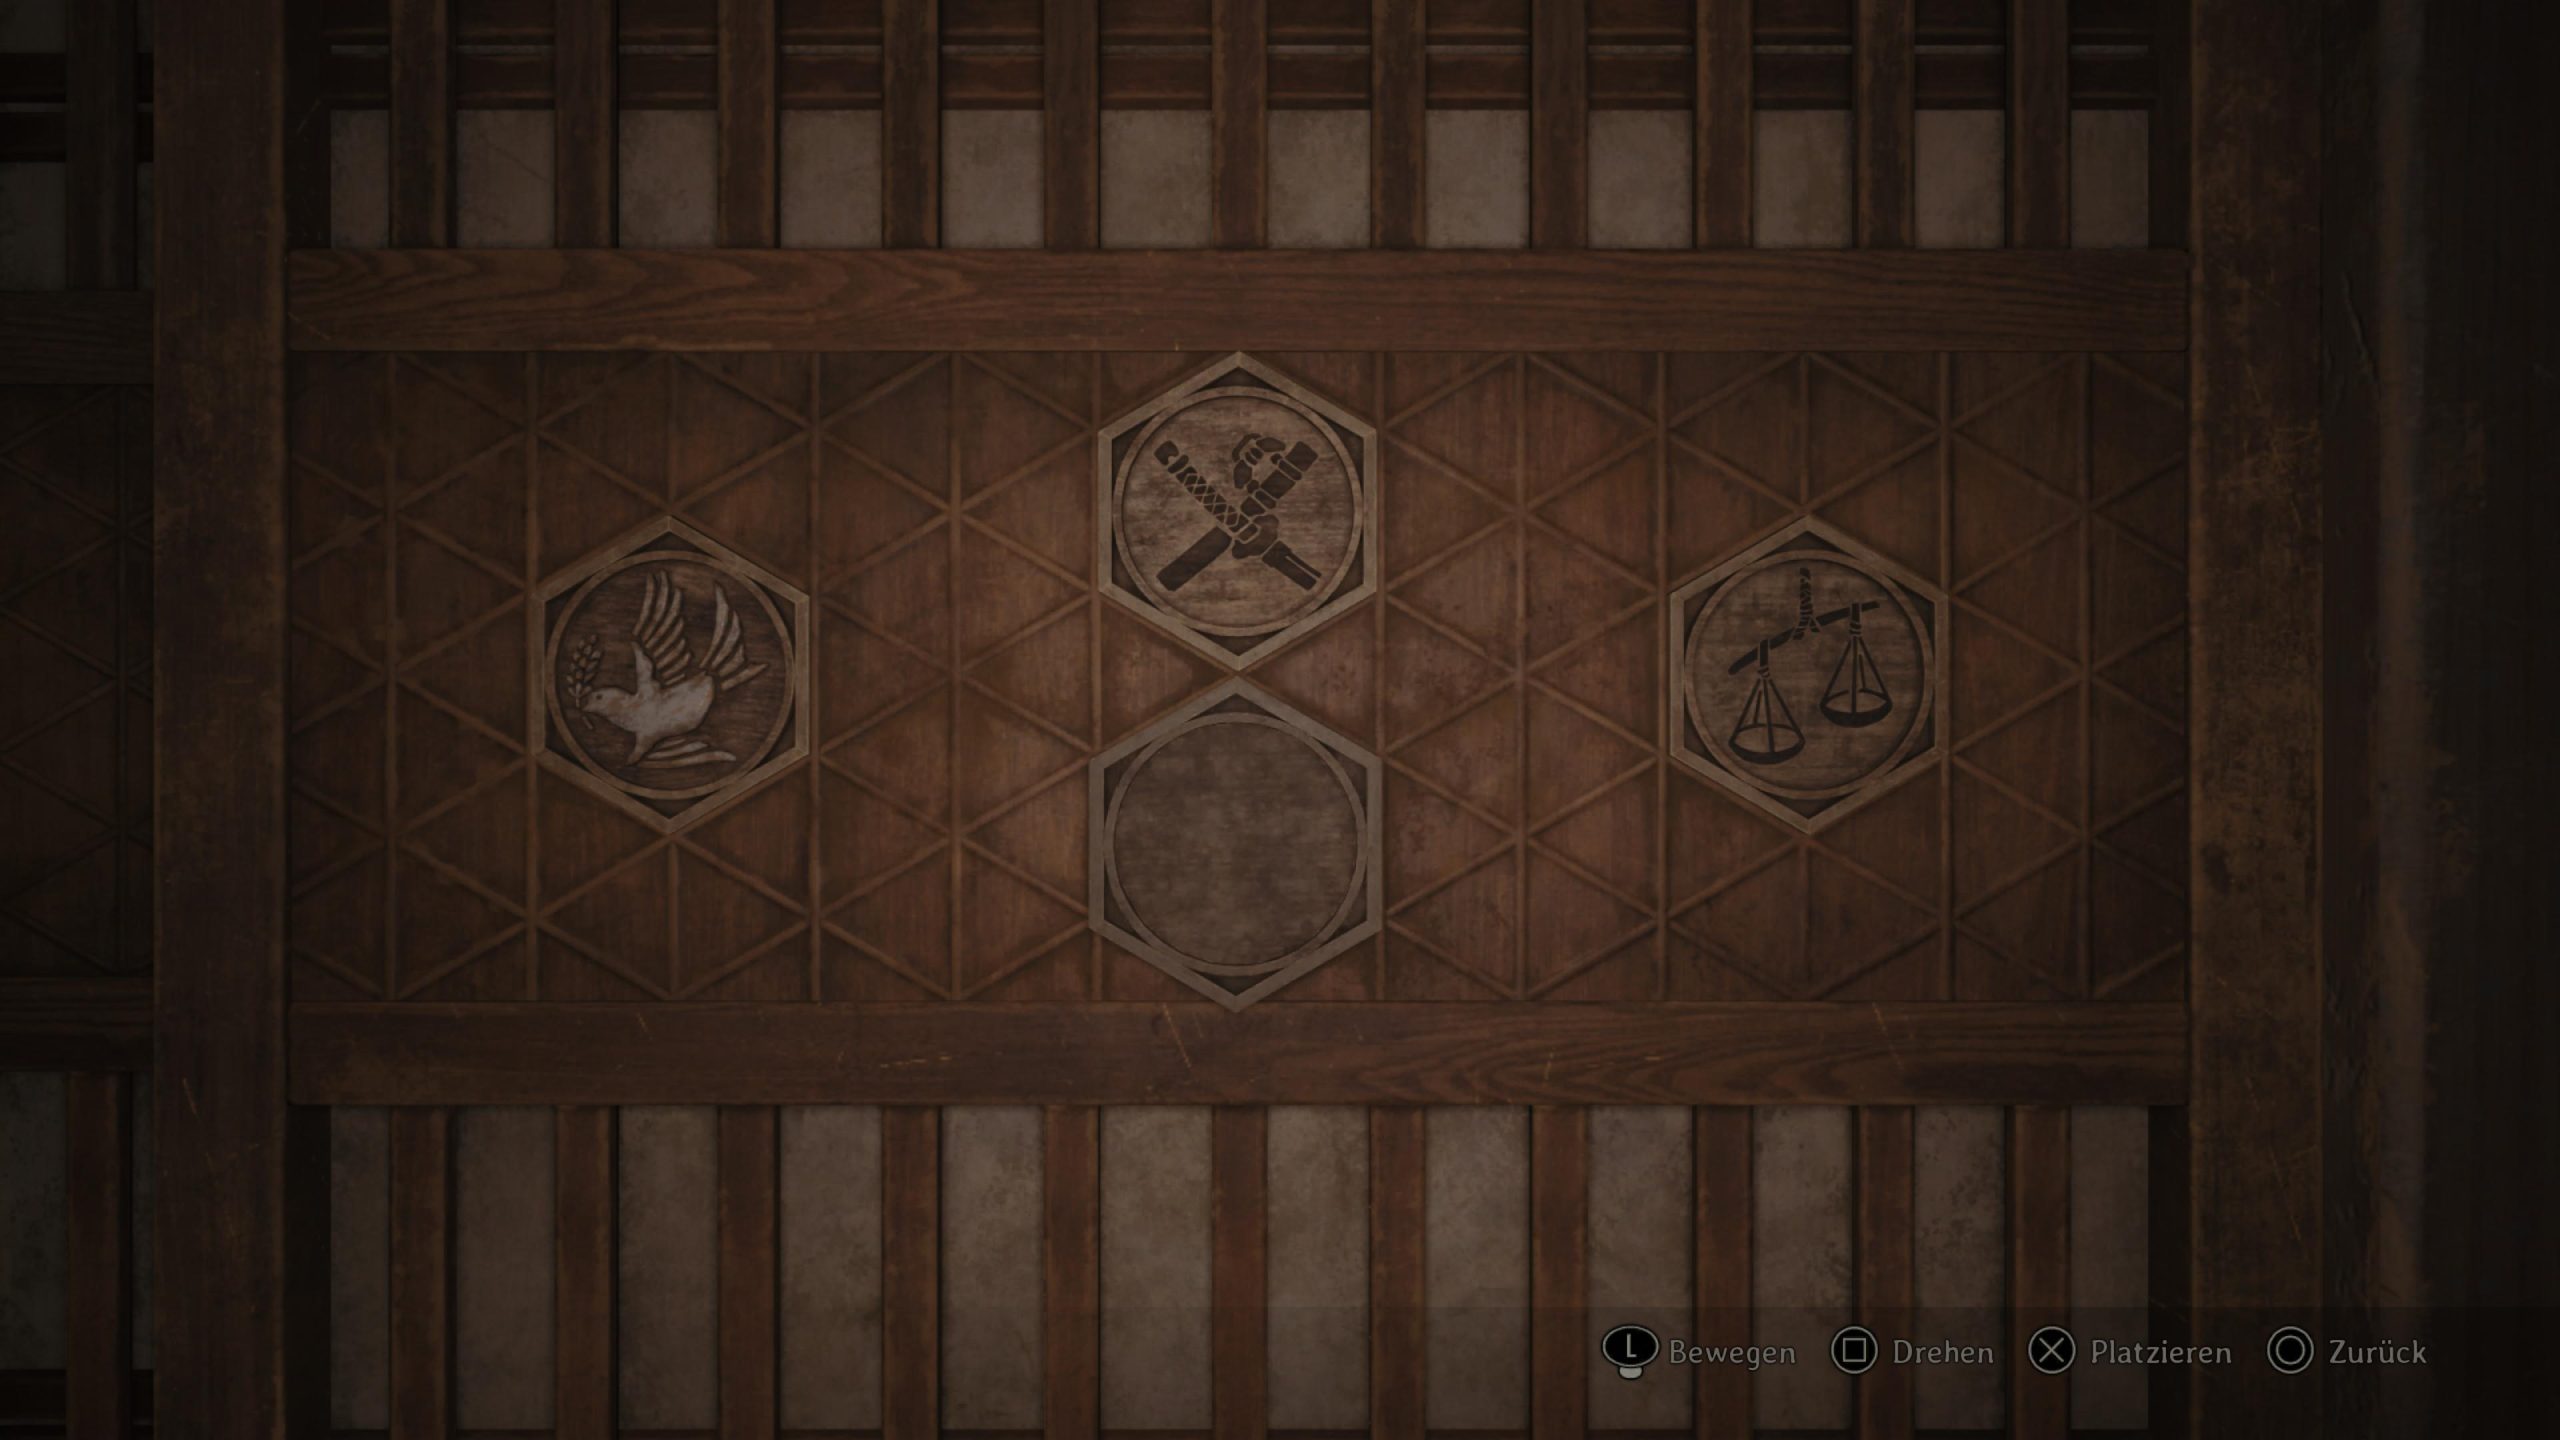
Puzzle Mural To correctly place the three crests for Ending 3: The Fox Wets Its Tail, use the following configuration on the mural: Fox Mask Crest: Place in the
Top Left Slot (matching the image of a Fox holding up a lantern).
White Sparrow Crest: Place in the Bottom Right Slot (matching the image of a running Fox).
Black Sparrow Crest: Place in the slot adjacent to the White Sparrow Crest (the slot in the Bottom Middle position).Trophy Fox Tamer Starts as soon as you start the boss fight. – – Stage 3 – Complete the game on Lost in the Fog Mode / Lost in the Fog puzzle.

Weapon Sacred Sword Head to the Jizo Statue behind the house south of Sennensugi Shrine. 


Document Rinko’s Diary (1) Head to Rinko’s room (the northern room) in the western area and check the shelf to retrieve this item. 

Document Rinko’s Diary (2) In the western area, enter the Classroom (western room). You will find this item sitting on a student’s desk inside. 

Document Rinko’s Diary (3) Interact with the desklamp in the Classroom to turn the room red. The item will then appear on a shelf on the eastern wall. 

Document Rinko’s Diary (4) Interact with the desklamp in the Classroom to turn the room red. The item will then be available on a shelf on the southern wall. 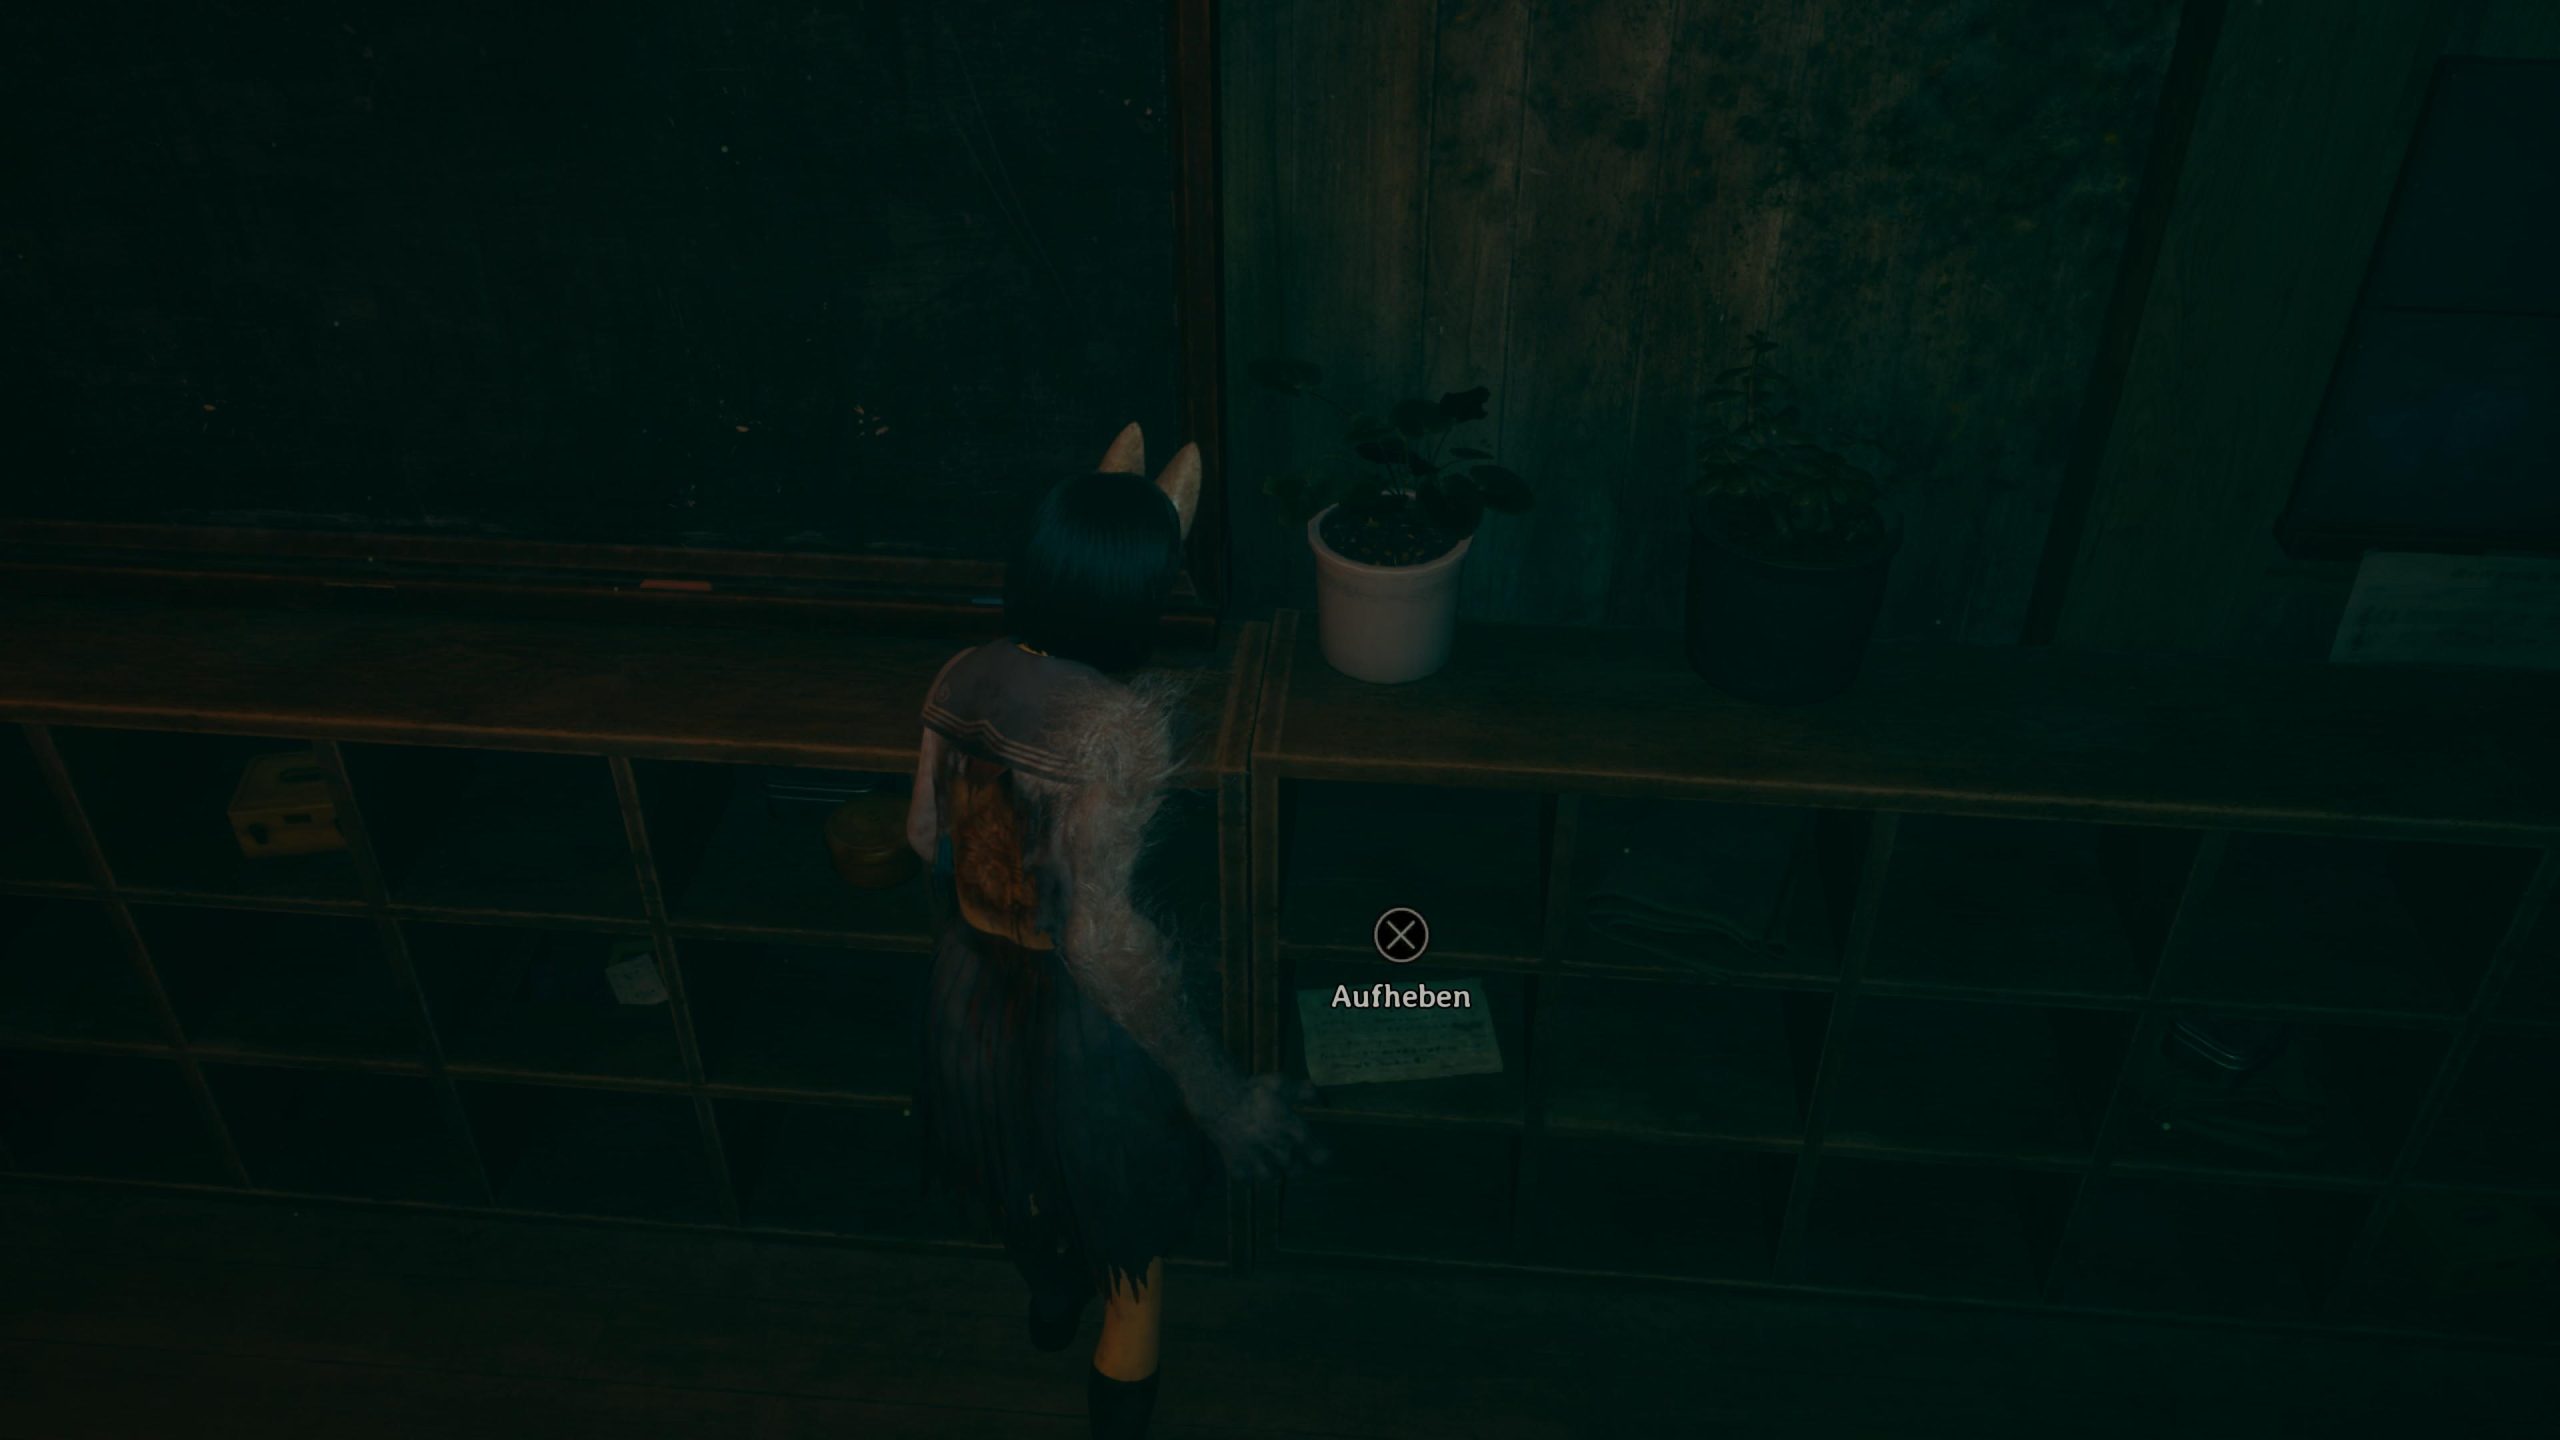

Document Rinko’s Diary (5) In the western area, go to the southern room of the Chizuruya General Store. Interact with the desklamp (turning the room red) to make this item appear on a display. 

Document Sakuko’s Diary (7) In the eastern area, look for this item sitting on a bench inside the Locker room. 

Document Sakuko’s Diary (8) Found in the shrine room near the Hokora Shrine in the eastern area. 

Puzzle Light Left Platform: Fox and Rabbit facing away from each other
Right Platform: Fox and Rabbit both facing left– – Document Clinical Trial (3) Located on a bench at the first house after the Hokora Shrine when descending the path. 

Character Upgrade + Ancient Jizo Statue (for Ending 4) Ema Once you’re past the forced fight after the park, ascend the stairs and follow the right path. Here you’ll find the last Ema and the Ancient Jizo Statue. Offer the Brooch to the statue. This action locks you into Ending 4, but only if you have not taken any Red Capsules and have purified the Sacred Sword. 

Puzzle Scales To successfully balance the scales for Ending 4, you must place the five dolls based on their weight. 
– Puzzle Ominous Photo To solve the Photo Puzzle for Ending 4, first put the photo of Hinako into the empty spot. Then, arrange the photos so that only the photo of Hinako is upright, and all other photos (parents and friends) are turned upside down. – – Puzzle My Room Once you have acquired all three crests, return to the first area and place them on the plaque directly in front of Hinako’s Room. Left Spot: Set to the White Bird symbol. (You may need to flip the Fox symbol using the \text{Square} button.)
Right Spot: Set to the Black Bird symbol. (Flip the Swords symbol using the \text{Square} button.)
Top Spot: This spot must be empty (“Nothing”). Flip the Scales symbol using the \text{Square} button until the slot is cleared.
Bottom Spot: Set to the Heavens symbol.
Puzzle Mural Place the three crests into the mural slots in the following order (from top to bottom on the left side): Fox Mask Crest into the Top Left Slot (matching the fox holding a lantern).
Black Sparrow Crest into the Middle Slot (matching the red cage).
White Sparrow Crest into the Bottom Slot (matching the lantern dangling from the red-roofed cage).– Trophy God Slayer Starts as soon as you start the boss fight. – – 
 I Still Have Wings
Obtained all trophies.

 Ebisugaoka in Silence
We need to talk about our future.

 The Fox Wets Its Tail
A hell of your own choosing. Nothing else matters, now.
 Puzzle Master
Complete the game with puzzle difficulty set to “Lost in the Fog”.
 The Bird that Flies Highest
Defeated the Shiromuku without dying once.
 Fox Tamer
Defeated all the summoned monsters before putting an end to the Shichibi.
 Clear Skies
Complete the game with action difficulty set to “Lost in the Fog”.
 Puppetmaster
Defeated the Tsukumogami without getting hit by a single arrow.
 God Slayer
Defeated both the Tsukumogami and the Kyubi within 10 minutes of the fight starting.
 Winners Don’t Do Drugs
Reached the Iwai residence without taking a single capsule and left the capsules on Shu’s desk in his workshop.
 Fox’s Wedding
Dolls are happiest when they are loved.

![]() A Gift I Cannot Accept
A Gift I Cannot Accept
Offered the Brooch to the ancient Jizo Statue.

![]() The Truth about the Tsuneki Family
The Truth about the Tsuneki Family
Obtained the following documents:”Housemaid’s Note””Family Physician’s Log””Strict Mother’s Letter”

![]() O Divine Tree
O Divine Tree
Discovered the Thousand Year Cedar.

![]() Just Shut Up for Once, Dad!
Just Shut Up for Once, Dad!
Defeated Hinako’s father before her mother at the Shimizu residence.

![]() Sly Like the Fox
Sly Like the Fox
Obtained all the ll the crests without making a single mistake on the Inari statue puzzle.

![]() Where Are You Going?
Where Are You Going?
Caught up with the Fog Monster 3 times.

![]() Fires of Jealousy
Fires of Jealousy
Obtained all the following documents:”Rinko’s Diary”.

![]() A Miko Possessed
A Miko Possessed
Obtained all the following documents:”Sakuko’s Diary”.


![]() Fate of the Apostate
Fate of the Apostate
Obtained all the following documents:”Diary of Revenge”


![]() Inari-sama’s Secrets
Inari-sama’s Secrets
Opened all rooms and boxes marked with Inari-sama’s seal.

![]() Be Free of Your Hatred
Be Free of Your Hatred
Purified the Sacred Sword.

![]() Omamori Sage
Omamori Sage
Obtained all the hidden omamori.

![]() Omamori Collector
Omamori Collector
Obtained all the omamori available from hokora.Item Type Item Faith Gained Non-consumable (High Value) Shriveled Abura-age 500 Faith Antique Comb 300 Faith Dried Carcass 200 Faith Consumable Inari Sushi 150 Faith Kudzu Tea 100 Faith Higashi / Chocolate 80 Faith Divine Water 50 Faith Yokan 30 Faith Ramune 20 Faith Arare 10 Faith

![]() Fervent Collector
Fervent Collector
Obtained all the items that increase inventory size.

![]() Close to the Sun
Close to the Sun
Fully upgraded Health, Sanity, and Stamina.

![]() Agile Escape
Agile Escape
Escaped from the Fog Monster at Sugisato without getting hit.

![]() The Malevolent Blade Never Rusts
The Malevolent Blade Never Rusts
Obtained the Sacred Sword after uncovering its legend.

![]() Treasured Belonging
Treasured Belonging
Obtained the small vial containing the Agura no Hotei-sama.
In the Main Hall, locate the Inari-sama door upstairs by the second ritual site. Opening this door reveals an outside area. Follow the path up the stairs to the temple, where the Agura no Hotei-Sama sits on the altar.

![]() Echoes of Jealousy
Echoes of Jealousy
Defeated Rinko without being hit by her puppets.

![]() A Federal Offense
A Federal Offense
Opened the Igarashi residence’s mailbox.


![]() No One Left Behind
No One Left Behind
Stopped a certain number of enemies behind the white rabbit crest door from reanimating.

![]() The Path of Self-Preservation
The Path of Self-Preservation
I refuse.

![]() The Fox’s Guidance
The Fox’s Guidance
The fox watches over the chicken coop.

![]() Scarecrows’ Whispers
Scarecrows’ Whispers
As you bask in the sun, I sink into the shadows.

![]() Cleansed
Cleansed
Wash thoroughly before eating.

![]() On the Way to School
On the Way to School
The little sparrow escapes with its friends, wings flapping nervously…

![]() Shell of the Past
Shell of the Past
What exactly have we learned?

![]() The Farewell Party
The Farewell Party
You have no place in my future.

![]() A Dangerous Path
A Dangerous Path
For whom do I tread such a treacherous path?

![]() Plucked Wings
Plucked Wings
Anything for you.

![]() Parting on Good Terms
Parting on Good Terms
Good terms? No. I’m here to burn bridges.

![]() Solar & Lunar Eclipse
Solar & Lunar Eclipse
Two portals open; doors to a secret world.

![]() The Path of Exultation
The Path of Exultation
I accept

![]() Go Away! You’ll Ruin the Shop’s Reputation!
Go Away! You’ll Ruin the Shop’s Reputation!
Defeated the Giant Monster in front of Chizuruya General Store.

![]() Coming Home to Roost
Coming Home to Roost
Drown in a bottomless pit of self-doubt.

![]() The Great Space Invasion!
The Great Space Invasion!
Rise up! The Space Army is coming!


![]() Thankful to Be Here
Thankful to Be Here
Complete the game with action difficulty set to “Story” or higher.

![]() Grateful for a Worthy Foe
Grateful for a Worthy Foe
Complete the game with action difficulty set to “Hard” or higher.

![]() Intellectual Pursuits
Intellectual Pursuits
Complete the game with puzzle difficulty set to “Story”.

![]() Wise Researcher
Wise Researcher
Complete the game with puzzle difficulty set to “Hard”.

![]() Like the Fleeing Hare
Like the Fleeing Hare
Escaped from the Fog Monster at Ebisugawa without getting hit.

![]() Untouchable
Untouchable
Opened the Shrine Vault at the Shrine Path without getting hit.

![]() Acupuncture Specialist
Acupuncture Specialist
Arrived at the Nishida residence without making a single mistake on the scarecrow puzzle.


![]() Surrounded by Fog
Surrounded by Fog
The baby bird takes her first steps.

![]() The Sound of Silence
The Sound of Silence
Defeated Sakuko without getting hit by the suzu bell attack.

![]() Good Intentions…
Good Intentions…
Obtained all the following documents:”Clinical Trial”