
Game: Dusk Diver
Peripherals: –
Time to 100%: 12 – 16 hours
Difficulty: 3/10
Missable trophies: None, post-game is available.
Author: Sean
Welcome to the trophy guide for Dusk Diver. This can also be considered a walkthrough and may be used for PlayStation 4, Xbox One and Steam. Achievements for Steam and Xbox are in almost all cases the same as the PlayStation 4 Trophies. A roadmap is provided in the stages below.
Follow us on twitter for the latest news and giveaways.
Stage 1 – Finish the main story
Dusk Diver has no ‘no point of return’ and everything can be obtained post-game. That being said it is wise to watch out for a couple of things:
∙ Make sure to read When the peach is ripe![]()
∙ Completing missions (The 1st completion) and picking up Dragon Vein Stones are the only way to obtain to obtain Skill Points. You can’t farm them! So to make the game easier, actively collect the stones as you go to upgrade making the game easier.
∙ Completing Link Quests powers up your D. Arms as well, which is an invaluable asset.
∙ Don’t worry about S Ranks your first run, S Ranks are all based on time and time alone. So being OP and abusing TP items makes them trivial end-game.
∙ Leo is the heaviest hitter and a great shield destroyer, utilize him on big targets on groups of the medium enemies.
∙ Bahet has wonderful AoE making crowd control a breeze.
That being said there isn’t much else to say. Dusk Diver is a very straight forward game that is an absolute perfect entry into this genre! The game isn’t difficult, the collectibles except for about 3 aren’t out of the way, nothing is ridiculous!
Stage 2 – Post-Game content
You could do post-game in whatever way you see fit but there is recommended paths. As you’ll be wanting to S Rank everything in a single go without repeats it’s advised to do these last. So work towards collecting all Dragon Vein Stones in Ximending to most of your skill points for upgrades. Complete your Link Quests as they’ll unlock training for trophies and a powered up ultimate finishing move. Training is unlocked by affection levels increased drastically by restaurants and stalls, so wrap those up now too.
With city related trophies collected, you’ll want to go for your S Ranks. This also has a recommended path. Story Levels have the most Drgaon Vein Stones, you’ll also have to S Rank the Hard difficulty variants. Hard mode rewards HUGE skill point boosts, so you’ll want to do them. Story Mode on Hard isn’t hard, you’ll be plenty powered up. After you S Rank the Story Missions, you’ll want to do Boss’s Missions. The reason is they need to be done but they also reward store items and discounts! The discounts are what’s important here. Lastly are the training missions and this is where the difficulty spikes. Leo isn’t an issue, he hits hard and can take down evrything without much hassle. After Leo’s Missions (or before if you have trouble) You’ll have 200,000+ Cash, buy A LOT of +50% TP items and +100% TP items and equip them both. You’ll easily have 60-70+ 50% TP and around 15 – 20+ Full TP items. You’ll be able to use 5 50%’s and 2 Full’s each mission, and this is how you’ll S Rank with ease and quick. Bahet with his ![]() while transformed will easily hit high combo’s and rake in yellow and green orbs making it EASY to maintain the form for long periods of time allowing you to fly through missions. Use the finishers on the Big guys and reset with the items. La Viada… You might just fail to S Rank her missions at times. Your power + her output is terrible at damage meaning even blue enemies give you trouble. Her crowd control isn’t AoE it’s small spaced out area’s which often don’t activate. Due to these 2 factors it’s hard maintaining her transformations too. You’ll have to play around and figure out where in the mission is best for you to use them. As for fully powering up every character, this game has the exact amount needed to do just that upon completion of your final S Rank.
while transformed will easily hit high combo’s and rake in yellow and green orbs making it EASY to maintain the form for long periods of time allowing you to fly through missions. Use the finishers on the Big guys and reset with the items. La Viada… You might just fail to S Rank her missions at times. Your power + her output is terrible at damage meaning even blue enemies give you trouble. Her crowd control isn’t AoE it’s small spaced out area’s which often don’t activate. Due to these 2 factors it’s hard maintaining her transformations too. You’ll have to play around and figure out where in the mission is best for you to use them. As for fully powering up every character, this game has the exact amount needed to do just that upon completion of your final S Rank.
Trophies

![]() The King of Youshanding
The King of Youshanding
Earn every trophy. Thanks for playing!

![]() The master of Gacha Gacha
The master of Gacha Gacha
Obtain all the contents in all Gacha machines.
There are a total of 5 Gacha Machines in Ximending. 3 are unlocked after half-way through the story, the remaining 2 in post-game. When unlocked you’ll need to find them and purchase all the content. Luckily, Gacha machines won’t have repeat items. So you’ll get all the items in one go! Each spin only costs $200 so you’ll need some change as you’ll be earning quite a few items.
Refer to each of the respective gacha trophies for their locations.

![]() Where there’s a will there’s a wish
Where there’s a will there’s a wish
Acquire all Lottery poetry.
Lottery poetry are slips of paper you will draw at Mazu Temple (Bottom left of the map). You’ll have to progress in story and Link Quests first though. These are free to draw, with the problem being it is heavily reliant on RNG. There are 62 slips you’ll need to collect, but don’t be discouraged if you end up drawing 1000 or more trying to do so. Prepare some Netflix or whatever you watch and just press X for a movie or two and come back. Back at Tumaz Mart you can check your gallery book and see how many you are missing if you’re ever curious of how close.

Entrance to Mazu Temple 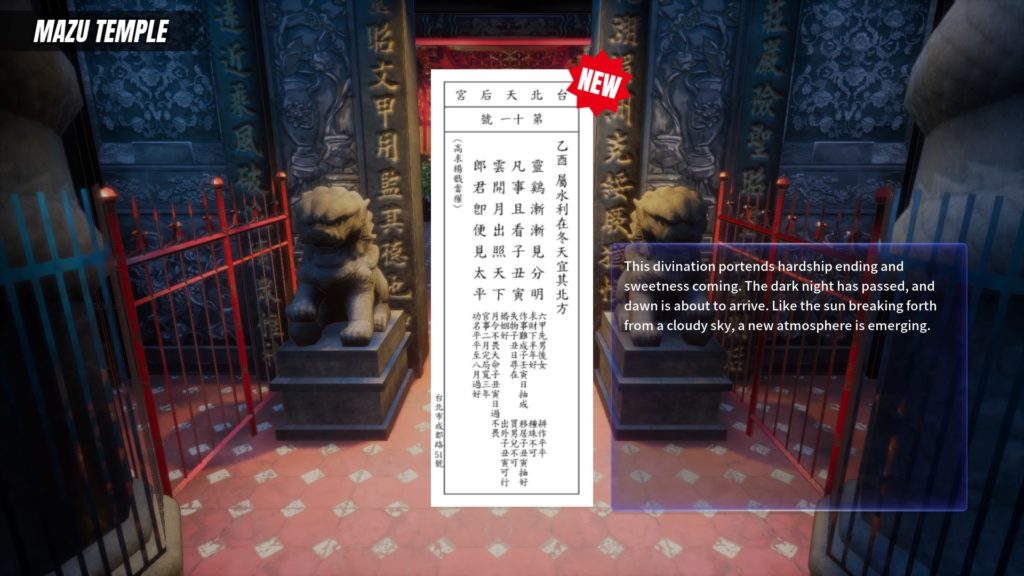
An example of Lottery Poetry

![]() ECO life
ECO life
Acquire all Dragon Vein Stones. That was a tough work…
Dragon Vein Stones are a collectible in Dusk Diver. They are used as a form of protection to get through Dimensional Rifts. Higher levels require more. There are more stones than necesary to complete the story and there are a few ways to earn them. You get Dragon Vein Stones through: finding them, quest rewards, LINK quests, Stall familiarity, etc. In city stones can be located by paying the Tao Master too.
Below you will find a list with all the Dragon Vein Stones in the game!
Note: Click the maps to enlarge them.
| Ximending | Map |
| This stone is obtained automatically through story progress. | 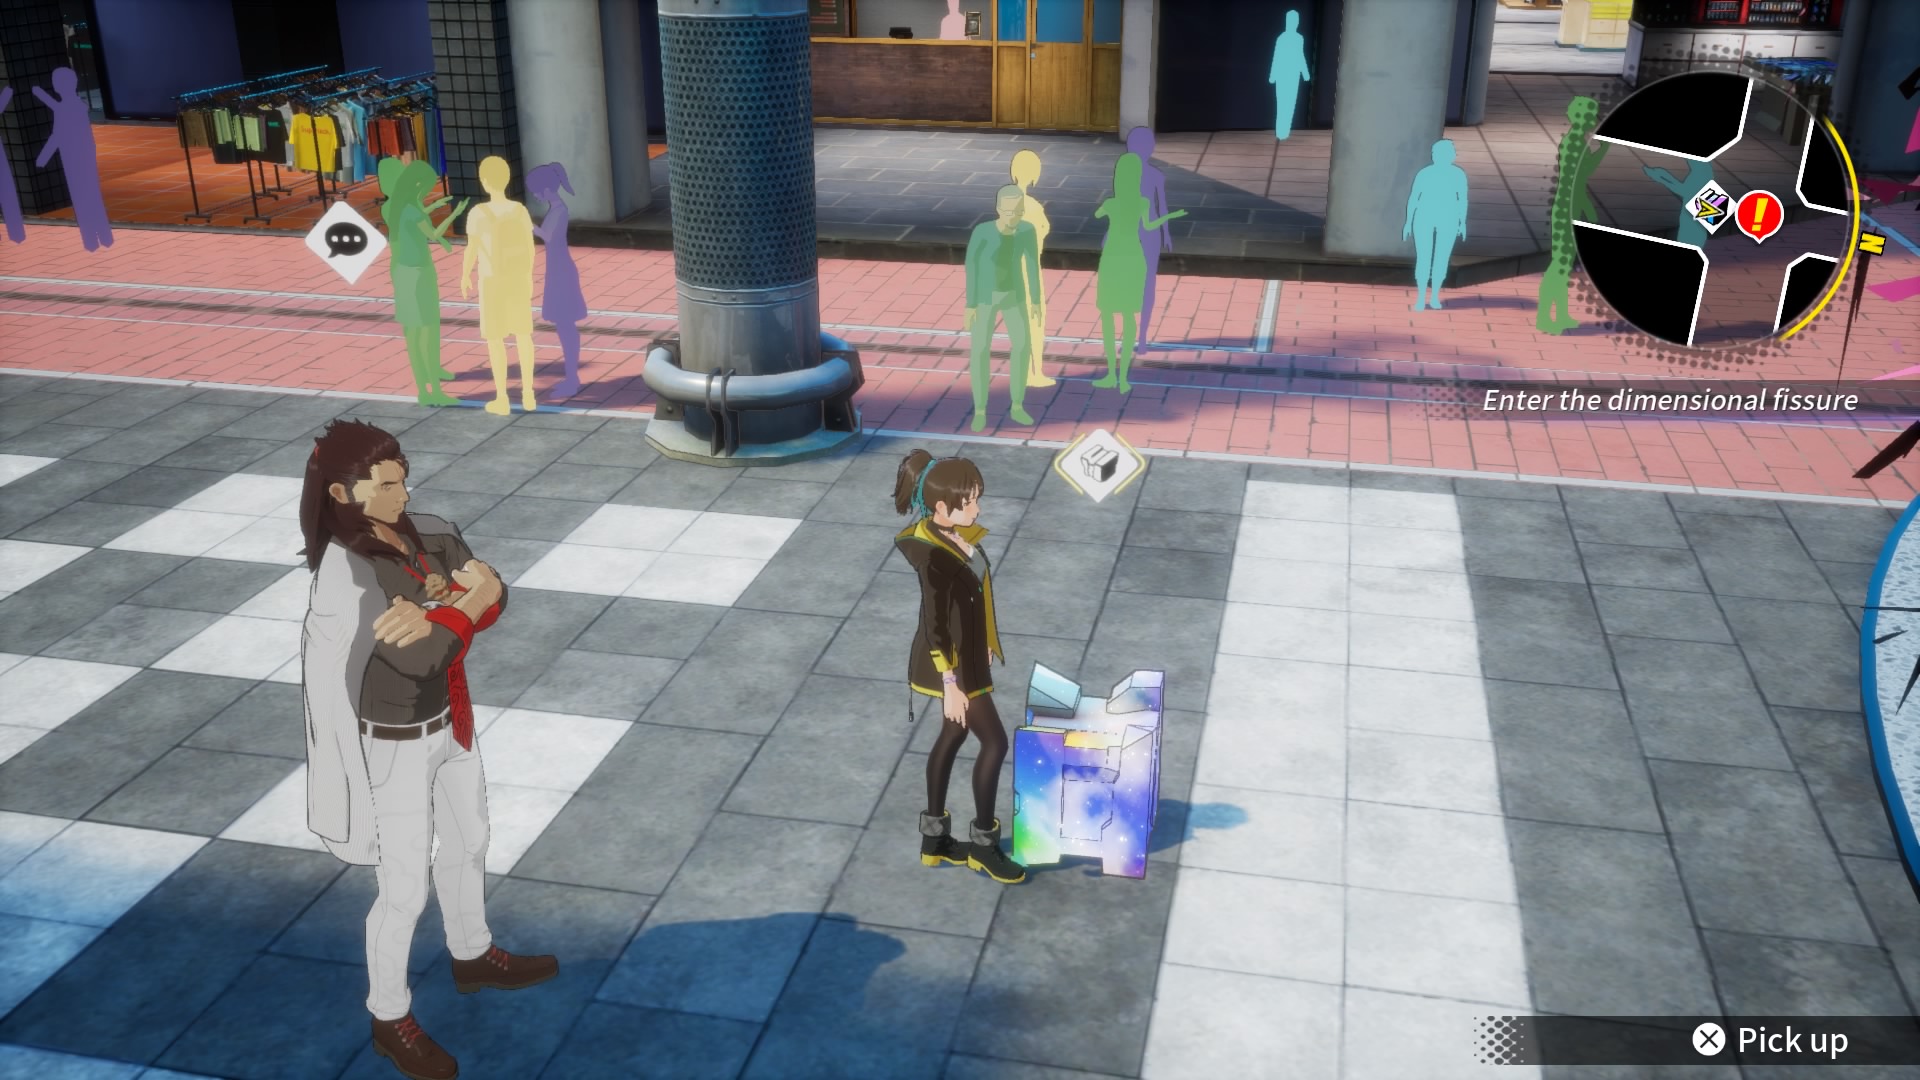 |
| Outside the Corn Dogs stand, you’ll find this stone under a bench. |  |
| Across the street from Tumaz Mart, you’ll find the stone on a market stall. | 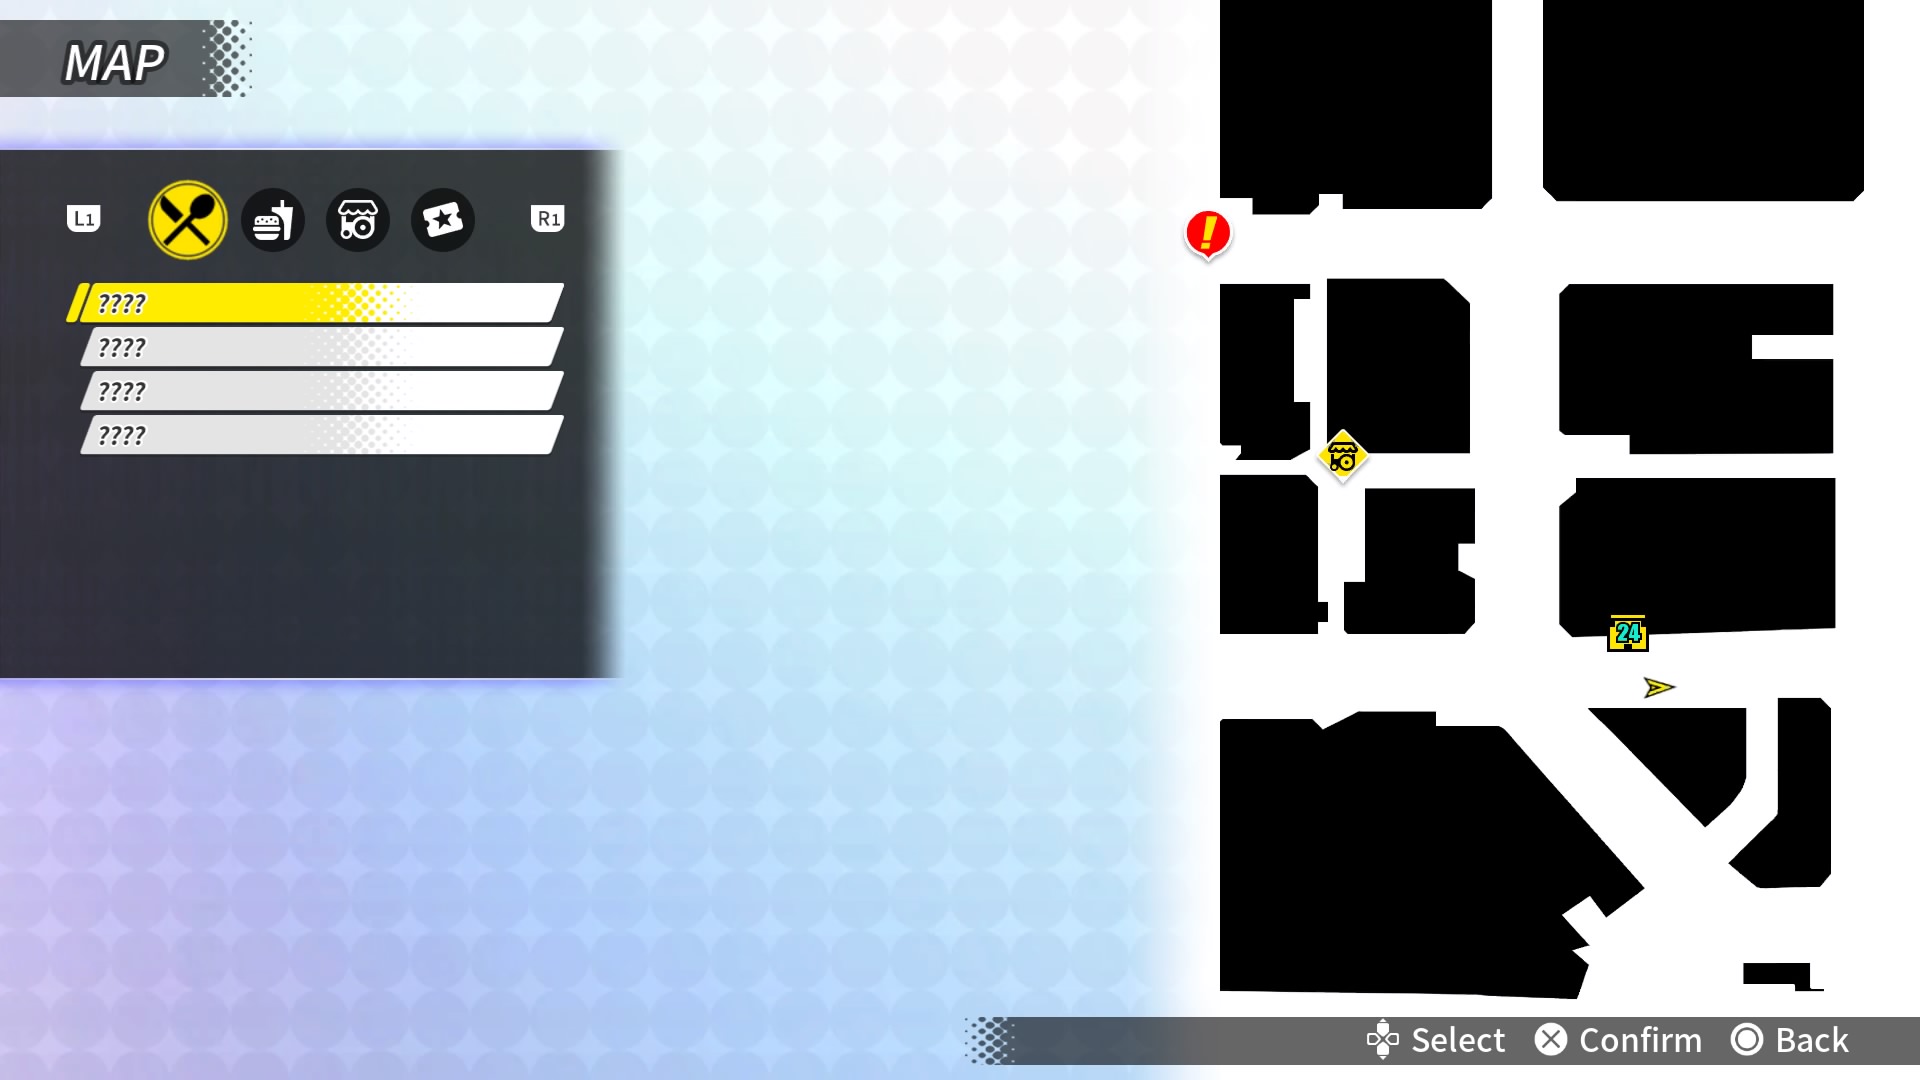 |
| In the alleyway beside the Corn Dogs vendor you’ll find this stone. |  |
| After obtaining 5-Star Familiarity with the Fried Squid stand. | 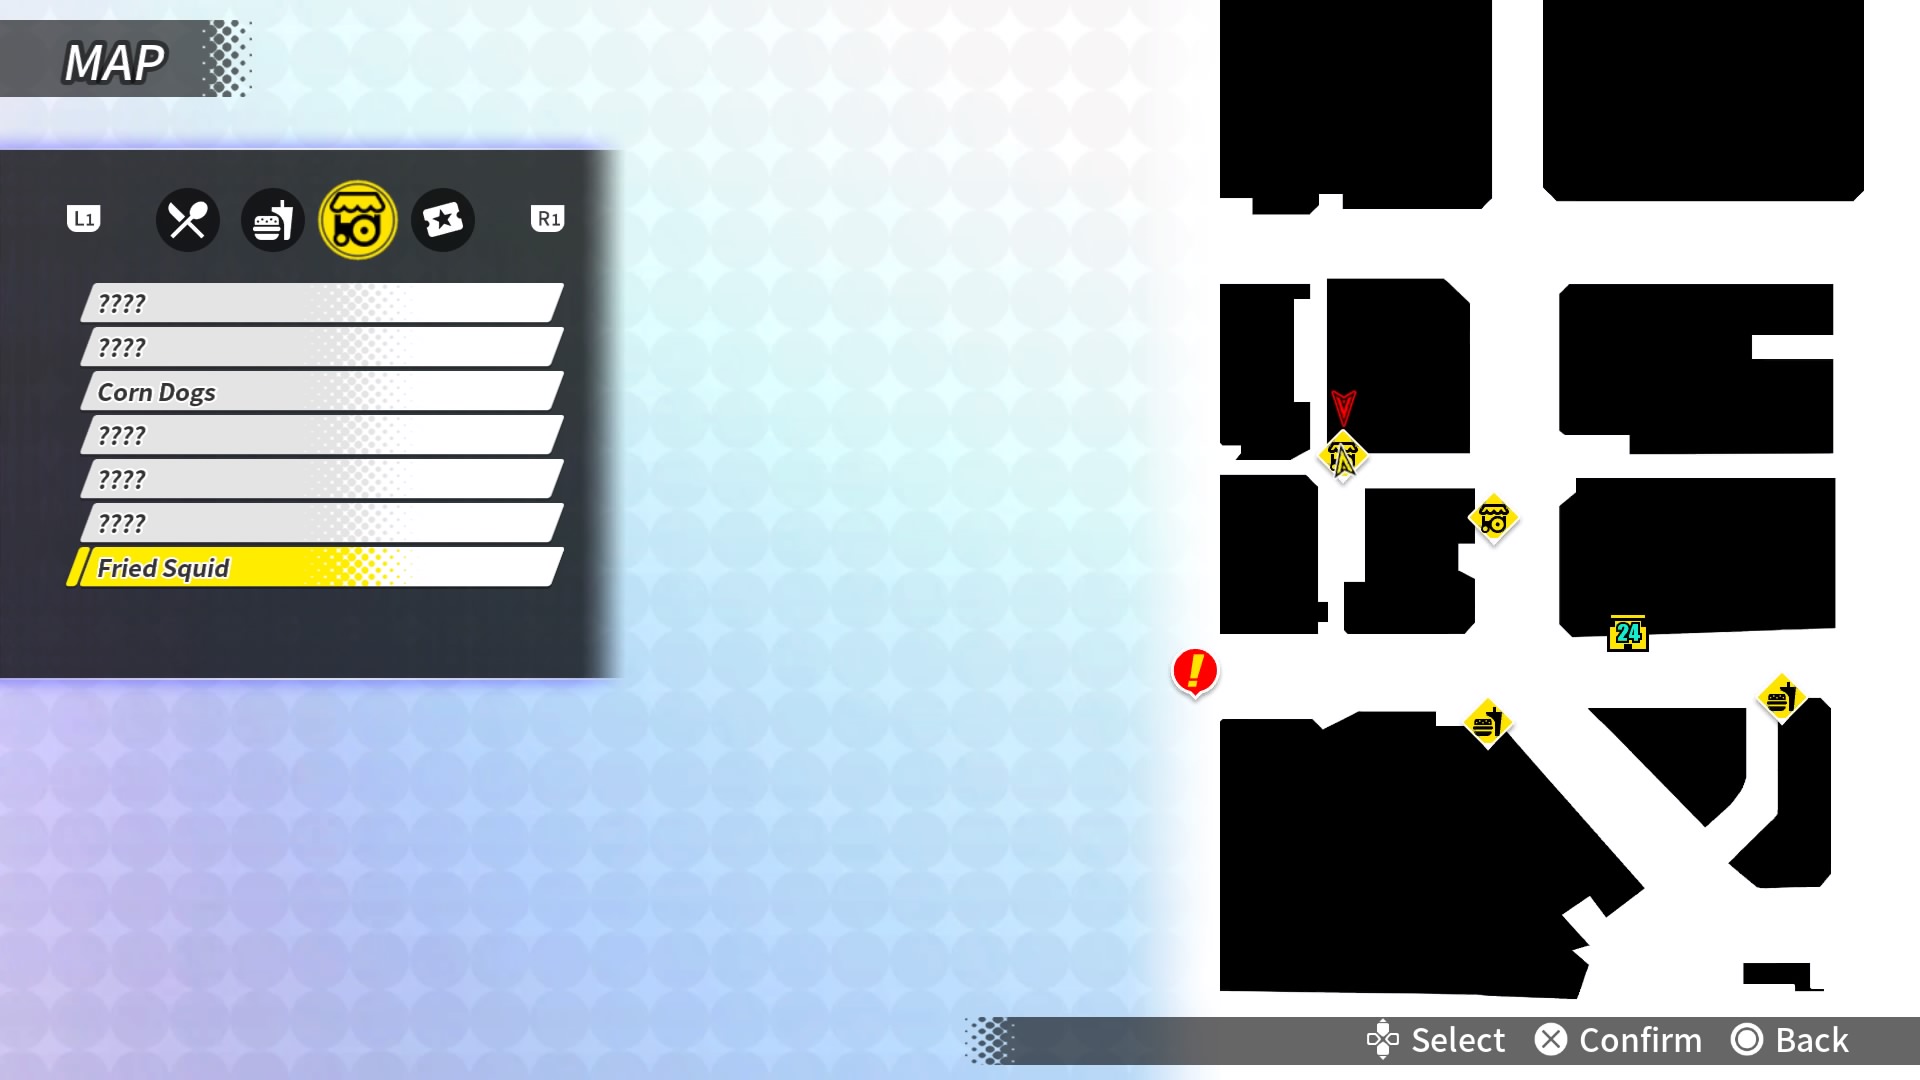 |
| South of the Fried Squid stand, you’ll find this stone in a fruit stand. |  |
| Left of the Hot-Star Large Fried Chicken you’ll find this stone behind a pillar. |  |
| After obtaining 5-Star Familiarity with the Pendlan Coffee stand. | 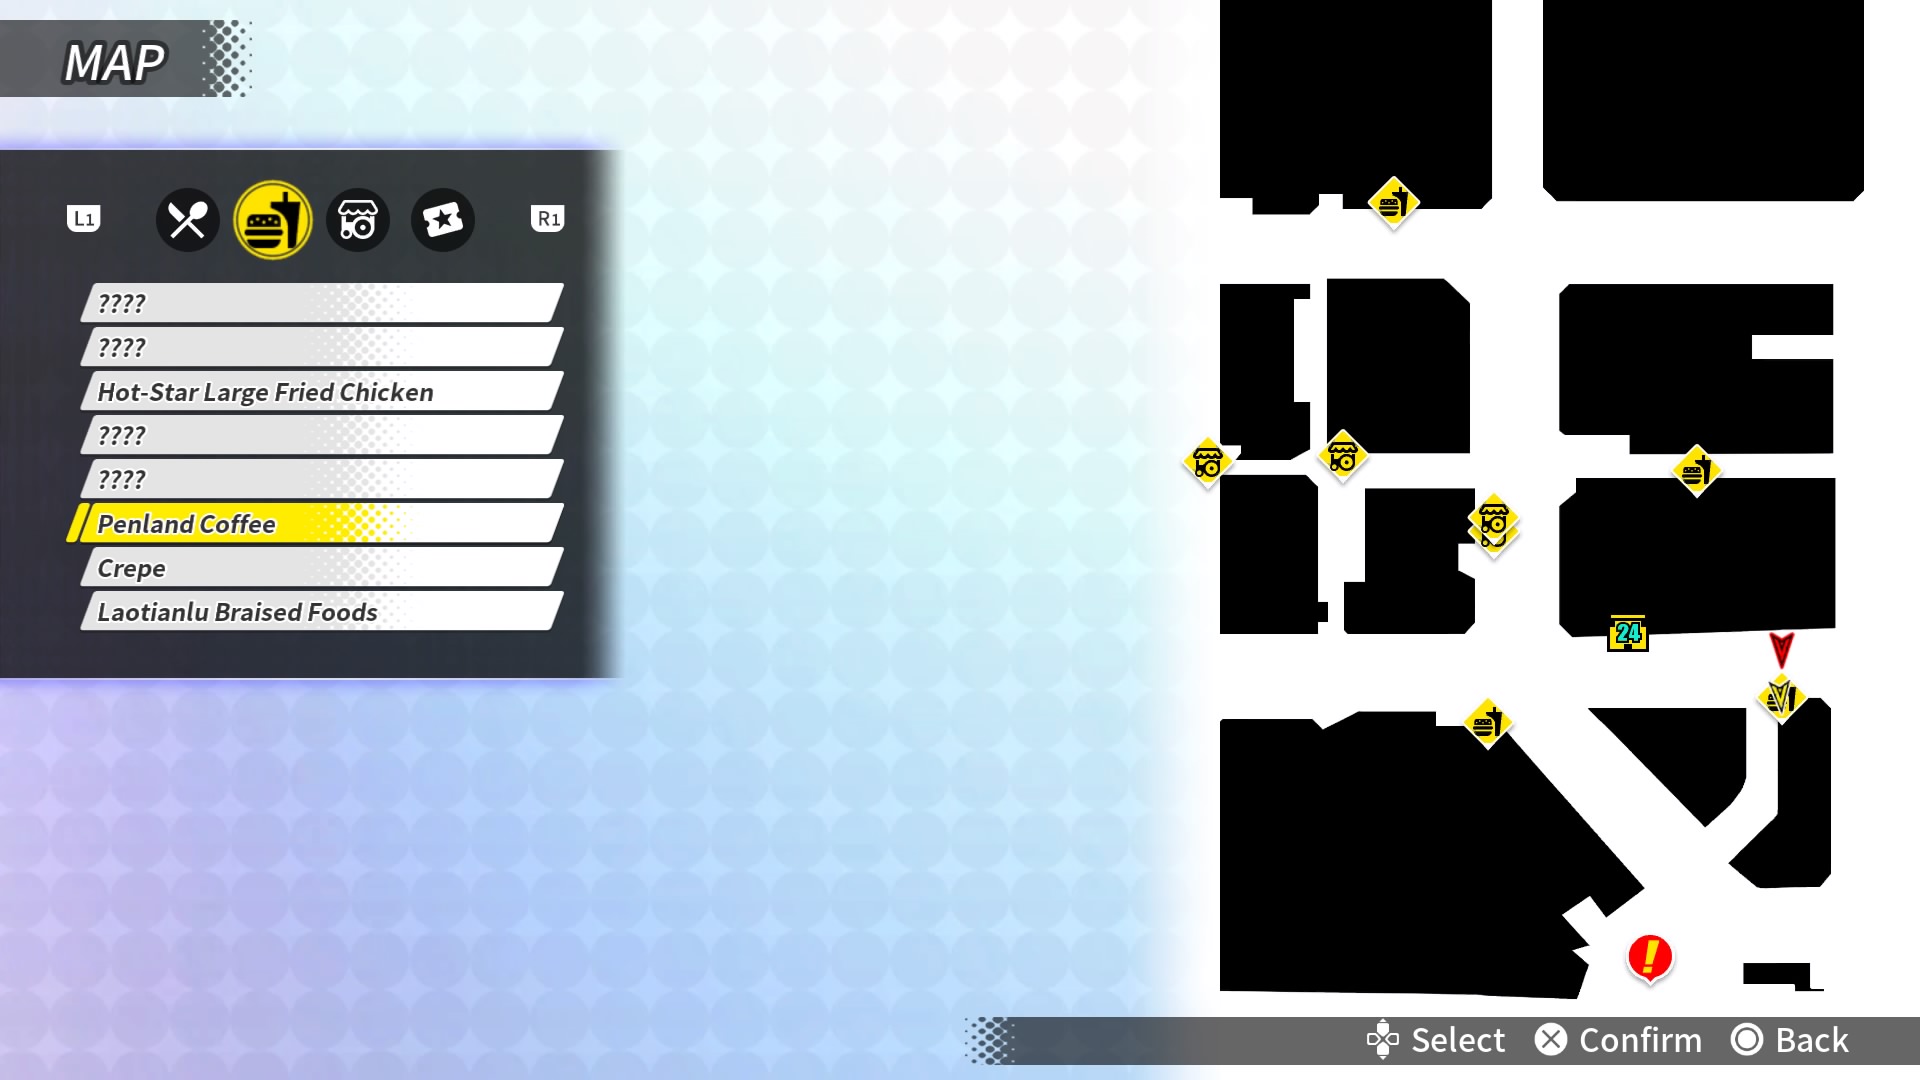 |
| South-East of Hot-Star Large Fried Chicken you’ll find this stone in a trash bin. |  |
| After the Cardboard Box objective in the LINK Quest “Urban Legend in Ximending.”, this stone can be picked up. |  |
| On the city’s border (right side) you’ll find this stone inside a phone booth. |  |
| This stone is in an alleyway near the Tao Master. |  |
| To the left of Crepe, you’ll find this stone on a store fronts floor. | 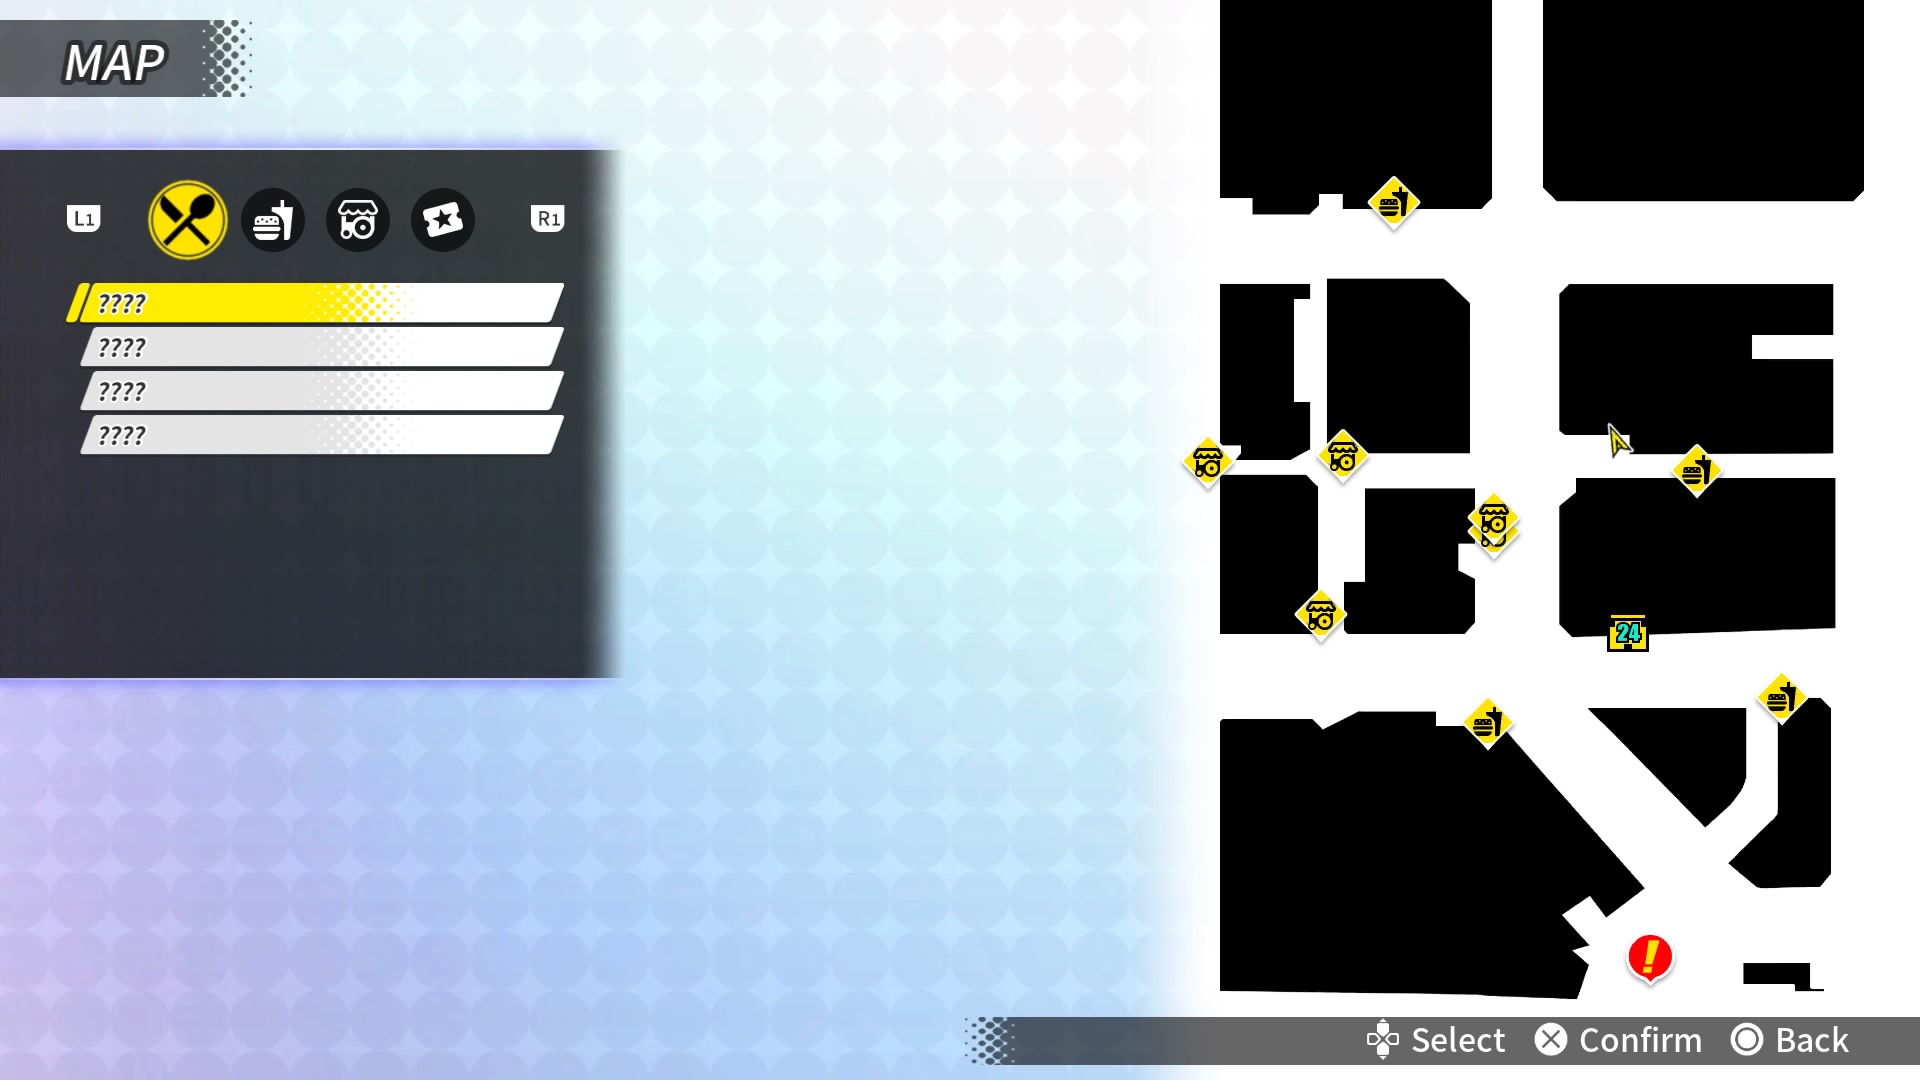 |
| Left of Laotianlu Braised Foods, this stone will be in a corner near a barricade. |  |
| This stone is in some bushes outside the Subway Entrance. |  |
| After obtaining 5-Star Familiarity with the Hot-Star Large Fried Chicken stand. |  |
| After obtaining 5-Star Familiarity with the Taiwanese Hotdog stand. | 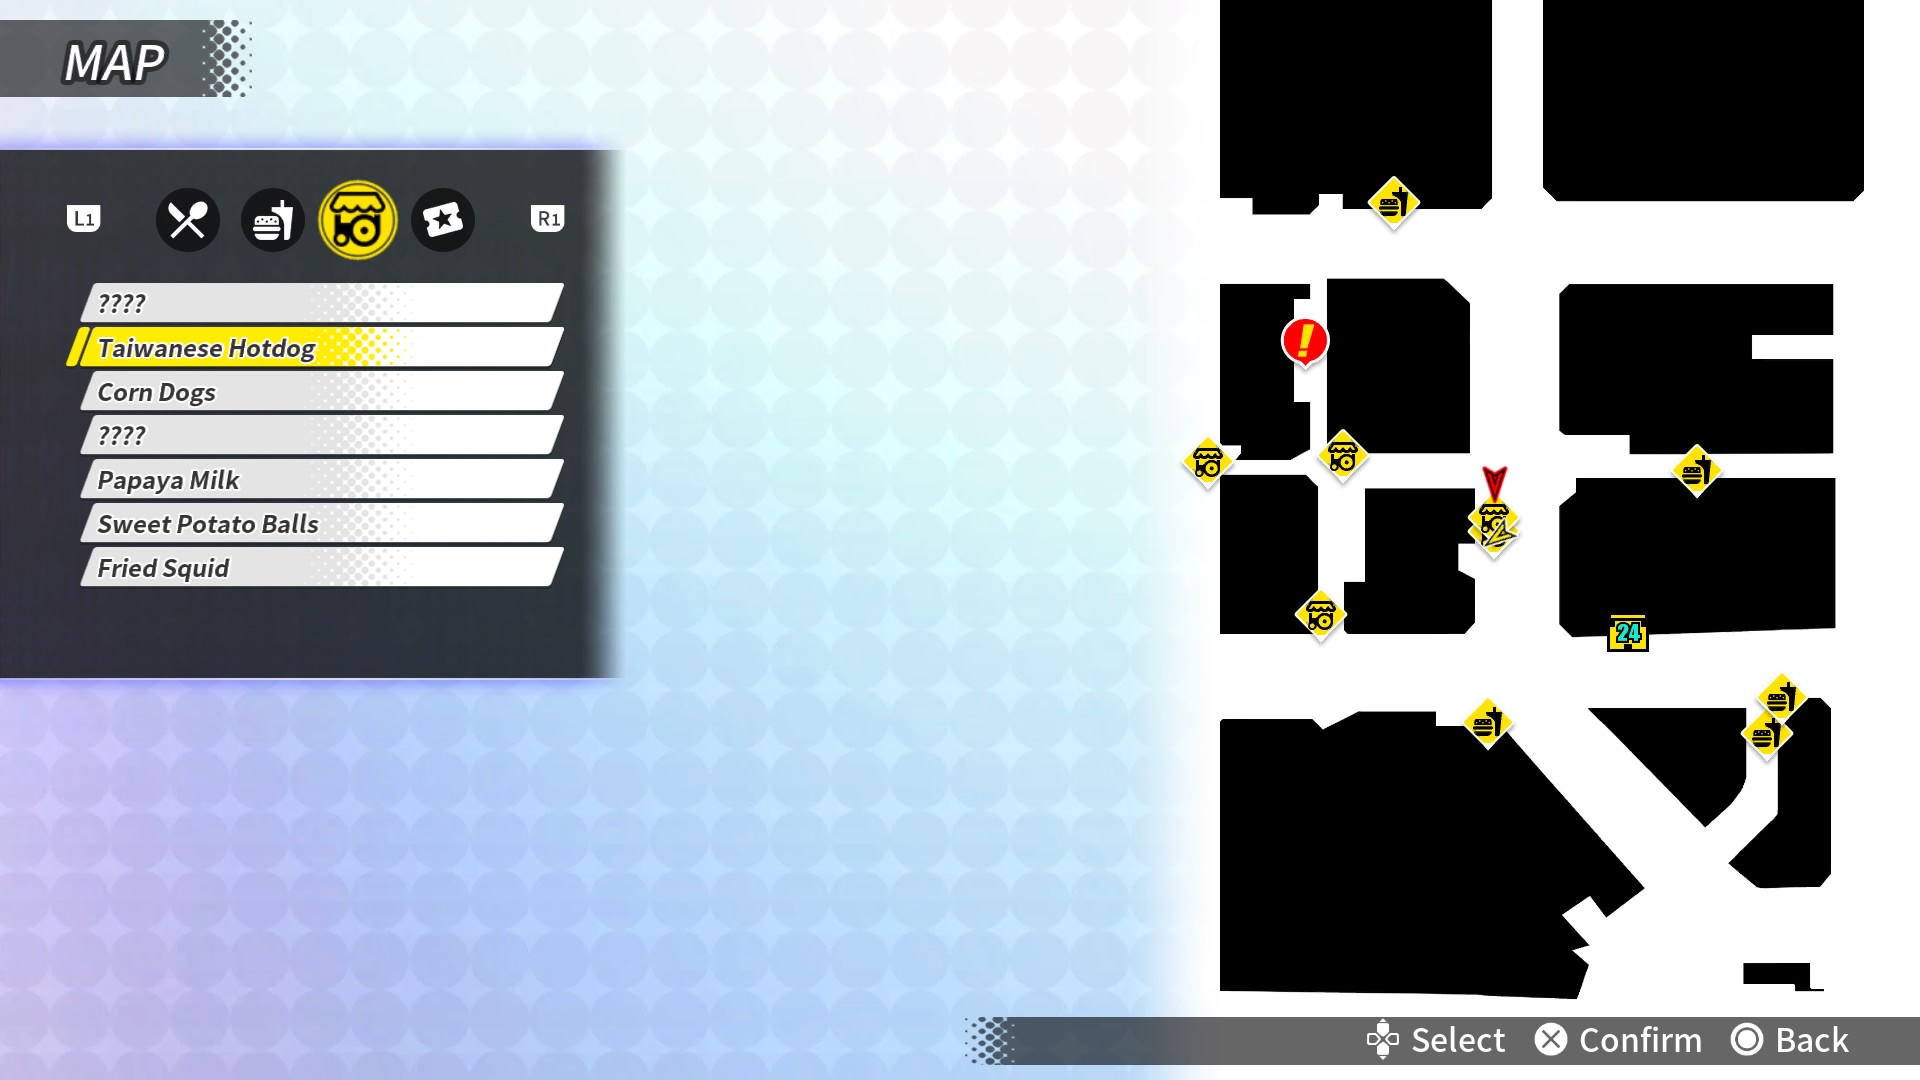 |
| Right of Laotianlu Braisd Foods you’ll find this between some make-up stands (against a wall). |  |
| This stone is on-top of a make-up stand across from the subway entrance. |  |
| To the right of Tumaz Mart you’ll find this stone under a book table. |  |
| Right outside of the Movie Theatre. |  |
| This stone is in an alleyway behind the Fried Squid stand. |  |
| Across from Tumaz Mart, you’ll find this stone on a counter. |  |
| After obtaining 5-Star Familiarity with the Crepe stand. | 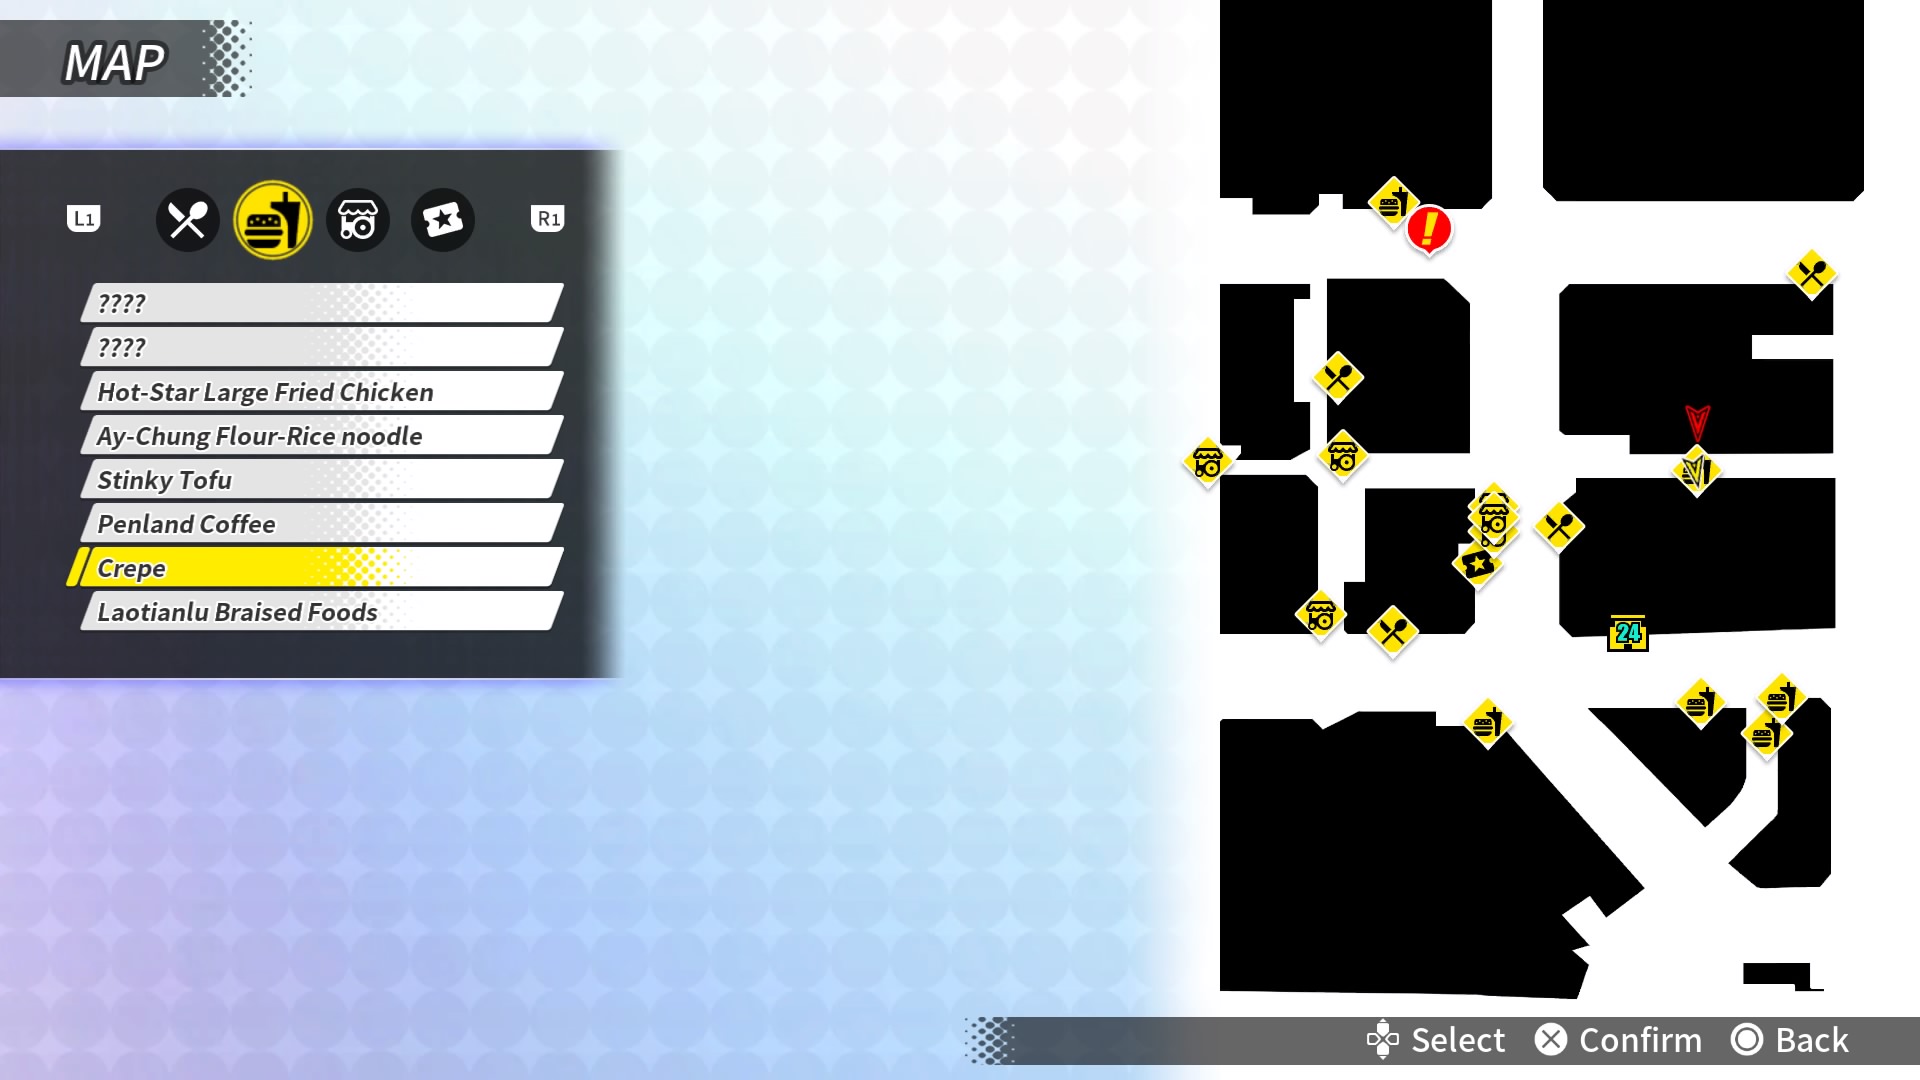 |
| To the right of the Crepe stand, you’ll find this stone floating in a store. |  |
| After obtaining 5-Star Familiarity with the Laotianlu Braised Food stand. | 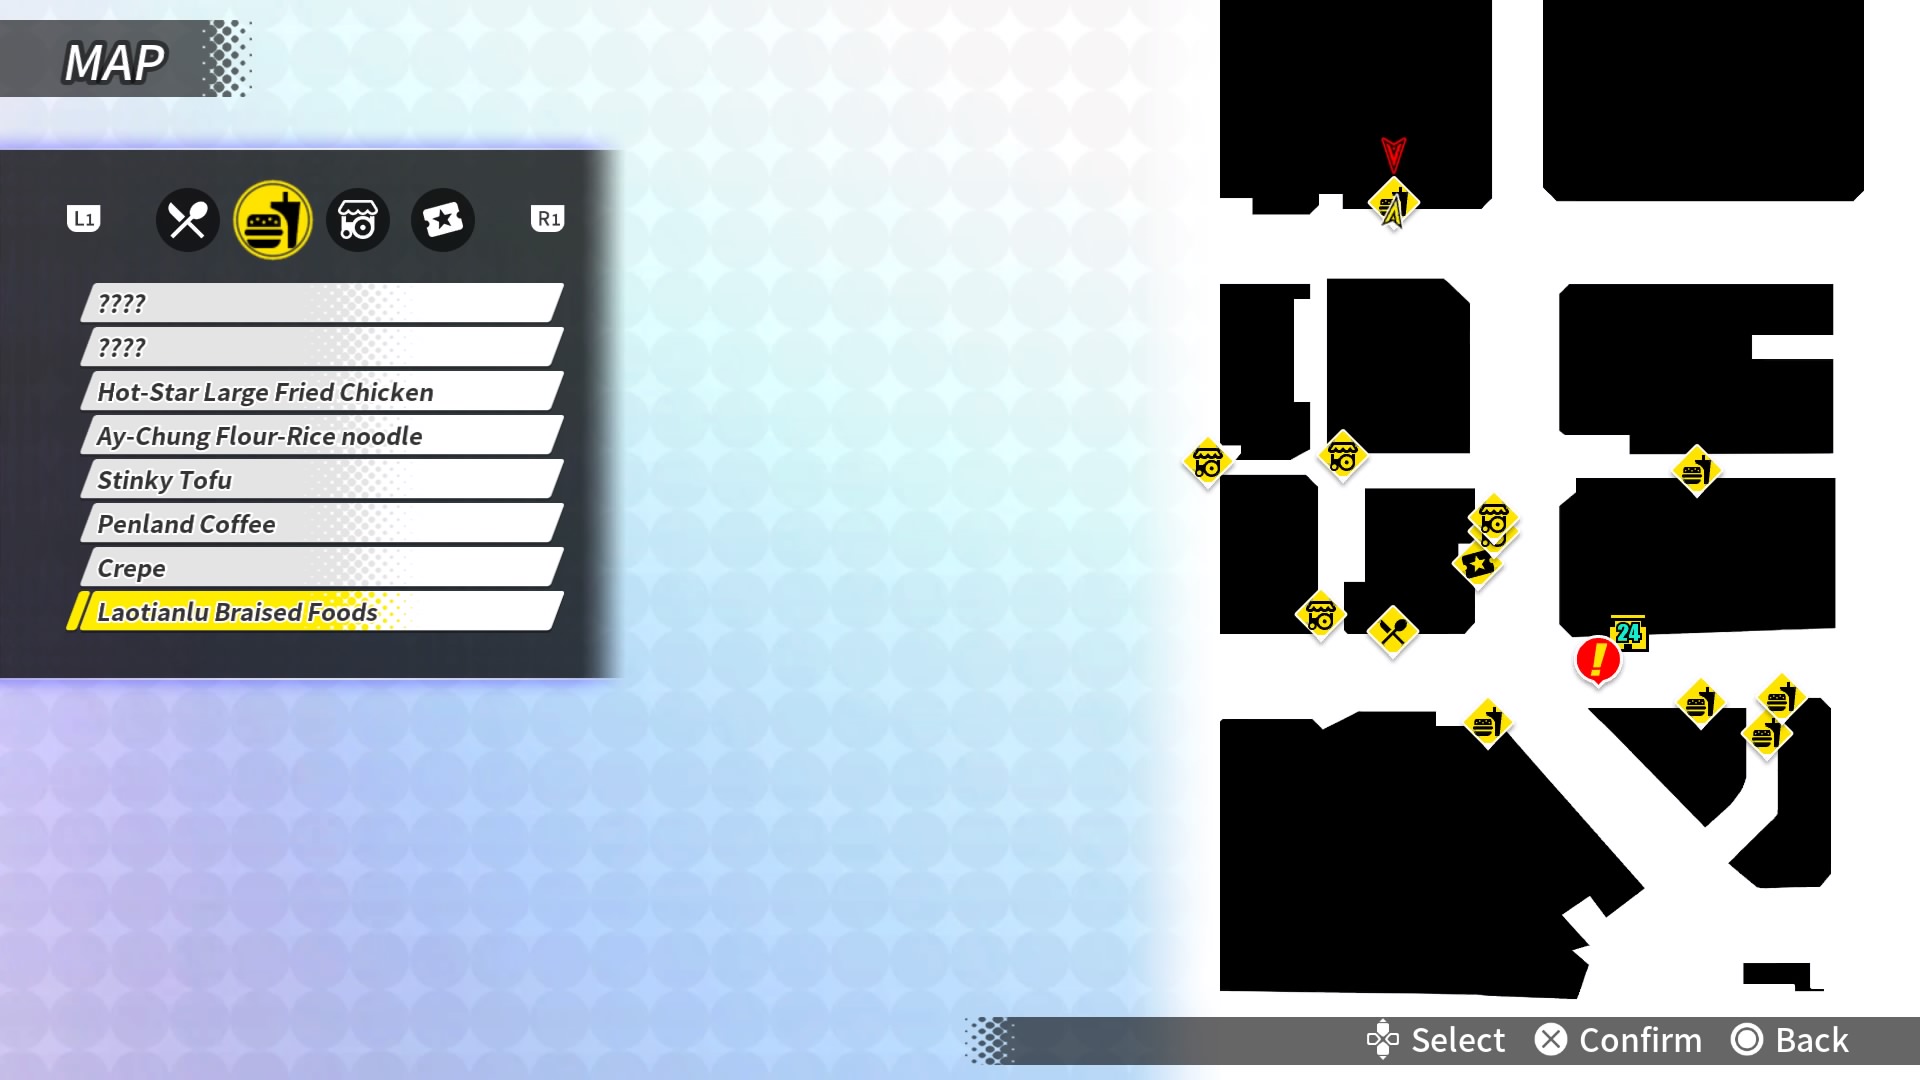 |
| After obtaining 5-Star Familiarity with the Corn Dogs stand. | 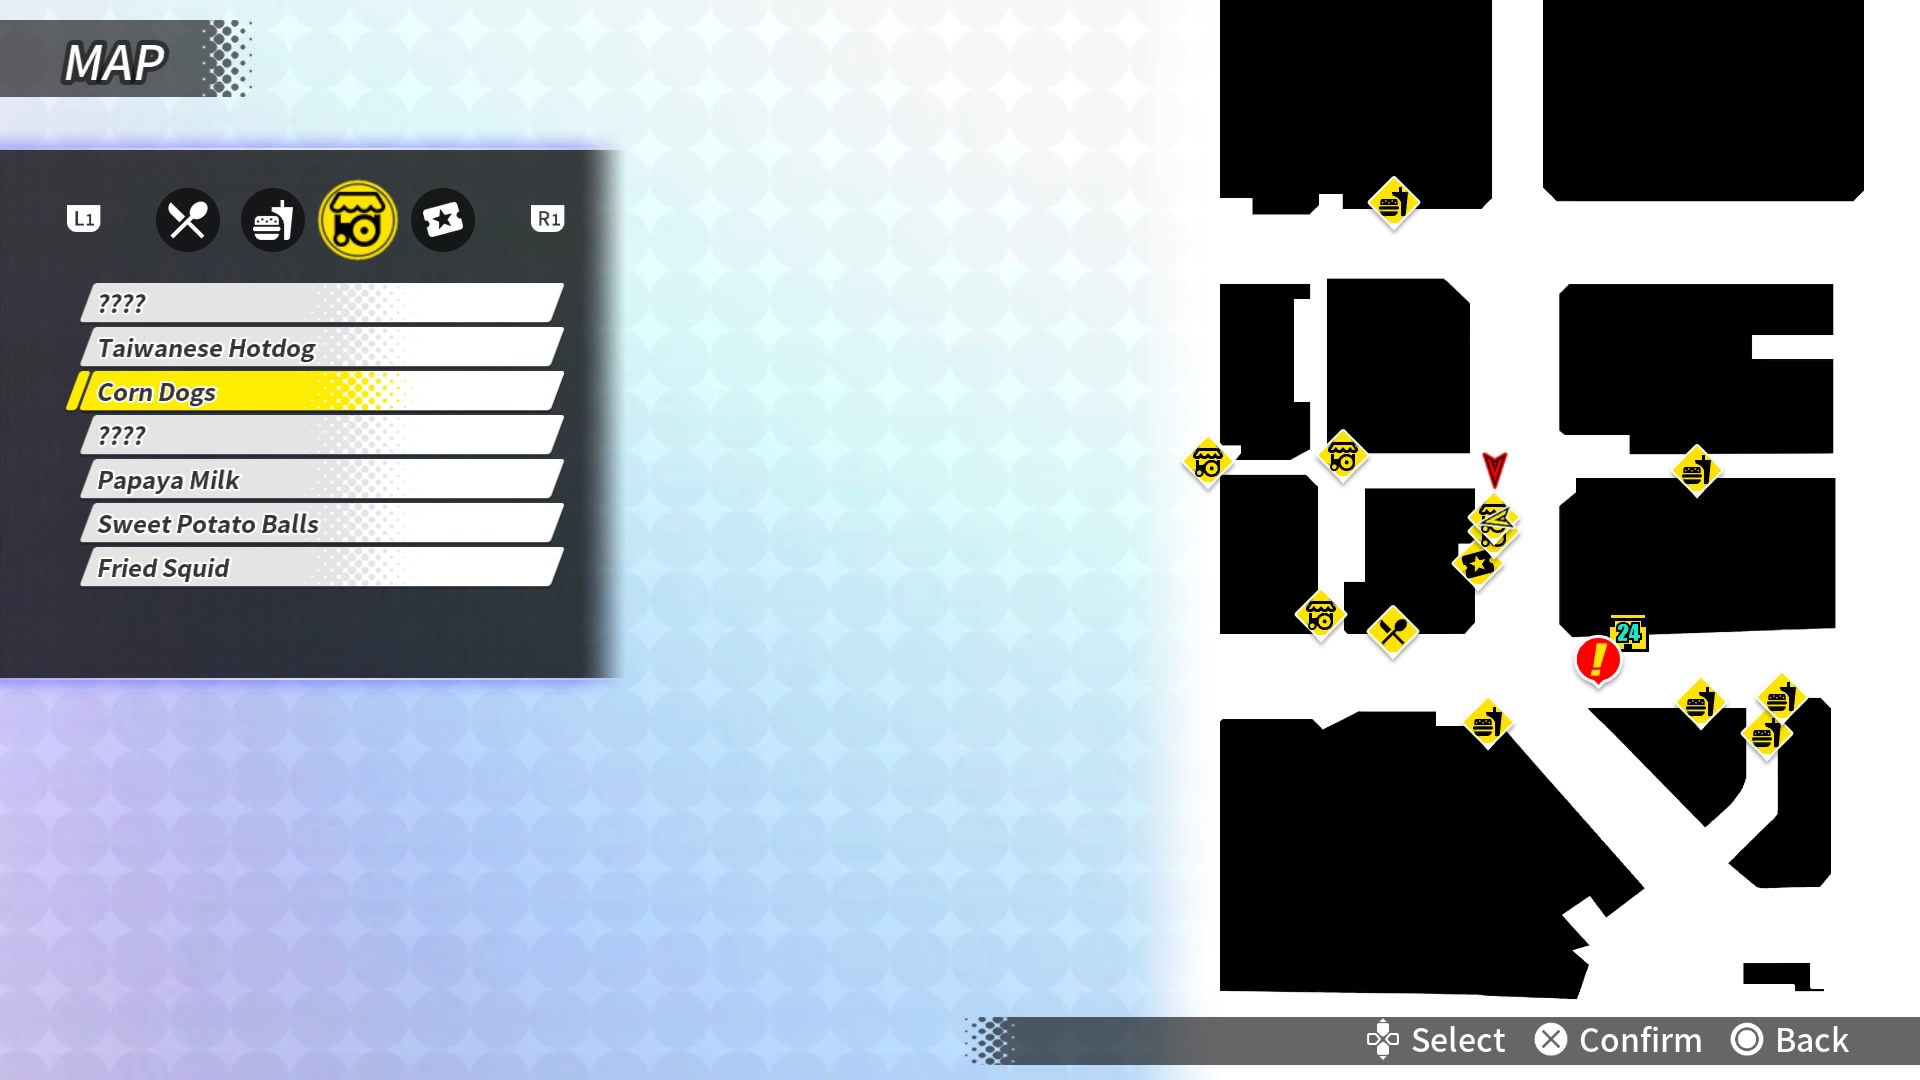 |
| At the map border, you’ll find this stone beside a pillar. |  |
| Behind the Subway Station there will be a ramp. At the top of this ramp you’ll find the stone. |  |
| North of the Corn Dogs stand, the stone will be beside a pillar. |  |
| At the map border, the stone will inside a stack of cardboard boxes. |  |
| North of Papaya Milk in a planter. |  |
| Beside Fried Squid stand, this stone is in a glass case. | 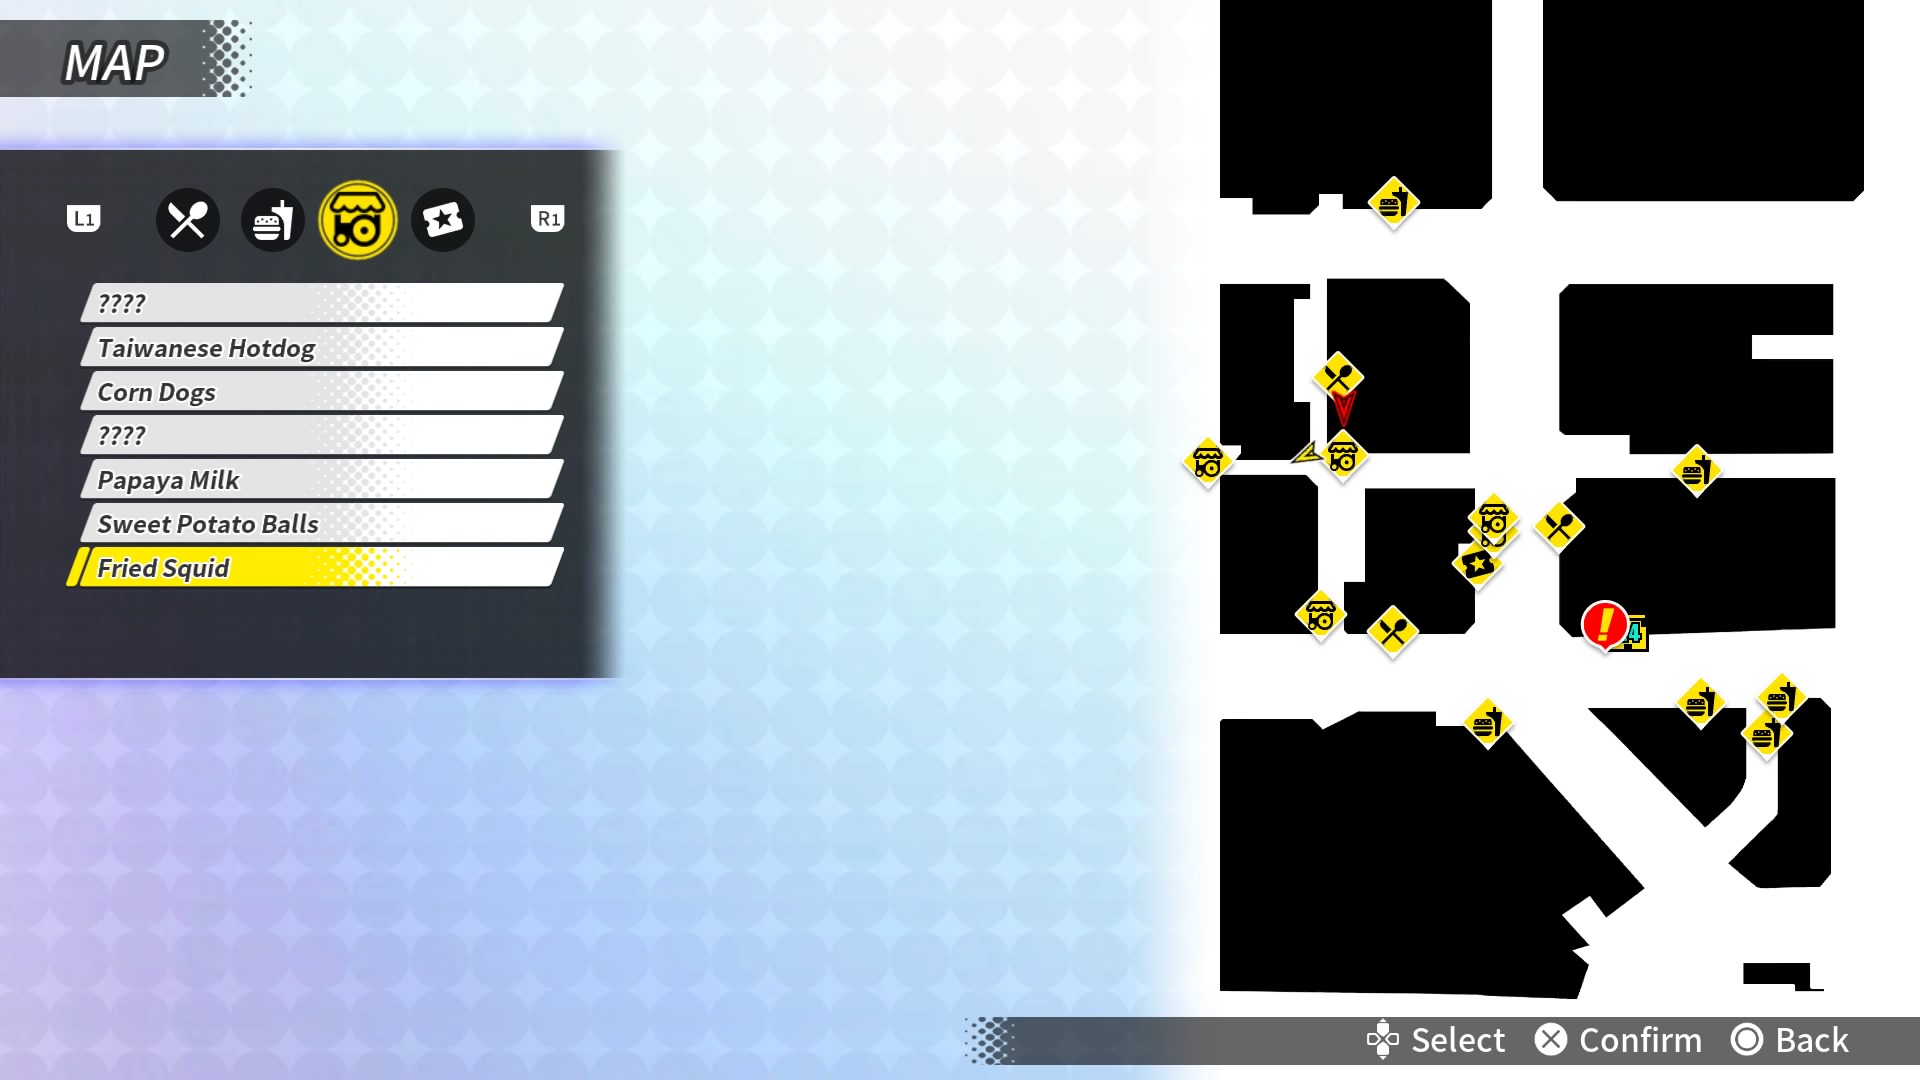 |
| At the end of Stinky Tofu’s alley you’ll find a store. Inside this stores display you’ll find the stone. |  |
| At the map border, you’ll find this stone on a bench. |  |
| Beside Sweet Potato Balls you’ll find the stone on a scooter. |  |
| After obtaining 5-Star Familiarity with the Ay-Chung Flour-Rice noodle stand. | 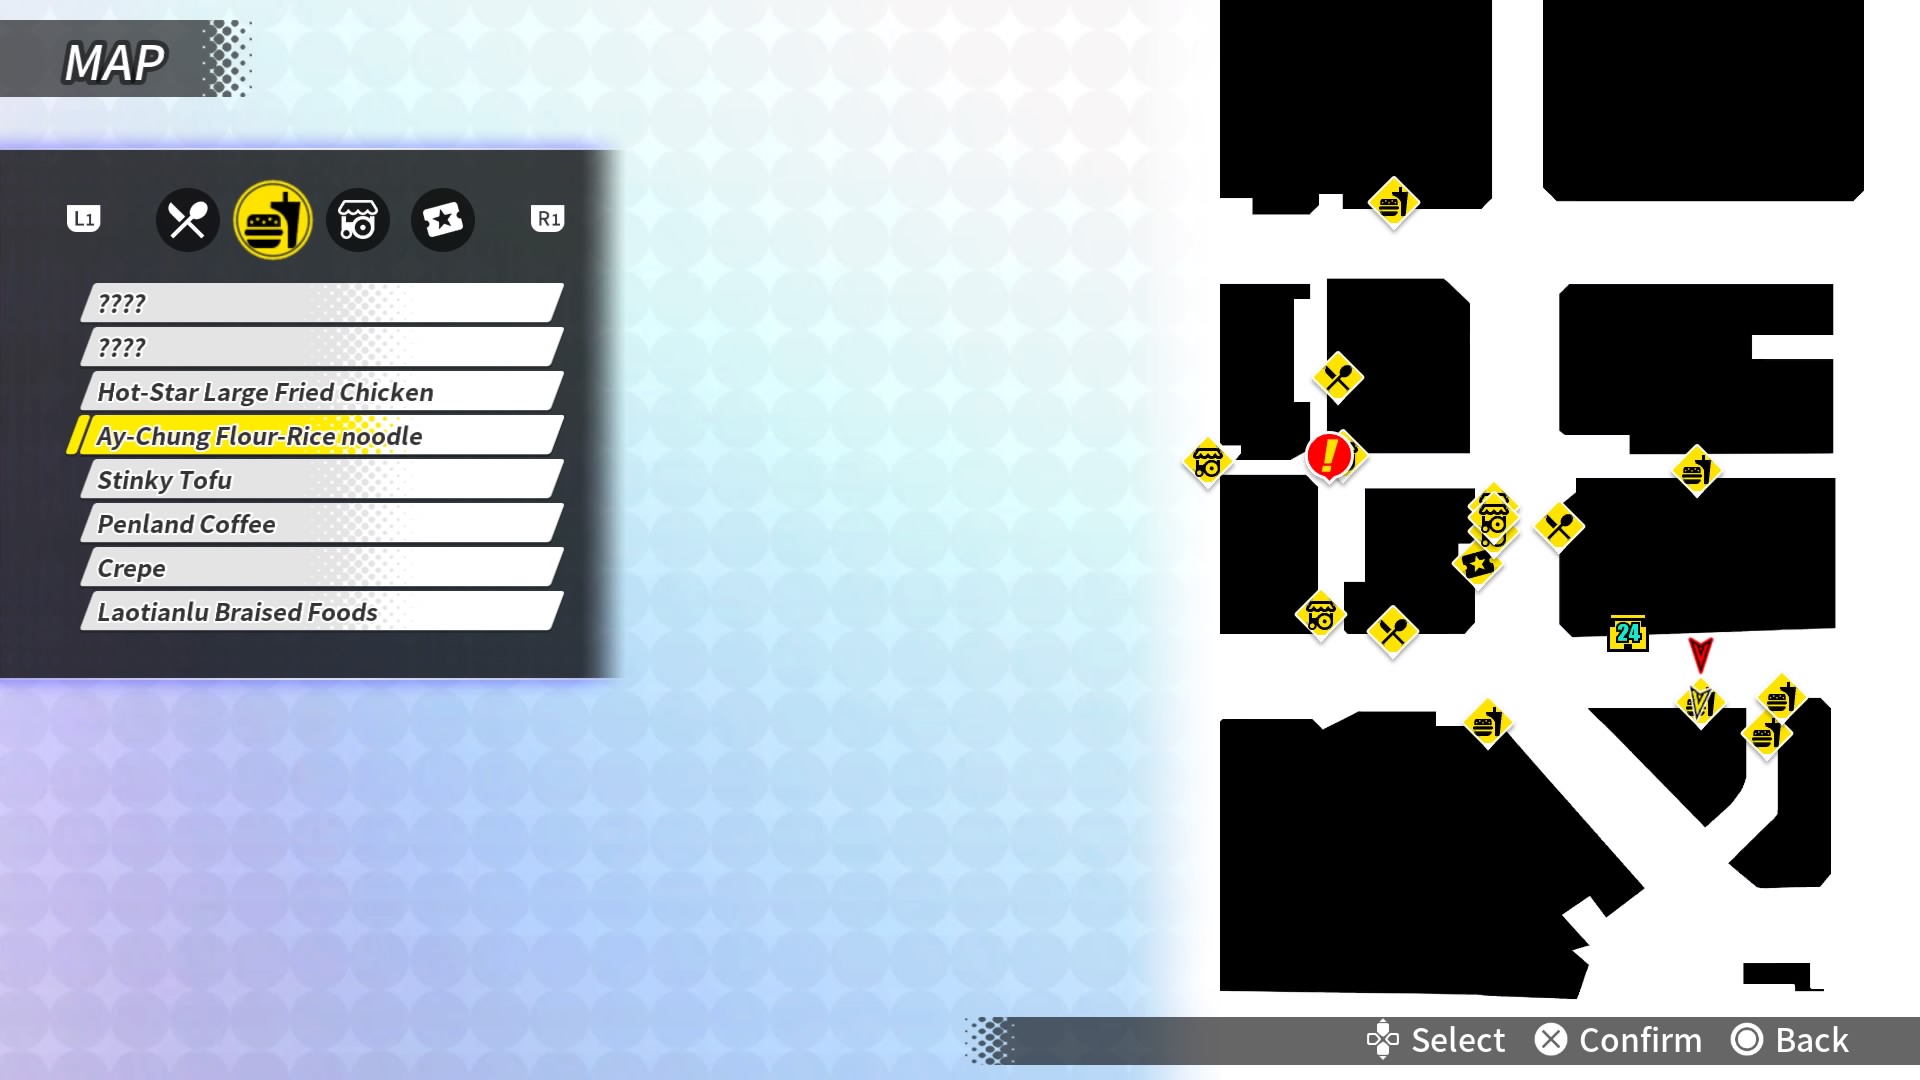 |
| After obtaining 5-Star Familiarity with the Stinky Tofu stand. |  |
| After obtaining 5-Star Familiarity with the Oyami Cafe restaurant. | 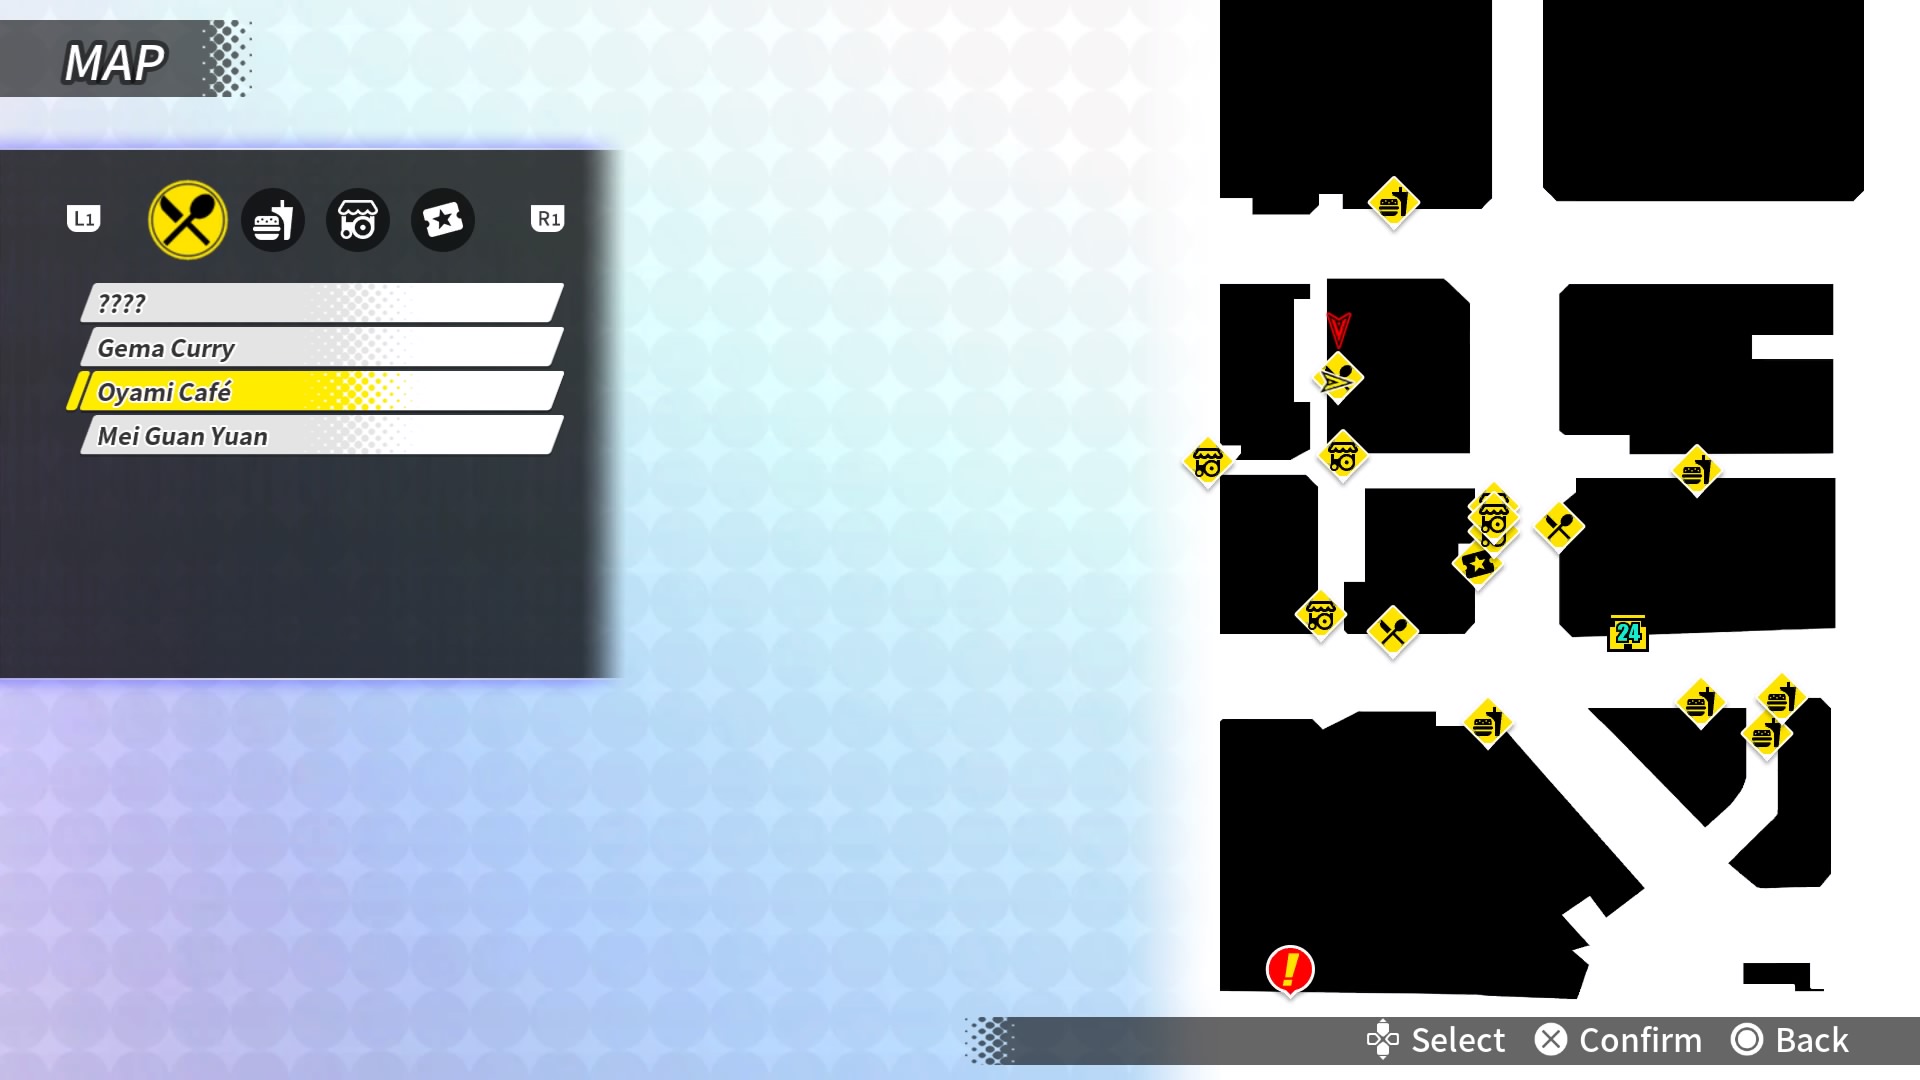 |
| After obtaining 5-Star Familiarity with the Sweet Potato Balls stand. | 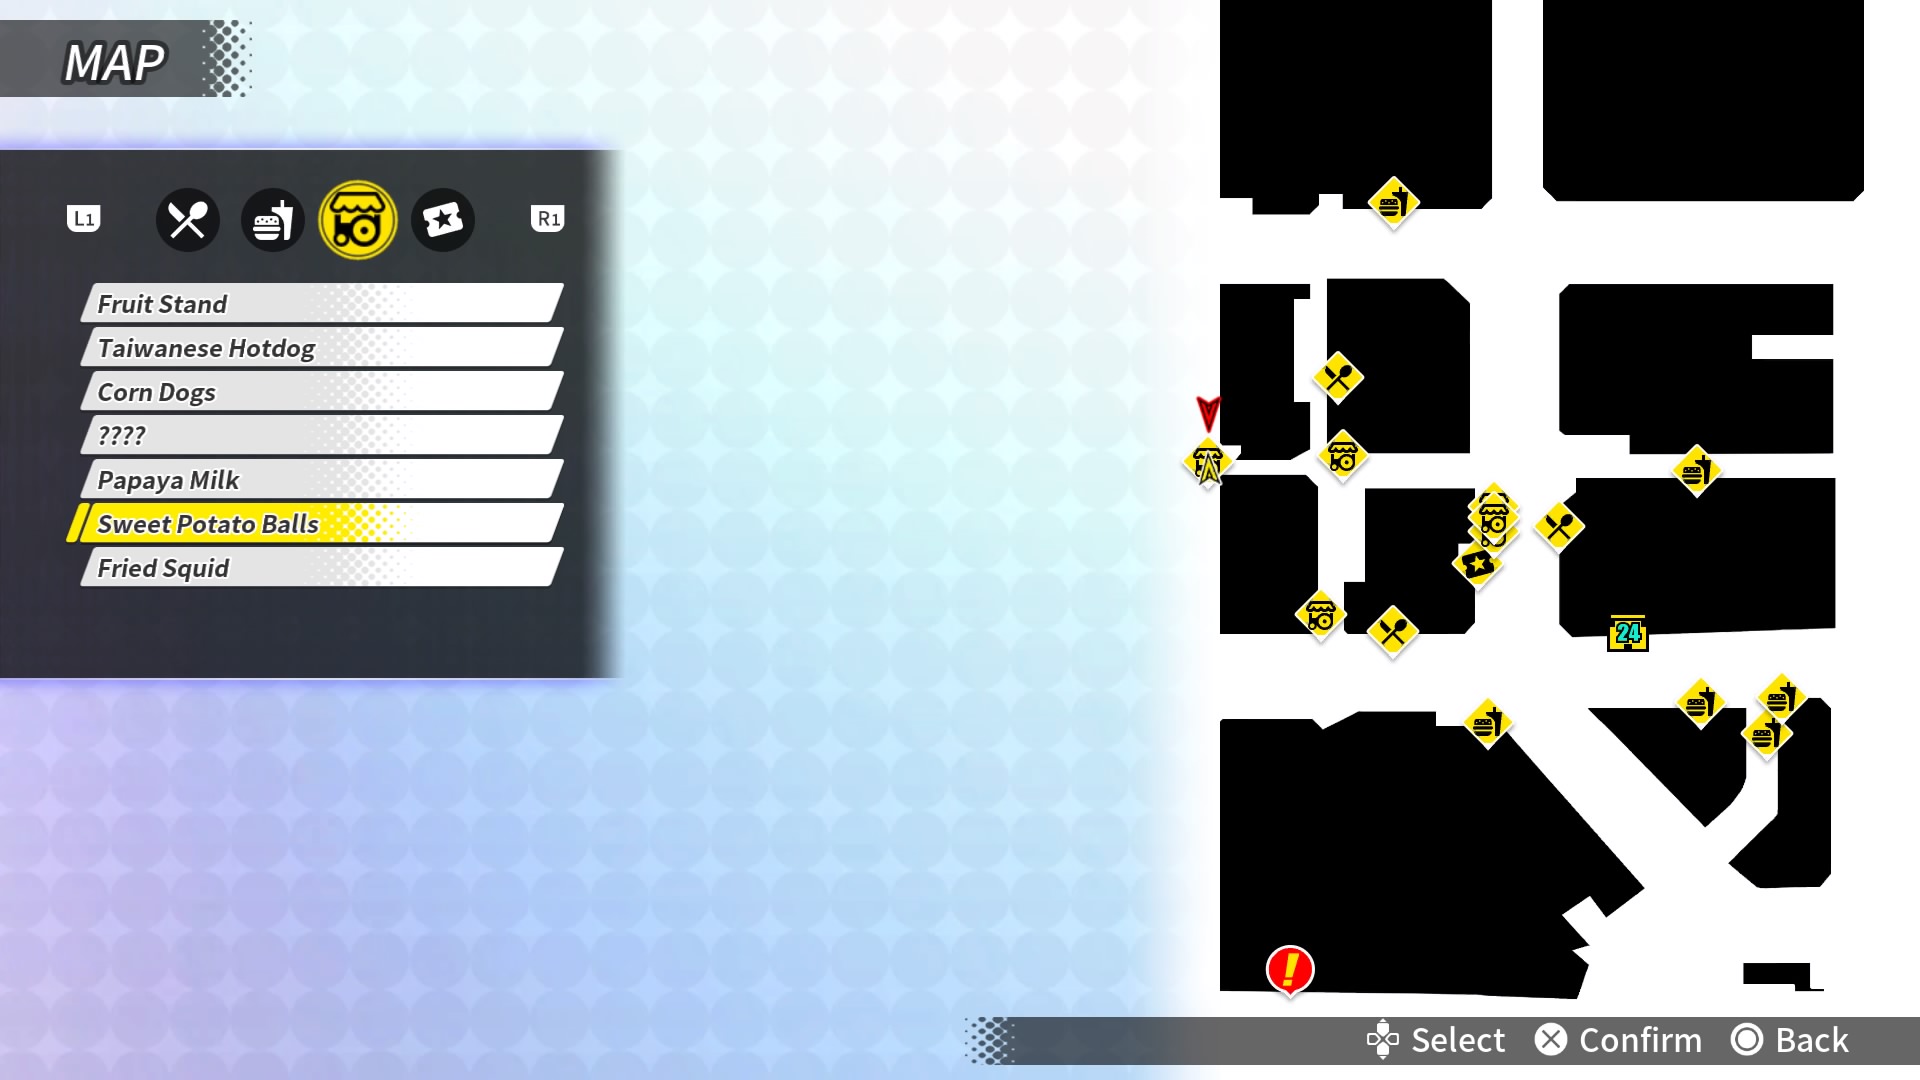 |
| After obtaining 5-Star Familiarity with the Mei Guan Yuan restaurant. |  |
| After obtaining 5-Star Familiarity with the Movie Theatre. | 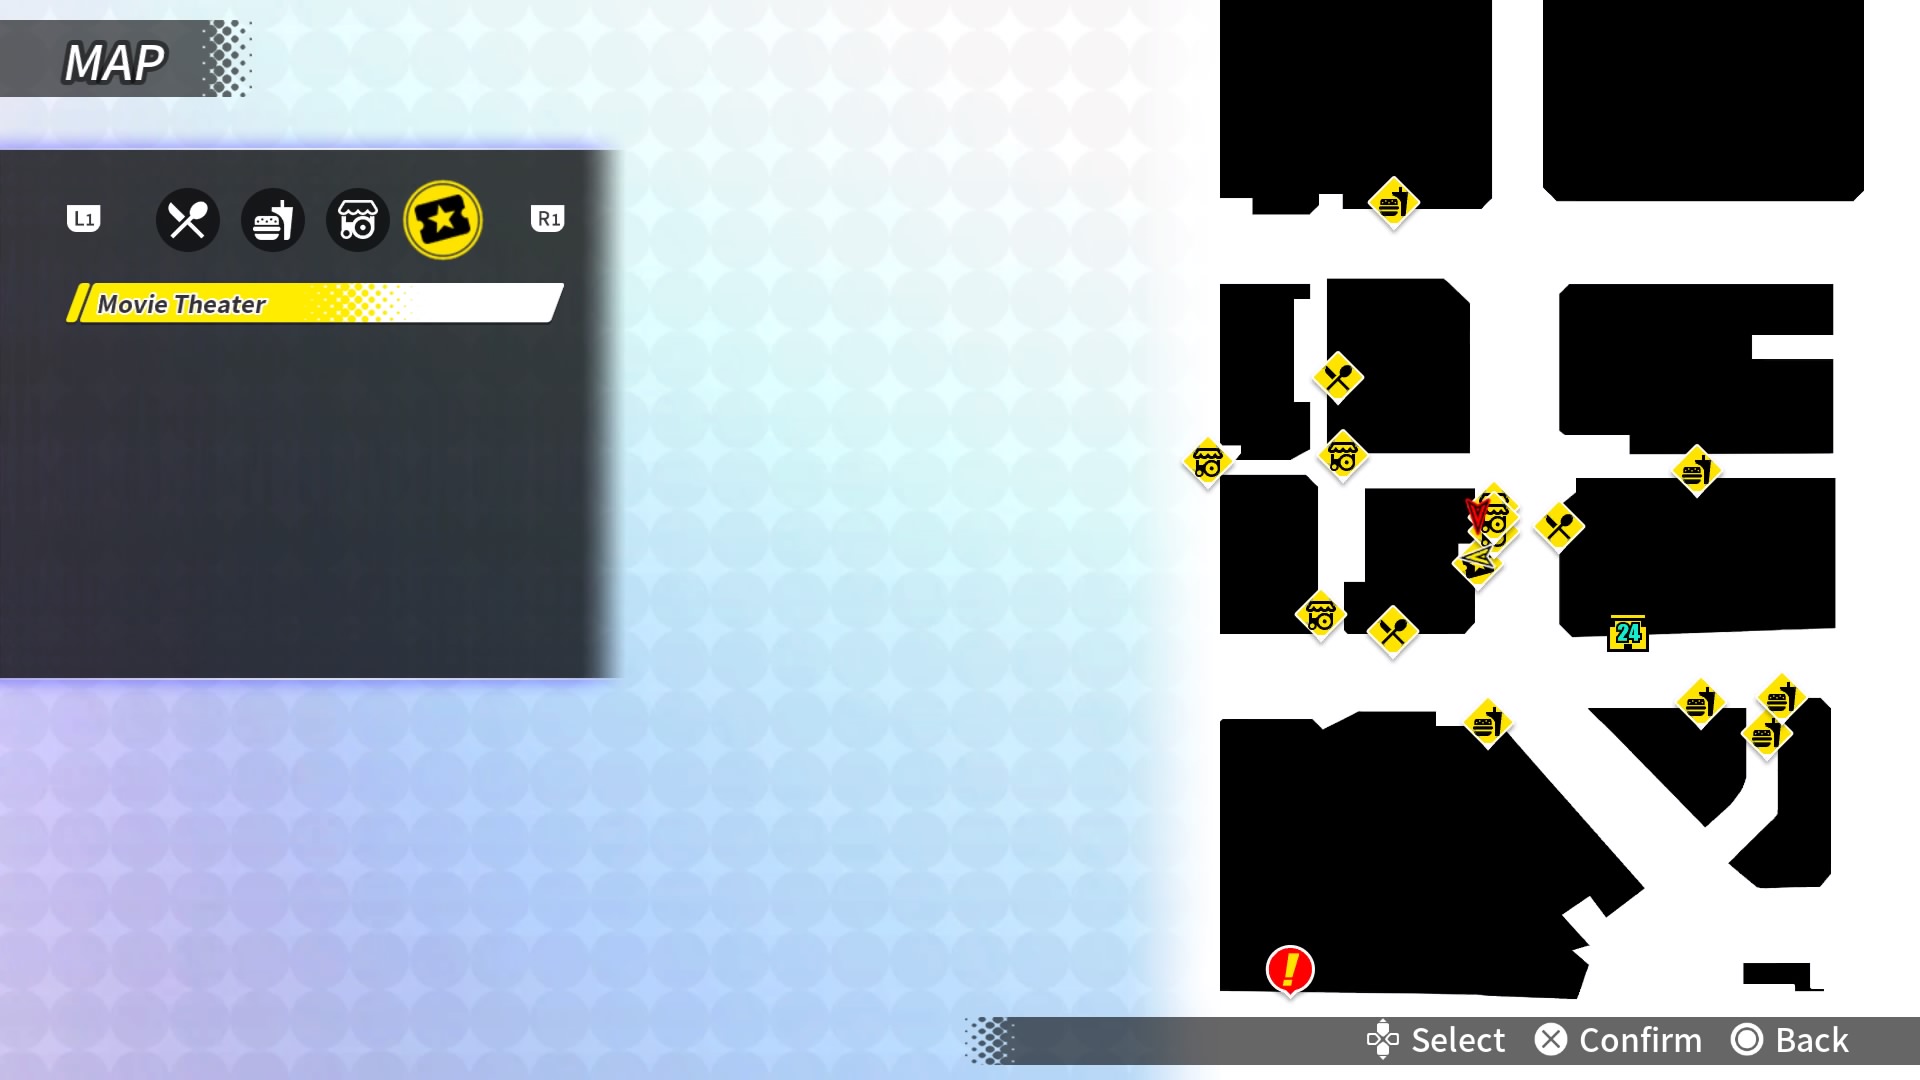 |
| After obtaining 5-Star Familiarity with the Fruit Stand. | 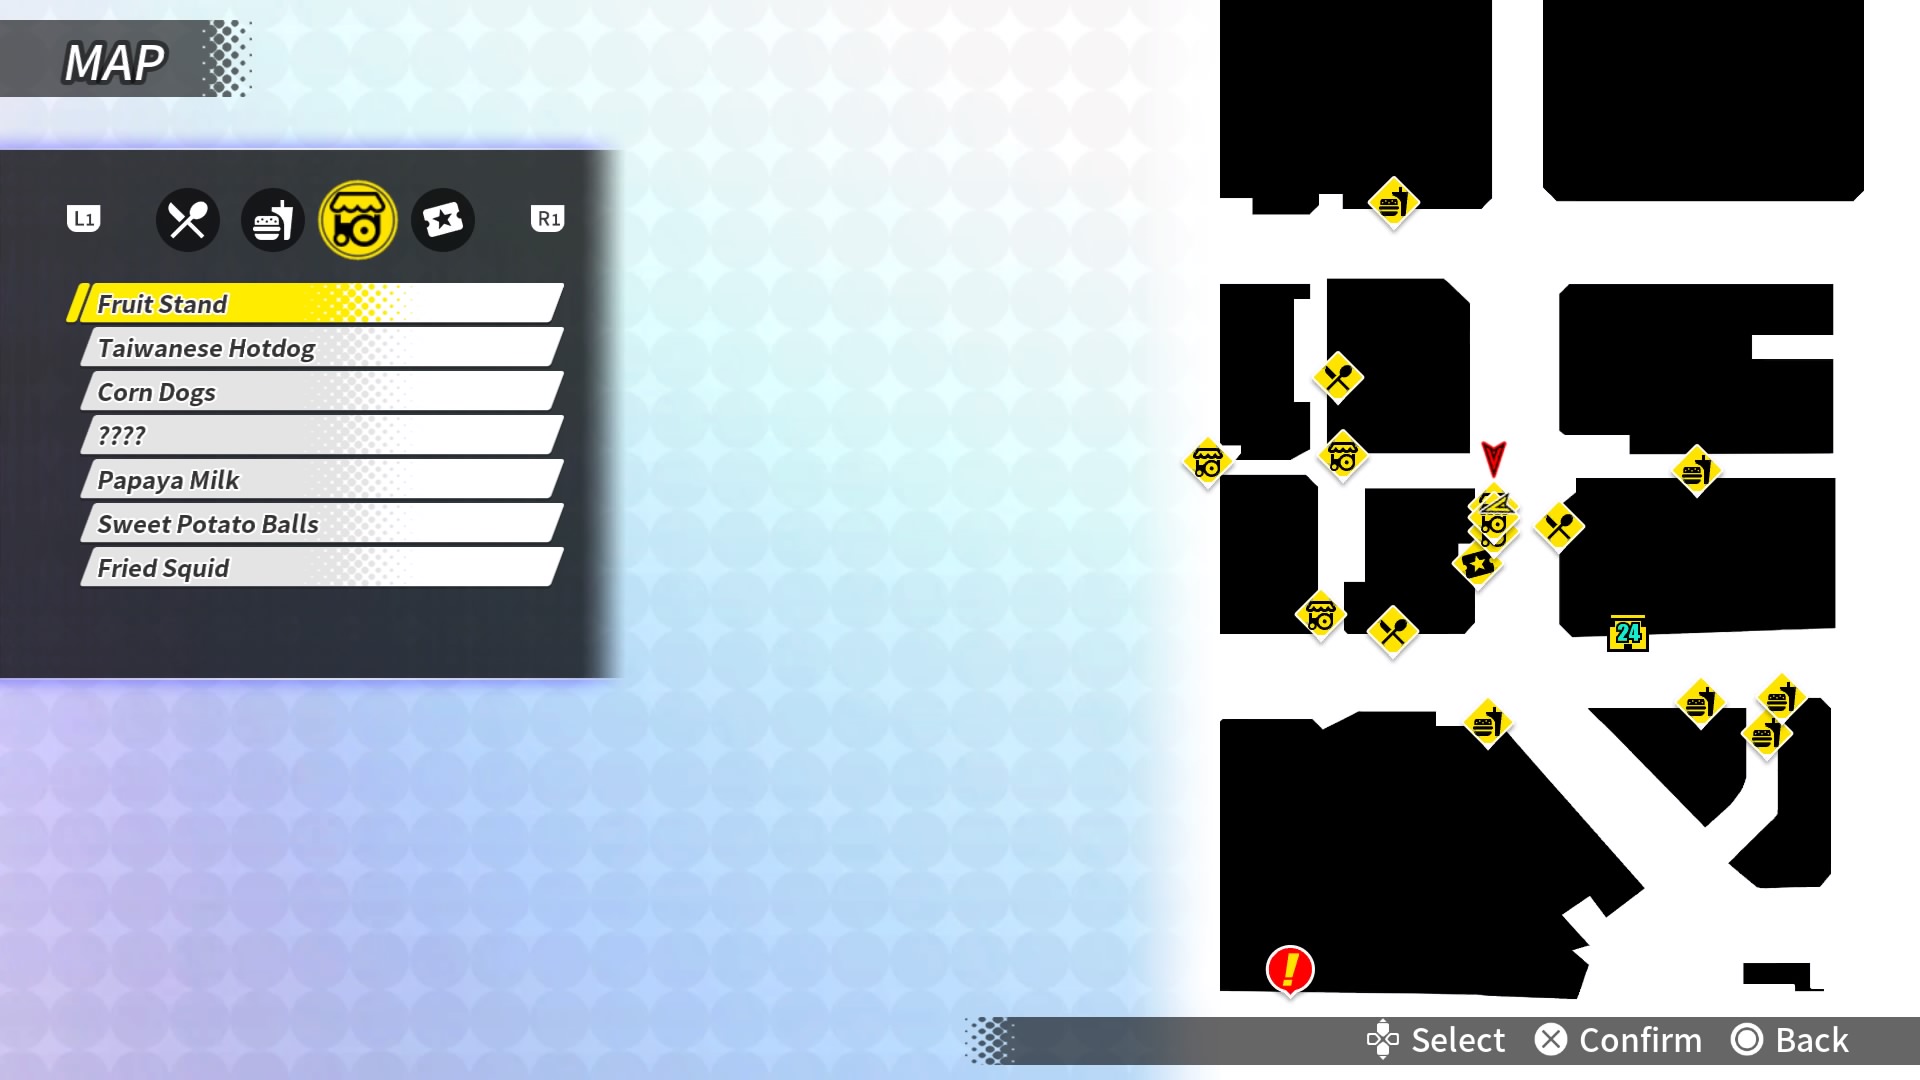 |
| After obtaining 5-Star Familiarity with the Genma Curry restaurant. |  |
| At the end of the street (right) with Tumaz Mart, you’ll find this stone on the corner of the walkway. |  |
| To the very left of Hot-Star Large Fried Chicken vendor. You’ll find this below a wall poster. |  |
| This stone will be in a Clothing Store Display, found between Hot-Star Large Fried Chicken and the Subway. |  |
| This stone is in the same hall as the Exit 6 gacha machine. |  |
| Bottom right corner of the map below a street light is where you’ll find this stone. |  |
| This stone is across from the Muza Temples gacha machine. |  |
| This stone is beside a pillar at the top left of the map. |  |
| Outside of the Movie Theater, you’ll find the stone among some clothing racks. |  |
| After obtaining 5-Star Familiarity with the Cold Stone Creamery restaurant. | 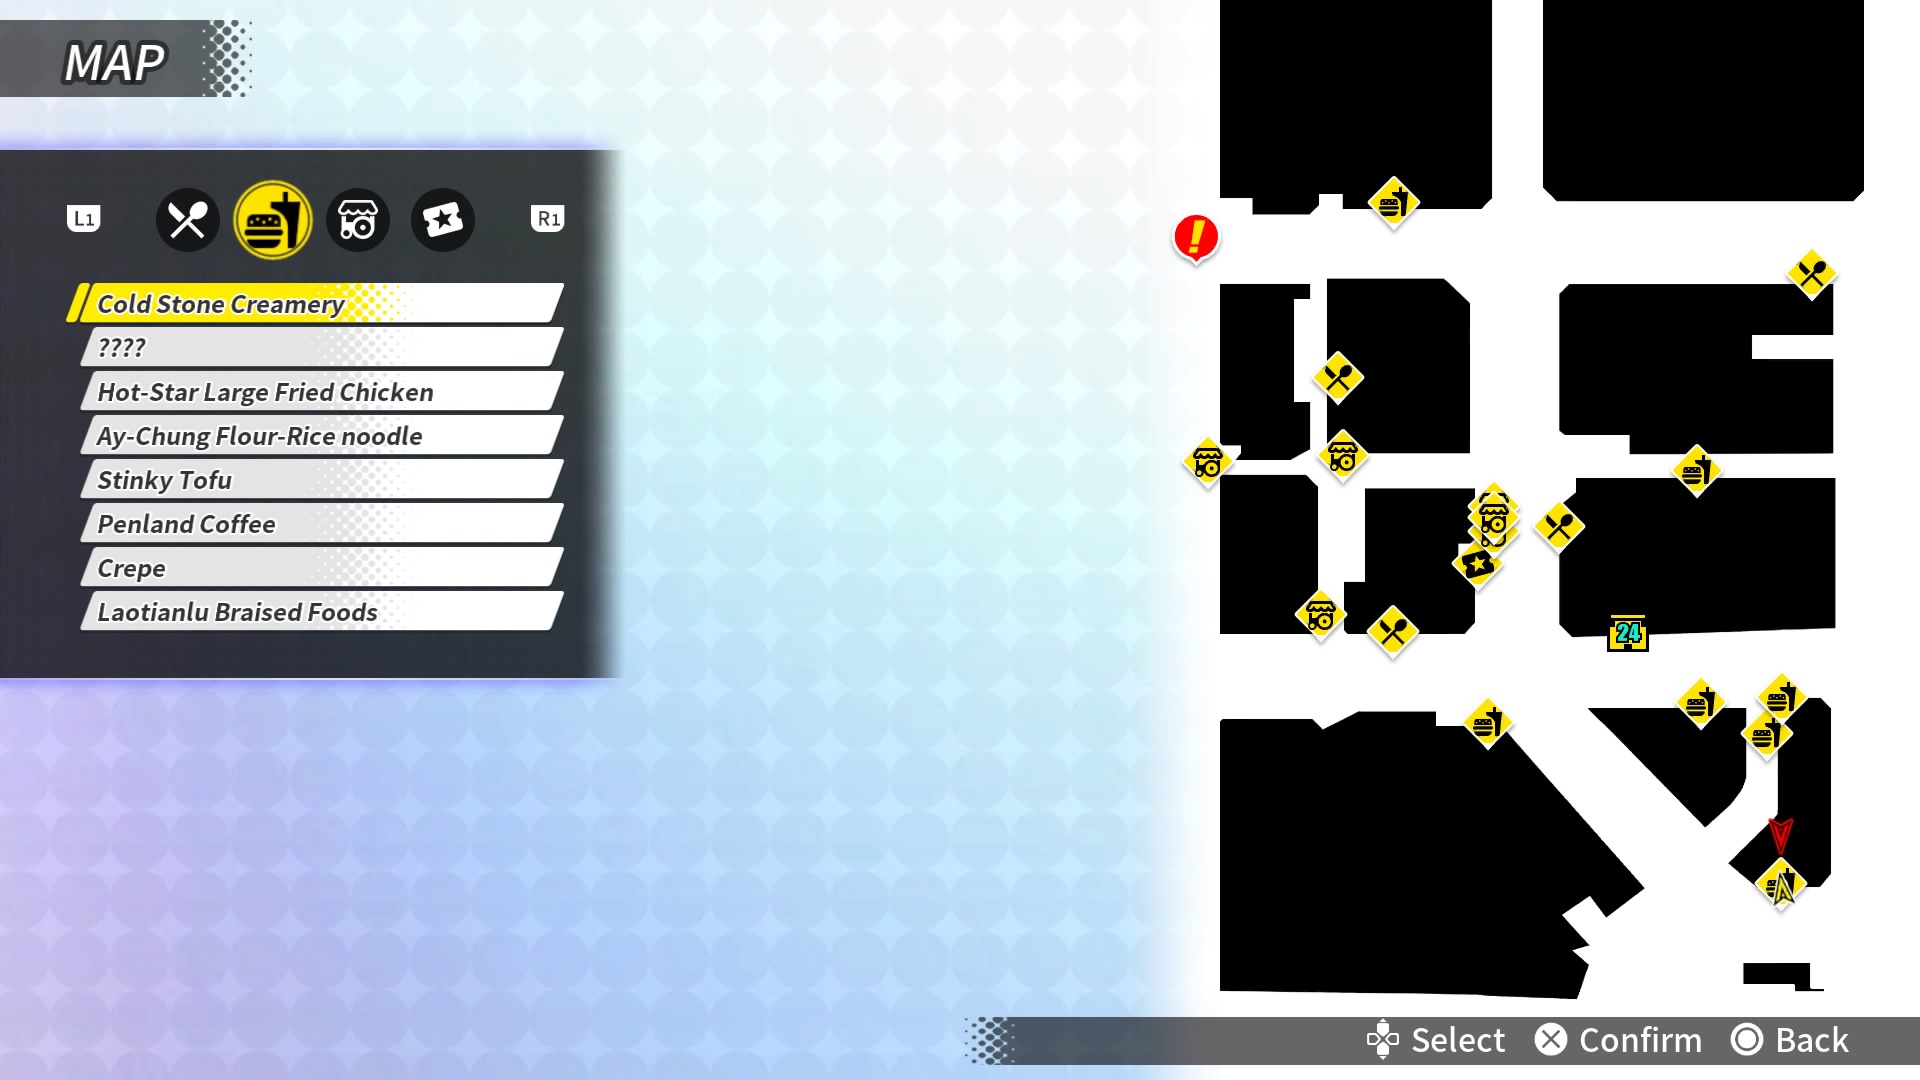 |
| After obtaining 5-Star Familiarity with the Mianjian Cake restaurant. |  |
| North of Sweet Potato Balls is where you’ll find this stone. | 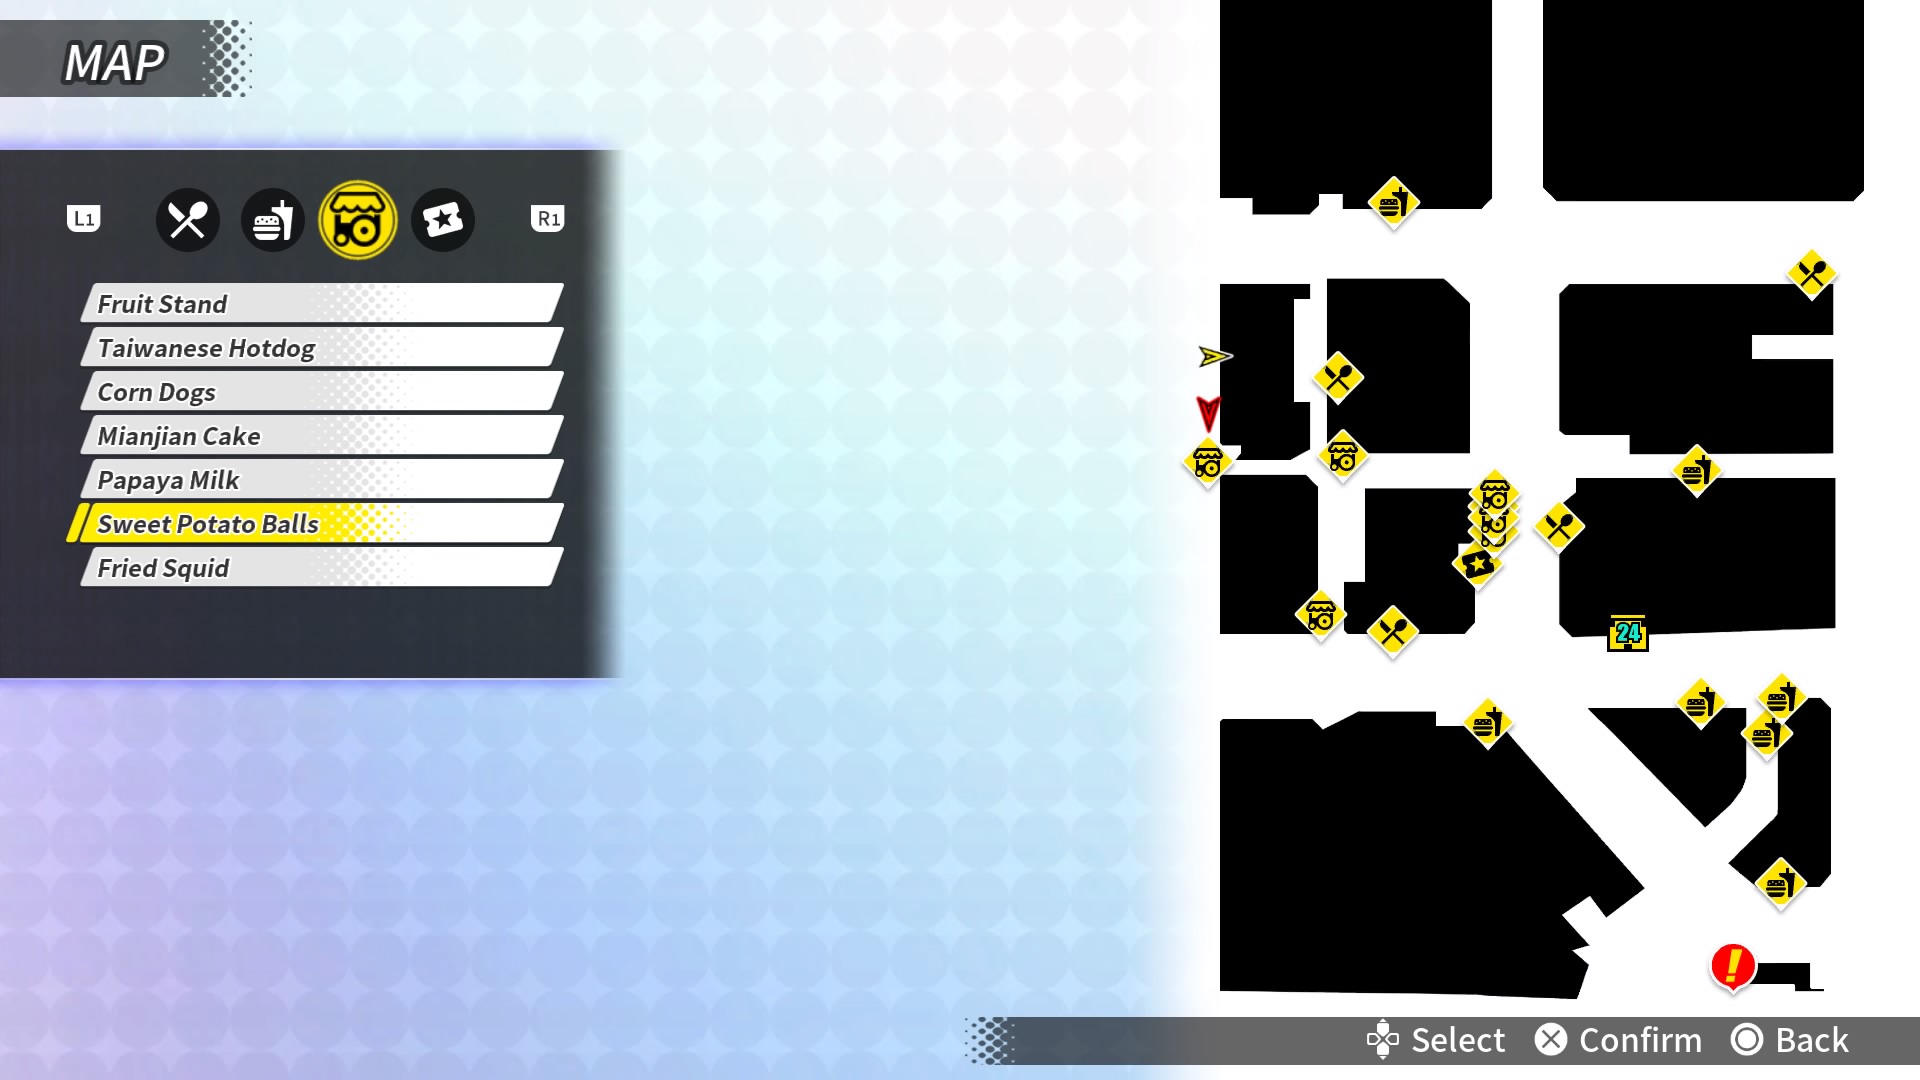 |
| This stone is in Stinky Tofu’s alley. |  |
| Slightly NW of Ya Rou Ban in a store. |  |
| After obtaining 5-Star Familiarity with the Ya Rou Ban restaurant. |  |
| This stone is inside a box on the lower left border of the map. |  |
| This stone is in-front of the subway station. |  |
| After obtaining 5-Star Familiarity with the J&G Fried Chicken restaurant. |  |


| Chapter 3 | Map |
| While you’re looking for the Mirror Stone you will find a Chaos Wall on top of a building. You will find the stone inside the wall, which will fall to the ground when broken. |  |
| After you use an elevator you’ll quickly meet blue enemies. These blue enemies will spawn in firing projecticles at you. Do not hit the switch, you need to walk off the ledge and fall to the road below to find this stone. | 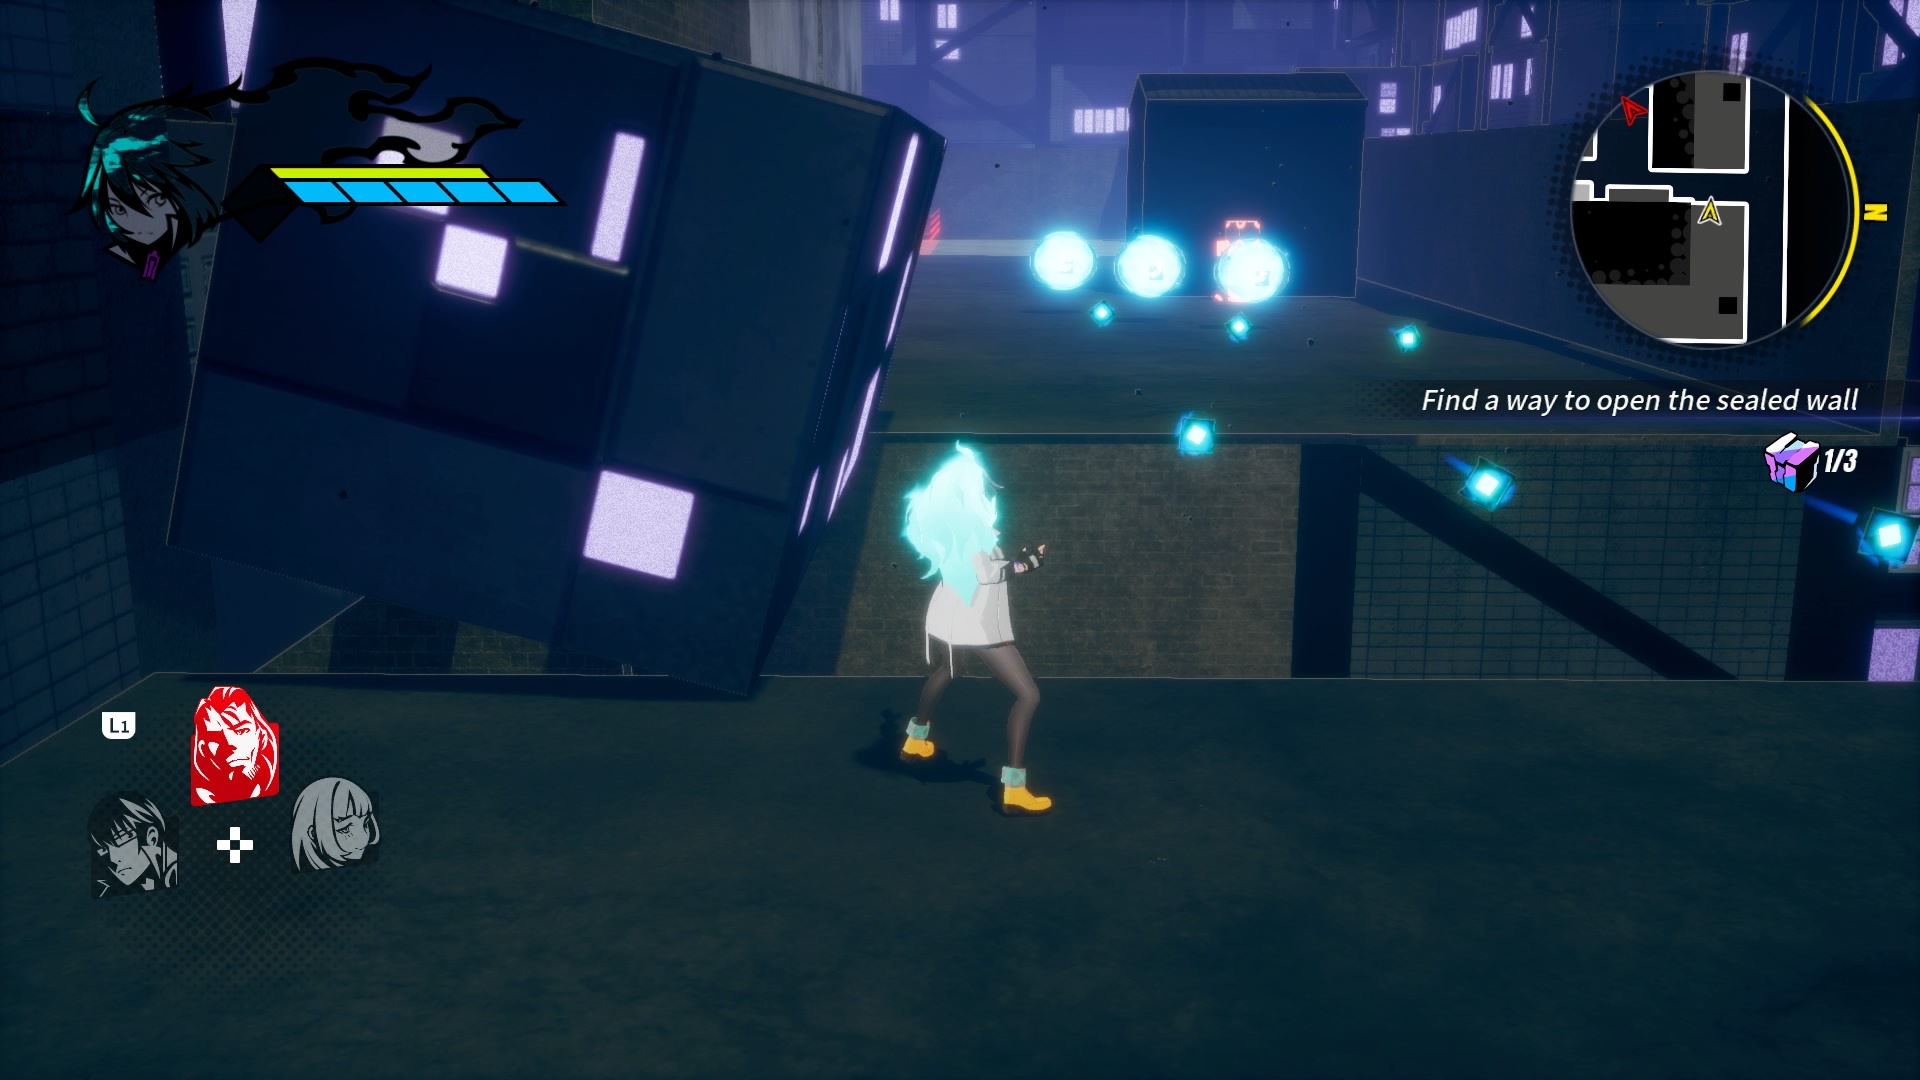 |
| When you need to activate 3 stones to get across the rooftops, is where you’ll find this. When the bridge is complete, go to the corner of the bridge closest to the first switch. You’ll use Bahet’s Note: the picture shows the ledge where th stone was. |  |
| A reward for completing the mission with an S Rank. [Normal] | |
| Before you use the Bagua Switch and ride the elevator up, there’ll be alleyway. Breakdown the Chaos Walls and find your stone behind them. |  |
| A reward for completing the mission with an S Rank. [Hard] |
| Chapter 4 | Map |
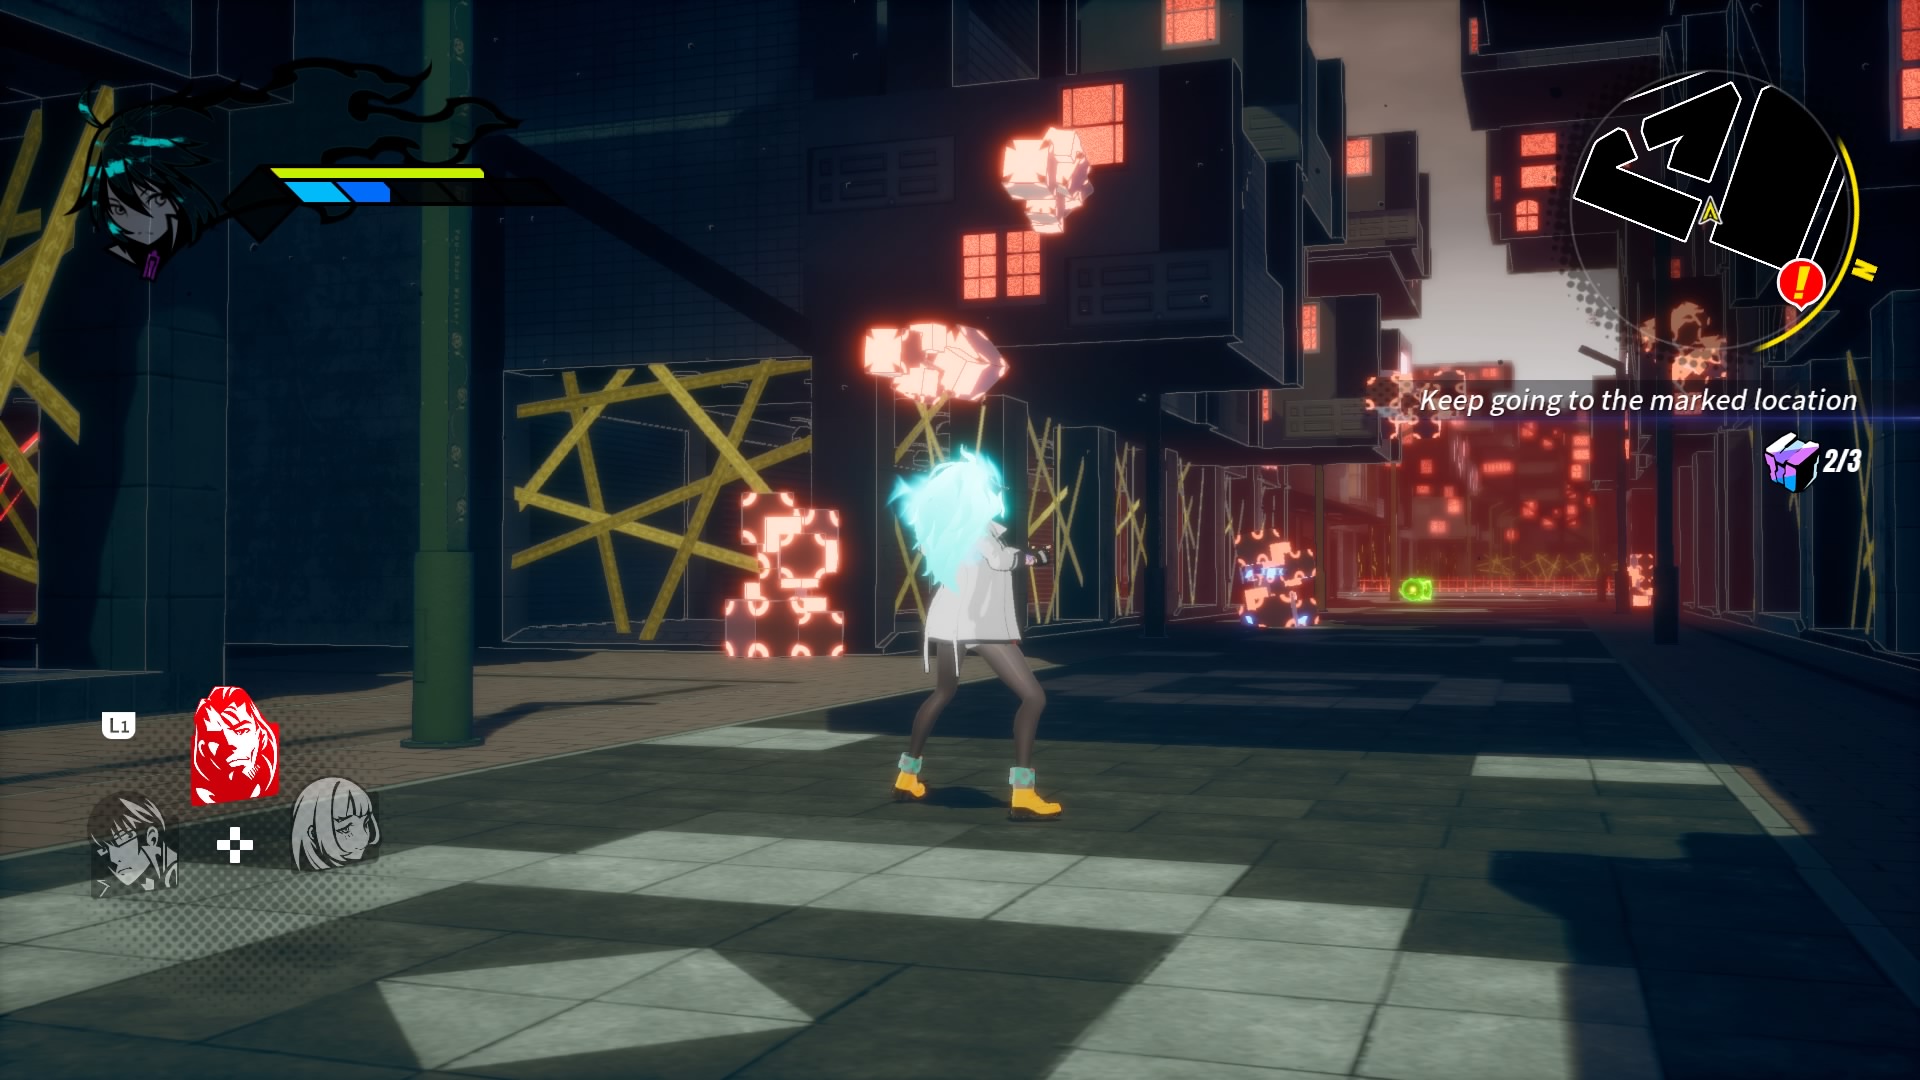
| A highly missable stone. Once you enter the Parking Garage you’ll fight off a horde of enemies. When this is done, access to the upper levels of the Garage are now open. Don’t go up, instead go back to the beginning of the level and go to the end of the street. You’ll spawn a big enemy and the stone will appear after his defeat. Note: the picture shows the direction to go. |  |
| Note: This chapter has the HUB disabled/Map Before you start ascending the ramps of the Parking Garage, look to the ramps left. The stone will be visible and in the open. |  |
| As you ascende the Parking Garage this stone will be on the main path. |  |
| A reward for completing the mission with an S Rank. [Normal] | |
| No picture neccessary. While Ascending the Parking Garage, before the boss you’ll need to activate a switch. Beside this switch is an alarm enemy with your stone. | |
| A reward for completing the mission with an S Rank. [Hard] |
| Chapter 5 | Map |
| After the yellow minion runs away behind the Bagua Wall, you’ll have to take another route. This stone will be on your right hand side by a fence. |  |
| Immediately after the previos stone, when heading into the next area keep right. There’ll be a small alley with a bunch of breakables, the stone is behind these. |  |
| After you pick up the Bagua Mirror you’ll need to fight a horde of enemies. After the battle is done, you’ll find this stone behind a Chaos Wall. |  |
| A reward for completing the mission with an S Rank. [Normal] | |
| In an alleyway near the Bagua Mirror is where you’ll find the stone. |  |
| A reward for completing the mission with an S Rank. [Hard] |
| Chapter 6 | Map |
| After the first horde of enemies a platform will appear. This connects to a short rectangular strip with the stone. (The picture shows the platform it’s on.) |  |
| After the first horde of enemies, you’ll advance on a moving platform. At the end when you’re on a stationary platform again, look in the water to see the stone. You’ll have to jump in to get it. Note: Picture shows where it was. |  |
| During the progression of the level this stone will come naturally. It’s on the main path. You really shouldn’t miss it. | |
| A reward for completing the mission with an S Rank. [Normal] | |
| This stone is on the stationary platform before the boss. [Hard] |  |
| A reward for completing the mission with an S Rank. [Hard] |
| Chapter 7 | Map |
| Near your starting location there’ll be a Chaos Wall to break, the stone is behind it. |  |
| As you head towards Stone 2 from 1, keep an eye out on your left. You’ll find an alley that leads to the stone. |  |
| Note: Map disabled. End mission you’ll need to teleport to The Park. Look around in the corners of the park to find this stone. | |
| A reward for completing the mission with an S Rank. [Normal] | |
| To the left of Stone 3 you’ll find this stone in an alleyway. | 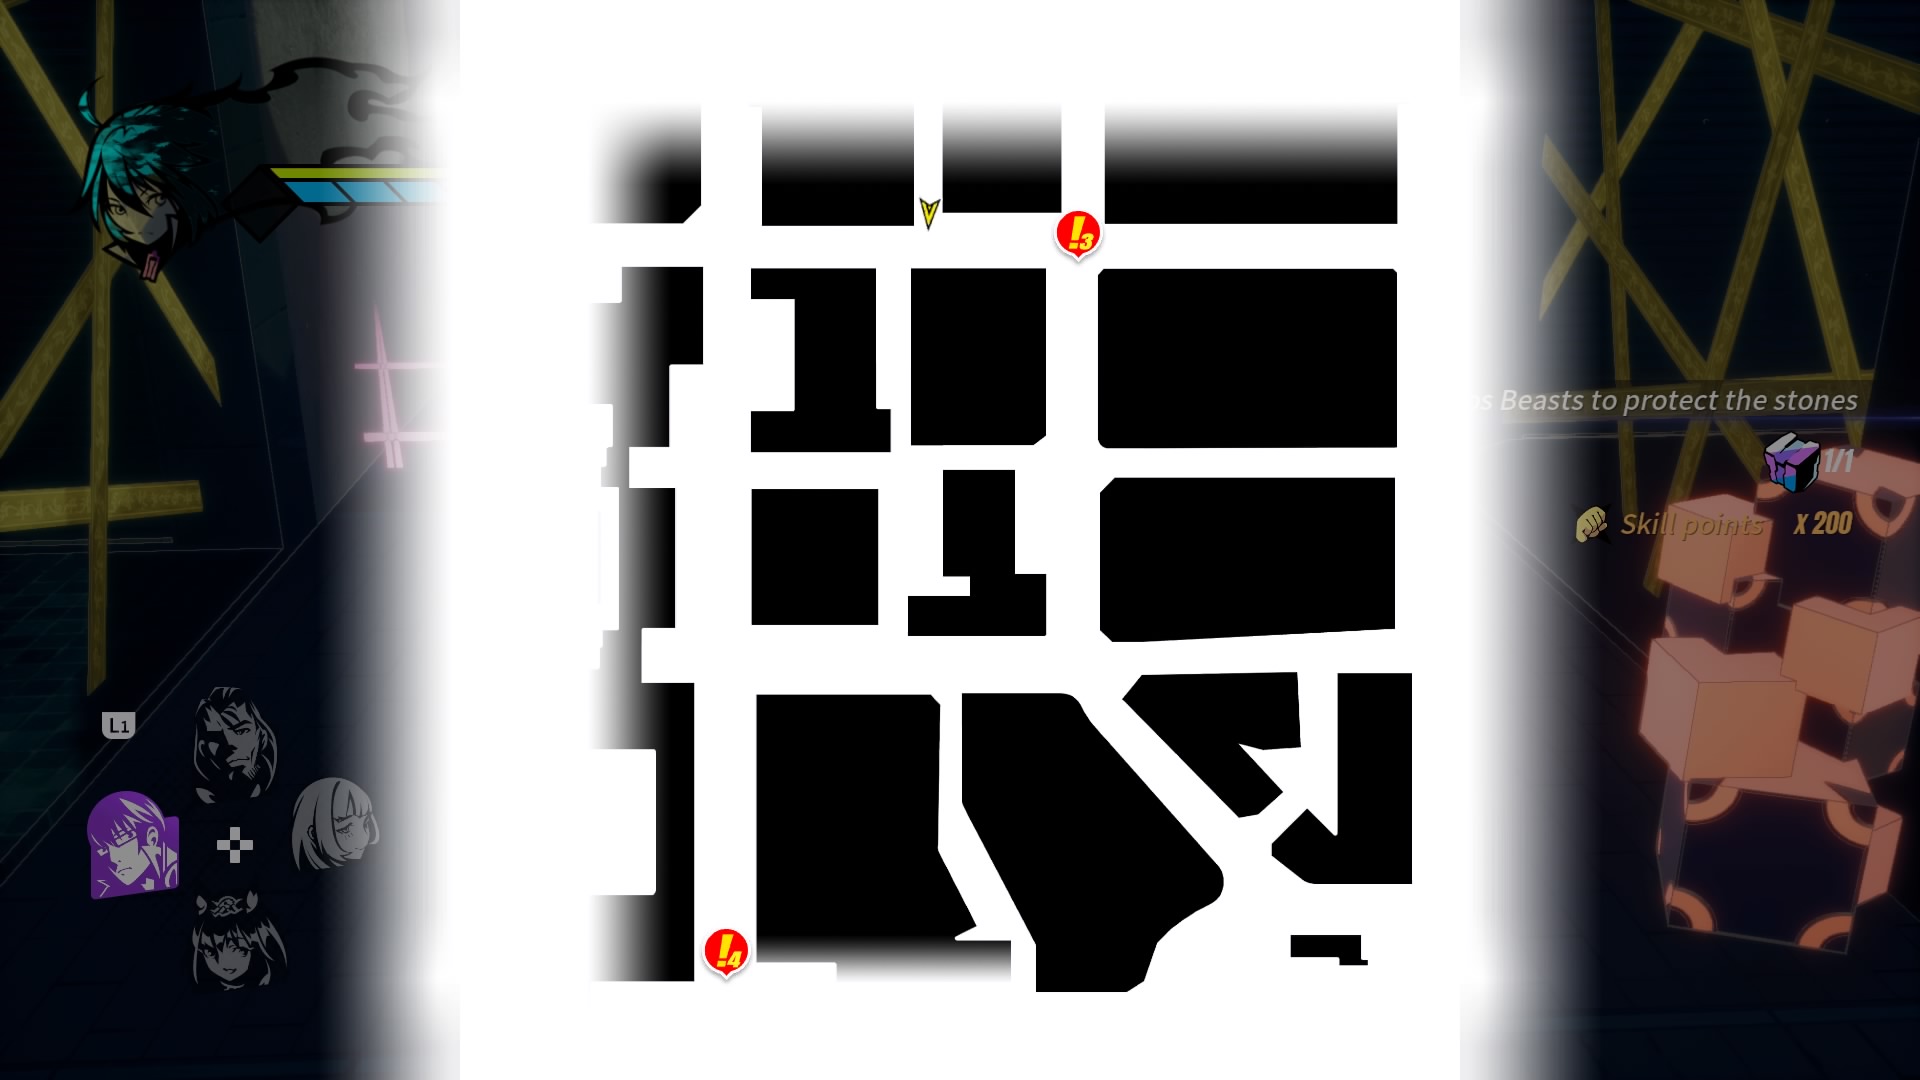 |
| A reward for completing the mission with an S Rank. [Hard] |
| Chapter 8 | Map |
| Near the beginning of the mission you’ll find an enemy with an alarm area. Past this enemy is a teleport which will bring you right to the stone. |  |
| After you get the Bagau Mirror, you’ll find a small Bagau Wall. Behind it is a large enemy which will drop this stone. |  |
| You’ll find this stone in an alleyway after fighting a big horde. |  |
| A reward for completing the mission with an S Rank. [Normal] | |
| After you get the Bagau Mirror, you’ll find a small Bagau Wall. Behind it is a large enemy which will drop this stone. Note: Same as Normal Stone 2. | |
| A reward for completing the mission with an S Rank. [Hard] |
| Chapter 9 | Map |
| After your first alarm enemy, you’ll find a Chaos Wall. Behind here is your stone. |  |
| Outside the Parking Garage you’ll find an alarm enemy. The stone is inside the alarm perimiter. | 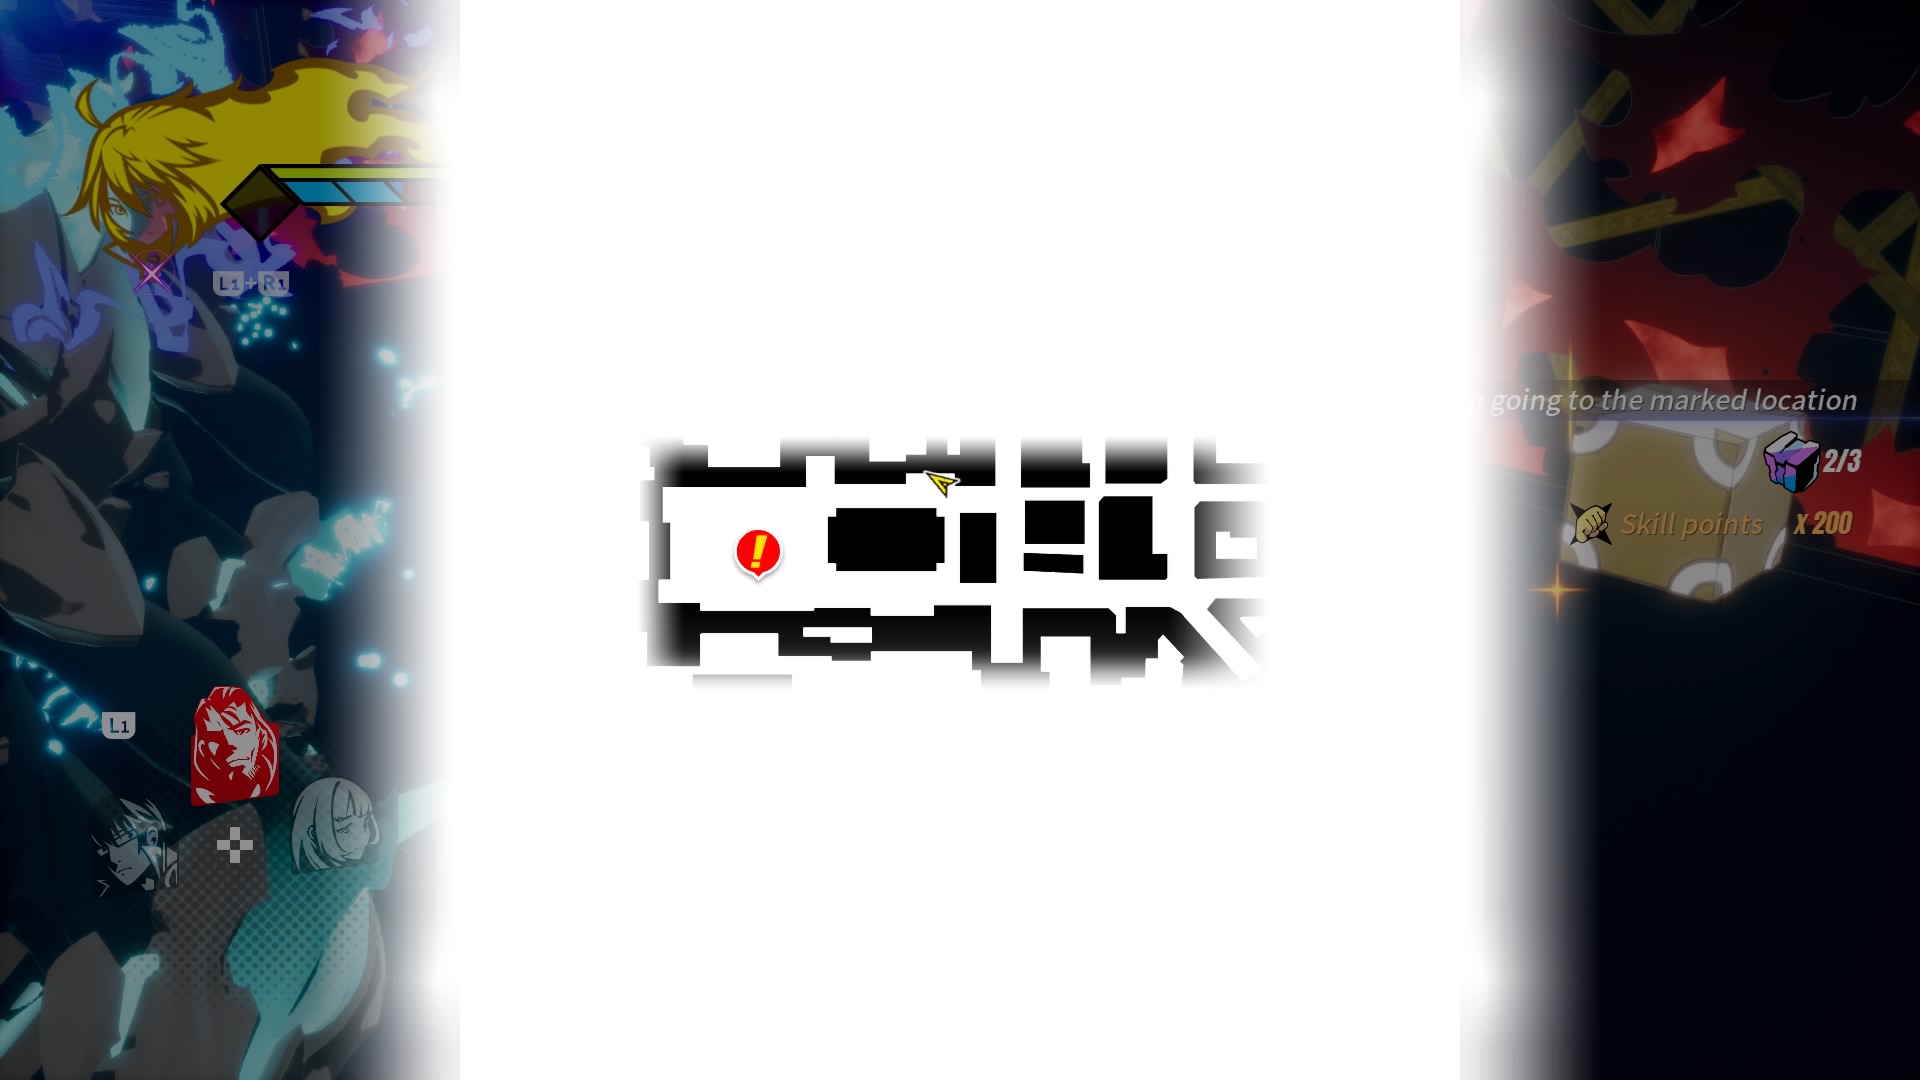 |
| On the ramp towards the basment entrance to the Parking Garage. You’ll find the entrance near the Bagua Wall. |  |
| A reward for completing the mission with an S Rank. [Normal] | |
| In an alleyway you’ll find an alarm enemy. The stone is with this alarm enemy. |  |
| A reward for completing the mission with an S Rank. [Hard] |
| Chapter 10 | Map |
| At the start of the level there’ll be a platform off to the right. This moving rotating platform will bring you across to the stone. |  |
| Climb the path off of La Viada’s route or this stone. Note: Do not go to La Viada as it will progress before you get the other stone. |  |
| Climb the path off of Bahet’s route or this stone. | 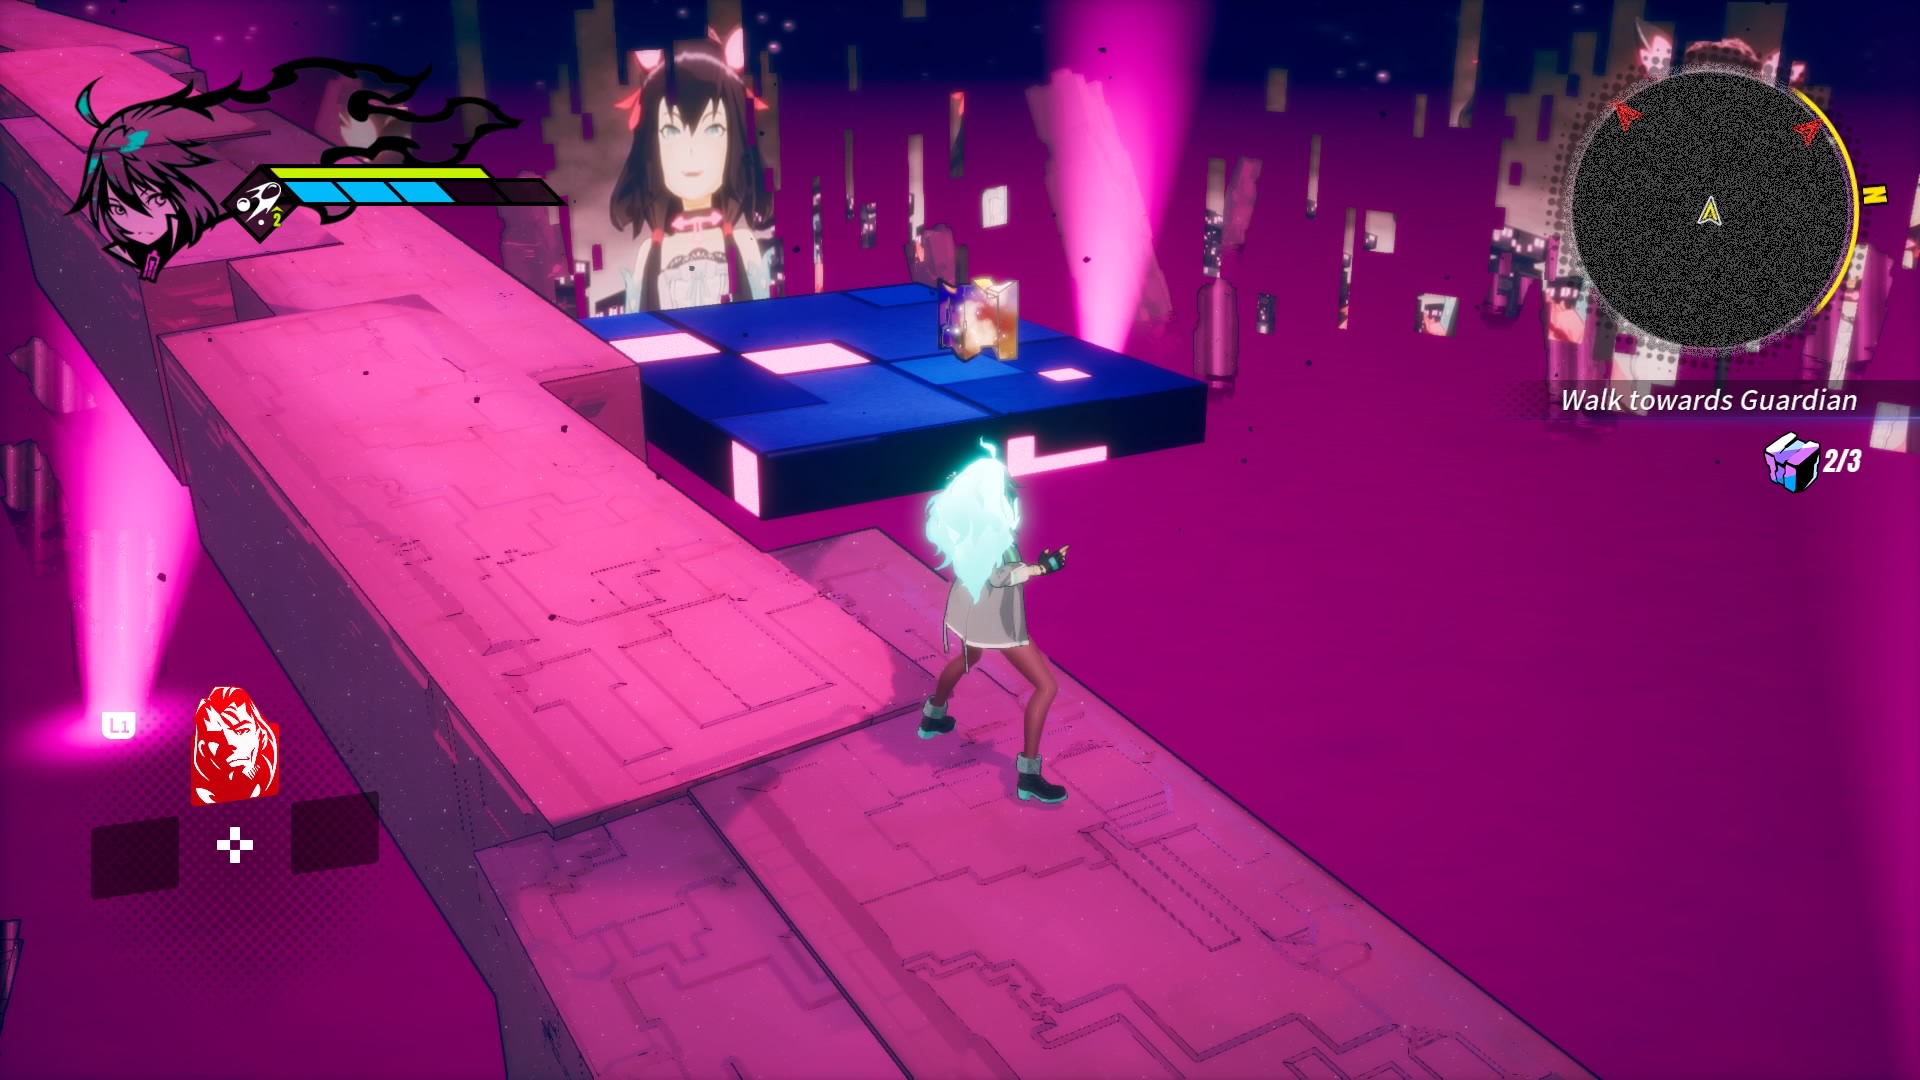 |
| A reward for completing the mission with an S Rank. [Normal] | |
| At the start of the level there’ll be a platform off to the right. This moving rotating platform will bring you across to the stone. [Hard] |  |
| A reward for completing the mission with an S Rank. [Hard] |
| Chapter 11 | Map |
| Come to this location before the first defense system objective. |  |
| After you activate the 2nd defense system, you’ll have to fight off a horde of enemies. This horde will bring down a barrier revealing your next stone. |  |
| After you activate the last defense system, you’ll have to fight off a horde of enemies. This horde will bring down a barrier revealing your next stone. | 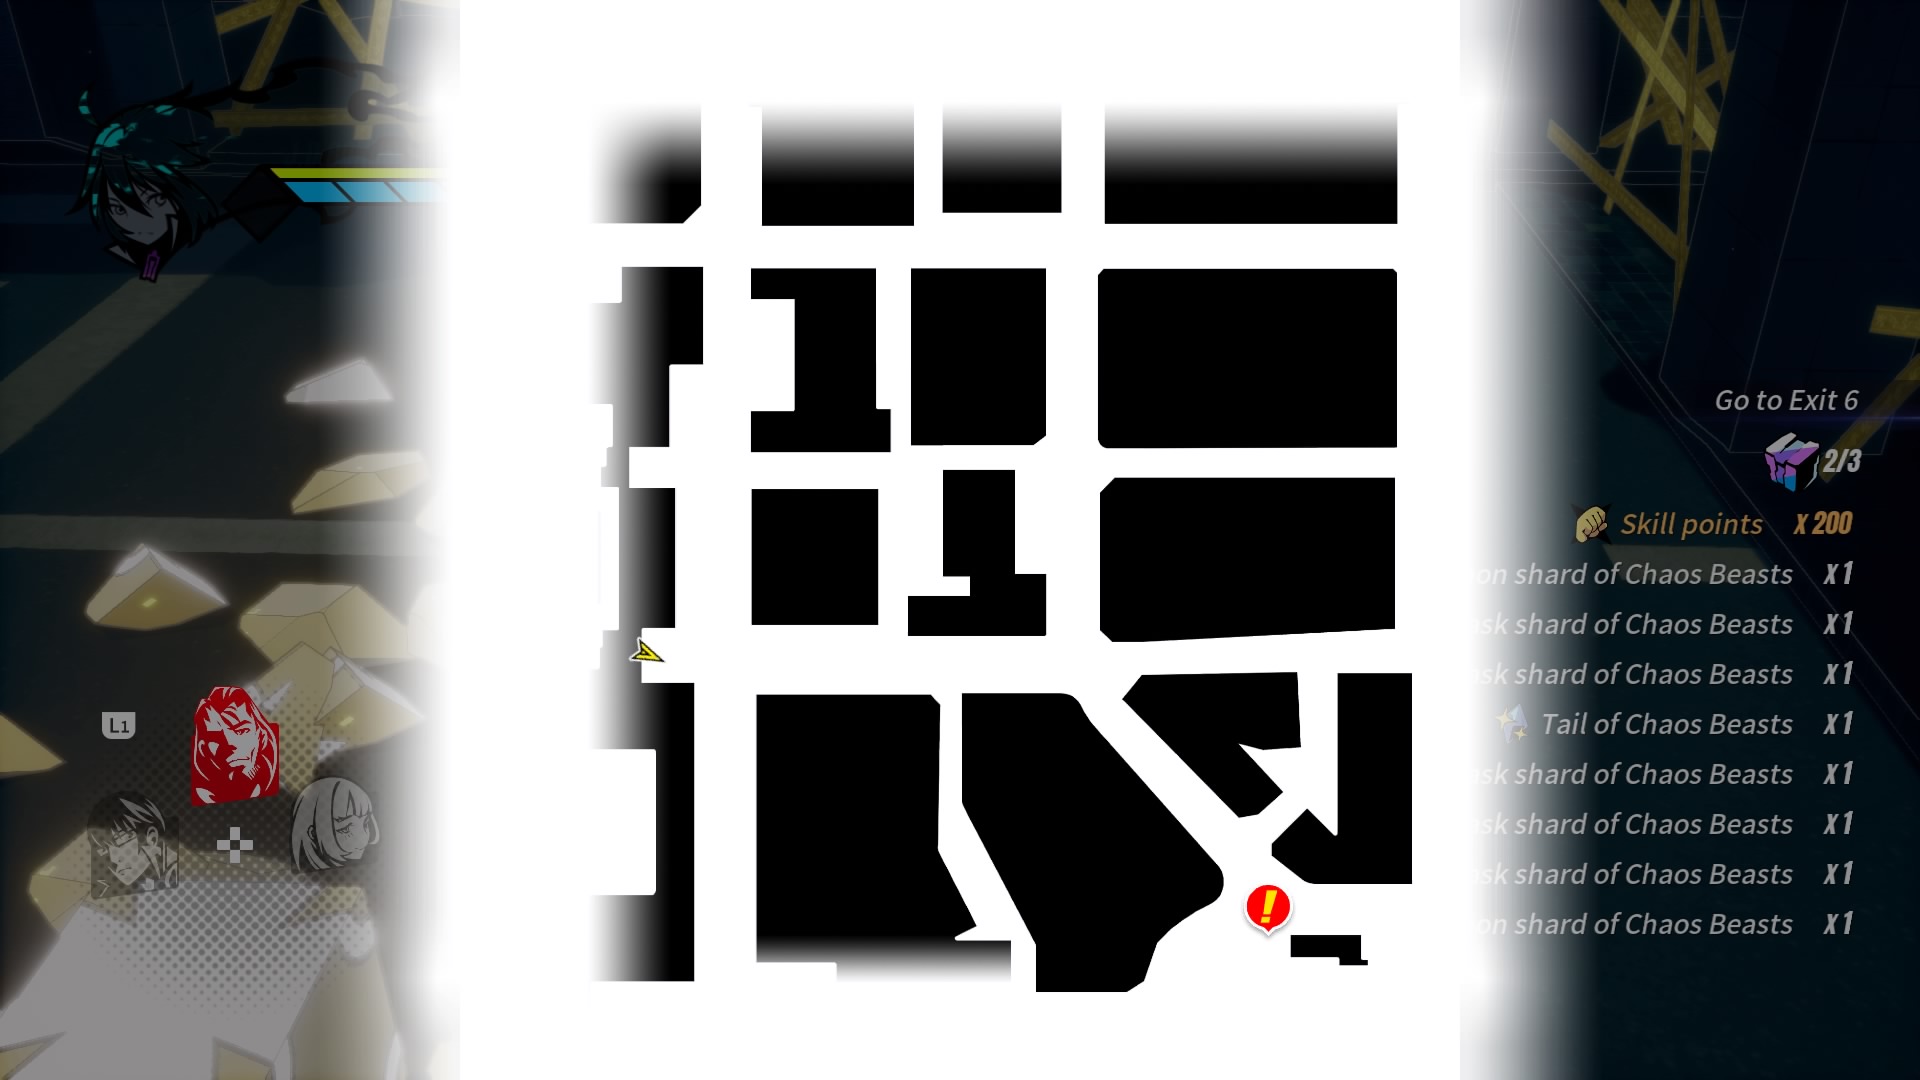 |
| A reward for completing the mission with an S Rank. [Normal] | |
| In the alleyway right before Exit 6. [Hard] |  |
| A reward for completing the mission with an S Rank. [Hard] |

![]() The Guardian of Ximending
The Guardian of Ximending
Clear all levels in S rank. Kunlun should give Yumo a letter of gratitude…
All levels includes: Story Missions [Normal and Hard], Training Missions [Normal and Hard], Boss’s Missions [Normal and Hard]. S Ranks are solely based on the time it took to complete the mission and nothing else. So rushing objectives should always be your main objective. Refer to stage 2 for tips.

![]() Can you keep up with my rhythm?
Can you keep up with my rhythm?
Power up Bahet to the max in SKILL menu.
Refer to Heeeeeya! I can beat ten guys!![]()

![]() Everything about the magical girl
Everything about the magical girl
Acquire all contents in Gallery.
all contents means when you chek the book on the table in Tumaz Mart all the subcategories are completely filled. These subcategories are filled by beating enemies, drawing lotteries, completing link quests, and doing all gacha’s. As long as you’re obtaining all the other trophies this will come with those. This trophy will not pop when you acquire them all though, you must view the book for this trophy to pop.

![]() Aim for the stars
Aim for the stars
Complete “Final Training with Viada”
Refer to Double Star Lion Roar![]()

![]() Broken Chords
Broken Chords
Complete “Final Training with Bahet”
Refer to Double Star Lion Roar![]()

![]() Double Star Lion Roar
Double Star Lion Roar
Complete “Final Training with Leo”
Training Missions are unlocked after viewing “Paw Events”. You’ll find them on the map by a Blue Circle with a Black Paw. These events will unlock a new store and a Training Mission. The events are unlocked when a characters Affection fills the circle up. Each character has 4 events to see in total. The difficulty with Training Missions though is that only specified characters can be used.
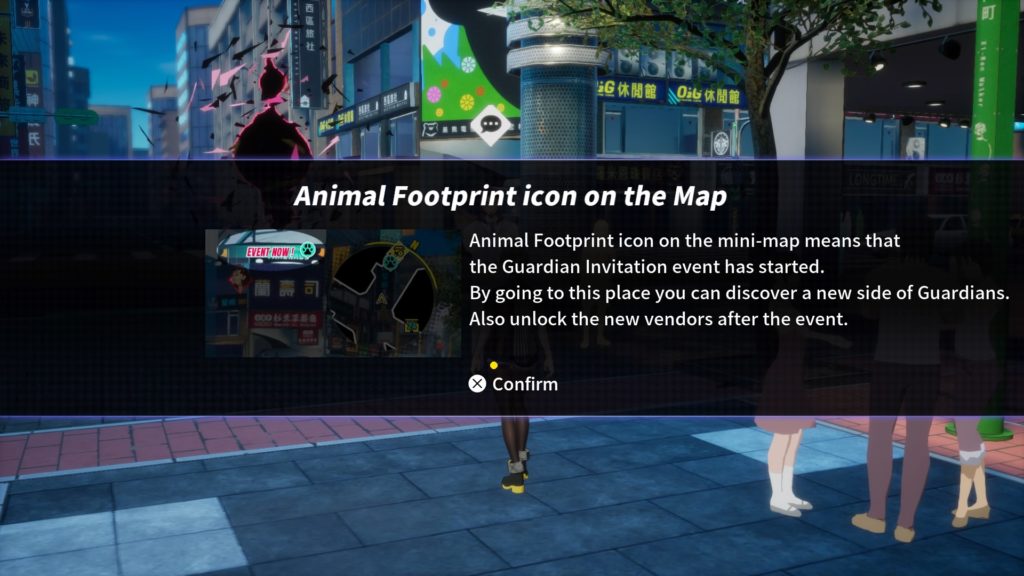
The Pawprint to look for 
The Training Quest submenu Icon 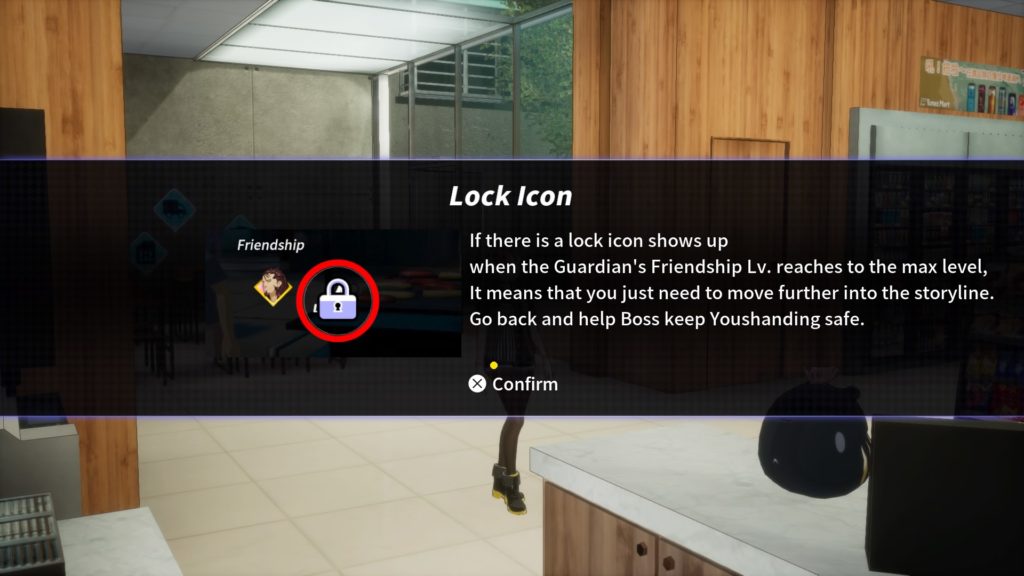
Character affection is tied to story 
A filled affection bar 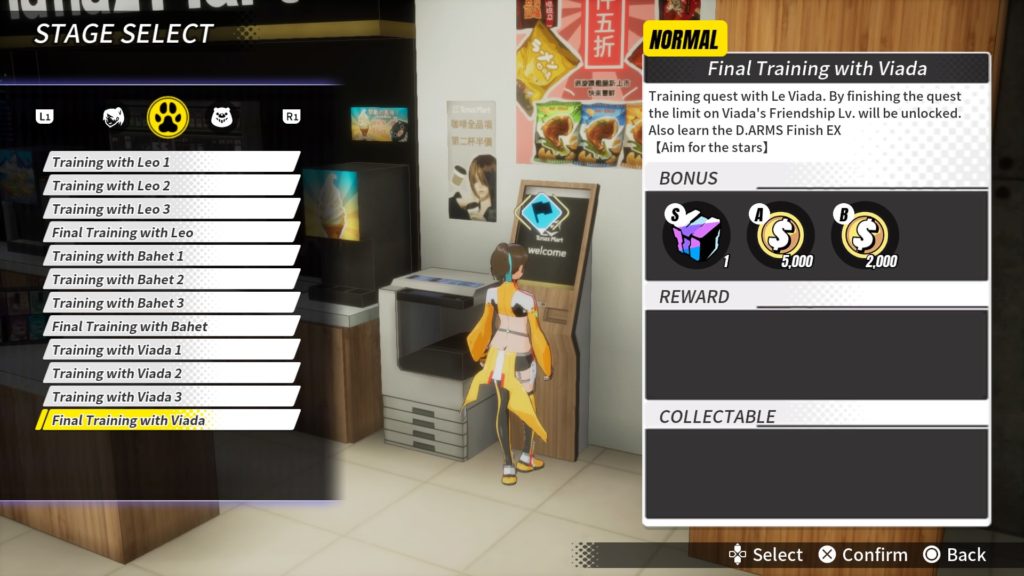
The list of missions

![]() The considerate Boss
The considerate Boss
Complete “Boss’s wayward request”
Boss’s wayward request is the final mission Boss will give you. As you progress through the story you will unlock Boss Missions (You’ll have to comeplete them to unlock the next one as well). So check back in-between missions often. Boss Missions aren’t like regular missions, some of them incorporate platforming, or procedures to go through. Though the are all short and not many mission to do. the wayward request is the 5th quest in her line-up. Boss’s Missions usually reward discounts and items from her store.


![]() When the peach is ripe
When the peach is ripe
Get the tree in Tumaz mart to bloom.
The tree this trophy refers to is the Peach Tree inside the Tumaz Mart garden. it takes A LOT of water. You can only water it once between missions. So make it an absolutely necessary habit to water this tree after every mission. After completing all the story missions, boss’ missions, and training missions the tree still wasn’t watered enough, to give you an idea about the amount. If you water the tree after every mission, you’ll unlock this early post-game as you’re wrapping missions up.
As you water the tree you’ll notice the text change as the tree goes through stages.
Beginning tree stage 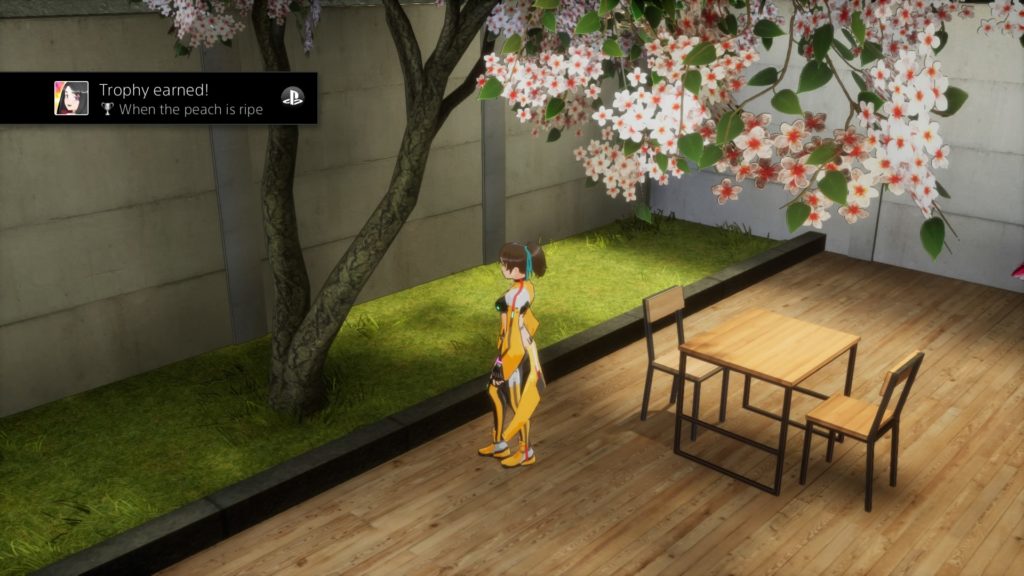
Fully bloomed tree

![]() Good man, good deeds, good Yumo
Good man, good deeds, good Yumo
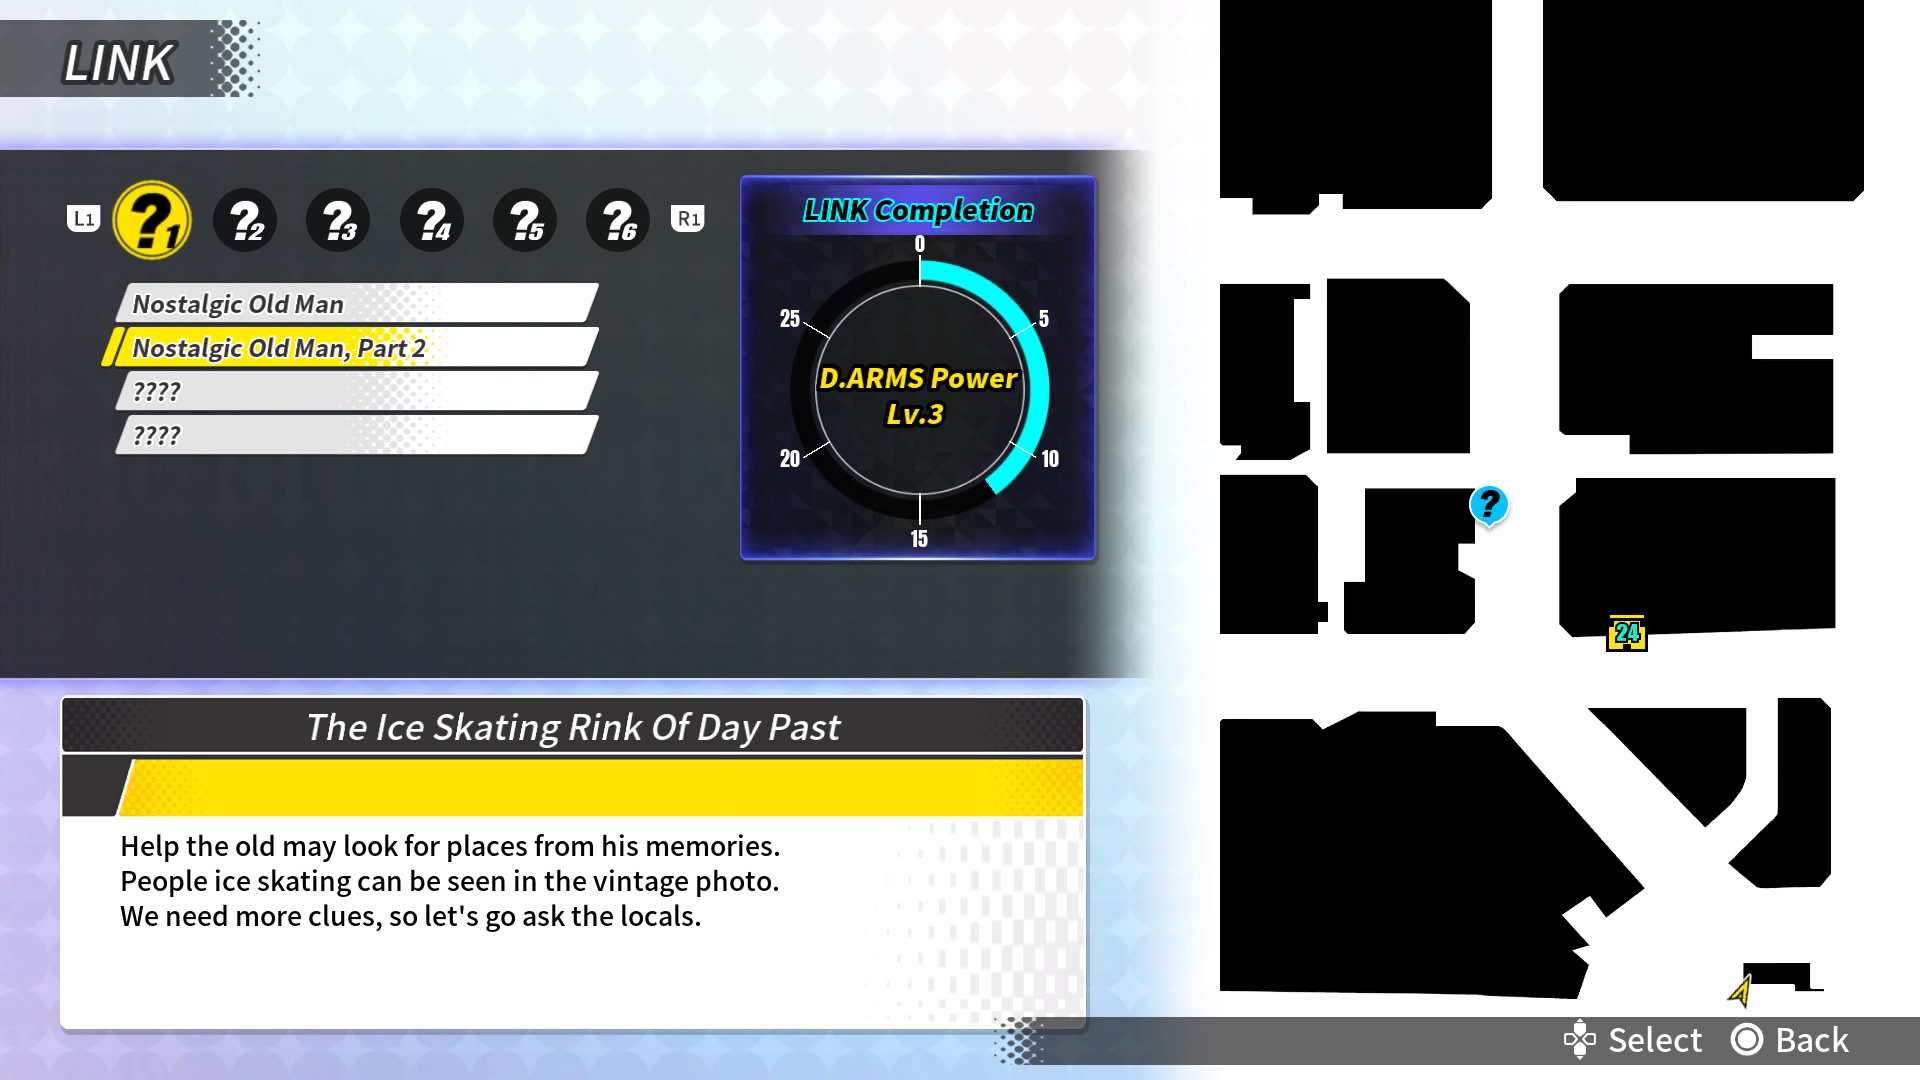
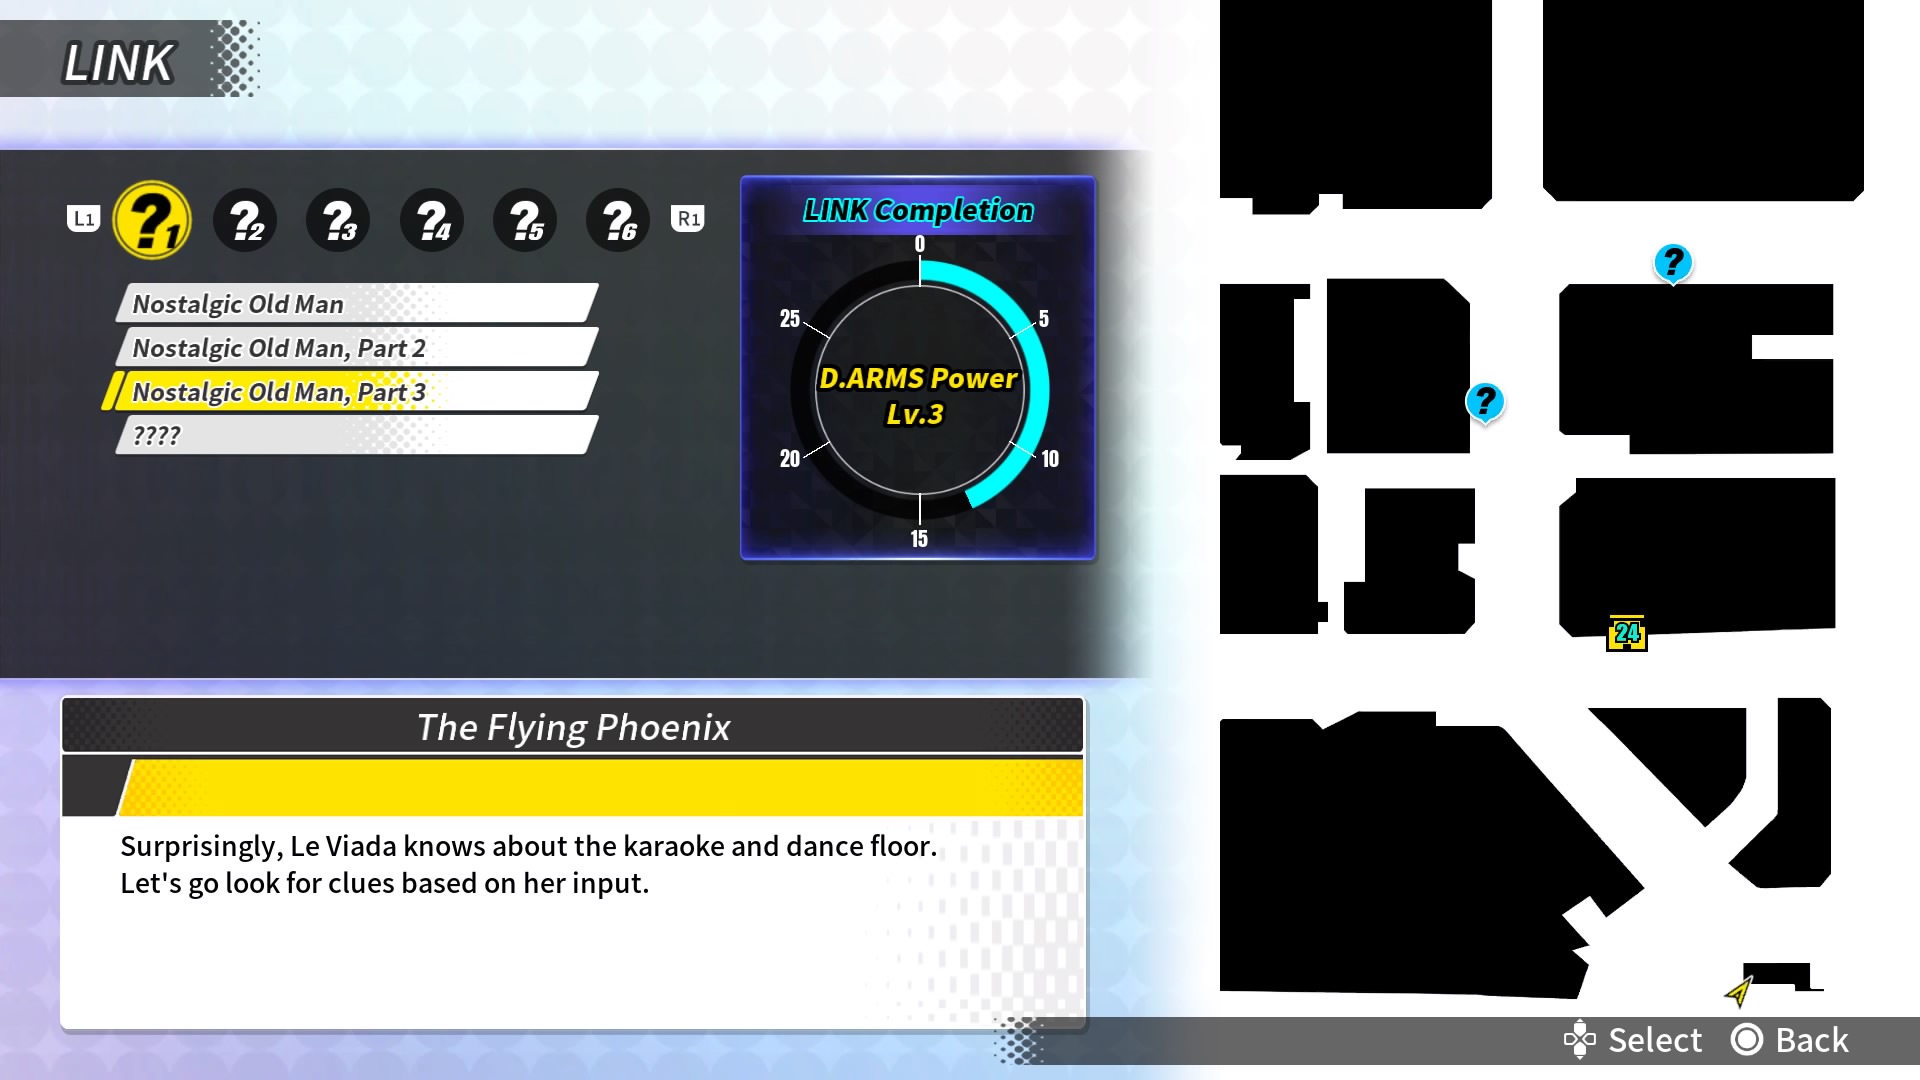
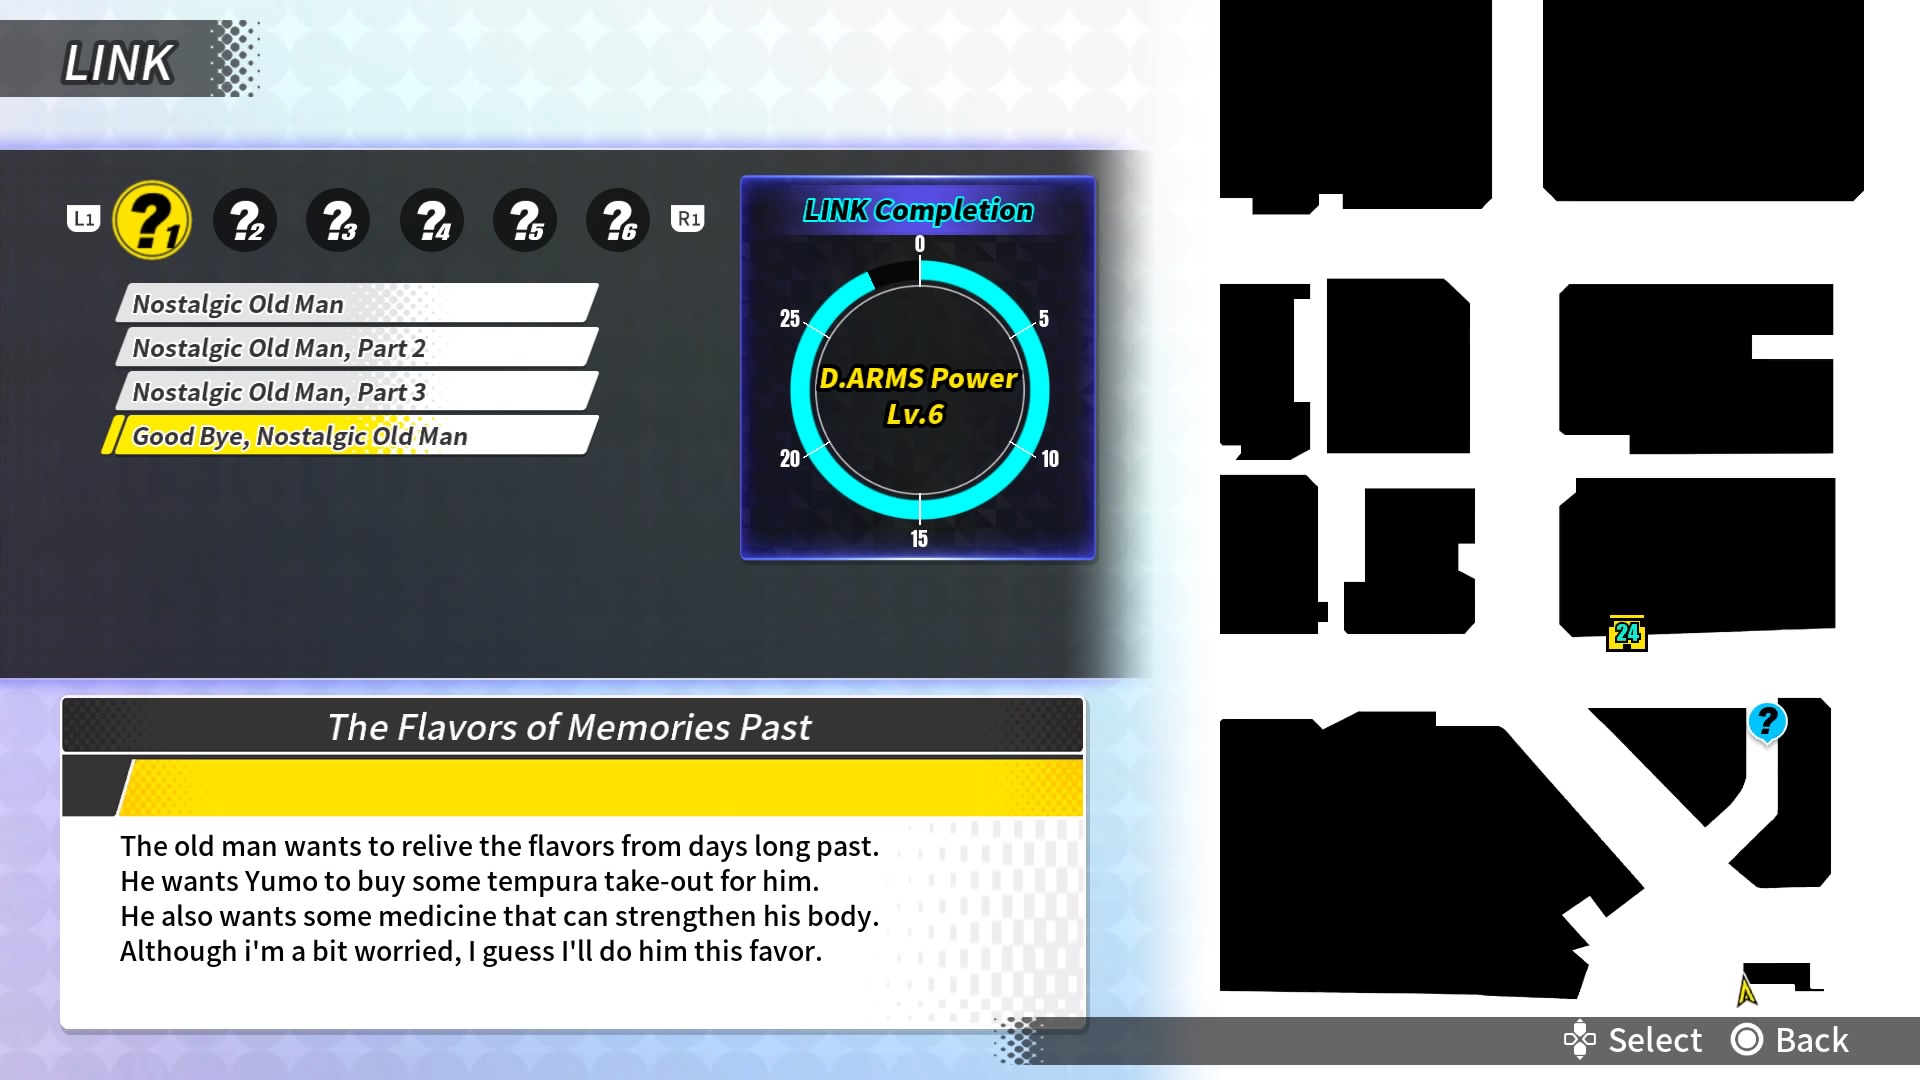
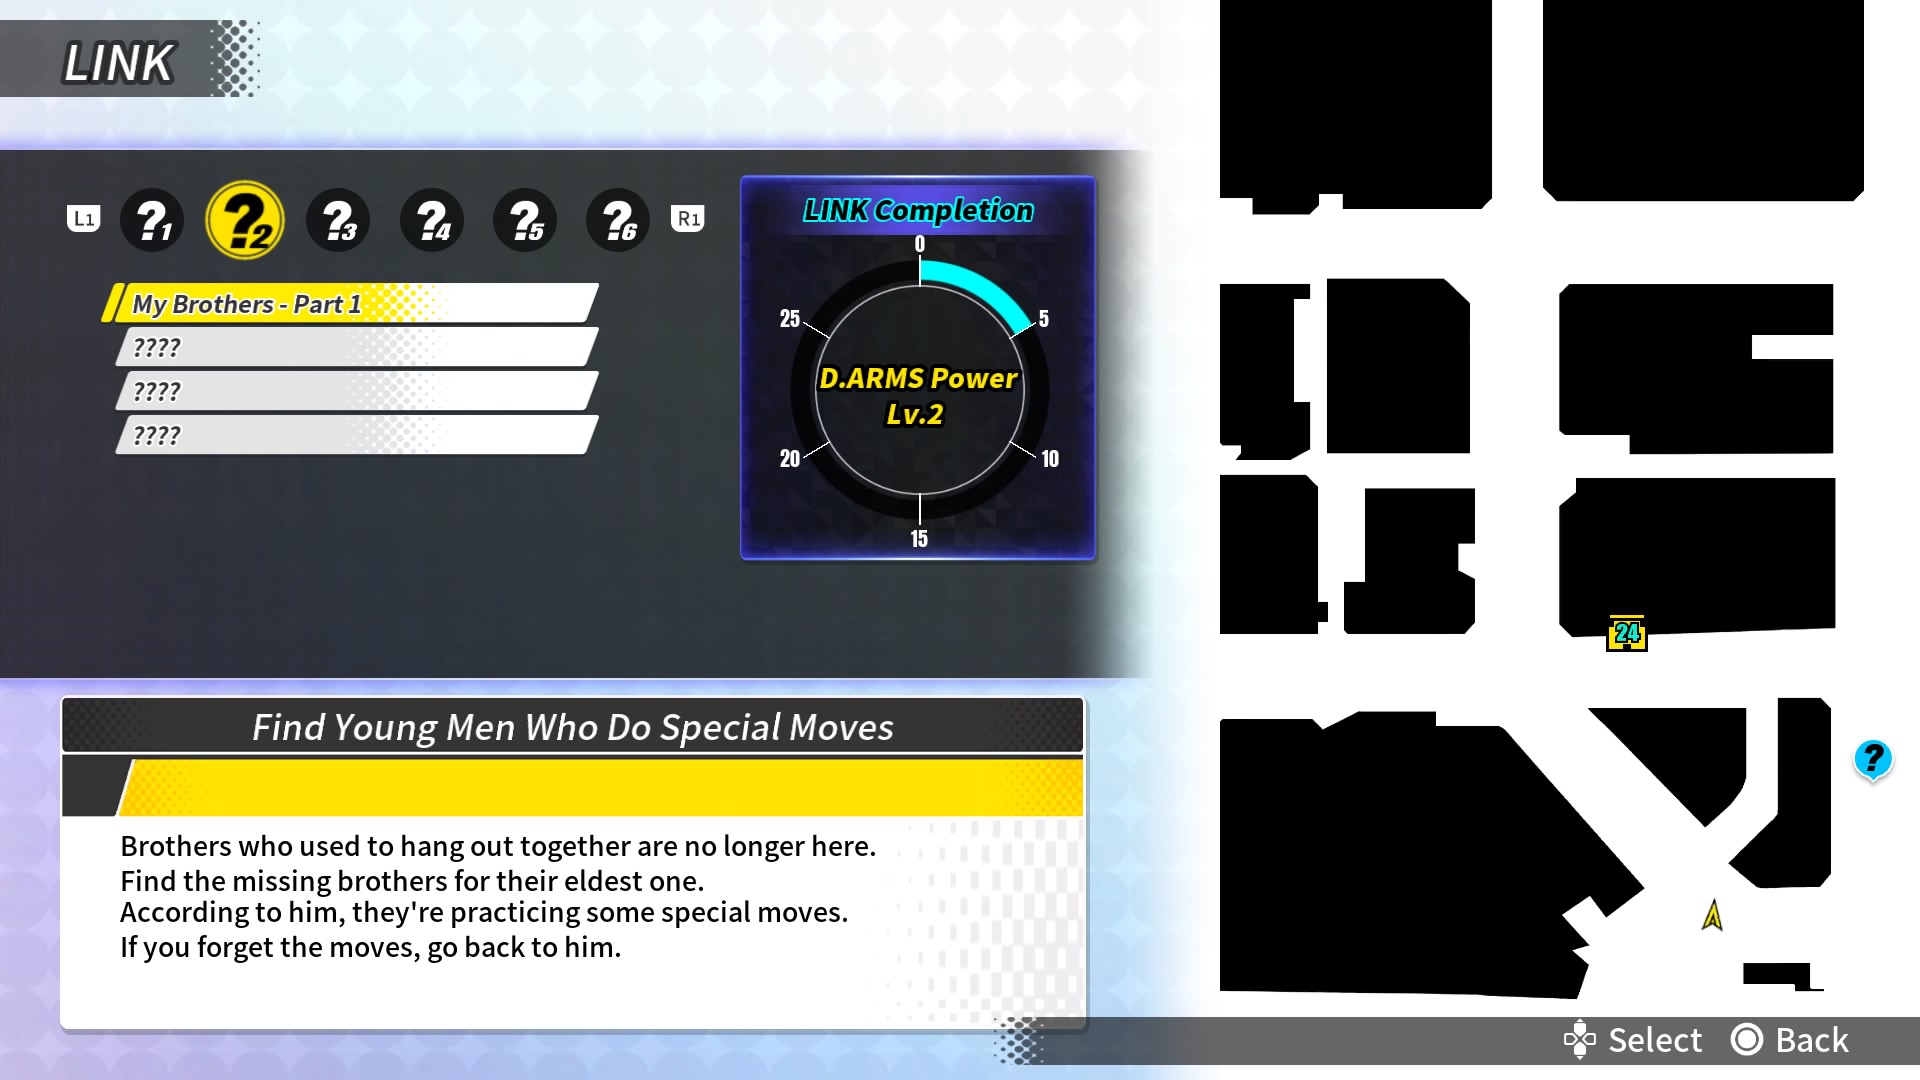
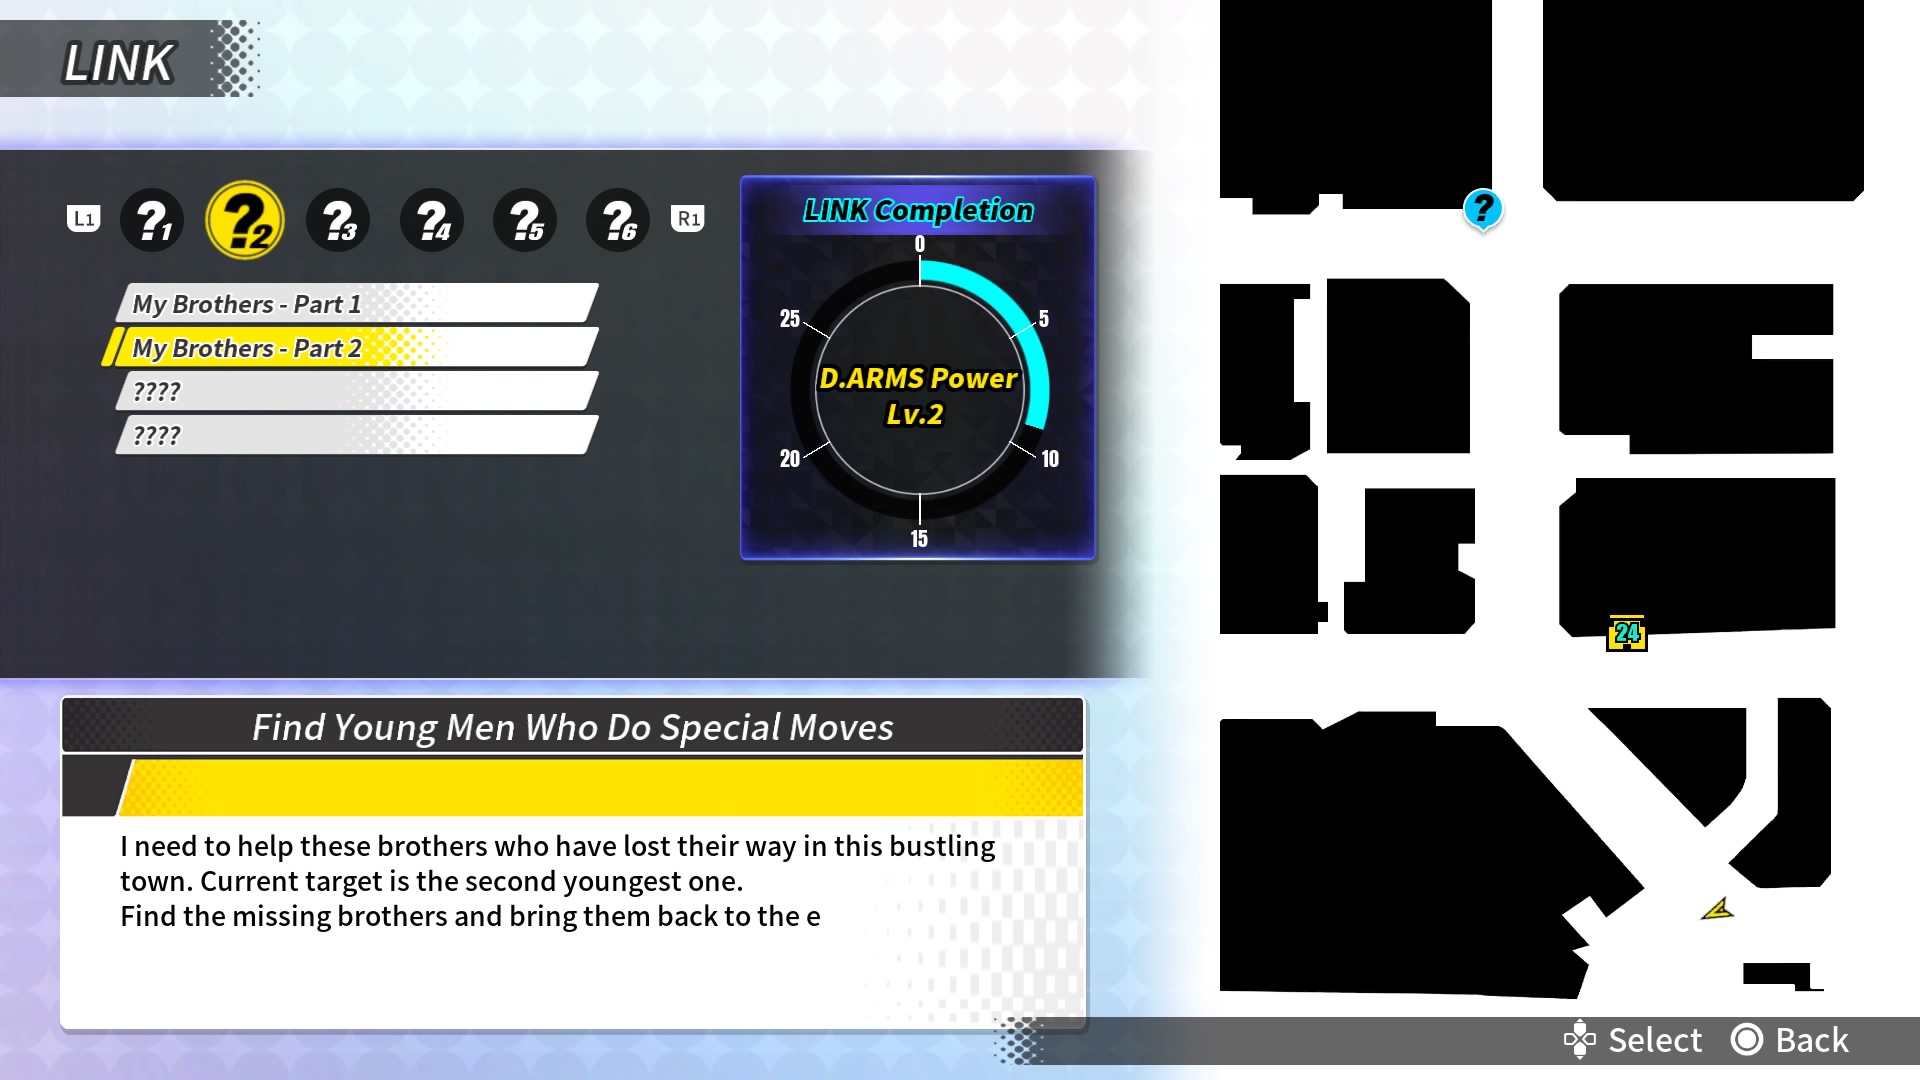
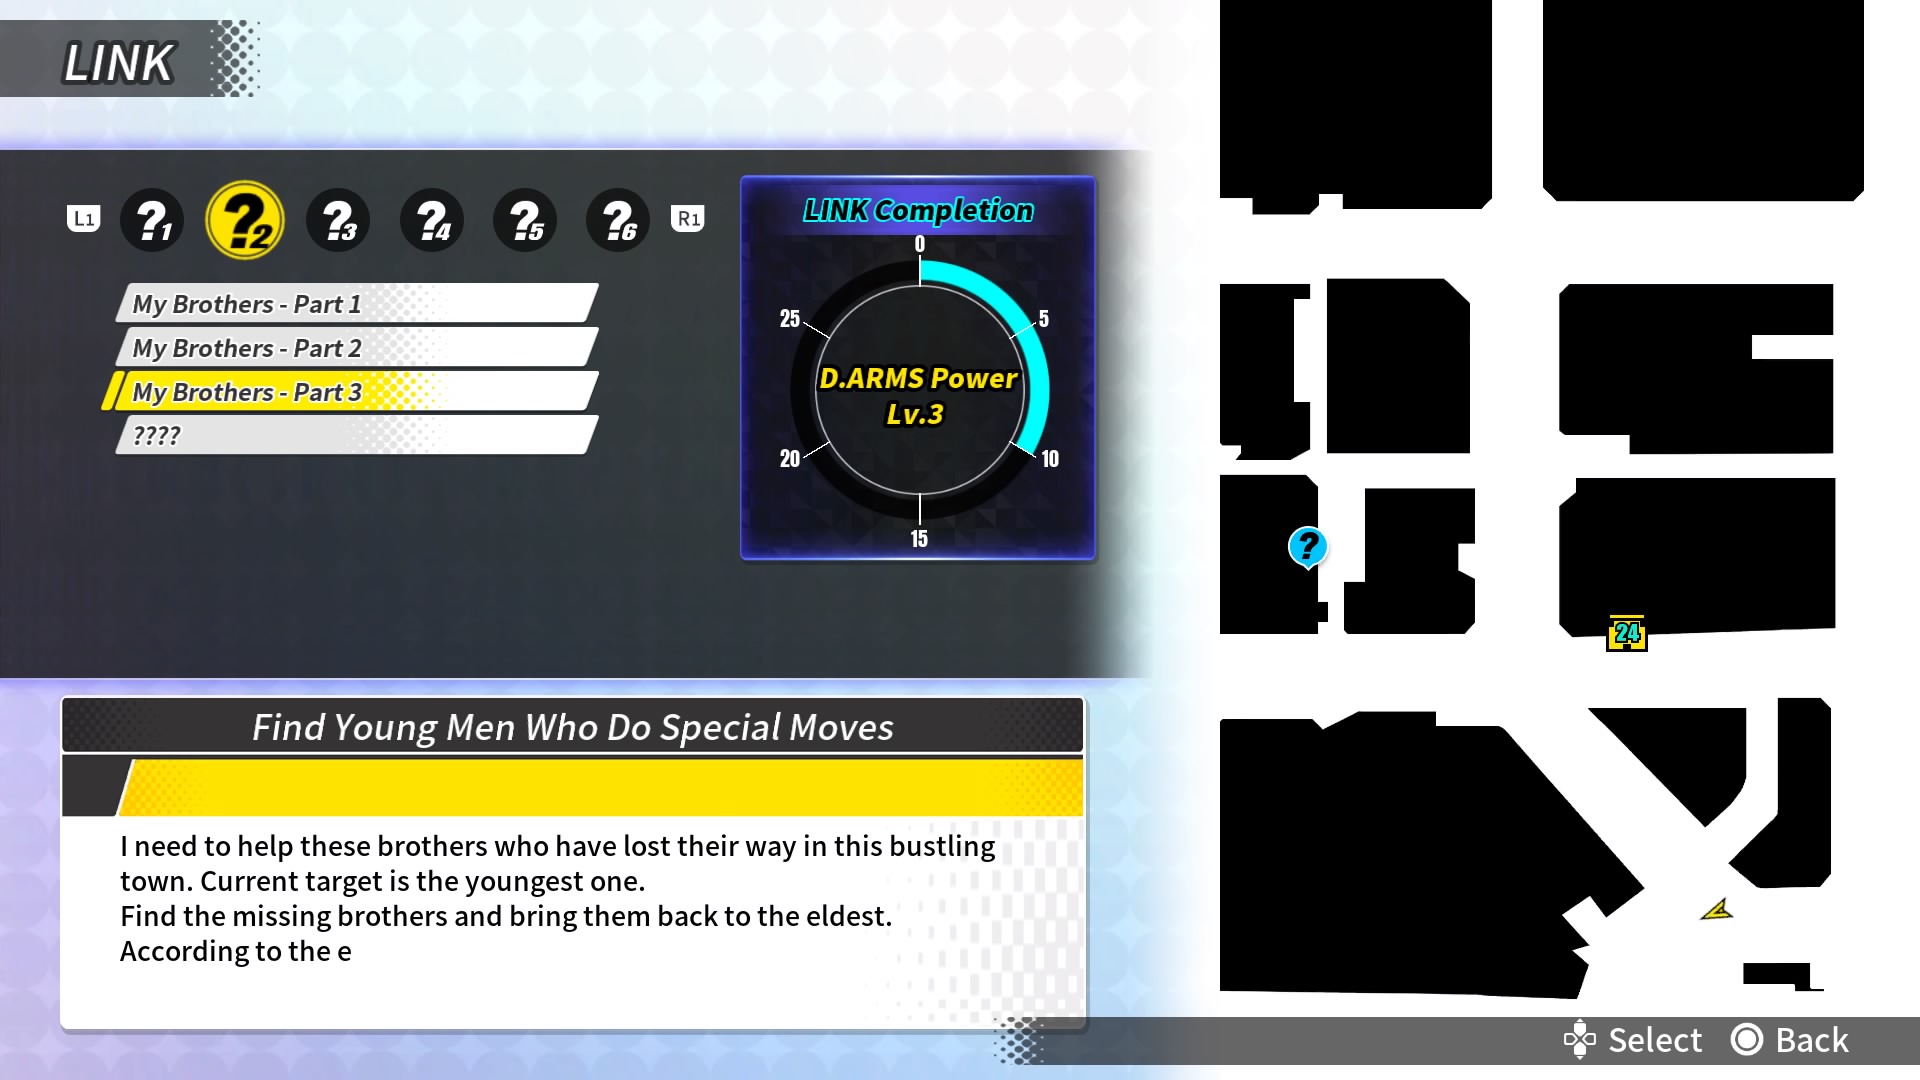
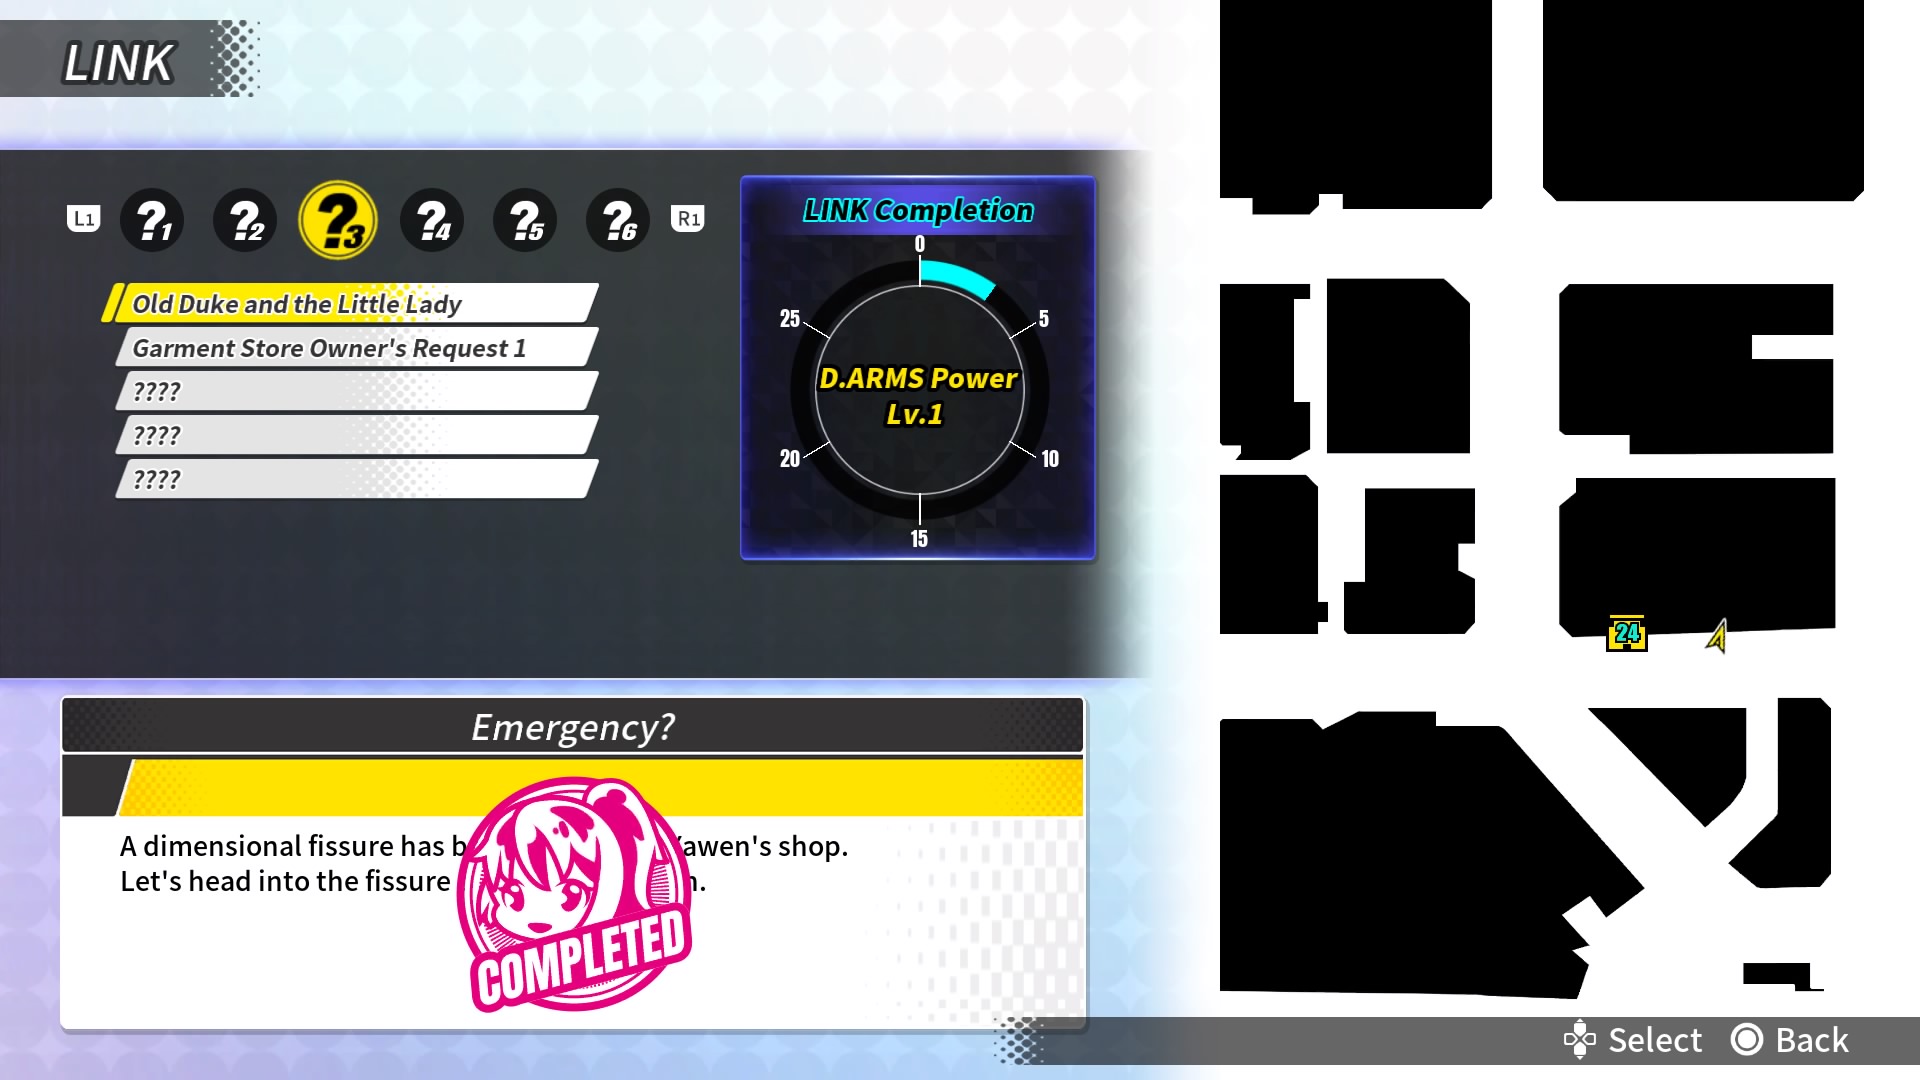
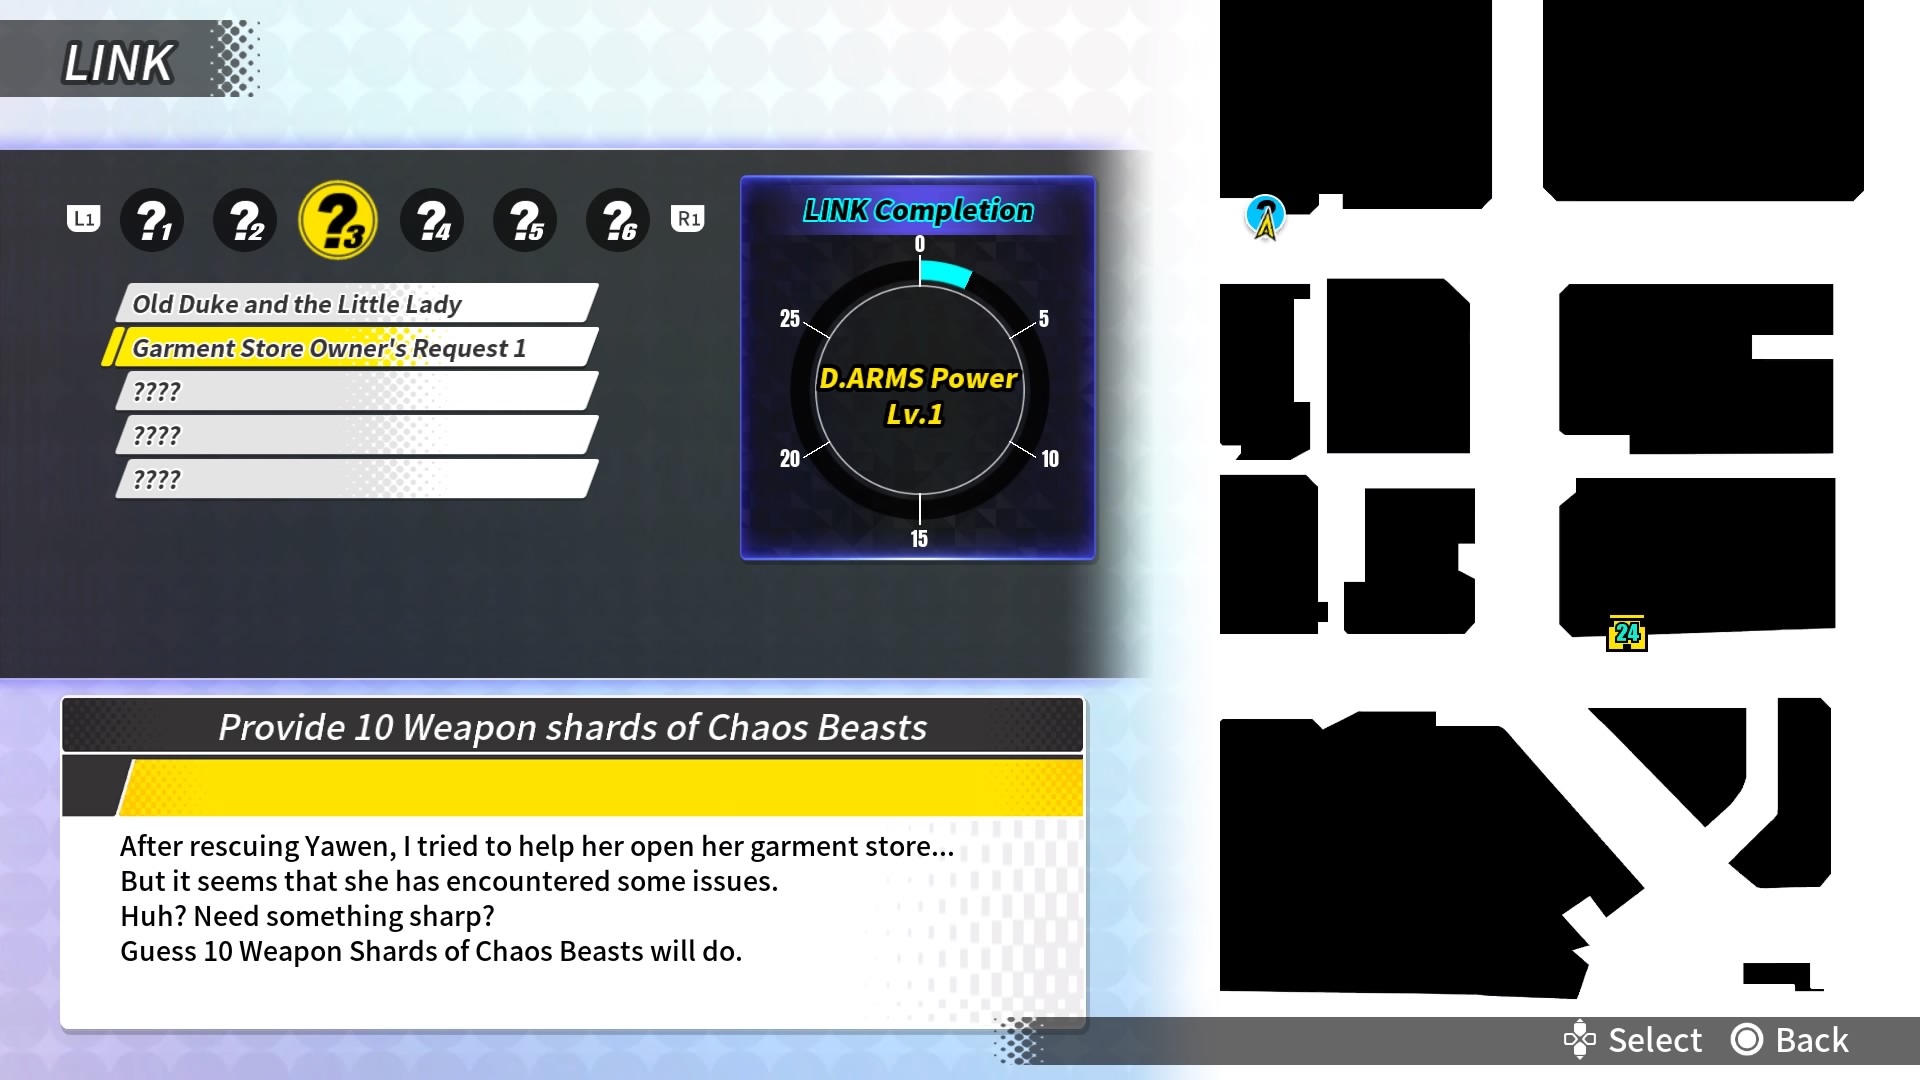
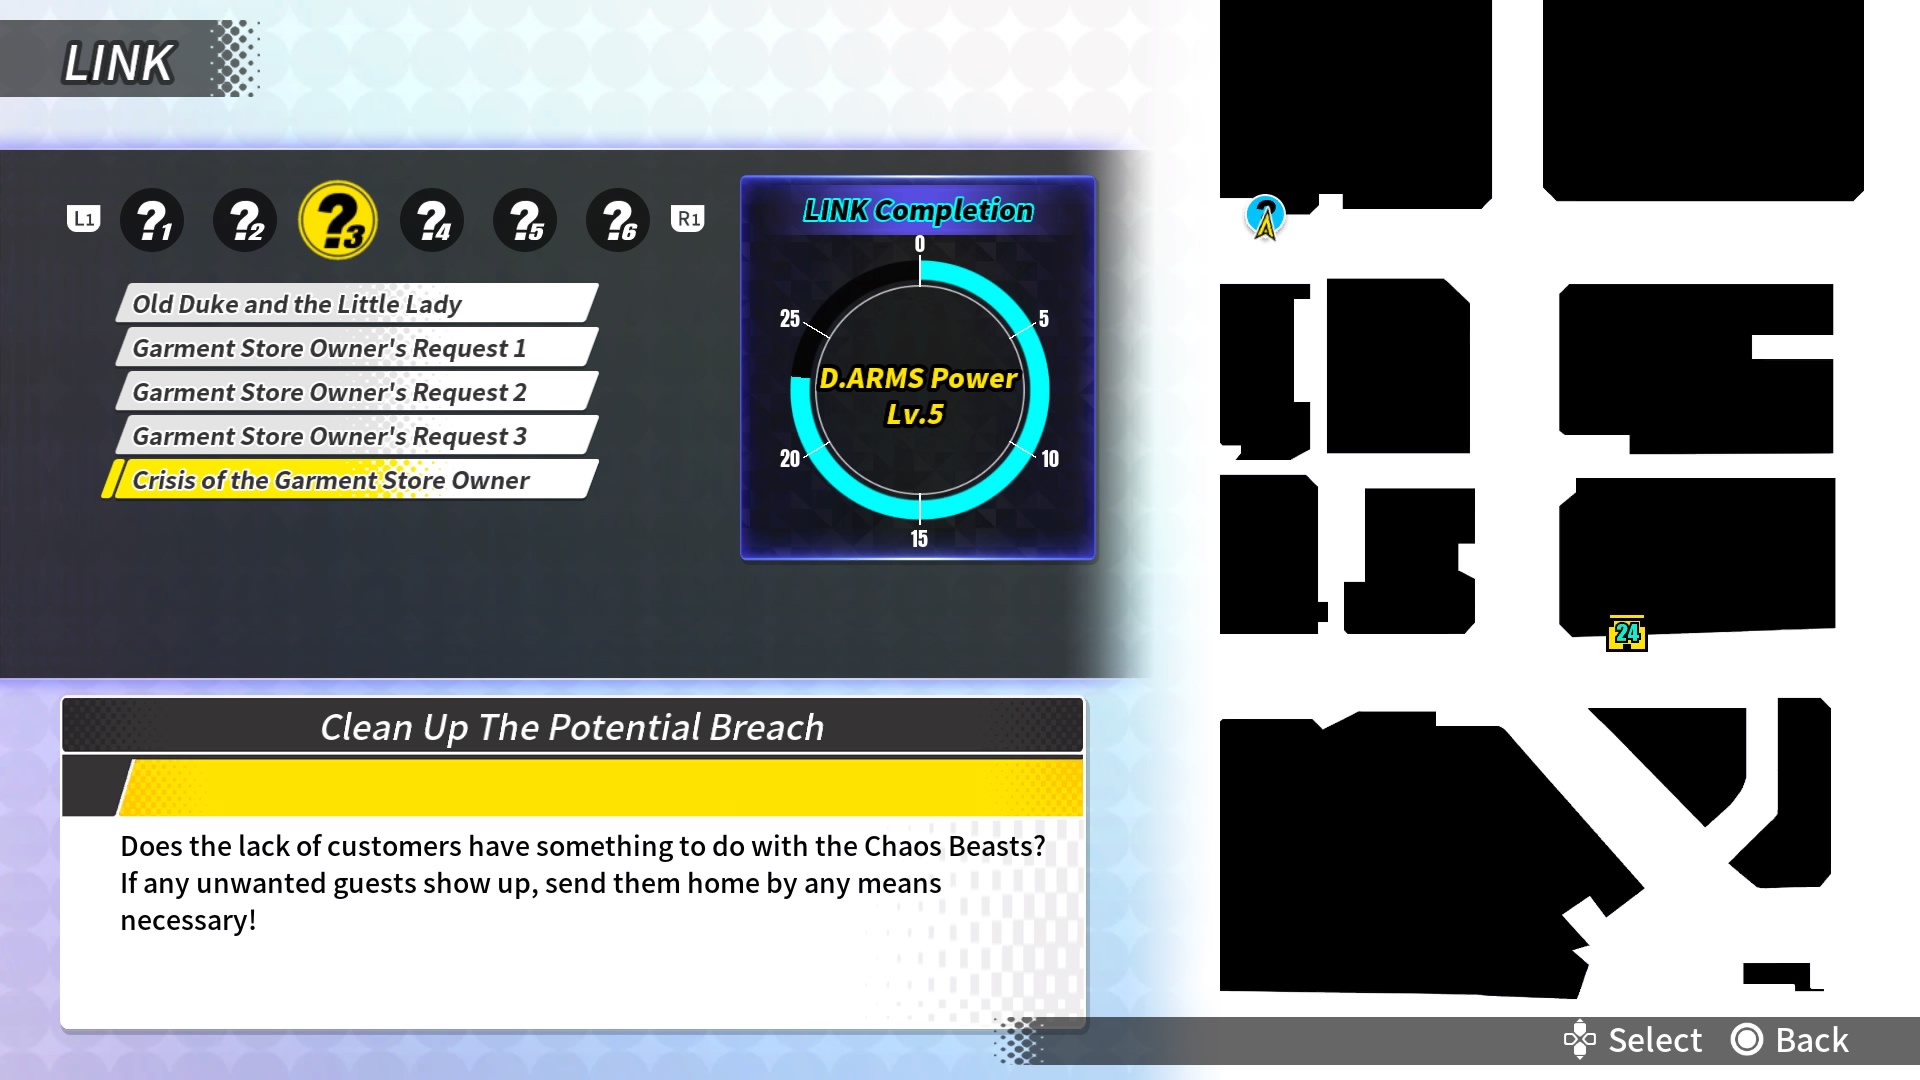
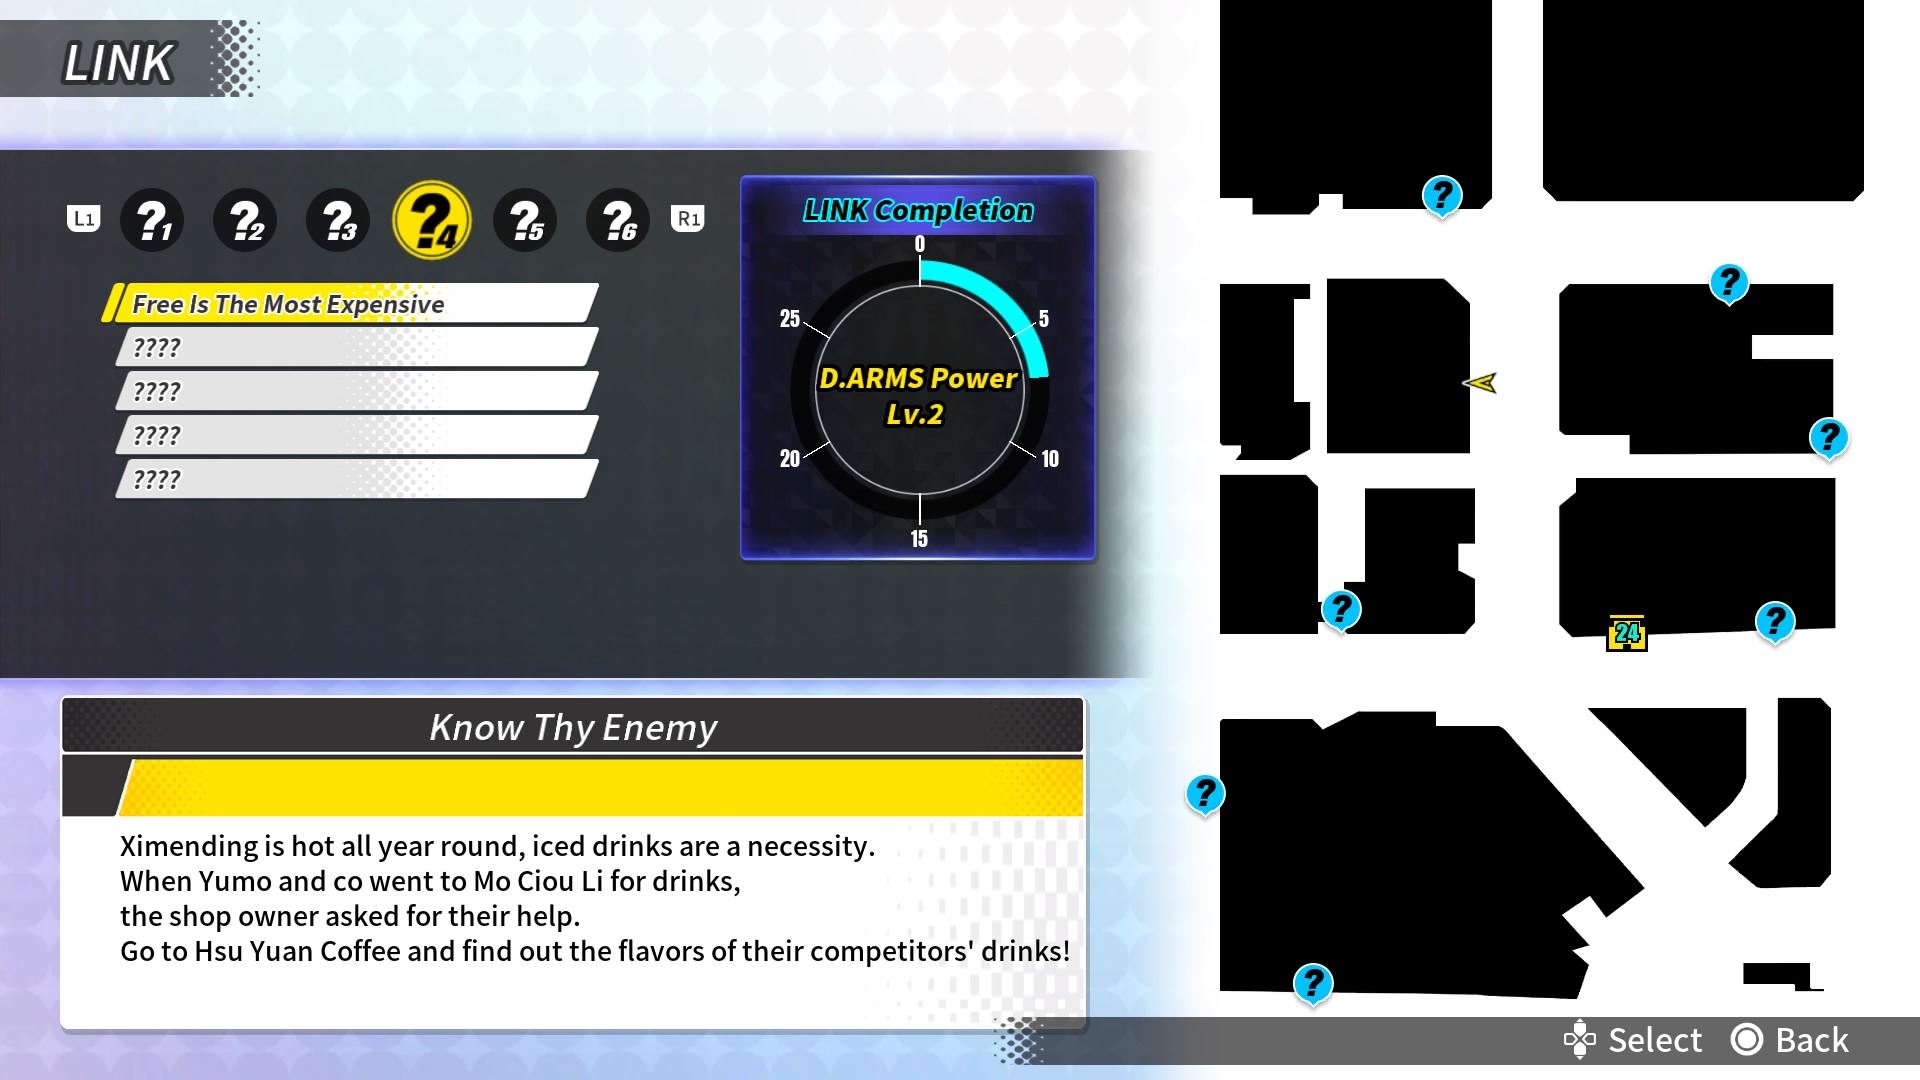
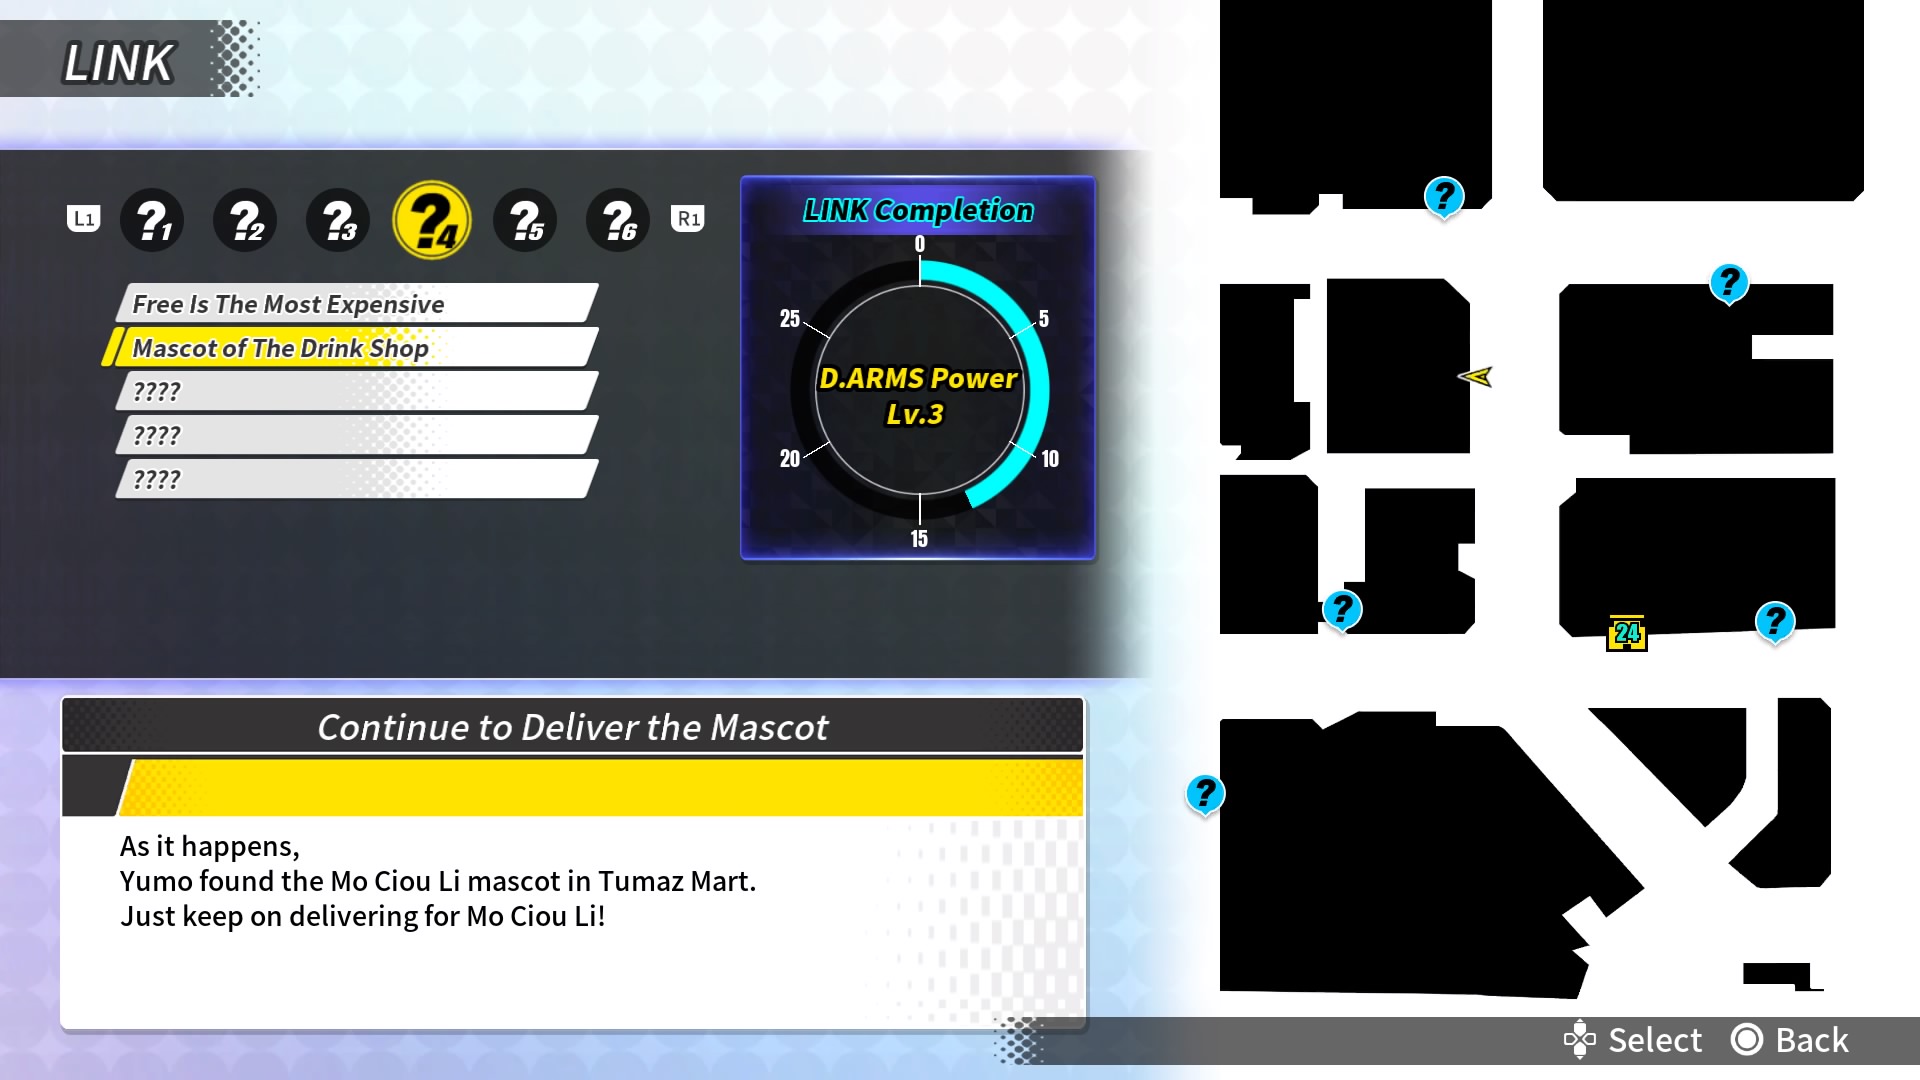
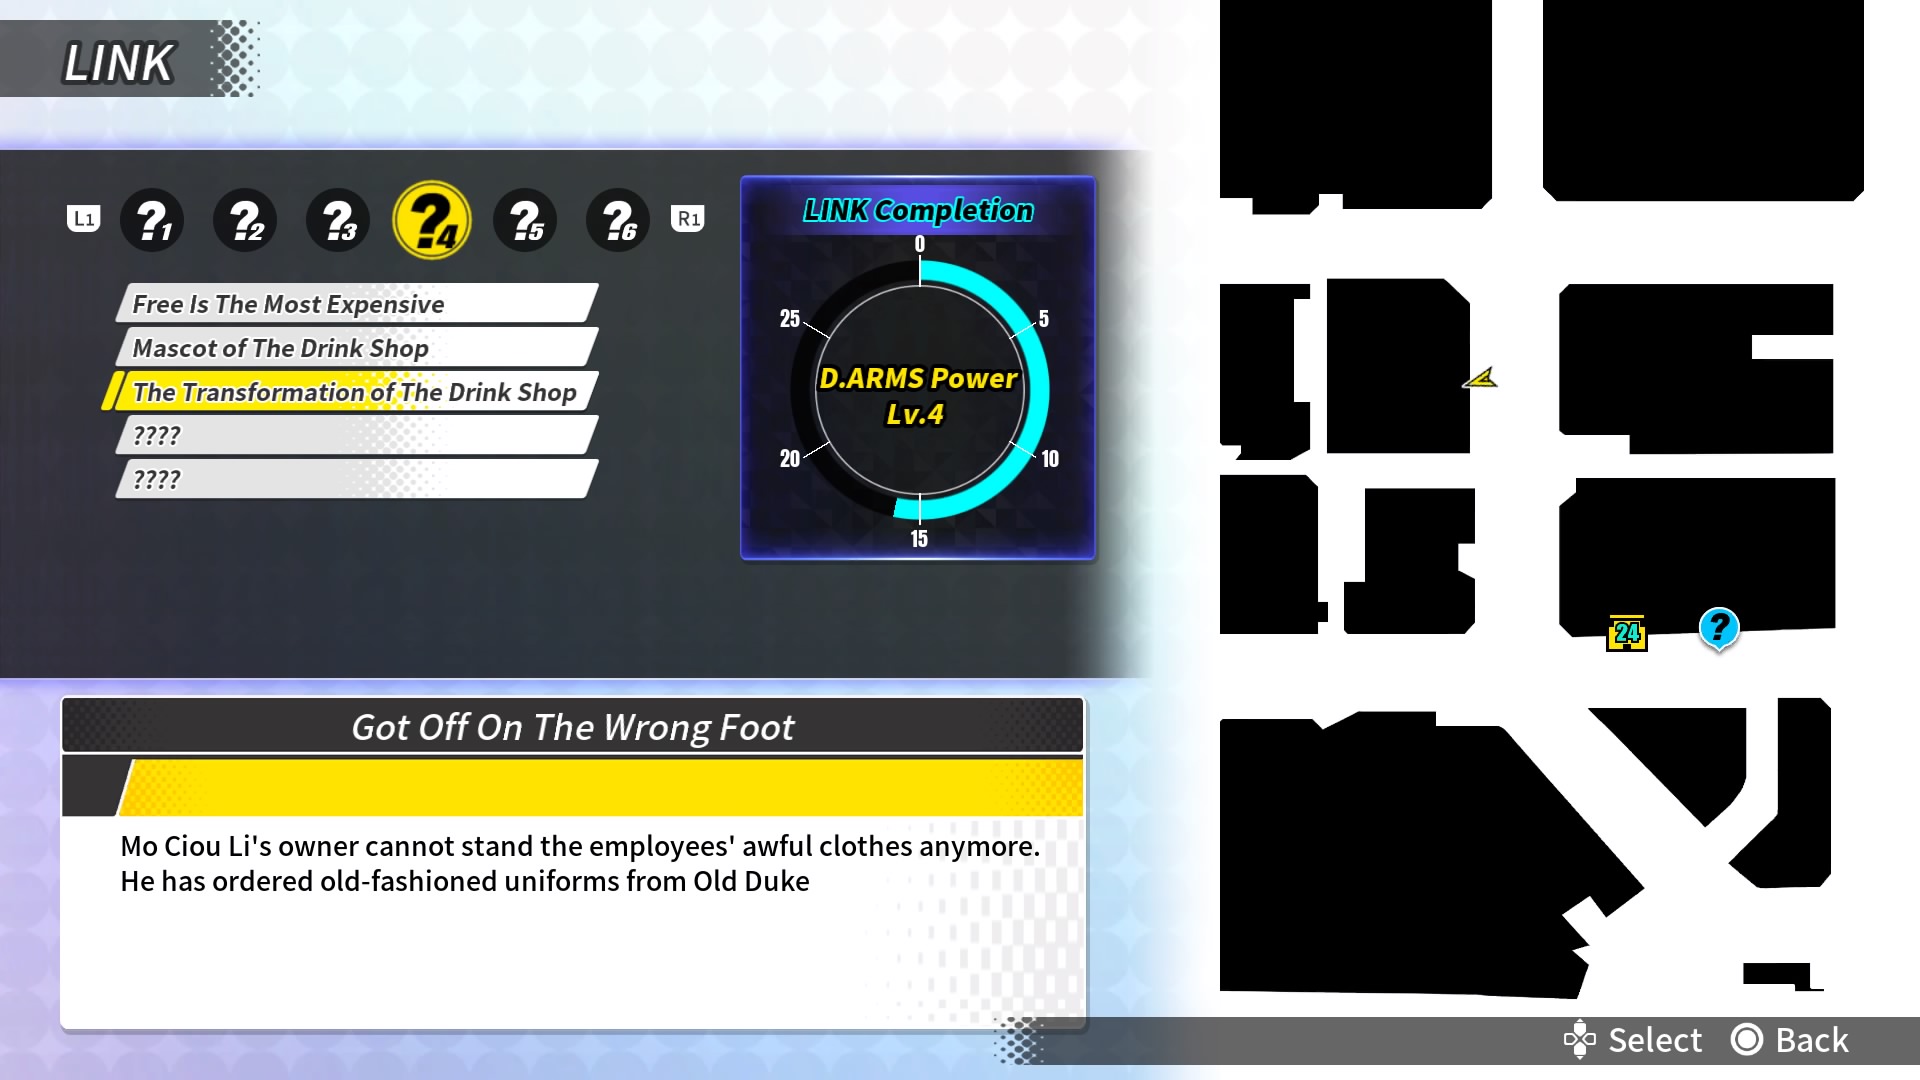
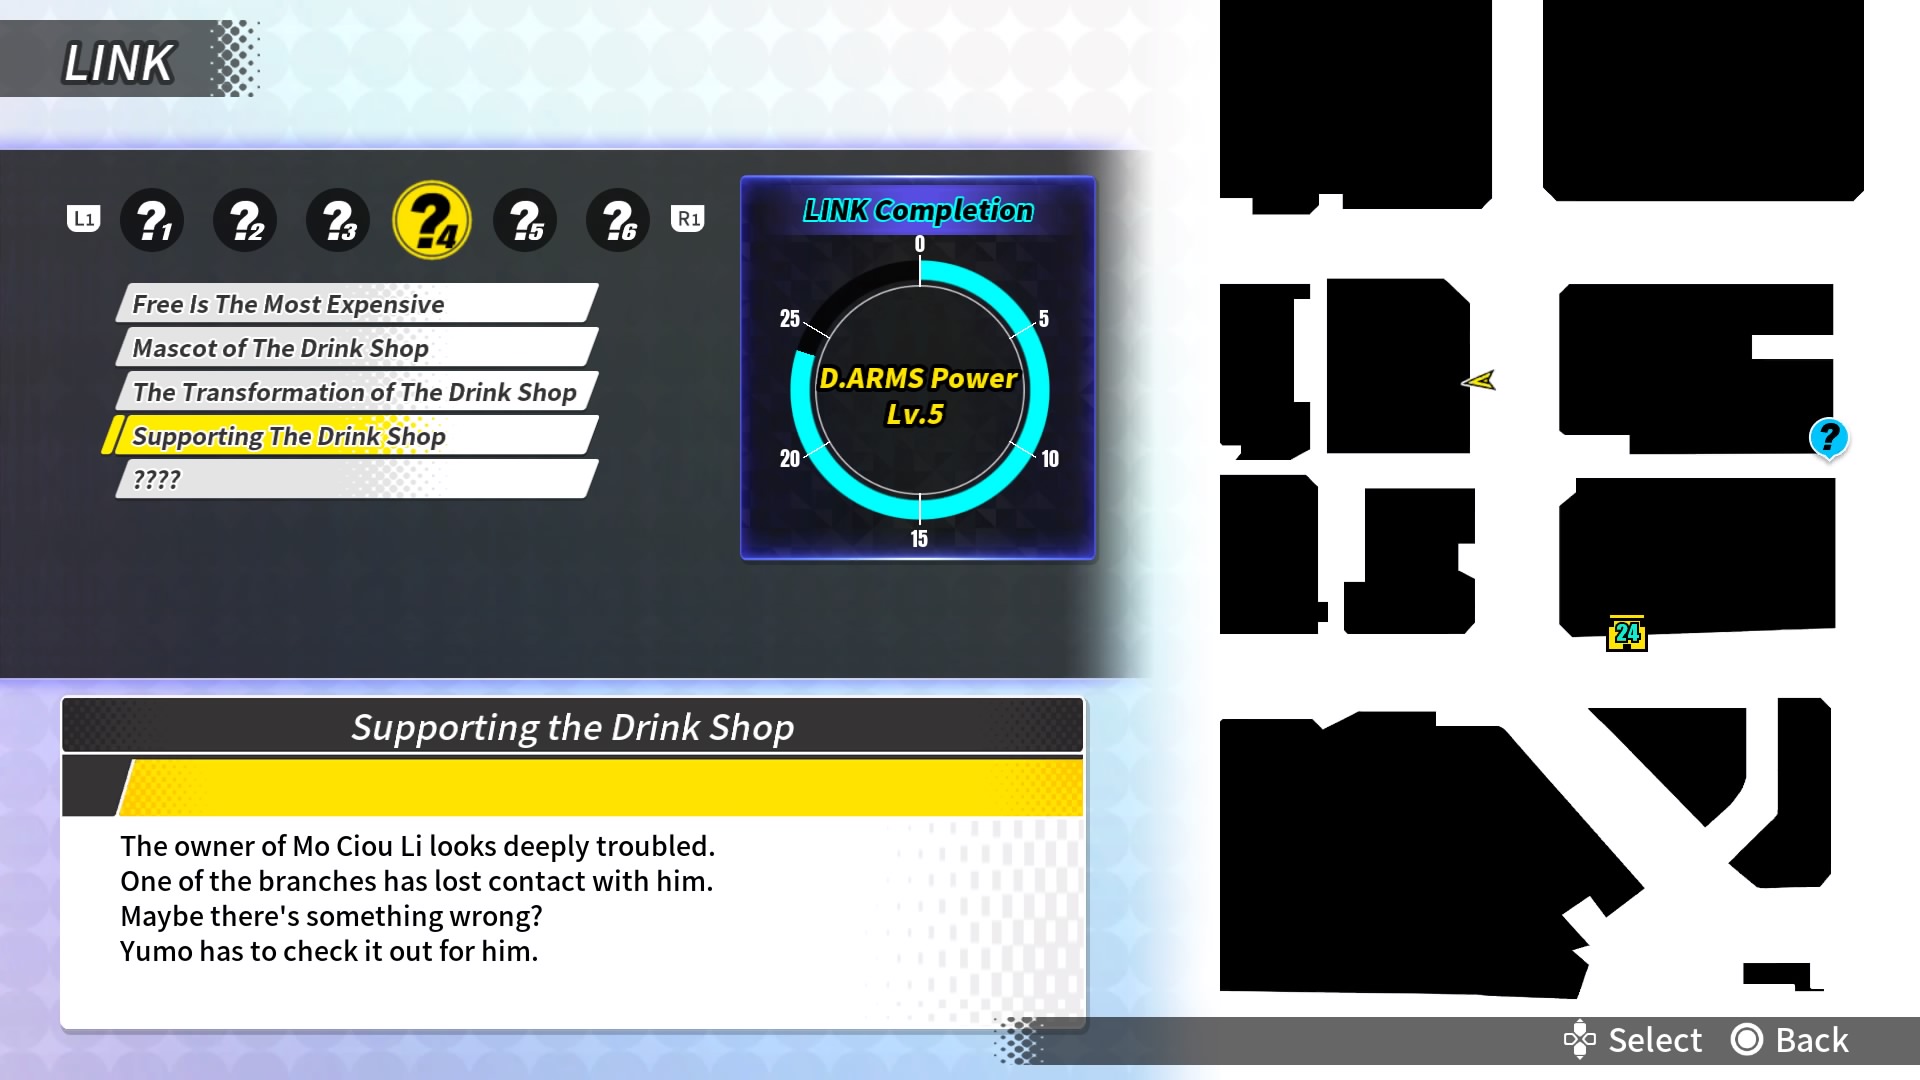
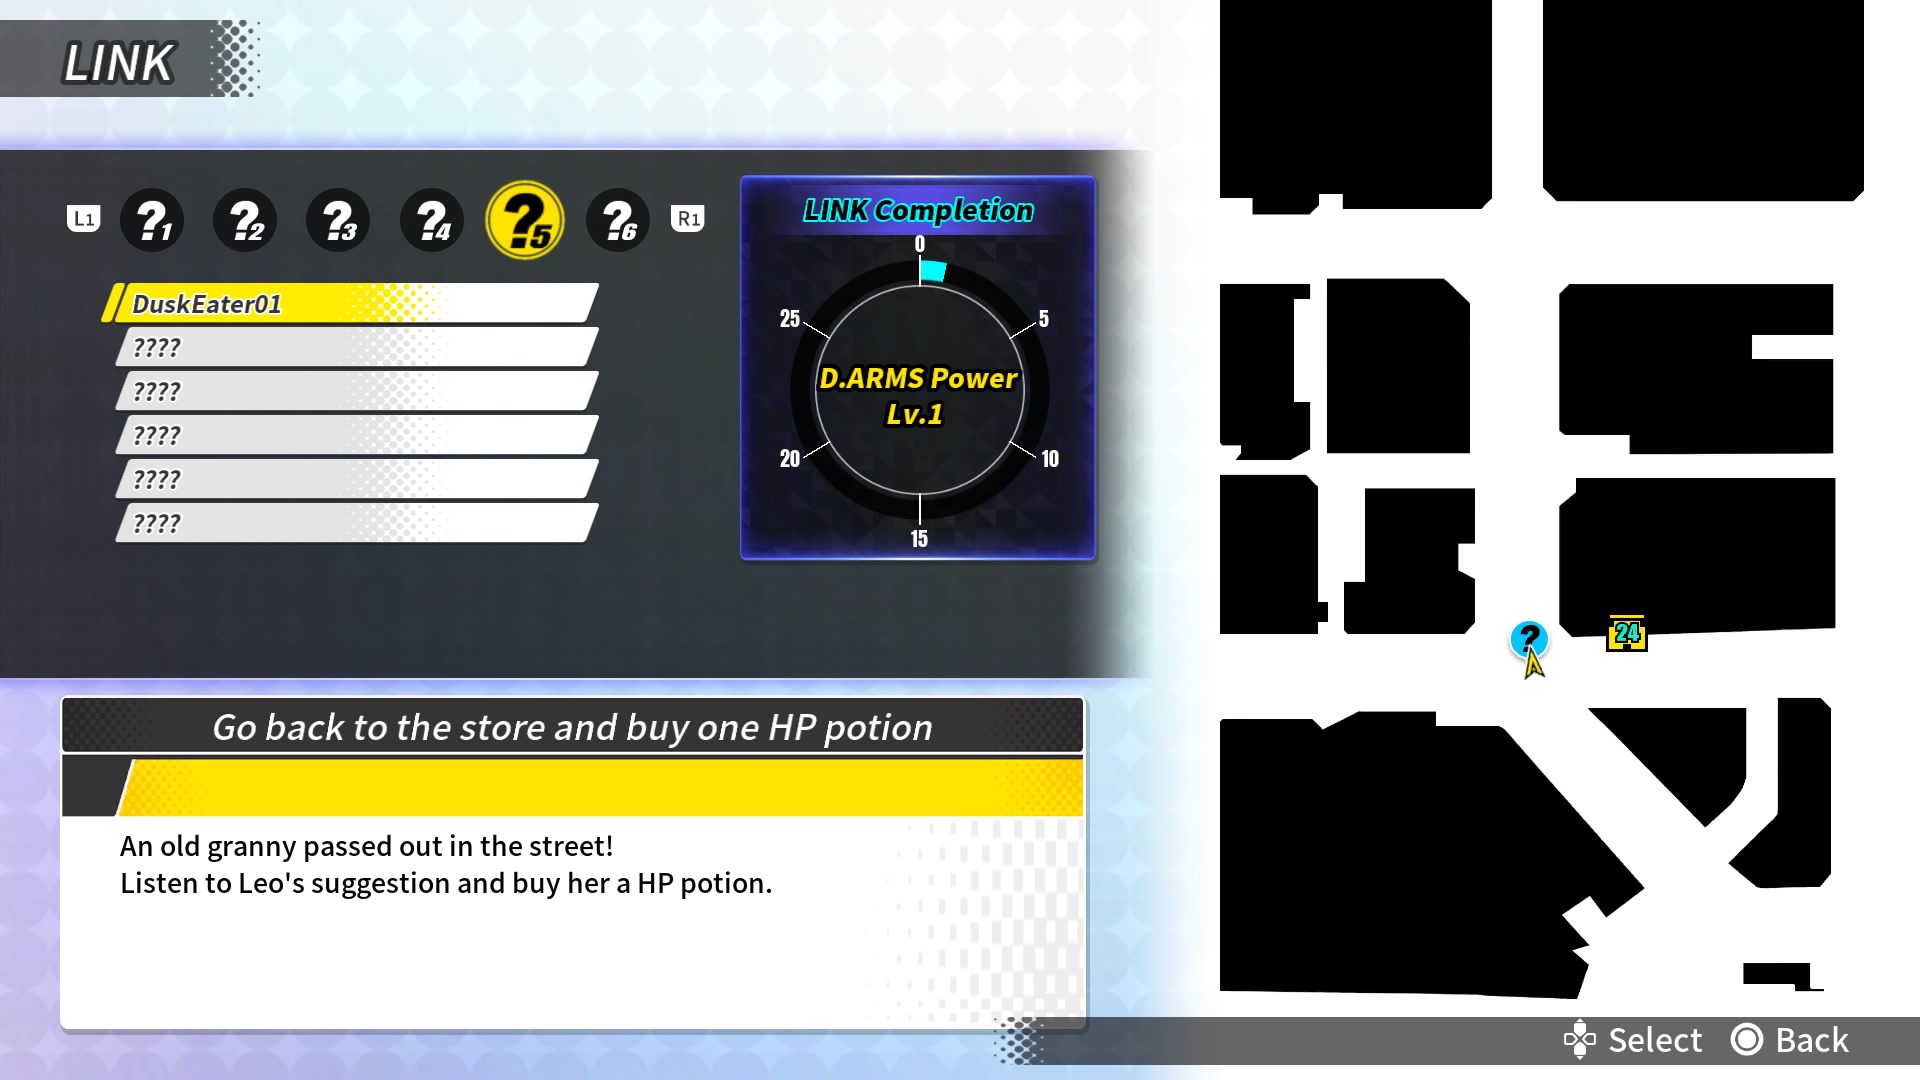
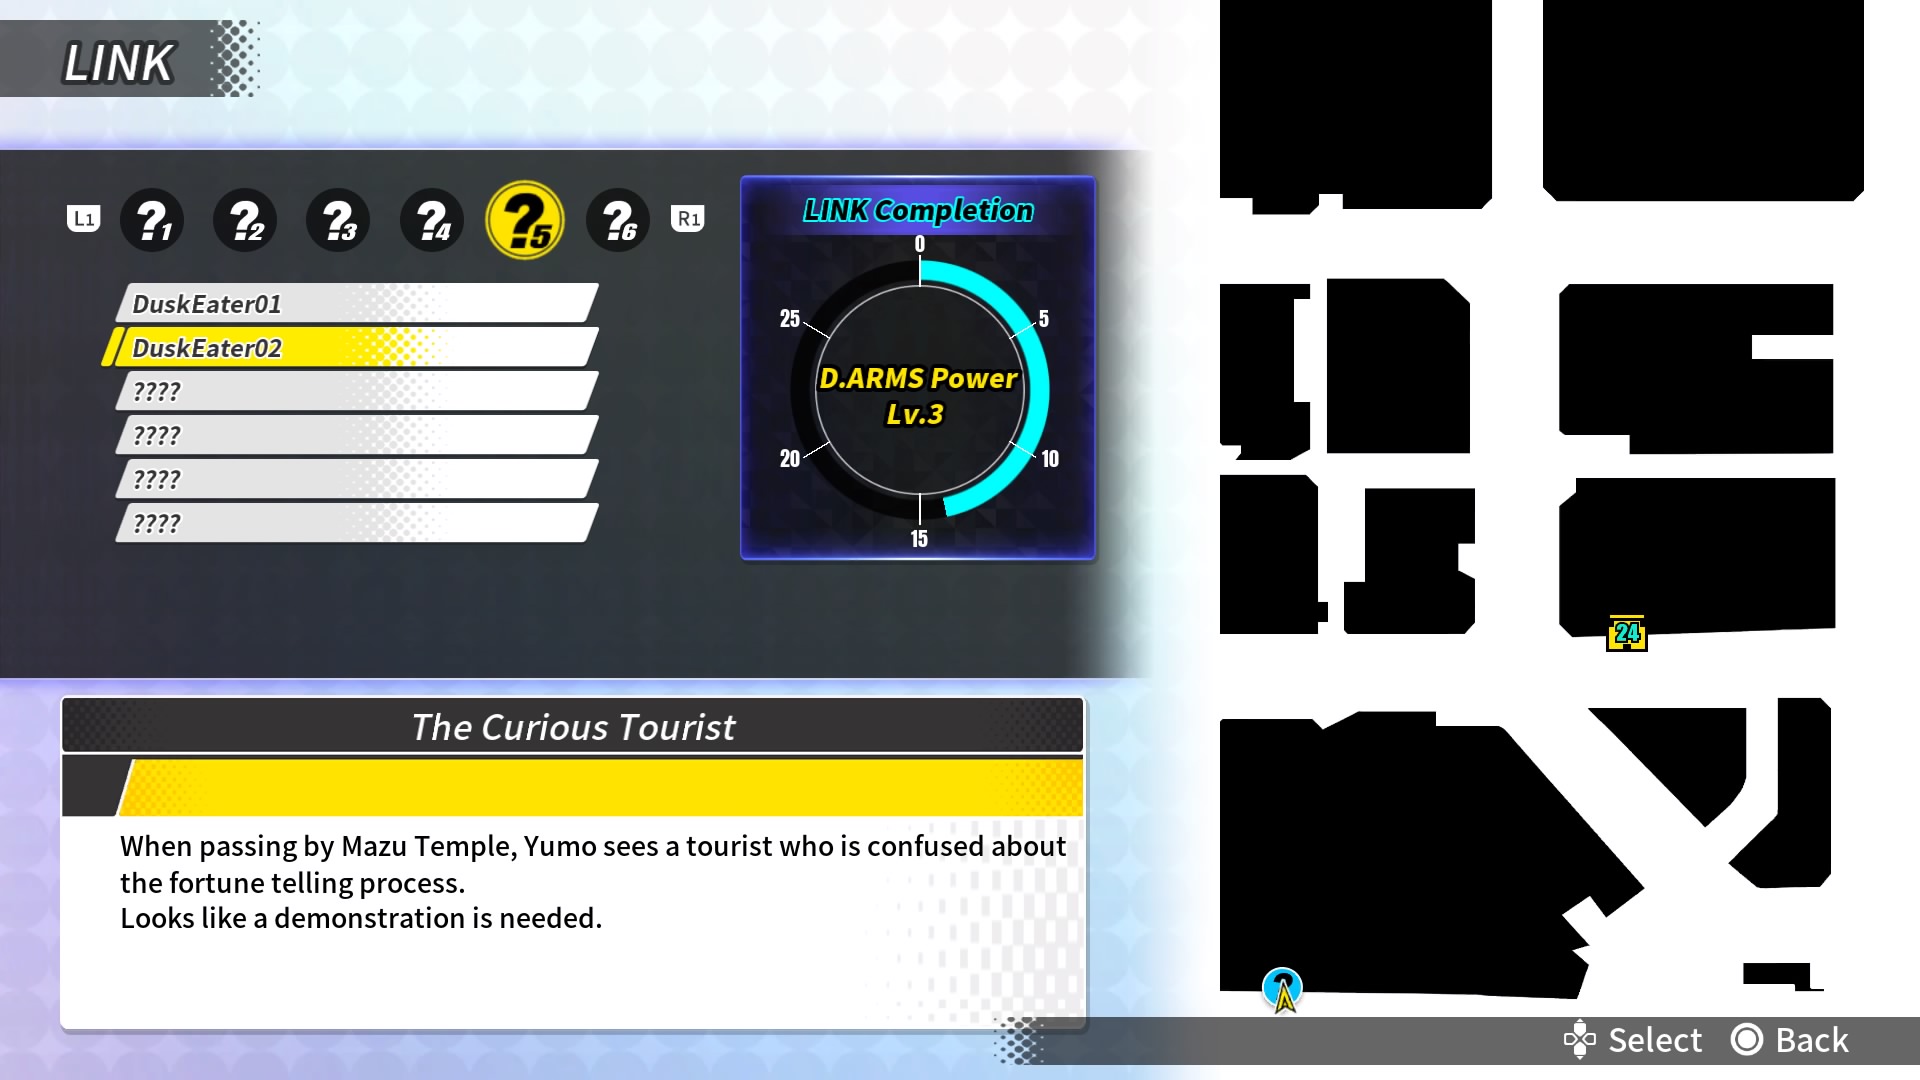
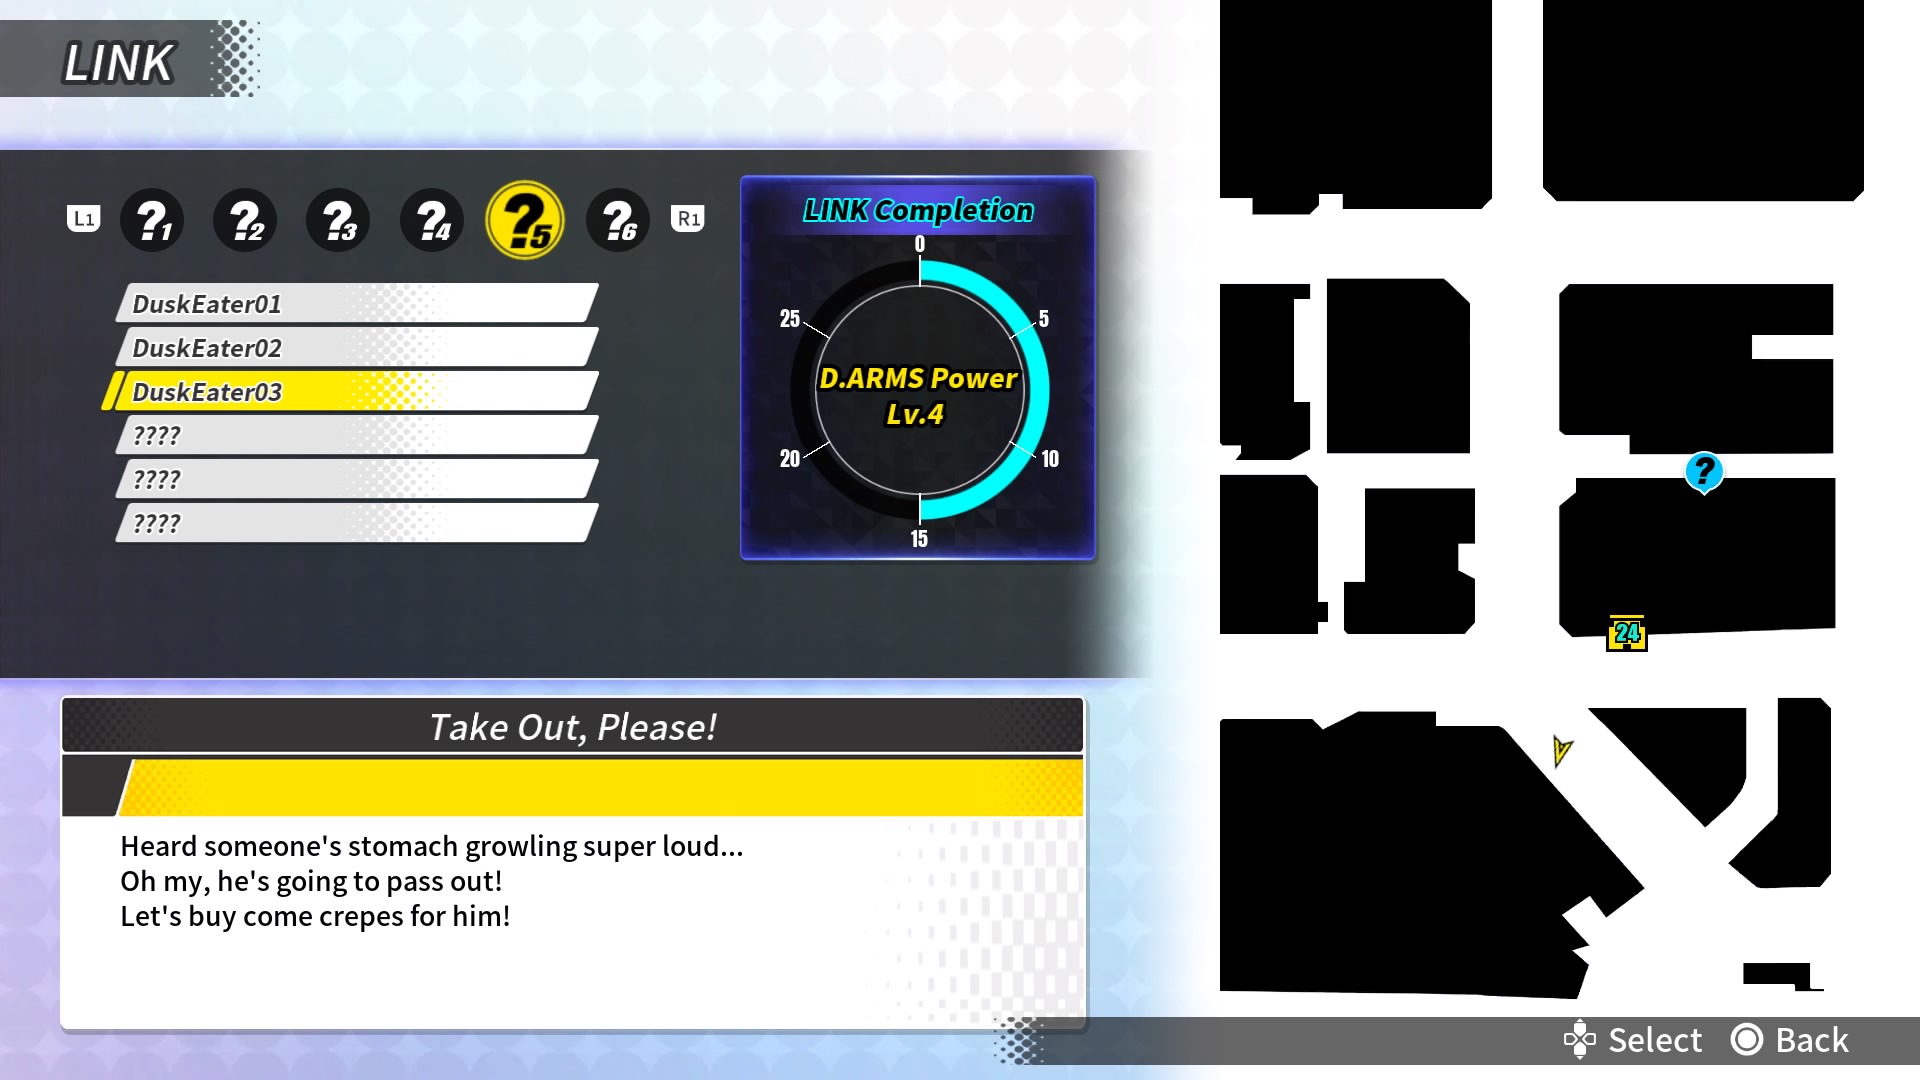
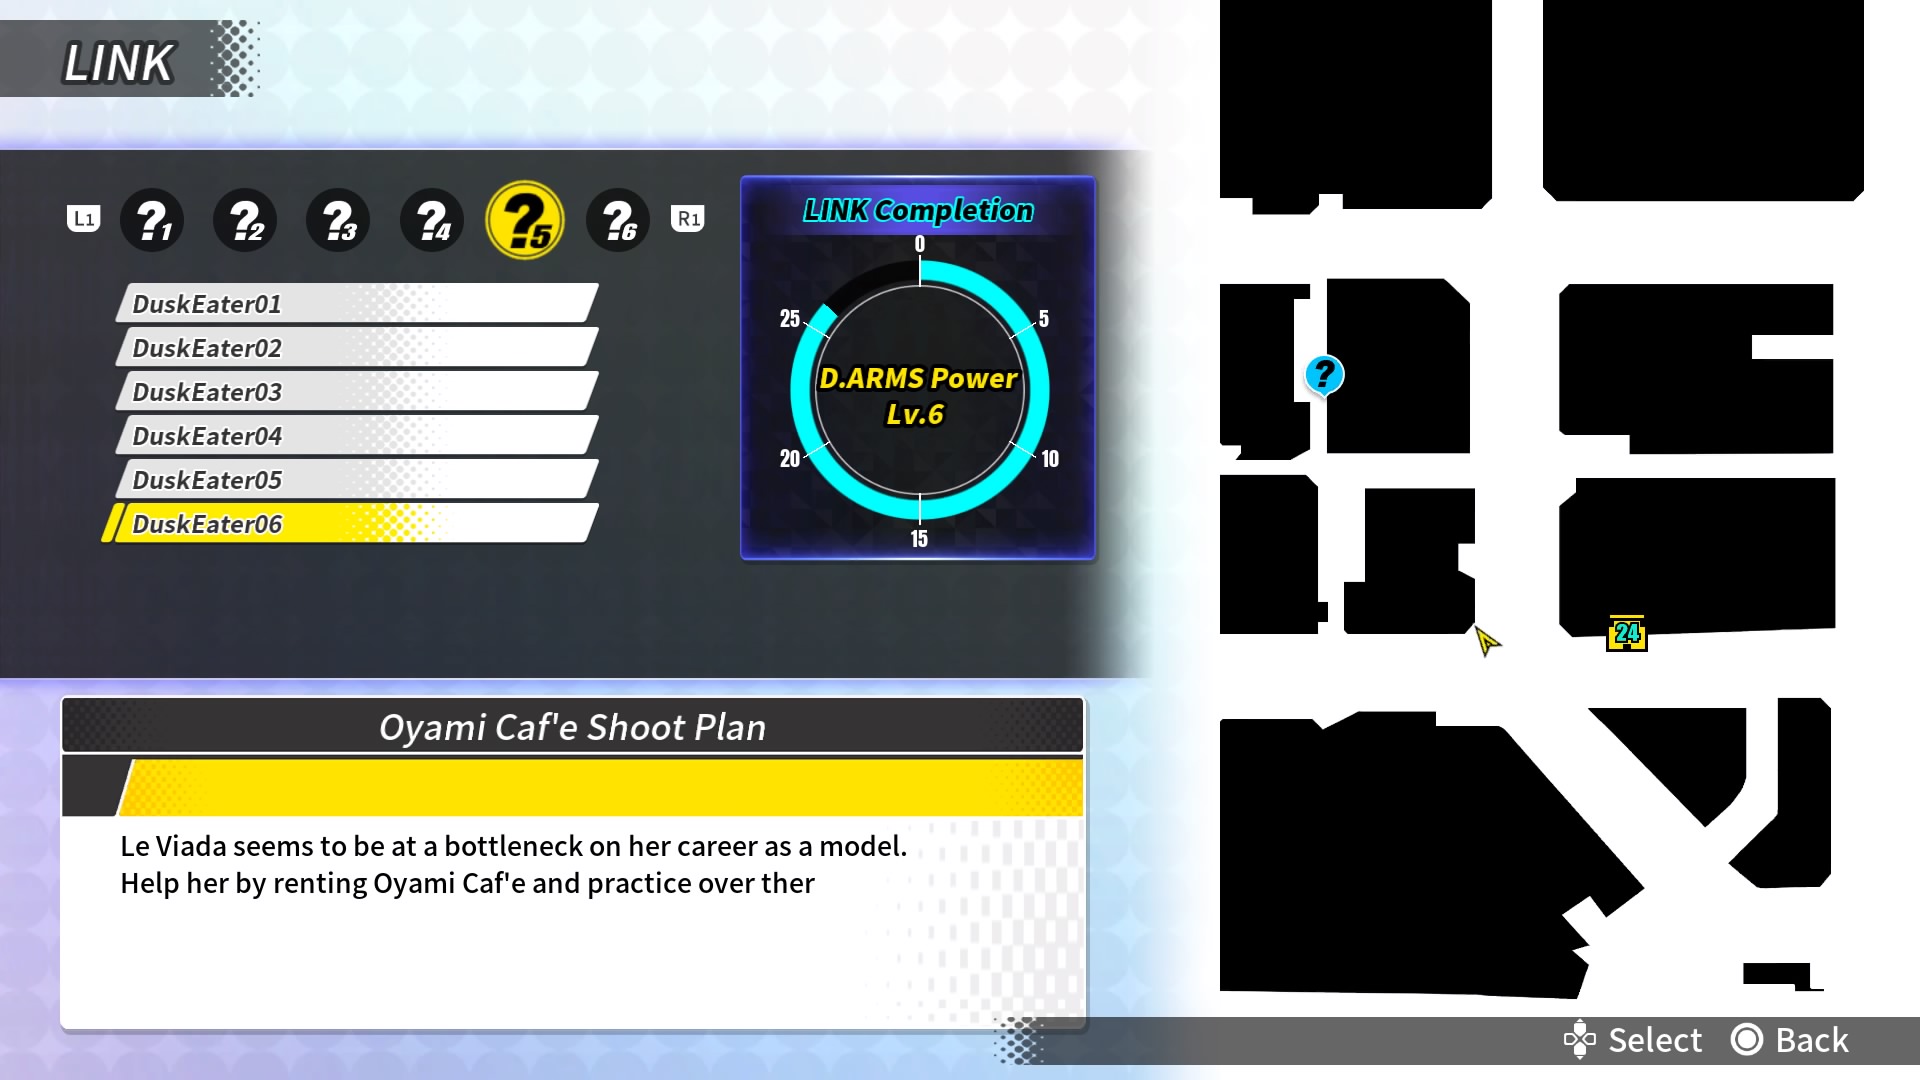
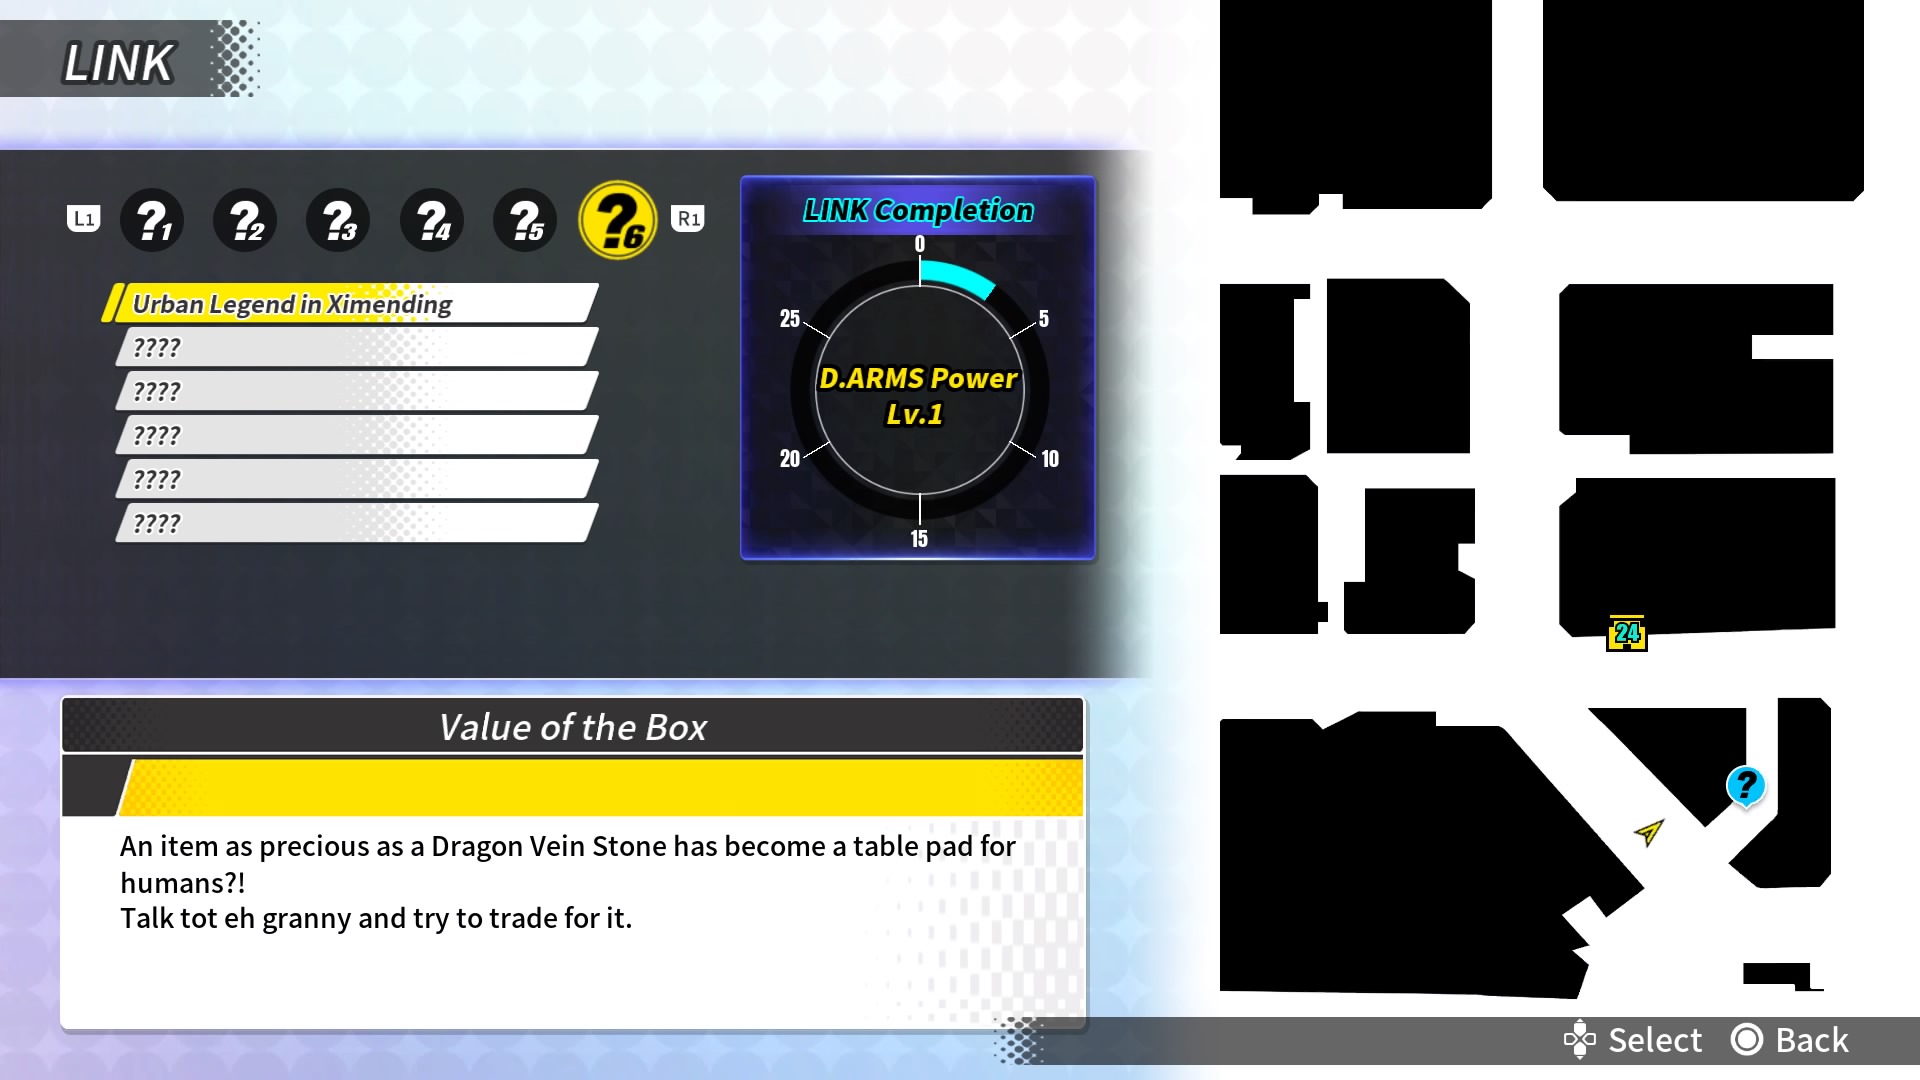
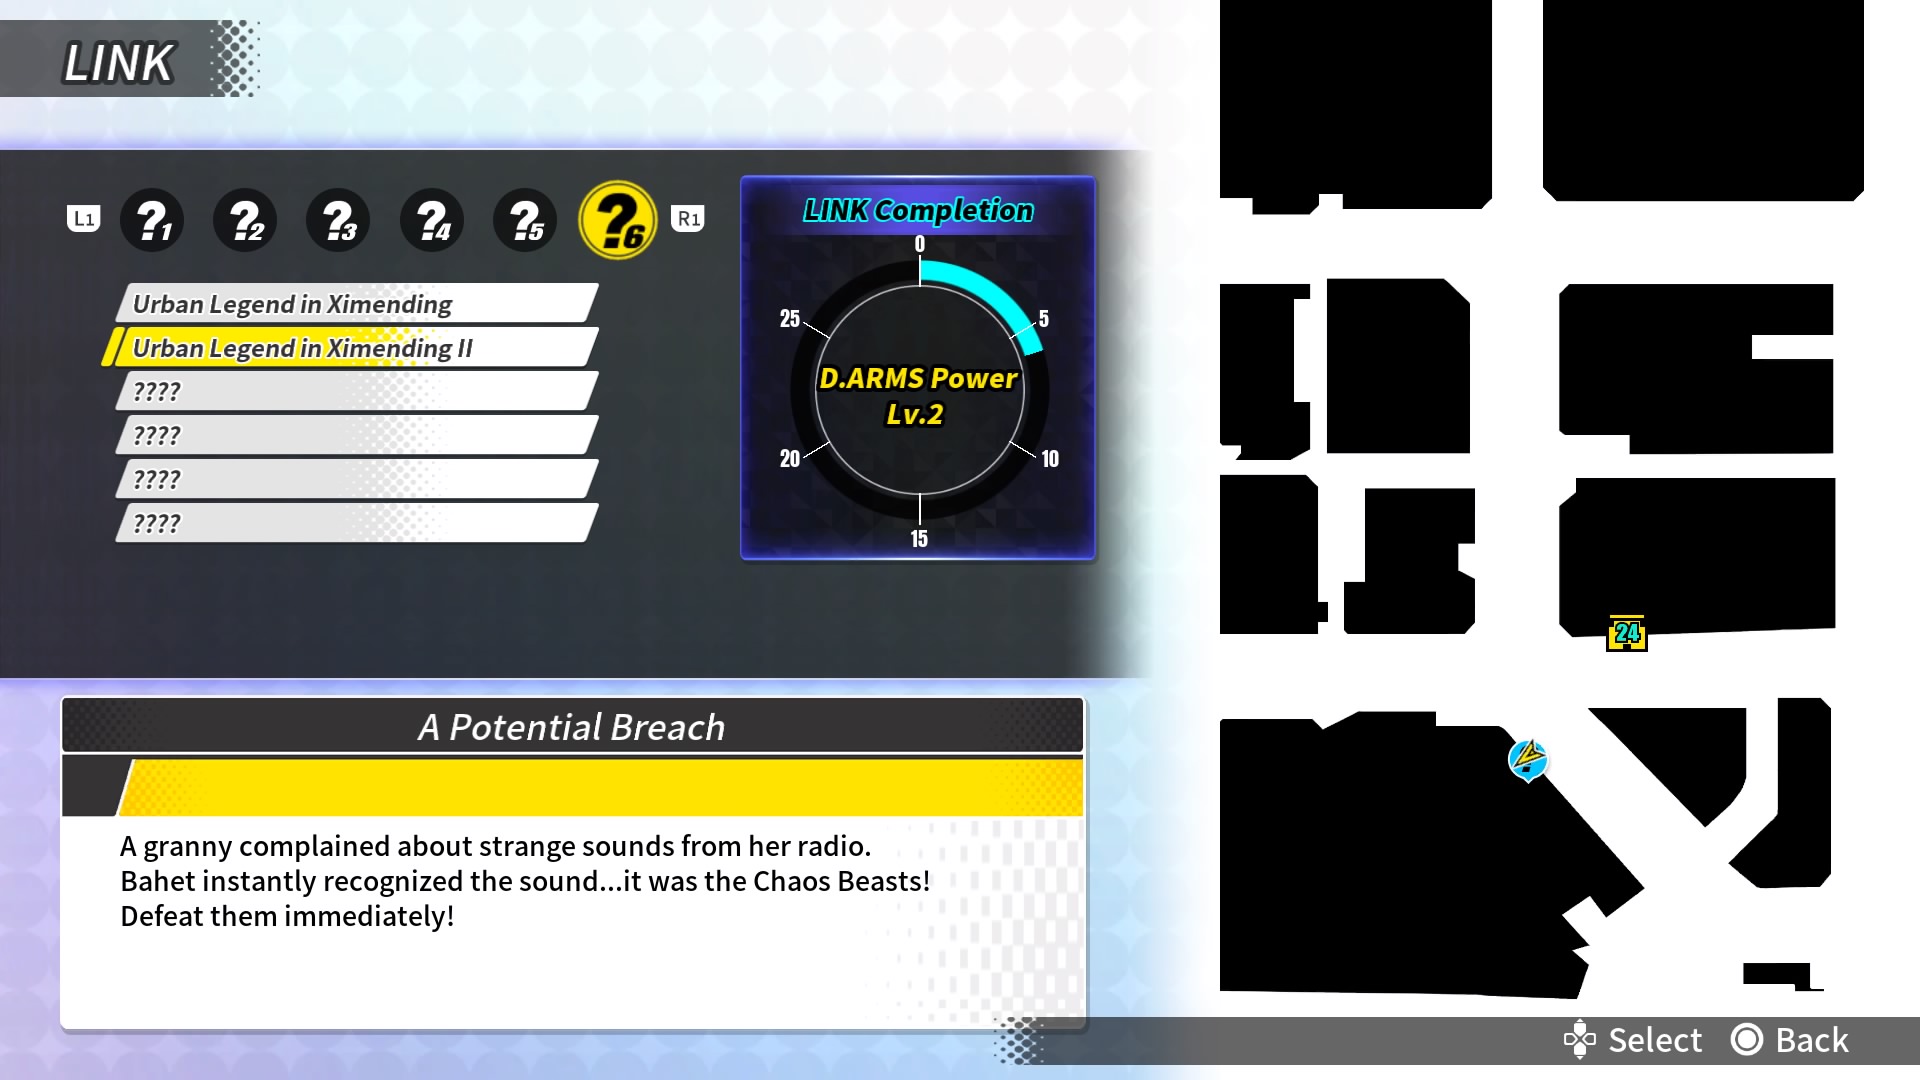
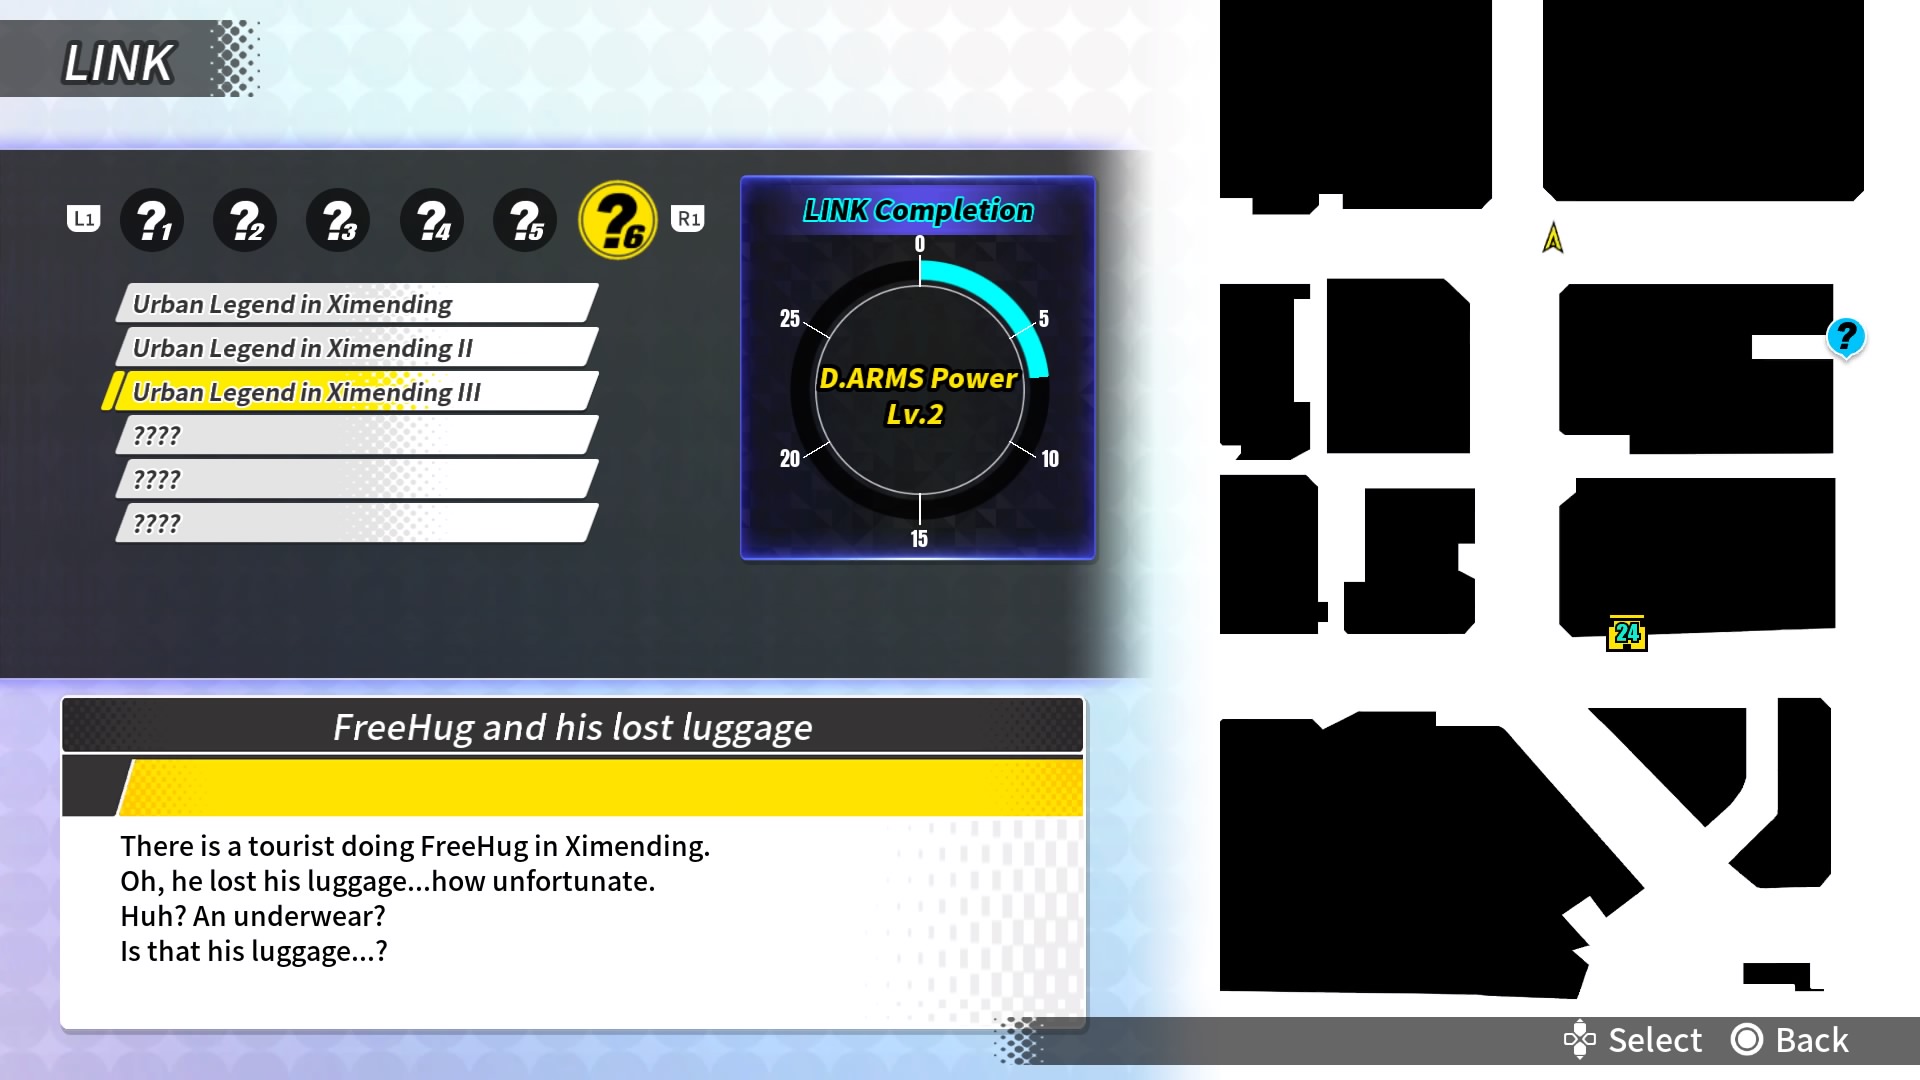
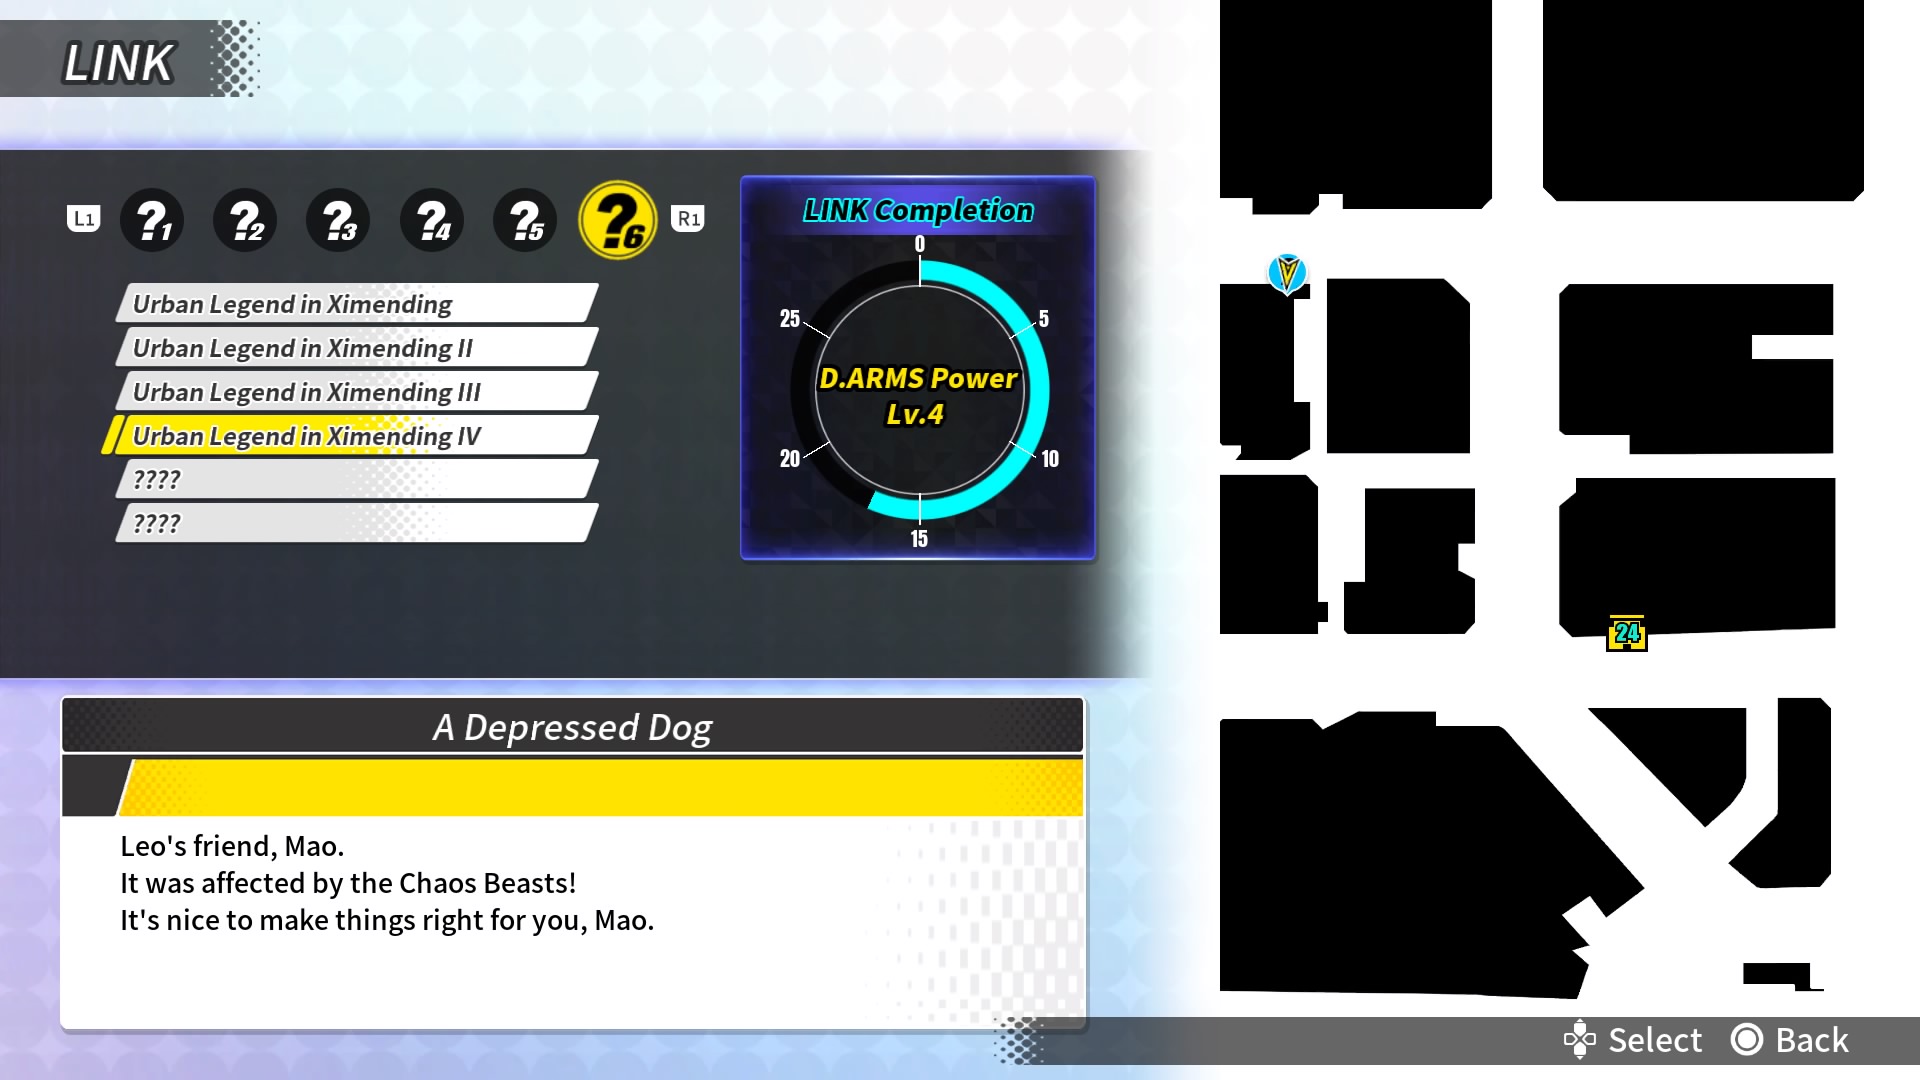
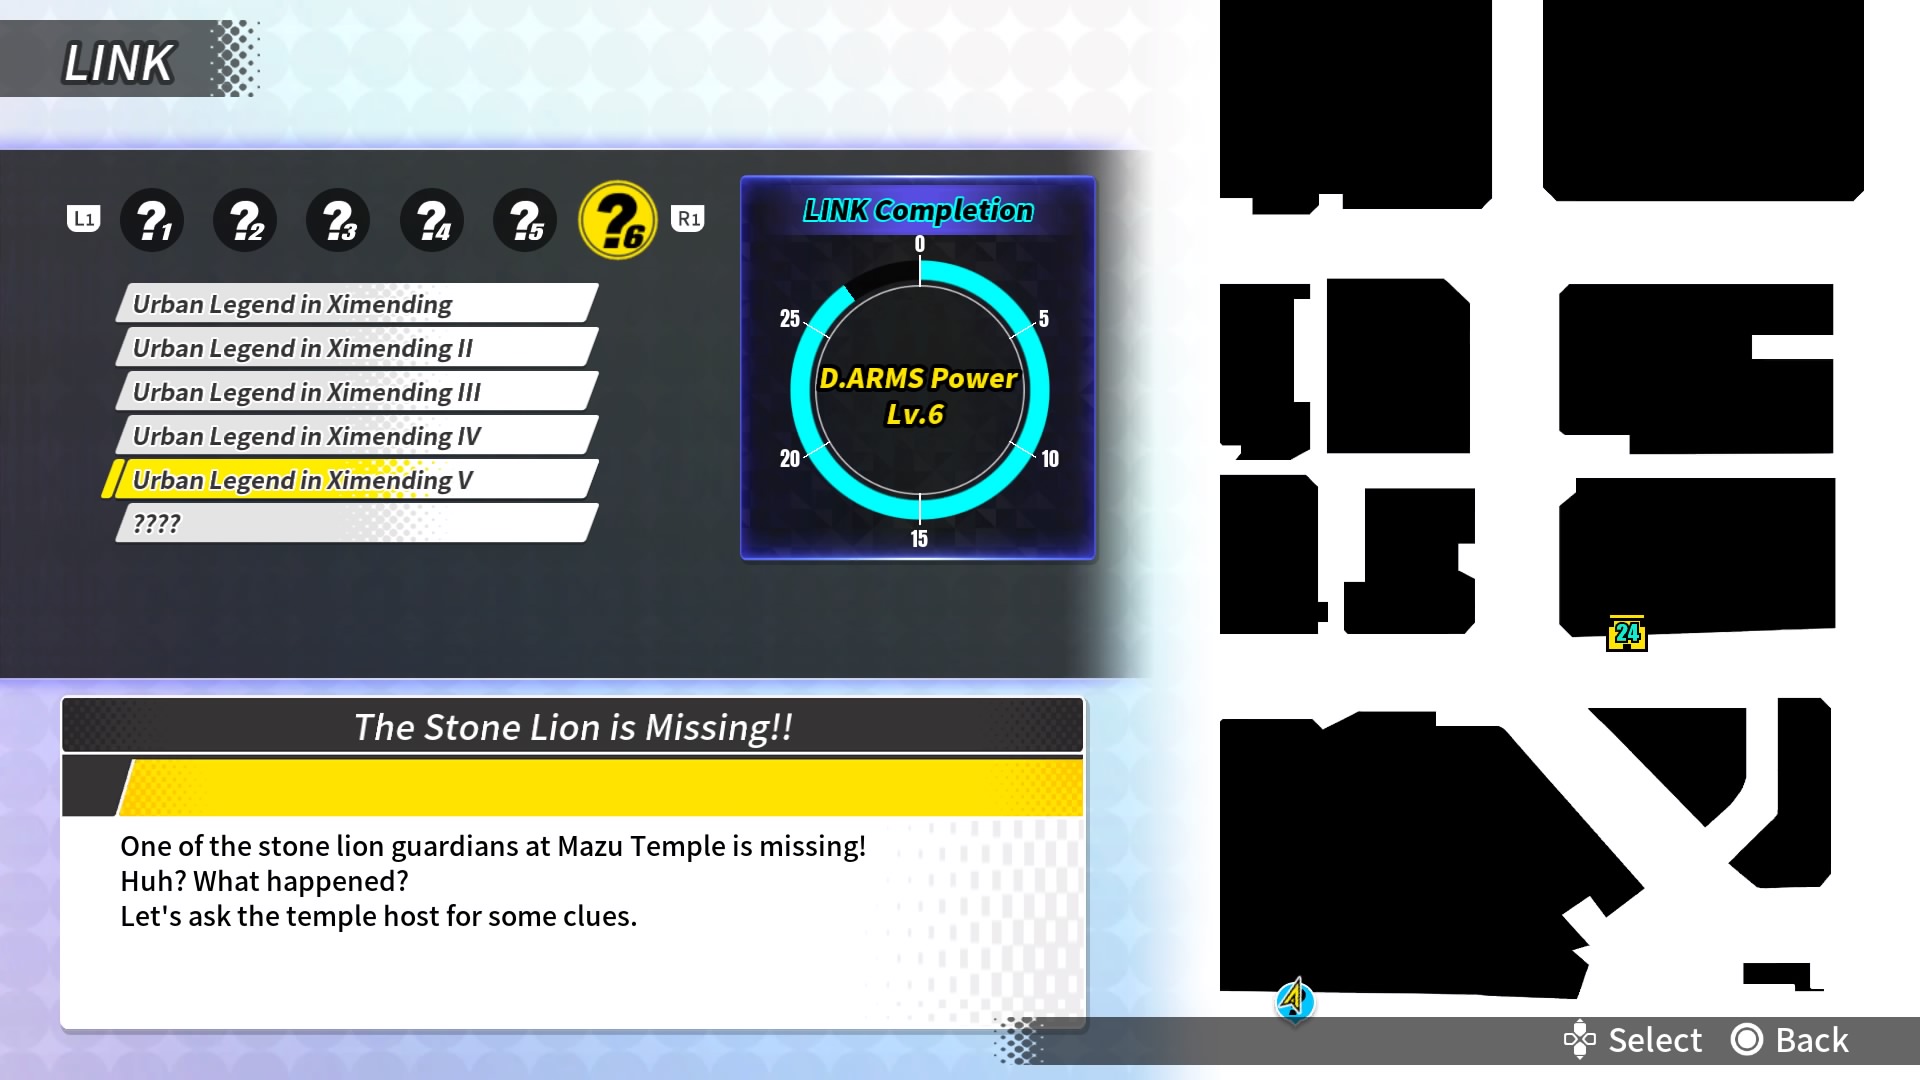
Complete all LINK quests.
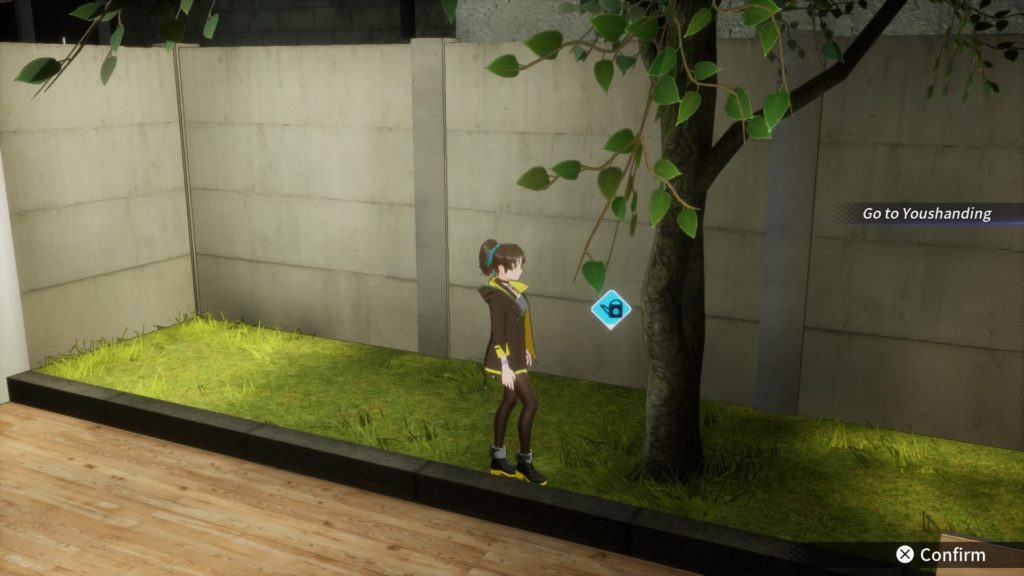
LINK Quests are Dusk Diver’s version of side-quests. You’ll unlock them by progressing through the story, and beating your different missions. They are done sequentially, so you need to beat the quest chain in order, don’t worry about skipping anything. They’re easy to spot, they don’t show up on the whole map but they pop up easily on the HUD. You’ll know you see one when you see a Question Mark in a blue circle appears on the HUD. These quests range from picking an item up, visiting a location, doing a small battle, etc.
Below is a list of maps showing each quests starting location.
 |
 |
 |
 |
 |
 |
 |
 |
 |
 |
 |
 |
 |
 |
 |
 |
 |
 |
 |
 |
 |
 |
 |
 |
 |
 |
 |
 |
 |
 |

![]() I can shoot the stars
I can shoot the stars
Power up Le Viada to the max in SKILL menu.
Refer to Heeeeeya! I can beat ten guys!![]()

![]() How can I survive this month?
How can I survive this month?
Spend a certain amount of money to buy the items in Tumaz mart.
The items in Tumaz Mart refers to just that, the items Boss sells. As to the certain amount of money, you’re looking at about $50,000. Due to the games low difficulty, you probably won’t be buying close to that by game end. This will most likely come in post-game. You could complete the every other trophy without this being done but you’ll be utilising it to get S Ranks, and platinum time shorter. So save your money.

![]() 120% POWER!
120% POWER!
Power up Leo to the max in SKILL menu.
Refer to Heeeeeya! I can beat ten guys!![]()

![]() Heeeeeya! I can beat ten guys!
Heeeeeya! I can beat ten guys!
Power up Yumo to the max in SKILL menu.
Powering up to max in the SKILL menu, means spending your Skill Points to level up all your stats. There’s 3 ways to obtain Skill Points:
-Collecting Dragon Vein Stones (200 in mission/50 outside of mission)
-First time mission completion.
-One time Mission Rewards.
What this means is that you won’t be able to farm skill points and be heavily overpowered at any point in the game. Dusk Diver once you collect all 153 Dragon Vein Stones and beaten all missions with an S Rank, will reward you with the exact amount of Skill Points to fully level Yumo, Leo, Bahet, and Le Viada.

![]() The beginning of a new journey
The beginning of a new journey
Complete the main quest. Thanks for playing!
Dusk Diver is not that long of a game, variably depending on how much you rush the story it can generally take you about 10 hours. There are a total of 11 Story Missions for you to complete. The ‘First Mission’ is the tutorial and isn’t replayable, so it’s not included in the mission listing in Tumaz Mart.

![]() Don’t call me a gangster
Don’t call me a gangster
Yumo meets the Guardian of Ximending – Leo.
After the tutorial fight in Youshanding for the first time, you’ll be brought back to Tumaz Mart. It is here that Leo will introduce himself.

![]() Rock with me!
Rock with me!
Yumo meets the young master of the bat clan – Bahet.
During Chapter 4, you’re goal in Youshanding will be to find the Fruit Thief. Bahet is the fruit thief you are after! After the conclusion of the battle and you’re back at Tumaz Mart, Bahet will introduce himself.

![]() Come on baby!!
Come on baby!!
Yumo meets the master of Tamsui River – Le Viada.
Le Viada is the last companion to join your party and does so after CHapter 6. You’ll be investigating the questionable new weather and occurences hapenning in Ximending and Youshanding. Le Viada is the reasoning, beat her and bring her back to Tumaz Mart. She’ll be introduced there earning you this trophy.

![]() Play with Nemea
Play with Nemea
Yumo meets the mysterious girl – Nemea.
You will periodically see glimpses of Nemea through the course of the story. It won’t be until after you complete Chapter 8 that you’ll be introduced to her at Tumaz Mart. Be careful though, her battle is the first actual difficulty spike in the game though her moves are predictable and you shouldn’t have trouble.
For those having trouble with her boss fight:
She takes set amounts of damage upon her shield being depleted so that should be your entire focus. This is done easily in 2 steps. 1st, you hit her shield a few times to charge up enough to use a 1SP attack with Leo than you’ll dodge away. 2nd, when you’re Just Dodge cooldown is gone, you’ll dodge her attacks to slow time down and instant refill your SP, use a 3SP Attack with Leo, use it now on her. Rinse and repeat these steps until she’s defeated.

![]() A good neighbour
A good neighbour
The familiarity of 5 vendors reaches the max level. Enjoy the food delivery to Tumaz.
Refer to Ximending tourism ambassador![]()

![]() The local idol
The local idol
The familiarity of 10 vendors reaches the max. I can’t decide which one to eat.
Refer to Ximending tourism ambassador![]()

![]() Just leave the rest to Yumo!
Just leave the rest to Yumo!
Complete 25 LINK quests.
Refer to Good man, good deeds, good Yumo![]()

![]() Yumo the allrounder
Yumo the allrounder
Complete 20 LINK quests.
Refer to Good man, good deeds, good Yumo![]()

![]() Yumo the helper
Yumo the helper
Complete 10 LINK quests.
Refer to Good man, good deeds, good Yumo![]()

![]() Yumo the handyman
Yumo the handyman
Complete 15 LINK quests.
Refer to Good man, good deeds, good Yumo![]()

![]() Yumo the gofer
Yumo the gofer
Complete 5 LINK quests.
Refer to Good man, good deeds, good Yumo![]()

![]() Person-to-person
Person-to-person
Unlock LINK quest.
You’ll unlock LINK quests after your first training mission, which is introduced to you during the story.

![]() New star in my town
New star in my town
The familiarity of 15 vendors reaches the max. Did you decide what to order?
Refer to Ximending tourism ambassador![]()

![]() Perhaps I play too much?
Perhaps I play too much?
Obtain all the contents in Gacha machine near Ya Rou Bian.
Gacha machines are unlocked later in the story after Chapter 6 and post-game. When unlocked you’ll need to find them and purchase all the content. Luckily, Gacha machines won’t have repeat items. So you’ll get all the items in one go! Each spin only costs $200 so you’ll need some change as you’ll be earning quite a few items.
Ya Rou Bian refers to the area South of the Tao Master. Directly outside of an alleyway, you’ll find this Gacha machine.
Gacha location 
Gacha content amount

![]() I want the whole set!
I want the whole set!
Obtain all the contents in Gacha machine near Tumaz Mart.
Gacha machines are unlocked later in the story after Chapter 6 and post-game. When unlocked you’ll need to find them and purchase all the content. Luckily, Gacha machines won’t have repeat items. So you’ll get all the items in one go! Each spin only costs $200 so you’ll need some change as you’ll be earning quite a few items.
You’ll know Tumaz Mart as it’s your ‘base‘. Directly to the right of Tumaz’s entrance you’ll find this Gacha machine. Interaction with this Gacha Machine is locked until story completion.
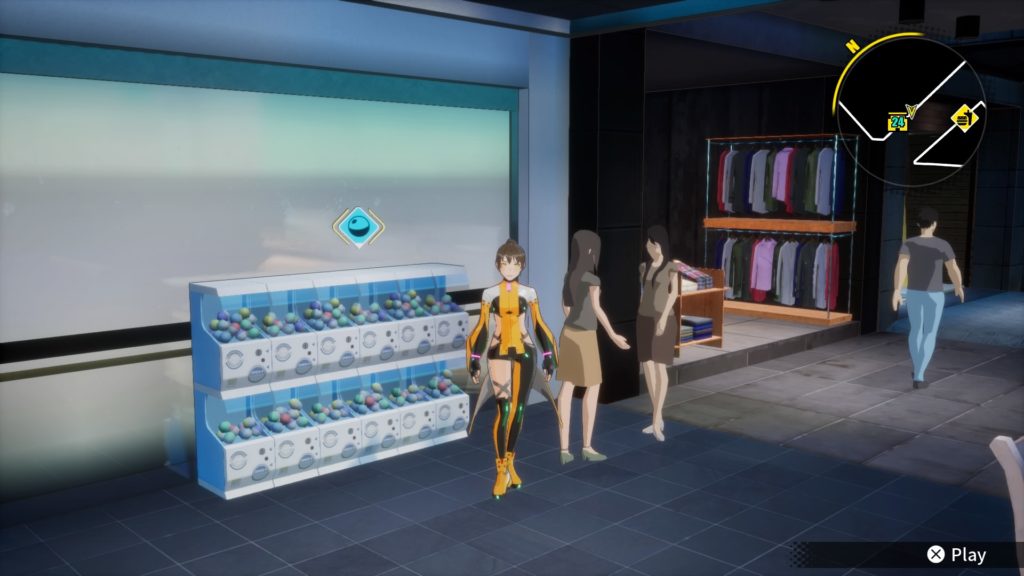
Gacha Location by HUD 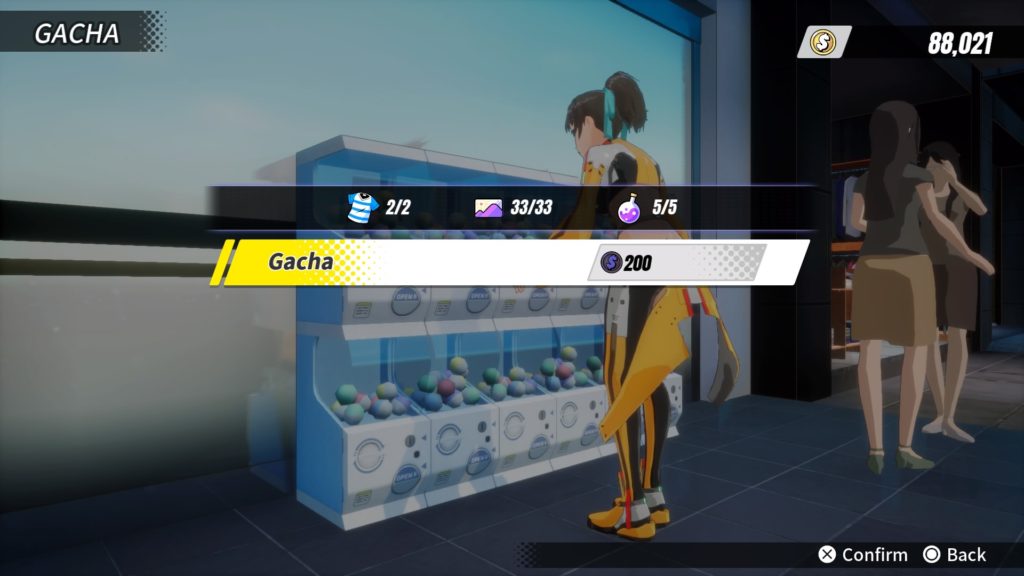
Gacha content amount

![]() A good way to spend your pocket change
A good way to spend your pocket change
Obtain all the contents in Gacha machine near Tattoo street.
Gacha machines are unlocked later in the story after Chapter 6 and post-game. When unlocked you’ll need to find them and purchase all the content. Luckily, Gacha machines won’t have repeat items. So you’ll get all the items in one go! Each spin only costs $200 so you’ll need some change as you’ll be earning quite a few items.
Tatoo street starts where the Sweet Potato Balls cart is and runs east. Directly on the corner with the Sweet Potato Balls cart, you’ll find this Gacha machine.

Gacha location 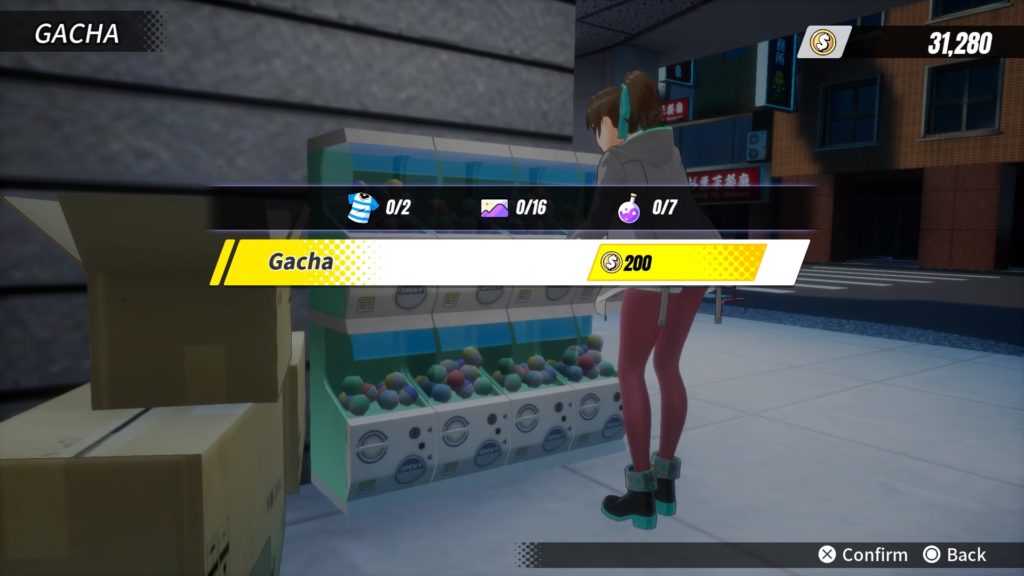
Gacha content amount

![]() My daily adventure
My daily adventure
Start the new game. The beginning of Yumo’s daily adventure.
This trophy will pop after the short introduction of the game’s story. Once you’re back in Ximending and you are introduced to Yumo this will pop.

![]() One more please…
One more please…
Obtain all the contents in Gacha machine near Exit 6.
Gacha machines are unlocked later in the story after Chapter 6 and post-game. When unlocked you’ll need to find them and purchase all the content. Luckily, Gacha machines won’t have repeat items. So you’ll get all the items in one go! Each spin only costs $200 so you’ll need some change as you’ll be earning quite a few items.
Exit 6 refers to the area with the Subway Station. Directly West of the Subway Station you’ll find a hallway into a building. In this hallway is this Gacha machine.

Gacha location 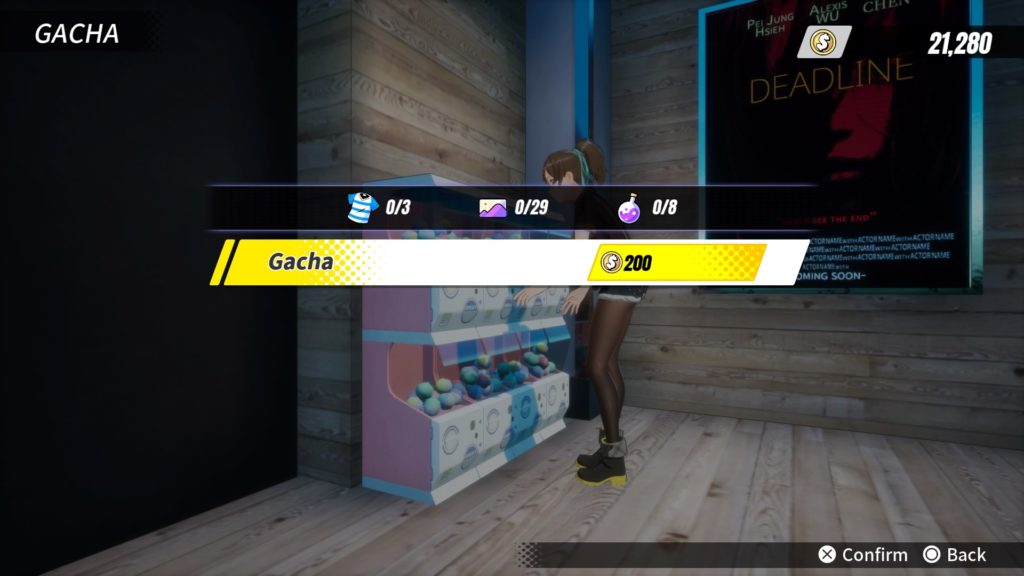
Gacha content amount

![]() Ximending tourism ambassador
Ximending tourism ambassador
The familiarity of all vendors reaches the max level. Be careful with your weight, guys.
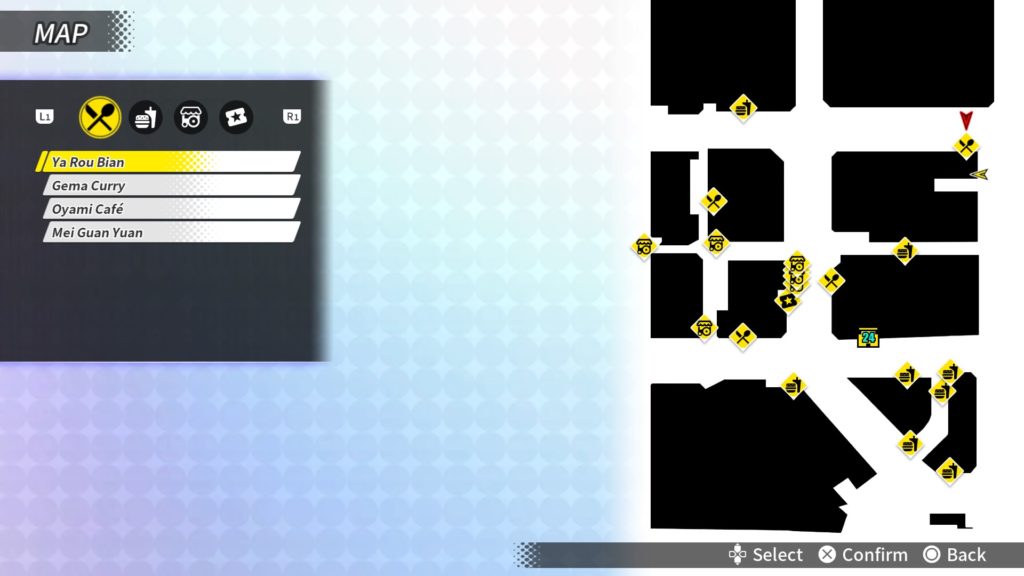
Vendors in Dusk Diver are easy to level up. Buying food levels up the familiarity with them 1 level, with each vendor having a max level of 5. The food to purchase varies between vendors but it’s generally between $20-300.
Not all vendors will be available in the beginning, you’ll unlock them through character progression. Everytime you fill an affection bar with one of your team members, they’ll have an event at a new vendor. View their event and the vendor will unlock.
Eventually in Tumaz Mart you’ll unlock the ability of delivery, purchasing food from vendors for the effect without leaving the store. Only maximum vendor’s can deliver, which makes it easy to see which vendors you still need to maximize.
Below is a list of all the vendors.

1st Page of Vendors 
2nd Page of Vendors 
3rd Page of Vendors 
4th Page of Vendors 
The Delivery System

![]() I can’t stop collecting…
I can’t stop collecting…
Obtain all the contents in Gacha machine near Mazu temple.
Gacha machines are unlocked later in the story after Chapter 6 and post-game. When unlocked you’ll need to find them and purchase all the content. Luckily, Gacha machines won’t have repeat items. So you’ll get all the items in one go! Each spin only costs $200 so you’ll need some change as you’ll be earning quite a few items.
This Gacha machine is near the Mazu temple. You’ll find the temple at the bottom left of Ximending. To the left of Mazu temple, you’ll find this Gacha machine.

Gacha location 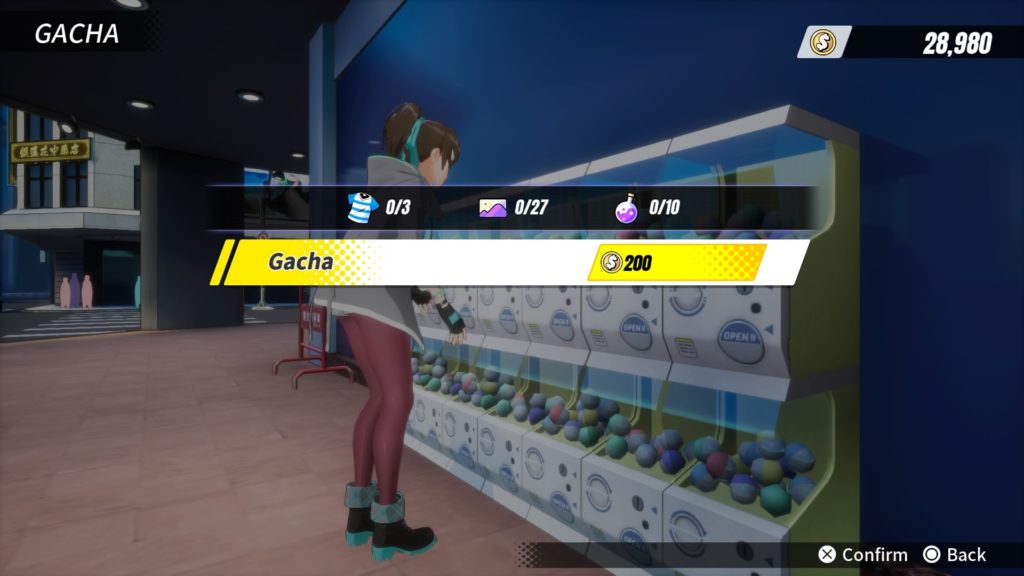
Gacha content amount