
Game: Trollhunters: Defenders of Arcadia
Peripherals: –
Time to 100%: 10 hours
Difficulty: 3/10
Missable trophies: “Daylight Complete”, “New and Improved”, “Fine Gifts”, “Daylight Armory”, “You Gnome What to Do”, “Serving Up Sushi”, “Hocking Up a Luug”, “Quest Bester”
Author: Knoef_NL
Welcome to the trophy guide for Trollhunters: Defenders of Arcadia. This can also be considered a walkthrough and may be used for PlayStation 4, Xbox One and Steam. Achievements for Steam and Xbox are in almost all cases the same as the PlayStation 4 Trophies. A roadmap is provided in the stages below.
Follow us on twitter for the latest news and giveaways.
Stage 1 – Complete the game on Normal and Hard.
You need to complete the game on Normal difficulty. The difficulty trophies for Normal/Hard do not stack, so you need to do another run on Hard.
While playing normal mode, try to obtain all collectibles listed in the “Gnome Place to Hide” trophy.
You will be able to do a cleanup for the collectibles, even after the Point of No Return, so do not worry about that.
Note: Collectibles will not carry over to “New Game +”(NG+).
Point of No Return.
After completing Akiridion City 5, you won’t be able to time travel. So after completing Akiridion City 4, make sure you have earned the following trophies:
Daylight Complete – Buy all Armors
New and Improved – Upgrade any assists
Fine Gifts – Purchase any item
Daylight Armory – Purchase any armor
You Gnome What to Do – Complete the gnome game with 100% accuracy
Serving Up Sushi – Complete a game of Go-Go Sushi.
Hocking Up a Luug – Catch Luug
Quest Bester – Complete 3 side-quests
Trophies

![]() Ultimate Defender
Ultimate Defender
Unlock all trophies in Trollhunters: Defenders of Arcadia.

![]() A Por-GONE Conclusion
A Por-GONE Conclusion
Reach the end and reset the Timeline.
Story related and cannot be missed.

![]() Here Come Troll-ble
Here Come Troll-ble
Complete the game in Troll (Hard) Mode.
The Troll (Hard) mode is not any harder than the Normal mode. Enemies have a tiny bit more health, and less Gems(money) will drop. You will barely notice any difference.
Note: The Normal and Hard difficulty trophies do not stack, 2 playthroughs are required.

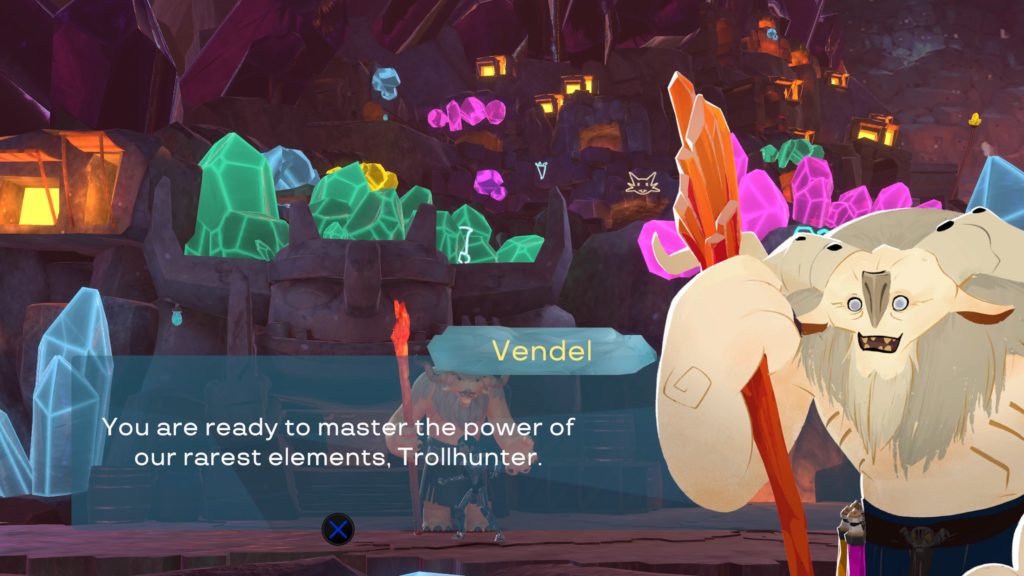
![]() Daylight Complete
Daylight Complete
Purchase all Armor Upgrades from Vendel.
Armors can be bought from Vendel in the city. You need to buy a total of 3 armors, which are available for:
2.500, 4.500, and 6.500 coins.
Coins are not found much, so you need to play the sushi game!
The sushi game is also available in the city by talking to Toby, and can earn you around 150 coins each every 2 min. You need to reach sushi Level 5 before earning that amount of coins. After completing Akiridion City 5, you will not able to time travel, so complete this trophy before doing Akiridion City 5.
Vendel. 
All 3 armors.

![]() Gnome Place to Hide
Gnome Place to Hide
Catch every Gnome in the game.
Arcadia
Sock #1: In front of the store.
Sock #2: When climbing the Sergio store, on your left.
Sock #3: In front of the Bella’s sign.
Sock #4: On the roof, when jumping a bit down.

Sock #1. 
Sock #2.. 
Sock #3. 
Sock #4.
Arcadia Tunnels 1
Gnome #1: At the intersection, go left and you will find your first gnome.
Sock #1: Slide down, then above you.
Sock #2: Jump onto the moving platform, above you.
Gnome #2: Jump the moving platforms towards the left.
Sock #3: Jump onto the platform where the little creep is.
Gnome #3: At the disappearing platforms, jump down.
Sock #4: On the main path, jump upwards when on the moving platforms.

Gnome #1. 
Sock #1. 
#Sock #2. 
Gnome #2. 
Sock #3. 
Gnome #3. 
Sock #4.
Arcadia Tunnels 2
Gnome #1: Jump down, head left straight away.
Sock #1: Jump onto the platform behind you.
Sock #2: After killing the golem, jump to the platform to the left.
Gnome #2: Drop down.
Sock #3: At the disappearing platform, jump straight ahead.
Sock #4: After the slide down, jump onto the platform behind you.
Gnome #3: When jumping the little 2 stone platforms, go left.

Gnome #1. 
Sock #1. 
Sock #2. 
Gnome #2. 
Sock #3. 
Sock #4. 
Gnome #3.
Sock #1: Jump the platform and take the upper area.
Gnome #1: Jump the moving platforms and take the upper area.
Sock #2: Jump the platforms and head left.
Sock #3: Jump the shaking platforms, and head left.
Gnome #2: Take the upper path.
Sock #4: Take the lower path.
Gnome #3: Take the upper path.

Sock #1. 
Gnome #1. 
Sock #2. 
Sock #3. 
Gnome #2 / Sock #4. 
Gnome #3.
Geode Caverns 2
Sock #1: Fall down, on your left.
Gnome #1: Jump the platform and take the upper path.
Sock #2: Walk a bit towards the left.
Sock #3: On the main path, jump the platform.
Gnome #2: Right after Sock #3, demolish the blocks and drop down.
Gnome #3: Demolish the blocks and drop down.
Sock #4: Jump the platforms on your left.

Sock #1. 
Gnome #1. 
Sock #2. 
Sock #3 
Gnome #2. 
Gnome #3. 
Sock #4.
Canal Bridge 1
Sock #1: Right at the beginning of the level, when on top of the truck.
Gnome #1: Instead of activating the switch, use your ability and jump onto the platform on the right.
Gnome #2: Activate the switch, then go left through the door.
Sock #2: After killing the flying dinosaur, use your stone ability, and jump onto the platform.
Sock #3: After destroying some boulders with your ability, you’ll face another dinosaur. Instead of jumping onto the moving platform, walk beneath it.
Gnome #3: Instead of jumping onto the moving platform, drop down.
Sock #4: Shortly after Gnome #3, jump from a moving platform onto another. The Sock is above you.

Sock #1. 
Gnome #1. 
Gnome #2. 
Sock #2. 
Sock #3. 
Gnome #3. 
Sock #4.
Canal Bridge 2
Sock #1: After hitting the switch, slide towards the right.
Sock #2: A bit further, you need to summon a boulder to progress, jump the gap
Gnome #1: After seeing the boss, slide down. Now slide towards the left.
Sock #3: Right after finding the gnome. it’s on the left of the switch.
Gnome #2: In the intersection, use the special ability so summon a block. Now jump left.
Sock #4: Right after Gnome #2. Instead of jumping down, jump onto the small platform in front of you.
Gnome #3: Final section of the game. Instead of going right where you will face the boss, drop down.

Sock #1 
Sock #2 
Gnome #1 
Sock #3 
Gnome #2 
Sock #4 
Gnome #3
Darklands 1
Sock #1: Hit the switch and you can grab the sock.
Gnome #1: Right after the sock, jump onto the moving platform and head left.
Gnome #2: At the intersection where you can jump up or slide down, go up.
Sock #2: After sliding down, call for a boulder and jump right.
Sock #3: After killing the charging boar, fall down (don’t jump the moving platform)
Gnome #3: After finding the rock that rewards you gems, take the left path (with the moving platform) and fall down.
Sock #4: After demolishing the boulders, summon a rock and jump onto the platform on your left.

Sock #1 
Gnome #1 
Gnome #2 
Sock #2 
Sock #3 
Gnome #3 
Sock #4
Darklands 2
Sock #1: After destroying the blocks, slide down and it’s on your right.
Gnome #1: At the platforms, move left and destroy the blocks.
Gnome #2: Destroy the blocks, then summon a boulder. Now jump onto the platform
Sock #2: Bit later, jump the platforms and it’s on your left.
Gnome #3: After the rolling boulders, jump down and head left.
Sock #3: right after the gnome, take the platform up and it’s above you. Reach it by summoning a boulder.
Sock #4: Right after sock #3, it’s above you. It’s reachable by summoning a boulder.

Sock #1 
Gnome #1 
Gnome #2 
Sock #2 
Gnome #3 
Sock #3 
Sock #4
Darklands Grotto 1
Sock #1: After you spawn, turn left.
Sock #2: At the intersection, go up.
Gnome #1: Go back to the intersection and slide down (instead of going up)
Gnome #2: After following he path and destroying the blocks, drop down.
Sock #3: After jumping the platforms and dodging the fireball, head left.
Gnome #3: Head to the upper left area, right after finding Sock #3.
Sock #4: In the abyss, keep standing on the moving platform.

Sock #1 
sock #2 
Gnome #1 
Gnome #2 
Sock #3 
Gnome #3 
Sock #4
Darklands Grotto 2
Gnome #1: At the intersection, go up.
Sock #1: Hit the platform (triangle) and jump towards the left.
Gnome #2: The rolling boulders, take the upper right path.
Gnome #3: Hit the switch and take the lower path.
Sock #2: After jumping the platforms, head left.
Sock #3: Bit further, you’ll need to jump and hit a few platforms, it’s above you.
Sock #4: On the main road, cannot be missed.

Sock #4Gnome #1 
Sock #1 
Gnome #2 
Gnome #3 
Sock #2 
Sock #3 
Sock #4
Darklands 3
Gnome 1: At the platforms, head left.
Sock #1: Hit the platform and head left.
Sock #2: Instead of going up, go left and take the platform down.
Gnome #2: Where the fireball shoots downwards, drop down and take the left path
Sock #3: Hit the button and jump onto the highest platform on the right.
Gnome #3: Summon a boulder and take the upper left path.
Sock #4: After taking the moving platform and dodging all the gemstones, it’s above you.

Gnome #1 
Sock #1 
Sock #2 
Gnome #2 
Sock #3 
Gnome #3 
Sock #4
Akiridion city 1
Sock #1: Jump to the upper left area.
Sock #2: Follow the path, it’s above you.
Gnome #1: After finding the rock that reward gems, take the upper right path.
Sock #3: after Gnome #1, take the lower path, hit the switch, summon the hoverboard and collect the sock.
Sock #4: Follow the path and it’s above you.
Gnome #2: Drop down before facing another bunny with a mace.
Gnome #3: Jump the platforms and head left.

Sock #1 
Sock #2 
Gnome #1 
sock #3 
Sock #4 
Gnome #2 
Gnome #3
Akiridion City 2
Gnome #1: When you spawn, turn around.
Sock #1: Follow the path and it’s above you.
Sock #2: Follow the path, summon a hoverboard and it’s above you.
Sock #3: Before jumping the platforms, summon a boulder and collect the sock above you.
Gnome #2: Drop down, summon a hoverboard and move towards the left.
Gnome #3: Slide down to the right.
Sock #4: In between the platforms.

Gnome #1 
Sock #1 
Sock #2 
Sock #3 
Gnome #2 
Gnome #3 
Sock #4
Akiridion City 3
Gnome #1: At the start, summon a boulder and take the upper path.
Gnome #2: Drop down
Sock #1: Before jumping the platforms, take the sock on the far right.
Sock #2: Jump onto the platform and let it drop down a bit.
Sock #3: Summon a hoverboard and move towards the left.
Sock #4: Right after sock #3, above you in the neon sign.
Gnome #3: Take the platform up and jump left.

Gnome #1 
Gnome #2 
Sock #1 
Sock #2 
Sock #3 
Sock #4 
Gnome #3
Akiridion City 4
Sock #1: Spawn a hoverboard and move left.
Gnome #1: after jumping the platforms, dash left.
Sock #2: Drop down and turn left.
Gnome #2: Summon a block and jump towards the upper left area.
Sock #3: Spawn a hoverboard, jump the platform and you can collect the sock.
Sock #4: Summon a boulder and jump towards the platform.
Gnome #3: From Sock #4, turn around, fall down and head a bit towards the left, where you just came from.

Sock #1 
Gnome #1 
Sock #2 
Gnome #2 
Sock #3 
Sock #4 / Gnome #3
Gnome #1: Take the moving platform all the way down.
Sock #1: Above you, right before a switch.
Sock #2: Follow the path, summon a hoverboard, and collect the sock.
Gnome #2: Summon a builder, jump the platform, summon a hoverboard. Now jump onto the second platform.
Sock #3: After the moving belts, jump a few platforms. Now summon a hoverboard and dash.
Gnome #3: Drop down
Sock #4: Hit a switch above you, allowing you to collect the sock.

Gnome #1 
Sock #1 
Sock #2 
Gnome #2 
Sock #3 
Gnome #3 
Sock #4
Time-pocalypse 1
Gnome #1: At the very beginning, jump the toaster and summon a hoverboard that goes towards the RIGHT.
Sock #1: Hold X and glide upwards. The sock is on your left.
Sock #2: Jump the 2 platforms, it’s above the first one.
Gnome #2: Drop down before jumping the platforms.
Sock #3: Summon a boulder, jump onto the higher platform.
Sock #4: Onto the higher platform, reachable by hoverboard.
Gnome #3: Jump the platforms and follow the path to the left.

Gnome #1 
Sock #1 
Sock #2 
Gnome #2 
Sock #3 
Sock #4 
Gnome #3
Time-pocalypse 2
Gnome #1: Jump the platforms and go left.
Gnome #2: Drop down and slide towards the right.
Sock #1: Summon a boulder and jump, it’s above you.
Sock #2: After falling down onto the belts, it’s on your right.
Gnome #3: instead of hovering and dashing, go down and take the path towards the right.
Sock #3: Above the moving spike platform.
Sock #4: Summon a boulder, then a hoverboard and head left, jump onto the higher platform.

Gnome #1 
Sock #1 
Sock #2 
Gnome #3 
Sock #3 
Sock #4
Time-pocalypse 3
Sock #1: Jump onto the platform and ride it down.
Sock #2: Underneath the moving platform with spikes.
Gnome #1: Hover all the way up, then go right.
Gnome #2: Hover all the way up, then go left.
Sock #3: Take the lower path, destroy the boulders.
Gnome #3: Hover upwards and head left.
Sock #4: Before hovering up, jump towards the far right. (Just before the end of the level)

Sock #1 
Sock #2 
Gnome #1 
Gnome #2 
Sock #3 
Gnome #3 
Sock #4
Time-pocalypse 4
Gnome #1: Hover upwards, then jump towards the left.
Sock #1: It’s below the moving boulder with spikes.
Gnome #2: Jump the platforms towards the left.
Sock #2: It’s above the moving platforms with spikes.
Gnome #3: Take the upper platforms, then head left.
Sock #3: towards the left of the path. Be quick, as a moving wall will come towards you.
Sock #4: Same area, still with a moving wall coming towards you. Once you drop down, behind you.

Gnome #1 
Sock #1 
Gnome #2 
Sock #2 
Gnome #3 
Sock #3 
Sock #4
Castle Morgana 1
Holds no collectibles
Castle Morgana 2
Sock #1: Right at the beginning, behind the moving platform with spikes.
Gnome #1: Take the left path, destroy the boulders, summon a hoverboard, keep heading left.
Sock #2: On the same path as Gnome #1.
Gnome #2: Dodge the firetrap while summoning a hoverboard, head left.
Sock #3: Summon a hoverboard and head left.
Gnome #3: After finding the rock that rewards coins, jump towards the right. Now summon a hoverboard and head left.
Sock #4: After destroying some blocks, fall down and head left.

Sock #1 
Gnome #1 
Sock #2 
Gnome #2 
Sock #3 
Gnome #3 
Sock #4
Castle Morgana 3
Sock #1: Jump the firetrap, then jump towards the left.
Gnome #1: Fall down the ice (jump twice), on your left.
Gnome #2: Follow the path, head towards the upper left area.
Gnome #3: Destroy the ice blocks, head towards the right.
Sock #2: After finding Gnome #3, head upwards, on your left.
Sock #3: Jump the platform, then jump towards the left.
Sock #4: Between 2 traps, on the main path.

Sock #1 
Gnome #1 
Gnome #2 
Gnome #3 
Sock #2 
Sock #3 
Sock #4

![]() Trollhunter’s Return
Trollhunter’s Return
Defeat every Boss in the game.
Story related and cannot be missed.
There is a boss available after each chapter, but they aren’t really hard as the game is designed for kids.
Upon dying, the health counter won’t be reset. You’ll simply lose a life and you can continue fighting. Make sure to use your range attack (triangle) when fighting a boss, in combination with some melee hits. The special abilities won’t be any use during a boss fight.

![]() A Stinky Collection Complete
A Stinky Collection Complete
Gather every Dirty Sock in the game.
Refer to the “Gnome Place to Hide” trophy where all collectibles are listed.

![]() Horngazel Hunter
Horngazel Hunter
Collect the Horngazel and get the Treasure in a stage.
The Horngazel and treasure are available at each level. You’ll need to collect the sword [horngazel] and then find the rock where you’ll be rewarded with the treasure. The reward is about 100 coins.
you shouldn’t have a problem finding them, as many of them are located with a collectible at their side.

![]() Every Villain a Castle
Every Villain a Castle
Successfully reach Morgana’s Castle.
Story related and cannot be missed
The castle is the last chapter before reaching the final boss Morgana, which you’ll need to defeat in her lair!

![]() Waka Chaka!!
Waka Chaka!!
Slay 50 Goblins.
Story related and cannot be missed. Each level contains more than 10 Goblins, so you should have no problem earning this trophy after completing your first chapter.

![]() Subfold Spaceman
Subfold Spaceman
Successfully complete Akiridion-5.
Story related and cannot be missed. Akiridion is a city that resembles a future-like design with neon lights and flying cars.

![]() A Dark Time
A Dark Time
Survive the Darklands.
Story related and cannot be missed. A dark cave-like area which is the biggest ingame, with a total of 5 areas.

![]() Fleshbag in the Bag
Fleshbag in the Bag
Complete the game in Human (Normal) Mode.
The normal & hard difficulty trophies don’t stack, 2 playthroughs are required.

![]() A Dangerous Time
A Dangerous Time
Successfully survive the Time-pocalypse.
Story related and cannot be missed
![]() Below Arcadia
Below Arcadia
Successfully traverse the tunnels below Arcadia.
Story related and cannot be missed. This is the first chapter within the game.
![]() New and Improved
New and Improved
Upgrade any Assist.
You can upgrade your assists in the city. The first one available is ‘Troll armor’. This will reduce Toby’s recharge rate by 50%.
The upgrade itself will cost you 1.500 coins.
![]() Hisirdoux Helps
Hisirdoux Helps
Call for a healing Assist!
You’ll need to talk to Disirdoux before entering the warp-hole towards the end of the game. You’ll only need to make sure you call in its help during a level!
![]() Aja VOOM!
Aja VOOM!
Take a ride on an Akiridion Hoverboard.
Story related and cannot be missed. One of the assists you will be using a lot throughout the game.
![]() Rise Trollhunter!
Rise Trollhunter!
Reach new heights with an Assist!
Story related and cannot be missed. One of the assists you will be using a lot throughout the game.
![]() Awesome Sauce!
Awesome Sauce!
Have an Assist deliver a powerful smash!
Story related and cannot be missed. One of the assists you will be using a lot throughout the game.
![]() Fine Gifts
Fine Gifts
Purchase an item from Bagdwella in Trollmarket.
This trophy can be combined with the “New and Improved” trophy.
![]() Daylight Armory
Daylight Armory
Purchase any Armor Upgrade from Vendel.
Refer to the “Daylight Complete” trophy for more information on this.
![]() You Gnome What to Do
You Gnome What to Do
Hit every target without losing a gnome in Omelrug’s Gnome Challenge.
Will become available after collecting a bunch of gnomes in the city. You’ll need to hit all targets without missing once.
Should you miss a target, continue to miss the other targets too, so you can restart the challenge.
Should you complete it without 100% accuracy, you’ll need to collect a few more gnomes in order to reach the next level.
![]() Serving Up Sushi
Serving Up Sushi
Complete a game of Go-Go Sushi.
Available in the city by talking to Tobias. The Go-Go Sushi game is the best way to farm money.
As you progress ingame, more sushi levels will become available, allowing you to earn more money.
![]() Hocking Up a Luug
Hocking Up a Luug
Catch Luug in Trollmarket.
Luug is the little dogg that’s inside the city. He will be right beside you once you travel to Trollmarket. Interact with it and you’ll earn this trophy.
![]() Subterranean Metropolis
Subterranean Metropolis
Visit Heartstone Trollmarket.
Story related and cannot be missed. Throughout the guide, Trollmarket is being referred to as “city”.
![]() Geode Journey
Geode Journey
Successfully get through the Geode Caverns.
Story related and cannot be missed.
![]() Gnome Up!
Gnome Up!
Catch all Gnomes in any stage.
This trophy is earned once you catch all 3 gnomes in any stage/level.
![]() A Stinky Collection
A Stinky Collection
Gather all Dirty Socks in any stage.
Can be earned by collecting all 4 socks in any level.
![]() Quest Bester
Quest Bester
Complete 3 side quests in the game.
Site-quests are available within the city. You’ll need to talk to NPC’s and they will give you small assignments. There are plenty available, and you shouldn’t have any problems completing them.
The main goal is to deliver or fetch some items for the NPC’s.

Quest 1 
Quest 2 
Quest 3