The Sorrowvirus: A Faceless Short Story Trophy Guide
Game: The Sorrowvirus: A Faceless Short Story Peripherals: – Time to Platinum: 2 – 3 hours Difficulty: 2/10 Missable trophies: None Trophies: 1 , 10 , 4 , 0 Author: JimP2121, edited by BloodDragooner Welcome to the trophy guide for The Sorrowvirus: A Faceless Short Story. This can also be considered a walkthrough and may be used for PlayStation 4, 5, Xbox One, Series X and Steam. Achievements for Steam and Xbox are in almost all cases the same as the PlayStation 4/5 Trophies. A roadmap is provided in the stages below.
Follow us on Twitter for the latest news and giveaways. Feel free to join our Discord server if you have questions!
Welcome to The Sorrowvirus: A Faceless Short Story. Follow the journey of Wyatt Heyll, a young man stricken with a multitude of ailments from an early age. On the verge of death, Wyatt’s parents administer a paranormal substance known as the Sorrowvirus, which contaminates the human soul and prevents it from passing on to the afterlife. This causes a subject to fall into Purgatory instead, where they can heal and return to life. However, every time Wyatt comes back, his cancers and illnesses return more quickly than before. Wyatt’s parents allow him to continue dying over and over while they perform research on organic particles found in Purgatory that may cure him once and for all. Having died so many times, Wyatt simply wants to let go. Your objective is to set Wyatt free from his everlasting torment. Navigate haunting environments in first person, solving puzzles and discovering clues to unravel Wyatt’s tragic tale. With four endings in sight, only one is the true path.
Stage 1 – Play through the Game Three Times for an Ending.
Play through the story three times to reach one of the four endings. You only need to complete two of the four endings to the game. The True Ending will be earned in Stage 2. You will be collecting: Lighters, Dolls, Candles, Books, and using these to solve the puzzles to advance in the game. There will be Audio Recordings that you will need to listen to so that you can move to the next level within the story. For one of these endings you will need to not interact with Notebooks other than the starting ones in your bedroom, and when you end up back in the bedroom, you will go through the corner door of the starting room for the game that is beside the one with the image code lock on it, once it finally opens.
General Walkthrough for Playthroughs 1 - 3
General Walkthrough: 1. Start in your bedroom and interact with the Notebook on the corner desk. 2. Interact with the Audio Recording on the table and then use the portal symbol to go to the Oakfall Motel. 3. Follow the pathway, look for a Lighter in any rooms along the way (random location), light the candles to cause the level to open up Hyde St. Station. Follow Wyatt to the end of the hallway and the gates close. Go down the previous right hallway and then turn a quick left, move the shelf and follow the hallway. 4. Open the door and enter Willow Wells School. Go around the corner and interact with the Audio Recording on the table. Use the portal symbol and then move the shelf blocking the doorway. 5. Enter the next area which is the Wakeland Town Police Department. Interact with the Audio Recording on the right corner desk and then use the portal symbol. Go through the doors that are now open and down the ladder to the Wakeland City Sewers. 6. Follow Wyatt and turn around to change the level, go to the ends of the hallways and turn around. Enter the new hallway and room area. Go to the next door and turn around and walk back the way you came until you eventually are in a room with a lava lamp on a desk and cell doors that are closed. Get the number code (see “Notes on Locks in the Game”) and use it to open the locked door and walk through. Turn around and then open the next door to go into the WTPD Ritual Zone. Here you will need to find a doll that is randomly located and light the candles. The door will then open to the next area. 7. Enter into the Willow Wells School Ritual Zone. You will need to light the candles to the right by using the heights and color order shown on the chalkboard, then find 2 dolls that are randomly placed in this room and the classroom. The door to the next area will open after you have solved this puzzle. Follow Wyatt through the Metal Culvert. 8. Enter into the next area called the Oakfall Motel Sewers & Ritual Zone. You will need to find 3 randomly located dolls and 6 candles in this large area that consists of 3 smaller rooms and a large open room. The items can be on the floor, on the walls, inside the water areas beside the railings, etc. Once you find all the items, go to the small room where it showed a Grandfather Clock outline on the wall near the vines. The vines will disappear and you will enter the next area. 9. Enter the Wakeland Forest Park Ritual Zone and move the shelf out of the way in the apartment to get into the kitchen. In one of these two rooms you will need to find a new Lighter. Use the Lighter to light the candles in the kitchen and collect Wyatt. Try to exit the room and then turn around and now exit and follow the pathway to the right outside of the apartment. Go through the left opening into the next area where the Cave is located. 10. In the Cave, you will collect a Flashlight and then use it to help you find the Key, Candles, Book, and Red Paint Can. Once you have these items, move the cart out of the way and then open the locked cell door with code 0451. Go to your left in this next room and follow this long dark hallway to the next area called Wyatt’s Ritual Zone. 11. In Wyatt’s Ritual Zone, you will need to place Wyatt in the middle of the room and light all the candles. Next, interact with Wyatt and then leave back down the long dark hallway. Upon exiting, go to the left and around following the hallway. Move the cart out of the way by pulling in backwards, then proceed up the stairs to the top and open the door. You will be back in your bedroom and you will need to interact with the Notebook on the desk in the corner. Eventually the corner door will open and you can walk through it for Ending 1. 12. Repeat Steps 1 – 11 for two more playthroughs.
Notes on Locks in the Game
Notes: There are locks that you will need open during your playthroughs. The locks are: 1. A random number door lock in the sewers. First number is on the floor of the north cell door, second is on a triangular sign to the east, third is on the floor of the south cell door, and the fourth number is on the table near the locked door. 2. After the Cave puzzle where you push the cart out of the way, the number code is 0451 on the bulletin board. 3. During the 4th playthrough, Cassandra Noble’s secret room door lock is the Subject Numbers from the four Yellow Notebooks (random). 4. During the 4th playthrough, the image code lock on the door in the starting bedroom. This is a random code. You will need to look through the Bathroom Wall Hole near your bedroom, the end of the Hallway Hole after leaving your bedroom when its the Oakfall Motel, the Willow Wells School Office Floor, and the Wakeland Town Police Department on the Side Double Doors you see an image code behind the Doll. To see the code you will need to look at the Doll and then move in a complete circle and look again. This image code will be used on the locked door that is at the start of the game in the bedroom. 5. During the 4th playthrough, inside the church, the number code on the locked door is 1922.
Locations in the Game
Oakfall Motel.Hyde St. Station.Willlow Wells School.Wakeland Town Police Department.Wakeland City Sewers.WTPD Ritual Zone.Willow Wells School Ritual Zone.Oakfall Motel Sewers & Ritual Zone.Wakeland Forest Park Ritual Zone.The Caves.Wyatt’s Ritual Zone.
Stage 2 – Play through the Game for the True Ending.
Walkthrough for the True Ending Playthrough
Walkthrough for the True Ending Playthrough: 1. Start in your bedroom and interact with the Notebook on the corner desk. 2. Interact with the Audio Recording on the table and then use the portal symbol to go to the Oakfall Motel.
Note: Along the way you will need to interact with the 4 Yellow Notebooks to see the Subject Number. The Subject Number will make up the code for the lock on the door that says “Cassandra Nobles”. Interact with all of the Notebooks (especially the Yellow Notebooks) in this area. Look through the Cracks in the wall in the bathroom and at the end of the hallway. Once you see the doll, move away and turn around and have a second look as the doll should be gone and an image is painted in red. These are needed later in this playthrough. See “Notes on Locks in the Game” above for details. 3. Follow the pathway, look for a Lighter in any rooms along the way (random location), light the candles to cause the level to open up Hyde St. Station. Follow Wyatt to the end of the hallway and the gates close. Interact with the Yellow Notebook on the bench. Go down the previous right hallway to the end of this hallway for Cassandra Noble’s Secret Room. See “Notes on Locks in the Game” above for details. Interact with the two Purple Notebooks in this room. Then go back down the hallway and then turn a right at the Grandfather Clock, move the shelf and follow the hallway. 4. Open the door and enter Willow Wells School. To your right is a locked office with a doll sitting on the floor. Go around the corner and interact with the Audio Recording on the table. Use the portal symbol and go into the office room to find a Notebook and an image code painted on the floor where the doll was located. This image is used for later in the game, see “Notes on Locks in the Game”. Next move to the shelf blocking the doorway that was near the Audio Recording. 5. Enter the next area which is the Wakeland Town Police Department. Interact with the Audio Recording on the right corner desk and then look through the double doors to the left of the desk. There is an image code behind this doll. See “Notes on Locks in the Game” for more details. Then use the portal symbol. Go through the doors that are now open and down the ladder to the Wakeland City Sewers. 6. Follow Wyatt and turn around to change the level, go to the ends of the hallways and turn around. Enter the new hallway and room area. Go to the next door and turn around and walk back the way you came until you eventually are in a room with a lava lamp on a desk and cell doors that are closed. Get the number code (see “Notes on Locks in the Game”) and use it to open the locked door and walk through. Turn around and then open the next door to go into the WTPD Ritual Zone. Here you will need to find a doll that is randomly located and light the candles. The door will then open to the next area. 7. Enter into the Willow Wells School Ritual Zone. You will need to light the candles to the right by using the heights and color order shown on the chalkboard, then find 2 dolls that are randomly placed in this room and the classroom. Interact with the Notebook before going through the door that opened to the next area after you solved this puzzle. Go to the right and interact with the Body Bag on the table, then go through the open door to the right of the Metal Culvert. Go down the hallway, open the door, and interact with the Grandfather Clock. Go back and through the Metal Culvert. 8. Enter into the next area called the Oakfall Motel Sewers & Ritual Zone. You will need to find 3 randomly located dolls and 6 candles in this large area that consists of 3 smaller rooms and a large open room. The items can be on the floor, on the walls, inside the water areas beside the railings, etc. Once you find all the items, go to the small room where it showed a Grandfather Clock outline on the wall near the vines. The vines will disappear and you will enter the next area. 9. Enter the Wakeland Forest Park Ritual Zone and move the shelf out of the way in the apartment to get into the kitchen. In one of these two rooms you will need to find a new Lighter. Use the Lighter to light the candles in the kitchen and collect Wyatt. Try to exit the room, then turn around. You should be able to exit properly after turning around. Follow the pathway to a slight left outside of the apartment. Go to the door on the right and open it. Interact with the Audio Recording, then follow the hallway to go through the left opening into the next area where the Cave is located. 10. In the Cave, you will collect a Flashlight and then use it to help you find the Key, Candles, Book, and Red Paint Can. Once you have these items, move the cart out of the way and then open the locked cell door with code 0451. Go to your left in this next room and follow this long dark hallway to the next area called Wyatt’s Ritual Zone. 11. In Wyatt’s Ritual Zone, you will need to place Wyatt in the middle of the room and light all the candles. Next, interact with Wyatt and then leave back down the long dark hallway. Upon exiting, go to the left and around following the hallway. Move the cart out of the way by pulling in backwards. Then proceed up the stairs to the top and open the door. You will be back in your bedroom and you will need to interact with the Notebook on the desk in the corner. Then go around to the bed and heat radiator. Use the key hole on the wall near the heat radiator to reveal a secret doorway. Go through this Unknown Area and you will eventually see the gates open. Follow Wyatt back down the hallway and all the way back to just outside of your bedroom. Go through the end of the hallway near the bedroom. See “Atrophied” trophy description for more details. You will see the image code on the TV screens and a Notebook that you need to interact with. 12. Go into your bedroom and open the image code locked door in the corner of your bedroom. Go down the hallway and open the door. You have now entered the Church area. 13. Go to the left of the Church, all the way to the cellar doors and interact with the Audio Recording laying on top of them. Next, go into the church and go to the left door near the front altar. Open the lock with code 1922 and interact with the Notebook on the floor. Then proceed to interact with the Grandfather Clock and then walk through the entrance doors to the church into the graveyard area.
Mortal Degradation Unlock all other trophies.
Congratulations on your shiny new platinum!
The Bear Valley Tragedy Listen to the last words of a Wakeland City victim.
See Stage 2 above for details. See the pictures below.
Before going into the Metal Culvert, go to the right.On a table will be a body bag that you will need to interact with.
Beyond Blood Find Rosco Heller’s recording.
See Stage 2 above for details. See the pictures below.
After collecting Wyatt from the Kitchen head out of the Apartment.Go to the left towards the door on the right.Go to the closed door.Interact with the Audio Recording on the floor.
Anomalous Caverns Successfully make it through The Cave without dying.
When you enter The Caves, you will need use a Flashlight that is on the cart to look for 4 items: Key, Book, Candles, and Red Paint Can. They will be on the floor inside of an open drawer. You will need to make it through this area without dying and to do this make sure that you do not touch the enemies as they will burn you. If you get burnt enough, you will die. See the pictures below.
Collect the Flashlight. Test the Flashlight.Interact with the Notebook beside the Grandfather Clock.The Key is always at the start of the Cave.The Book will be in a random open drawer.The Red Paint Can will be in a random open drawer.The Candles will be in a random open drawer.
Indomitable Get into Cassandra Noble’s safe room.
See Stage 2 above for details. See the pictures below.
Oakfall Motel: Bedroom, Subject Number (1st number of code).Oakfall Motel: Hallway, Subject Number (2nd number of code).Oakfall Motel: Down the stairs in the next hallway, Subject Number (3rd number of code).Hyde St. Station: On a bench at the end of the hallway, Subject Number (4th number of code).Go to the end of this hallway.Enter the code for Cassandra Noble’s door lock.Open and walk into Cassandra Noble’s Safe Room.Cassandra Noble’s Safe Room.Interact with the Two Purple Notebooks.
No Room Unexplored Find the bonus Grandfather Clock.
See Stage 2 above for details. See the pictures below.
Go straight ahead to through the open door and down the hallway.Open the door and interact with the Grandfather Clock.
Defiance Find the hidden door.
See Stage 2 above for details. See the pictures below.
To the right of the bed near the heat radiator is a key hole.Interact with the key hole and enter through the open door.Defiance Trophy.
Whispers Of Wakeland Find Elijah Grey’s recording.
See Stage 2 above for details. See the pictures below.
Go to the left and around the church.Interact with the Audio Recording on the Cellar Doors.
Hollow Nexus Get into the Fallen Grace Church.
During your fourth playthrough, you will enter the Fallen Grace Church and earn this trophy. See Stage 2 above for details.
Set Him Free Free Wyatt’s soul.
After solving the third dolls and candles puzzle, you will enter a kitchen to light candles and then collect Wyatt. You will move through the Cavern to collect a Book, Candles, Key, and Red Paint. Once you have all of these items, you will eventually get to a room where you will need to place Wyatt, light candles, and interact with Wyatt to set his soul free. See the pictures below.
Set Him Free Trophy.
Atrophied Get the True Ending.
Complete your fourth playthrough following the steps outlined in Stage 2 above. See the pictures below.
Follow Wyatt after going through the Unknown Area from the Bedroom by using the Key on the hole near the heat radiator.Before going back into your bedroom, go straight through the wall at the end of the hallway.Find the secret room at the end of the hallway and interact with the Notebook on the floor.The image code for the bedroom door that is locked will be displayed.Use the image code on the locked bedroom door where Wyatt is standing.Follow the hallway to the next area at the church.Enter the church and go the left of the altar where the Grandfather Clock is and use the code 1922 on the lock. Interact with the Notebook on the floor.
Deliverance Complete the first instance.
Complete one playthrough of the game to reach one of the endings. An example is to open this door after returning to the starting bedroom of the game and walking through the open door. See the picture below.
Ending 1 is earned by not interacting with any Notebooks throughout your playthrough and walking through this open door in your bedroom.
Furtherance Complete the second instance.
Complete a second playthrough of the game to reach one of the endings. You can repeat the same ending as before.
Inheritance Complete the third instance.
Complete a third playthrough of the game to reach one of the endings. You can repeat the same ending as before.
Remembrance Complete the fourth instance.
Complete a fourth playthrough of the game to reach the True Ending. Follow the steps in Stage 2 above.


 Mortal Degradation
 The Bear Valley Tragedy
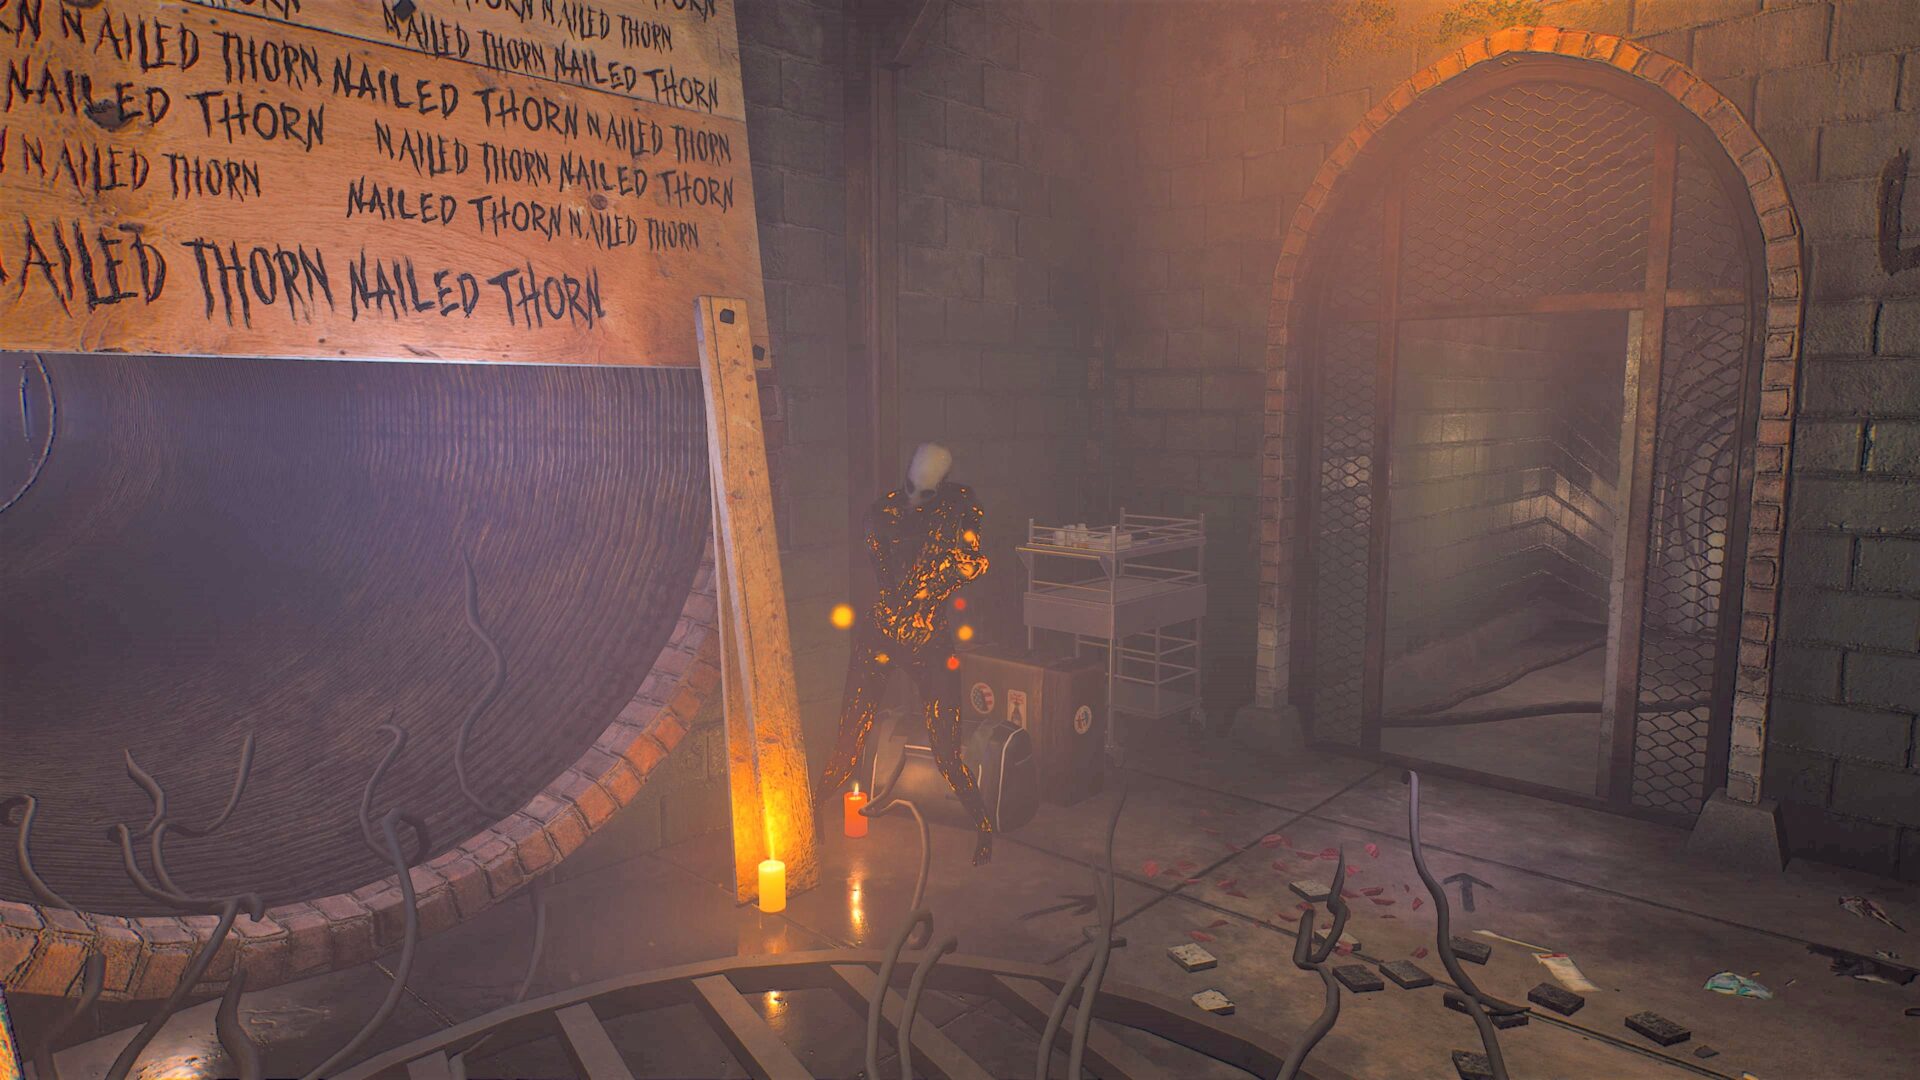


 Deliverance


