
Game: Murderous Muses
Peripherals: –
Time to Platinum: 15 – 20 hours (8 – 12 hours if you skip videos when possible)
Difficulty: 2/10
Missable trophies: None. You will need to replay the game multiple times
Trophies: 1 ![]() , 8
, 8 ![]() , 6
, 6 ![]() , 7
, 7 ![]()
Author: JimP2121, edited by BloodDragooner
Welcome to the trophy guide for Murderous Muses. This can also be considered a walkthrough and may be used for PlayStation 4, 5, Xbox One, Series X and Steam. Achievements for Steam and Xbox are in almost all cases the same as the PlayStation 4/5 Trophies. A roadmap is provided in the stages below.
Follow us on Twitter for the latest news and giveaways. Feel free to join our Discord server if you have questions!
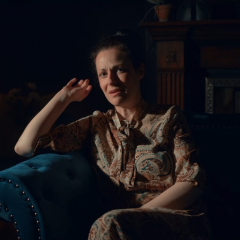
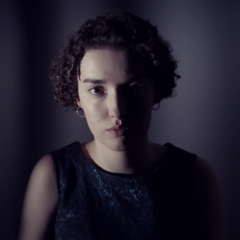
Welcome to Murderous Muses! It’s a year to the day since controversial artist Mordechai Grey was murdered. Now, a new exhibition has opened on the anniversary of his death, featuring six of his most famous portraits – each one a potential suspect in his murder. You play as the night watch, exploring the gallery in the echoing hours to uncover clues about his death. Solve puzzles and use the Eyes of Mordechai to bring the portraits to life, restoring the past to find his killer. Solve a cold-case murder mystery that re-rolls every time you play. Explore a procedurally-generated 3D gallery with shifting rooms and unexpected twists. Uncover clues and use deduction to find the killer. Solve puzzles and unlock secret locations! From the creators of The Infectious Madness of Doctor Dekker, The Shapeshifting Detective and Dark Nights with Poe and Munro, Murderous Muses is an infinitely replayable supernatural whodunit mystery adventure where choosing how to investigate is an art form.
Stage 1 – Play the Game – General Walhrough.
Play the game using the General Walkthrough below. You will need to play the game at least 5 times to earn all the trophies. Every time you play, the puzzle solutions will be different, the layout of the gallery will change, paintings you need to hang will change, and the murderer will change. There will always be 18 paintings that you will have to unbox and hang in the gallery, there is a room for each of the 6 suspected murderers with the important story elements to watch out for, a Sasha room with a Telephone Hotline, and there is always a room for the urns to be placed to reveal more information to the stories.
You will need to complete the following items (and these can be done over multiple games as they do accumulate):
1. Sit down 10 times.
2. Clicked on TVs 50 times.
3. Watch a police interview during one of the nights at one of the Suspect Boards, after earning the 3 word requirements for a character on that night.
4. Obtain 17 Urns, place them in the Urn Room and watch the videos.
5. Recycle 6 Eyes.
6. Restore 6 Eyes.
7. Catch the killer at least once.
8. Open 50 crates.
The game consists of 3 days and nights to find out the clues you need to try to solve the murder mystery. Each time you play, the murderer will be different, as the scenarios and circumstances around the mystery will change.
Begin the game and follow the instructions as they are given.
Day 1:
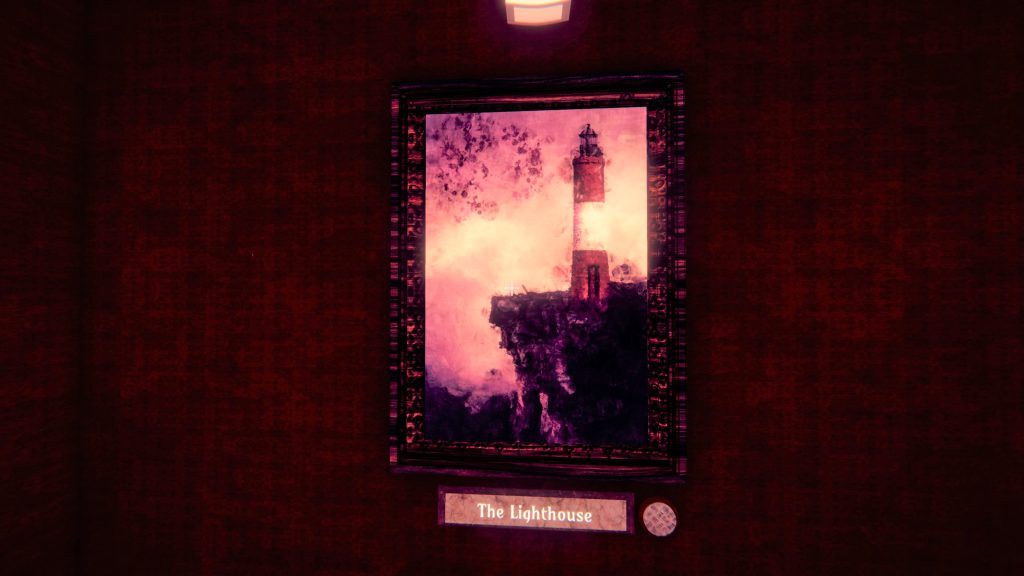
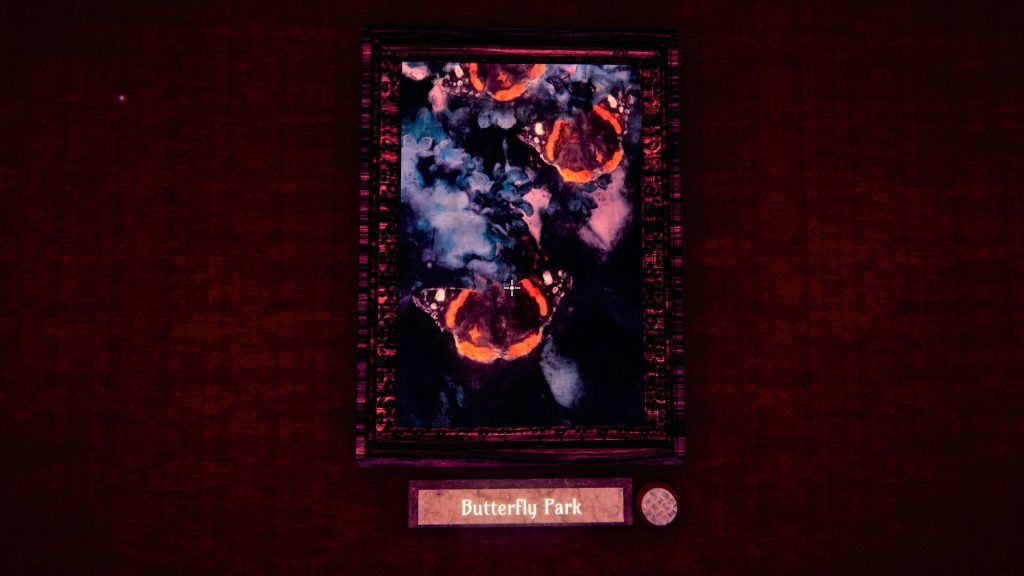
Open the crates of the paintings that are scattered around the gallery. There will be 7 crates on Day 1 as one box gives the Key to the Staff Storeroom (says Staff Only on the door). See the All Paintings with their titles to easily match the paintings and hang them up in the gallery. After you have hung a painting, there will be a button that will light up that you can interact with to hear some history of the area. After correctly hanging up all 6 paintings you can proceed back to the front desk area to interact with the Security Monitor.
Night 1:
You will interact with the painting of a key to collect it, hang it on the wall, interact with the button below it. Remove the painting from the wall, hang it up again, and then interact with the button below it. Do this again until you need to remove the painting, place it on the Eye Table, collect the red ball called and “Eye” from the pedestal, and place it in the left hole. Next, interact with the Restore button and the Eye will go back into the frame of the painting. Collect the painting, hang it again, interact with the button below it, and then collect the Key from the pedestal. Use the Key to open the door to get into the gallery. Read any notes that you find laying on the floor, desk, chairs, etc.
The gallery will now be setup as follows:
1. Where the Staff Storeroom door was, this will lead to a hallway with 6 doors for the Suspect Room, 1 room for all of Sasha’s videos and the Tips Hotline, and up the stairs where the Urns are placed for the Kira videos.
2. The galley part that had the paintings of the murder suspects will now be a hallway with a TV for an important episode on the Murder Suspect information.
3. The other part of the gallery will have the paintings, but it is pretty much the same as the day until Night 3. However, the paintings will have a different narration on the history of it so listen to these as you like.
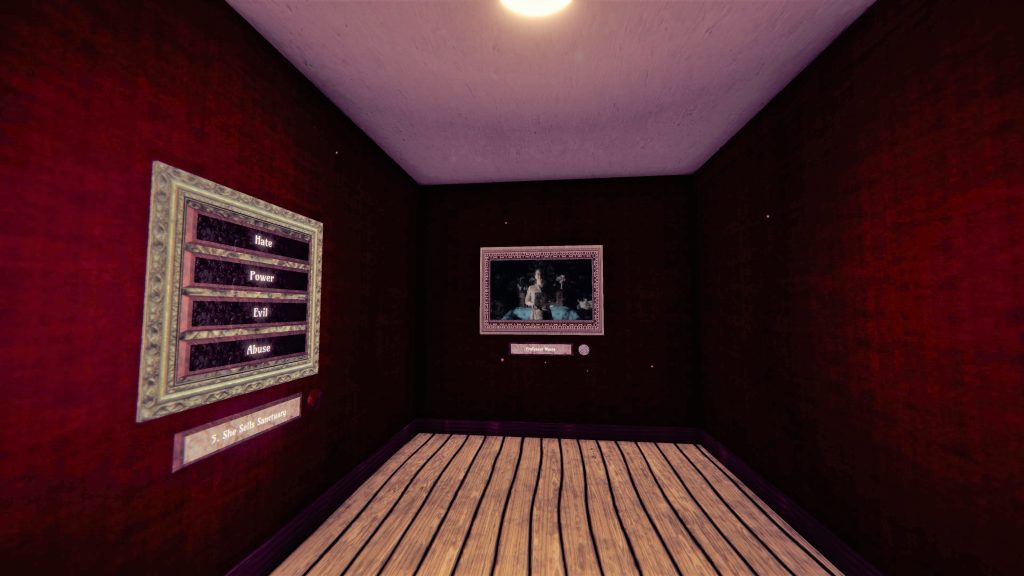
Watch the TV for the Murder Suspect information. There are a number of different stories (three examples shown below) and these will be important for determining who the murderer is during your current playthrough. After watching it, a new doorway will be revealed, leading to an area where there is a Suspects Board with the 3 Words that you will need to watch for each. There will be titles of these Words on the walls in this area and there may be more than one room in this area so check them all. Also, there will be Eyes scattered around on the floor, baseboards, carpet, benches, display cabinets, boxes, etc. However, typically there are 1 – 3 Eyes that can be found this way during Night 1. In your inventory triangle button), you will have all 6 Suspect paintings available for you to use. IMPORTANT: Do not hang any yet. Go to the 6 Suspect Rooms, here you might want to write down the 5 lists of words with any roman numerals (I) for each of the 6 suspects. This will greatly help you out when trying to make sure that you see as much content as needed for each Suspect. Each playthrough will only have a certain set of words available for the Suspect Boards and the Word titles where you hang the paintings.


Go back to the Suspect Board. In this room there will also be 2 Exhibition Board lists that show the order for the words for the Word titles for when you hang and then remove a painting. Sometimes there may be a blank and you will need to determine what it is yourself by hanging a picture, watching the FMV, and then removing the painting. It is recommended to write these Exhibition Keys down also to save time. The order is top to bottom, and then back to the top to start over again. Each Exhibition Key is independent of the other.
Look at the Suspect Board, the Word List needs to be done in order 1 – 3. You can choose any word or task on the list that you want to do, but be aware that when you return to the Suspect Room, the Word List will change, with the exception of the word you chose. If you make strategic choices with how you hang the paintings for the words you can complete the Suspect Board and also some of the words from the Suspect Room, especially the words with roman numerals beside them if they are available.


At the Suspect Board, interact with the name of the Suspects to watch their police interview after their 3 words have been highlighted. After the entire Suspect Board has the available Suspect word list filled in, you will have a grandfather clock sound during the FMV of the last word that you are completing.
You can use the Eye Table to restore Eyes if you need to or recycle them. After completing the Suspect Board and any Suspect Room words with roman numerals, you can place your paintings individually on the Eye Table to recycle the Eyes (it costs 2 Eyes to get 1 for your inventory). So if a painting has 2 Eyes left in the frame, you will get back 1 Eye. However, if you have 1 or 0 Eyes, you will not get an Eye back. This is a way that you can make sure to increase the number of Eyes that you have available throughout this playthrough as they will carry over to the next day/night cycle.
Also, there will be a Puzzle and a locked door within the room where the Suspect Board is located. The puzzles are either: Code Puzzle, Tickets Puzzle, Telephone Puzzle, or Matching Puzzle. The puzzles are explained in more details in the video below.
Solve the puzzle and then collect the Key to use on the locked door. Go into the room, collect the Urn, place the Suspect paintings on the word title in this room, watch the FMV for each Suspect, and then finally watch the Sasha video. Go to the Urn Room, rotate the Urn to see the roman numeral on the bottom, place it on the same numbered pedestal, and then watch the Kira video on the wall behind it. There will be 17 Urns to collect through multiple playthroughs, they will never repeat, and once you have collected and placed all of them, they will be replaced by Eyes you can collect.
You can use the Telephone Hotline if you have 6 Eyes in your inventory to activate it. This will rule out one of the Suspects. Finish the night by interacting with the Security Monitor.
Day 2:
Open the crates of the 6 paintings and hang them according to their titles. Listen to the history if you like. Proceed to the Security Monitor and interact with it. Sasha may ask you to “Choose Portrait(s) for Sasha.” . This means you will need to select a painting or more from the Suspect paintings which may or may not be returned the next day depending what shs says. This means that there could be a painting that will not be available for your Suspect Board that night so choose wisely and pick someone or ones that you do not suspect as the murderer(s) so far. Place the Suspect painting(s) you choose on the Easel(s) near the front door and interact with the Security Monitor to finish the day.
Night 2:
Check the Suspect Rooms to see which words now have roman numerals (II) beside them, make note of this as these can only be asked during this night. Proceed to the hallway leading to the Suspect Boards and there will be a new hallway with another TV for you to watch another episode of the Murder Suspect information. After it finishes go into the new area, search for any scattered Eyes in this area as there could be 2 – 4 Eyes available. Check out the Suspect Board, Exhibition Keys, and the word titles on the wall. Your inventory will be missing one painting, so you will not need to worry about highlighting the words for this Suspect that night. After the words are highlighted on the Suspect Board and you have completed any of the Suspect Room words with roman numerals are completed, watch the police interviews for each Suspect on the Suspect Board by interacting with their name. Remember to restore or recycle the Eyes as needed. Always remember to recycle the Eyes before ending the night so that your number of Eyes increases in your inventory.
Move onto completing the puzzle to obtain the key to the locked room. Go into the room, collect the Urn, place the Suspect paintings on the word title in this room, watch the FMV for each Suspect, and then finally watch the Sasha video. Go to the Urn Room, rotate the Urn to see the roman numeral on the bottom, place it on the same numbered pedestal, and then watch the Kira video on the wall behind it.
You can use the Telephone Hotline if you have 6 Eyes in your inventory to activate it. This will rule out one of the Suspects. Go to the Security Monitor and interact with it to end the night.
Day 3:
Open the crates of the 6 paintings and hang them according to their titles. Listen to the history if you like. Proceed to the Security Monitor and interact with it. Sasha may ask you to “Choose Portrait(s) for Sasha.”. This will mean that you will need to select 1 or 2 paintings from the Suspect paintings, but one may or may not be returned the next day depending on what she says. This means that a painting or more will not be available for your Suspect Board that night so choose wisely and pick someone or ones that you do not suspect as the murderer(s) so far. Place the Suspect painting(s) you choose on the Easel(s) near the front door and interact with the Security Monitor to finish the day.
Night 3:
Interact with the note on the Security Monitor counter and pick up the Auk statuette. Proceed to the hallway leading to the Suspect Boards, however you will be told to go find the Crystal Ball. This will be found in the gallery part, one room will have a large red Eye on the floor. Go past it, then go down the stairs and place the Auk statuetteon the pedestal. Then move to the left or right as the large red Eye will roll down the stairs and break through the wall. Go through the opening in the wall to a hidden room. In this room collect the Urn, use the Suspect painting on the word title on the wall, watch their FMV, and finally watch Sasha’s video.
Check the Suspect Rooms to see which words now have roman numerals (III) beside them and make note of this as these can only be asked during this night. Place the Urn in the Urn Room and watch Kira’s video.
Proceed to the hallway leading to the Suspect Boards and there will be yet another new hallway with another TV for you to watch another episode of the Murder Suspect information. After it finishes go into the new area. Search for any scattered Eyes in this area as there could be 2 – 6 Eyes available. Check out the Suspect Board, Exhibition Keys, and the word titles on the wall. Your inventory will be missing one painting so you will not need to worry about highlighting the words for this Suspect that night. After the words are highlighted on the Suspect Board and you have completed any of the Suspect Room words with roman numerals are completed, watch the police interviews for each Suspect on the Suspect Board by interacting with their name. Remember to restore or recycle the Eyes as needed. Always remember to recycle the Eyes before ending the night so that your number of Eyes increases in your inventory.
Move onto completing the puzzle to obtain the key to the locked room. Go into the room, collect the Urn, place the Suspect paintings on the word title in this room, watch the FMV for each Suspect, and then finally watch the Sasha video. Go to the Urn Room, rotate the Urn to see the roman numeral on the bottom, place it on the same numbered pedestal, and then watch the Kira video on the wall behind it. Go to the Security Monitor and interact with it to end the night.
Before you complete the last night, you can review the police interviews for each Suspect near the Security Monitor on the wall behind it. You can use the Telephone Hotline if you have 6 Eyes in your inventory to activate it. This will rule out one of the Suspects. Interact with the Security Monitor and then you will be back in the gallery. Enter where the hallway that use to lead to the Suspect Boards, however this time there will be a room where you will need to hang the painting of whom you suspect is the murderer. Next, interact with the Accuse button and watch for the cutscene reveal.
Next playthrough will carry over all of your word choices for the Suspect Rooms and eventually they will turn into a painting once a list of words is completed. It will also be noted on the door of the Suspect’s Room with a yellow square. The Urns placed will still be there too.


Stage 2 – Replay the Game At Least 4 more times.
You will need to follow the same General Walkthrough, but you can focus on earning certain trophies when it is more advantageous to you as you play through each game. For example, there is a trophy for having 20 or more Eyes at the end of a game. This will be more easily achieved when you are not worrying about if you convict the wrong suspect as there is a trophy related to actually convicting the real murderer too.
You will need to focus on these in at least one of your playthroughs of the game. They are:
1. End a game with more than 20 Eyes collected and not used.
2. Find a painting you left in the storeroom in a game. (Do not attempt with the “Employee of the Month” trophy.)
3. Use the Telephone Hotline at least once in a game.
4. Solve all 3 puzzles on their first attempts in a row in a game.
5. Hang all the paintings correctly for Sasha during a game.

 Platinum
Platinum.
Congratulations on solving the murders!

 Framed
You caught the killer.
You will earn this when you have correctly accused the Suspect who actually committed the murder during that game’s playthrough. The murderer will change each playthrough.

The Big Picture
You unlocked a character lore painting.
As you hang the Suspect paintings through the nights, when you have fully completed a word list from one of the five lists in one of the Suspect’s Room, you will unlock this trophy.

Choices Matter
You unlocked a branching painting.
As you hang the Suspect paintings using the Suspect Boards, you will highlight the words from their list. Eventually you will have a set of words that will lead to a you watching the FMV that branches the paintings for them.

Employee of the Month
You hung all the paintings correctly for Sasha.
There are 6 paintings to hang each night, and there are 3 nights that this happens for a total of 18 paintings to hang. When you hang a painting correctly there will be a highlighted circle that you can interact with to hear a narration of the history of that painting. See All Paintings with their Titles in Stage 1 – General Walkthrough for more information. After hanging the 18th correctly, you will earn this trophy.
Private Eye
You solved the murder with over 20 eyes left.
You will be able to recycle Eyes from paintings each night. Make sure to check the frames to remove the Eyes on the Eye Table. Also, collect any of the Eyes that are scattered throughout the Suspect Board rooms from the three nights. Finally, if you have collected all 17 Urns, you can earn Eyes from where the Urns would have previously have been located. You will earn this trophy if you correctly accuse the right Suspect and have over 20 Eyes in your inventory before the end of Night 3.

Mind Games
You solved all 3 puzzles first attempt
You will need to solve all 3 of the puzzles on your first attempt. These are the puzzles that will give you the Key to the locked door in the Suspect Board rooms. See Stage 1: General Walkthrough for more information and a link to a video of how to solve the 4 different types of puzzles.

Double Indemnity
You tried to solve the murder again
After completing the game once, play it again and Accuse someone at the of playthrough 2 to earn this trophy. You do not need to correctly name the Suspect to the murder during this playthrough.

The Importance of Being Urnest
You collected all the urns
There are 17 Urns to collect in the game. It will take at least 5 playthroughs to get all the Urns. The Urns are available in the locked rooms inside the Suspect Boards rooms and the hidden room where the large red Eye breaks through the wall after placing the Auk statue on the pedestal. See Stage 1 – General Walkthrough for more information.

 You Urned It
You watched a Kira video.
After you have collected an Urn, you will need to place it in the Urn Room. Each Urn will have a roman numeral on the bottom and you can rotate it to see what it is. Then place it on the correspondingly numbered pedestal. Behind the Urn/pedestal is a painting of Kira on the wall that you can interact with to watch a Kira video.

Lost and Found
You found a painting you’d left in the store room.
Do not attempt this trophy while trying to earn Employee of the Month trophy. After you have earned this mentioned trophy you will need to do the following:
During one of the Days (1 or 2) you will need to unbox the paintings, however do not place all of them in the gallery. You can keep one or more in your inventory and end the day. The night will follow and you will play through as usual. The next day you will need to go to the Staff Storeroom and start opening up the crates. You will eventually find the one or more that you did not hang the day before.

Eye Surgery
You socketed 6 Eyes of Mordechai.
You can use the Eye Table to Restore Eyes to the frame of a painting. This is cumulative so it will carry over to multiple playthroughs. However, if you did not earn it by your 5th playthrough, you will need to Restore Eyes to the frames of the painting until you earn this trophy.

Pay to Win
You paid the tips hotline.
You can use the Telephone Hotline by placing 6 Eyes in the slots above the Telephone and then interacting with it. This will play a message telling you who is not the Murderer for that playthrough. You can only use this once per night of a playthrough.
Hard Facts
You watched a police interview.
At any of the Suspect Boards, when you have completed the word list for any of the Suspects, all 3 words will be highlighted. You can then interact with the name of the Suspect and you will play a police interview video. Using the Police Interview behind the Security Monitor does not count for earning this trophy.

Recycle Recycle Recycle
You recycled 6 Eyes of Mordechai.
As you play through the nights, make sure that you are Recycling any paintings that have at least 2 Eyes in their frames. The cost to recycle the Eyes is 2 for 1. As soon as you have done this to obtain 6 using this method, you will earn this trophy.

![]() Art History
Art History
Hung your first painting to see into the past.
During your first playthrough, when you have hung your first painting either on the Police Interview wall behind the Security Monitor or from the Suspect Board onto the wall, you will earn this trophy.

![]() Crate Expectations
Crate Expectations
You opened 50 crates.
As you play the game multiple times, you will open 19 crates from the gallery area every game (Night 1 has 7, Night 2 has 6, and Night 3 has 6). There are also 12 crates in the Staff Storeroom each night that you can open. As soon as you open your 50th crate, you will earn this trophy.

![]() I Am TV
I Am TV
You clicked the TVs 50 times.
During one or more playthroughs, you can interact with any of the TVs for the Murder Suspect information. These are in the hallway leading into the Suspect Board rooms. You do not need to watch the full video each time if you want to quickly earn this trophy.

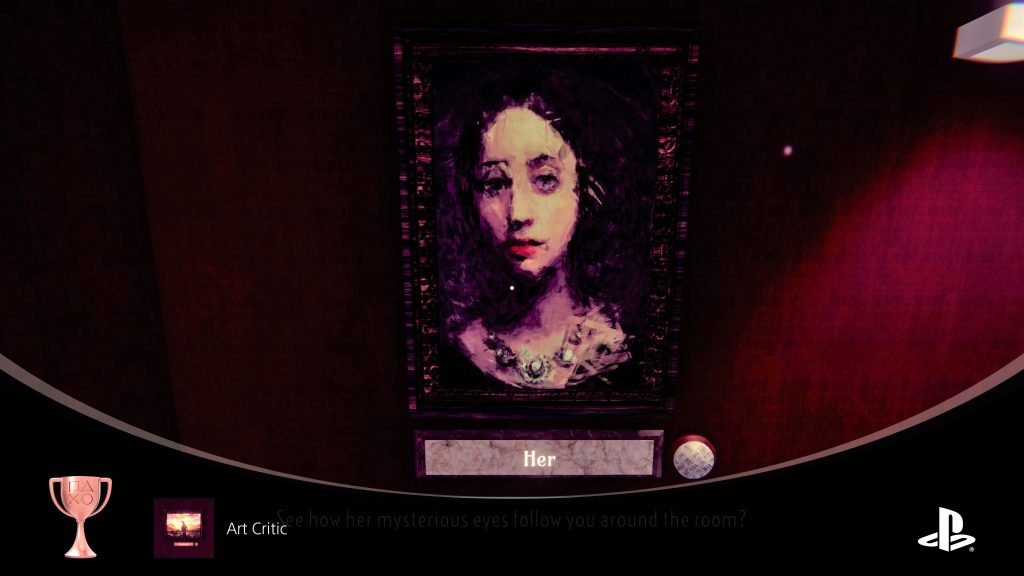
![]() Art Critic
Art Critic
Listened to your first Higgins lore painting narration.
During any Night you can go into the gallery and interact with any of the narration circles below a painting to hear Higgins narration for that painting.

![]() J.A.M.I.E. and the Magic Tour
J.A.M.I.E. and the Magic Tour
Listened to your first J.A.M.I.E. lore painting narration.
During the Day, after you have hung a painting with its correct title, there will be a narration circle that appears below the painting and near its title. Interact with the narration circle the first time to hear a J.A.M.I.E. painting narration.

![]() Art Admirer
Art Admirer
You sat down 10 times
There are benches that are scattered around the rooms during the day or night. You can quickly earn this trophy by sitting and seating 10 times in a row at any bench.

![]() Art Block
Art Block
You made it out of the tutorial puzzle
During Night 1, you will need to solve the tutorial puzzle that involves you learning how the Eyes with the paintings work. As soon as you earn the Key to exit the back room, you will earn this trophy. See Stage 1 – General Walkthrough for more information.