
Game: Creature in the Well
Peripherals: –
Time to 100%: 6 – 10 hours
Difficulty: 3/10
Missable trophies: None
Author: Pete
Welcome to the trophy guide for Creature in the Well. This can also be considered a walkthrough and may be used for PlayStation 4, Xbox One and Steam. Achievements for Steam and Xbox are in almost all cases the same as the PlayStation 4 Trophies. A roadmap is provided in the stages below.
Follow us on twitter for the latest news and giveaways.
Stage 1 – Play through all the different levels until you have to enter the Well.
Creature in the Well is a combination Pinball/Dungeon Crawler. Using the pinball mechanics to interact, solve puzzles, earn power, reveal Secret Doors, and to defeat the Creature.
Play through all the levels in the game while collecting all collectibles along the way and earning all miscellaneous trophies. The maps are shown as to what they look like below when completed. Play until you enter the Weather System Control level and you will have to enter the well to finish the game. If you are trying to earn all trophies in a single playthrough then before entering the Well make sure that you have all the collectibles except for: Great Sword Prototype and Clothe of the Creature’s Hand Cape as shown below.
Note: All of the 8 levels will have Secret Doors that need to be revealed. The maps below are all fully completed. To get access to all of the rooms shown on the Maps, you will need to complete a pinball mini-game in the previous room. These involve you hitting timed targets and bumpers to clear a room as quickly as possible. Depending on the level, you may need to change the Strike Tool and Charge Tool that you use to help you achieve success in these rooms. You may also need to upgrade with the Old Cores and/or have better tools for completing the puzzles or timed challenges in these areas. You can return to all locations later on if you need to do so. Once you have successfully completed the pinball mini-game, you will reveal a Secret Door that you will enter. Inside these Secret Rooms are some Old Cores, Strike Tools, Charge Tools, and/or Capes.
In the Maps below, the area of the game where you begin leads into the other entrance to the Temple. This is noted as Weather System Control Floor 2. You will eventually drop down into the area near the Monoliths inside the Temple. During the majority of the game, you will be near the main front entrance to the Temple. Also, the Weather System Control Floor 1 Map is at the end of the game after entering the Well.

The 8 Levels of the Temple. 
Completed Map of the Power Reserves. 
Completed Map of the Lockdown Systems. 
Completed Map of the Archives. 
Completed Map of the Power Grid. 
Completed Map of the Atmospheric Analysis. 
Completed Map of the Synchronous Field. 
Completed Map of the North Star Conduit. 
Completed Map of the Weather System Control Floor 1. 
Completed Map of the Weather System Control Floor 2. 
All Collectibles Found.


Tips:
– You can change the controller configuration under Settings. It is recommended to change these to a setup that you are most comfortable with. See the picture below.
– ‘Balls’ means the same as ‘Orbs’ throughout this trophy guide.
– After completing the Power Grid level you will open a door to the left of the well. Passing through this door will instantly take you to the area to the left of the Monoliths in the Temple. It works in both directions to save some time.
– All levels have a part where you can buy a teleport spot that is directly before the Creature battle room. It’s highly recommended to buy these as they allow fast travel within a level between near the Entrance and the Creature battle room. Each of the Creature battles involve completing 4 challenges to defeat the Creature. It will say, “The Creature has retreated…” when you successfully complete these battles.

Configure the Controls to Your Liking. 
Open Door near the Well (Fast Travel unlocked). 
Open Door to the Left of the Monoliths (Fast Travel unlocked).


More Tips: – One of the most useful Charge Tools is the Magnetic Fork, as when it is charged, it will attract all the balls near it. This tremendously decreases the time it takes to get another ball(s) so that you can hit targets rapidly.
– There are bright white, full healing pools in the Monolith area and inside of each of the Temple levels. You can easily get your health back to full strength by standing for a few seconds in one.
Stage 2 – Enter the Well to defeat the Creature and finish the Weather System Control level.
In the Weather System Control level where you face the Creature and obstacles, it is recommended to use the Fan Blade and the Dual Blades. (Use the Fan Blade because you can absorb the Anomaly Balls to gain health automatically. The Dual Blades emit a laser red line that points in the exact direction the ball(s) will fire toward.)
Trophies

![]() Beyond The Storm
Beyond The Storm
Unlock all other trophies.
Congratulations on your new shiny Platinum trophy, you have saved Mirage from the sandstorm and collected everything in the game!

![]() The North Star
The North Star
Save Mirage from the sandstorm.
See the Weather System Control level where you will battle against the Creature many times. Upon completing the final battles against the Creature, you will be able to enter the final room of the Weather System Control. Here you will talk to Roger on the right side of the room, then go to the left and interact with the 3 computers in front of you. Next along the left wall, interact to turn on the Weather System Control to clear the sandstorm. This will lead to the end of the game.

Creature Obstacles. 
Main Creature Battle Area. 
Avoid Lasers, hit bumpers, & absorb Anomaly Balls. 
Avoid the Lasers, Explosives, & hit bumpers. 
Avoid Lasers, hit the timed targets. 
The North Star Trophy.

![]() Open Sesame
Open Sesame
Find Phillip’s prototype.
Wait until you have upgraded Bot-C to level 7 or higher; found some of the Strike Tools and Charge Tools; and have earned at least 250,000 Electric Points. Exit the entrance to the Temple/village area through the front and follow the small stones that are to the left of the stone ramp. There is a secret path through the large rock, where you will find the Lost Garment Cape. Go through the secret path and follow the wooden stakes up to the entrance at the rear of the Temple. Battle through these rooms to eventually come to the room with the Closed Door that requires over 215,000 Electric Points to open it. In here you will find Phillip’s prototype. Exit and follow the path you took to get back to the front entrance of the Temple.

Exit the Temple/Village Area. 
Follow the small stones. 
Continue following the small stones. 
Follow the small stones more. 
Continue to move Left through a Secret Tunnel. 
Exit the Secret Tunnel (remember to go back through here later on). 
Follow the wooden posts. 
Continue to follow the wooden posts into the Temple. 
Pay to enter this Locked Door. 
Find Phillip’s Prototype.


![]() Stock Tools
Stock Tools
Find the scavenger’s hidden stash.
In the Temple/village area, there is a row of parallel buildings toward the entrance to this area. Enter the door on the right.
Once in here you will need to strike the timed targets and catch the ball every time to get through this first section.
The second section requires you to carry the ball through timed lasers and explosive triggers. Once through here you will need to strike 2 timed targets.
Tips: If you lose the ball after these, you can go back to get another from the previous room. Also, you can carry the ball along the outside of the walkway to get the ball around the small posts blocking you from carrying it on the actual walkway.
Then hit the 4 timed targets to reveal a Secret Door. Go through and along the path to enter the Scavenger’s hidden stash.

Enter this Open Door & hit the timed targets. 
Carry the ball while dashing through the Lasers. 
Hit the timed targets. 
Reveal the secret path. 
Go down the pathway to the Scavenger’s Hidden Stash. 
BOT-C CHRGR Charge Tool. 
BOT-C STRKR Strike Tool. 
Old Cloth Cape.

![]() Looking Fancy
Looking Fancy
Find all capes.
There are pathways that need to be revealed in order to find the collectibles. These are revealed when you complete an area quickly to open the hidden door. Many of the Old Cores are inside these areas with the Capes. Danielle gives you your 2nd Old Core after you upgrade your BOT-Core the first time. The last Old Core requires that you open the Weather Control Monolith before this item is available. This Old Core is behind where Roger is mopping the floor in the Temple.
See the pictures below for where you must collect:
9 Old Cores.
8 Strike Tools.
8 Charge Tools.
12 Capes.
1 Phillip’s Prototype (helmet).
Each picture has the information on where to locate each of the above items.

Complete Collection of Collectibles. 
Along the path at the start is the Pipe Strike Tool. 
After entering the Temple is the Charge Sword Charge Tool. 
In the front area of the Village is the Child’s Cape. 
Go inside the Small Building to the Right of the Well. 
Inside the Small Building is the Baseball Bat Strike Tool. 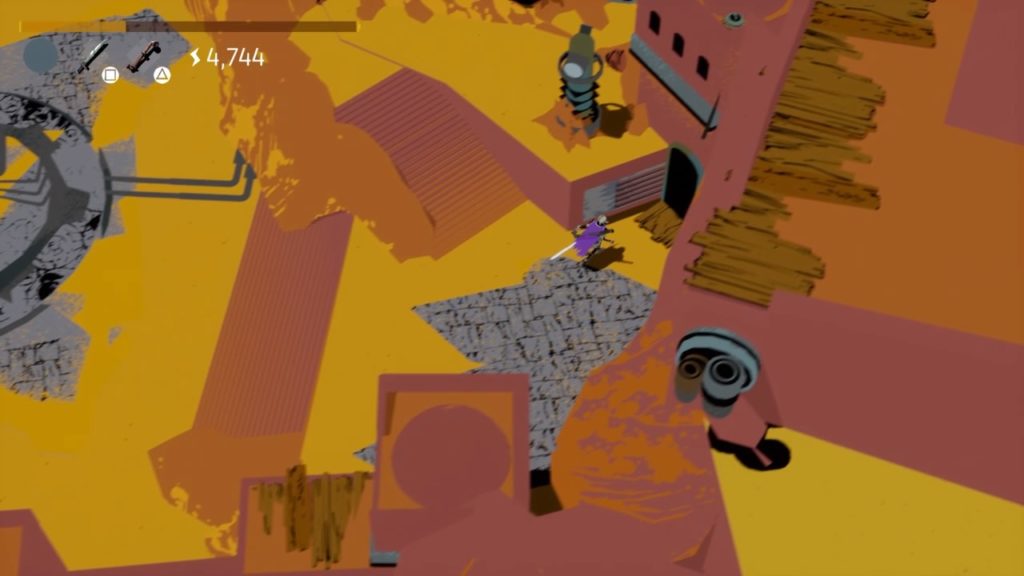
Go through this doorway in the Village area. 
Inside this Village building is the Cooking Pan Strike Tool. 
Inside this Village building is the Wooden Spoon Charge Tool. 
Inside Danielle’s Shop on the counter is the Blacksmith’s Rag Cape. 
Outside the Temple on the left is the Twig Charge Tool. 
Inside the Power Reserves is the Chain Blade Charge Tool. 
Inside the Power Reserves is the Reserves Banner Cape. 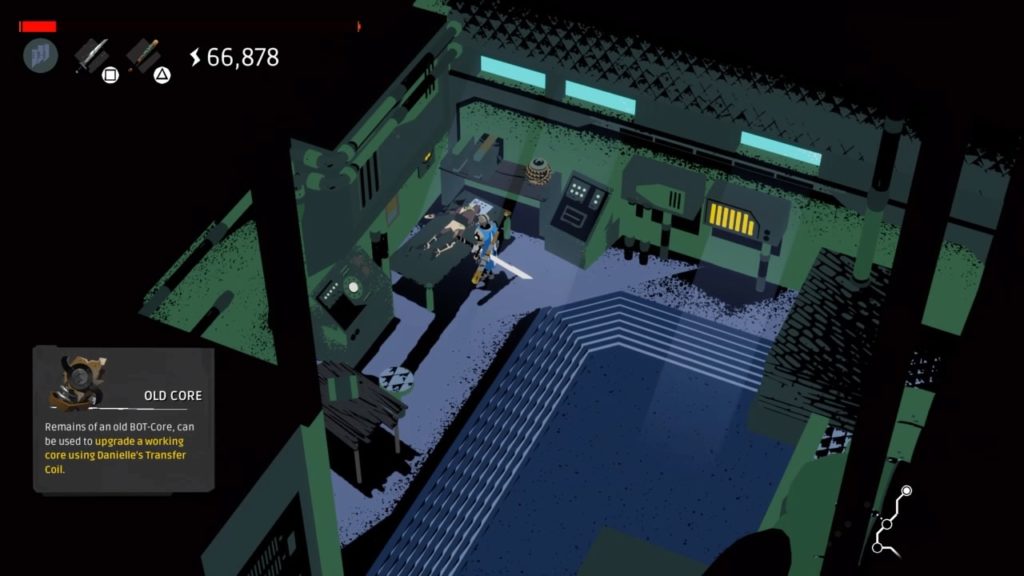
Inside the Power Reserves is an Old Core. 
After upgrading the 1st time, talk to her & get your 2nd Old Core. 
Inside the Archive is an Old Core. 
Inside the Archive is the Archive Banner Cape. 
In the Archives is the Focus Hammer Strike Tool. 
Inside of the Lockdown System is the Dual Blades Charge Tool. 
Inside the Lockdown System is the Lockdown Banner Cape. 
Inside the Lockdown System is an Old Core. 
Inside the Power Grid is the Fan Blade Charge Tool. 
Inside the Power Grid is an Old Core. 
Inside the Power Grid is the Power Grid Banner Cape. 
Inside the Atmospheric Analysis is the Thunder Staff Strike Tool. 
Inside the Atmospheric Analysis is an Old Core. 
Inside the Atmospheric Analysis is the Atmospheric Analysis Banner Cape. 
Inside the Synchronous Field is the Magnetic Fork Charge Tool. 
Inside the Synchronous Field is the Synchronous Field Banner Cape . 
Inside the Synchronous Field is an Old Core. 
At the Secret Tunnel to the back entrance of the Temple is the Lost Garment Cape. 
Inside the Back Entrance to the Temple is the BOT-C HLMT (helmet). 
Inside the North Star Conduit is the Folded Edge Axe Strike Tool. 
Inside the North Star Conduit is the North Star Conduit Banner Cape. 
Inside the North Star Conduit is an Old Core. 
Behind Roger is an Old Core (after completing the first 7 levels). 
Inside the Scavenger’s Hidden Stash is the BOT-C CHRGR Charge Tool. 
Inside the Scavenger’s Hidden Stash is the BOT-C STRKR Strike Tool. 
Inside the Scavenger’s Hidden Stash is the Old Cloth Cape. 
In the Weather System Control (inside the Well) is the Cloth from the Creature’s Hand Cape. 
Inside the Weather System Control (inside the Well) is the Greatsword Prototype Strike Tool.


![]() Hand Crafted
Hand Crafted
Find all of Danielle’s tools.
See ‘Looking Fancy’ for more information.

![]() Fully Charged
Fully Charged
Fully upgrade the BOT-Core.
Take your collected Old Cores to Danielle’s Shop in the Village to be able to upgrade your BOT-Core. As soon as you find one it’s highly recommended to use it to upgrade. There are 9 Old Cores to find and use to upgrade to BOT-Core Level 10.

Fully Charged Trophy.


![]() Backup Power
Backup Power
Generate a total of 2,000,000 power
You will earn this by having a cumulative total of 2,000,000 power throughout the game. You do not need all 2,000,000 power at one time, so you can spend power as needed throughout the game. (In making this guide, over 6,000,000 power was earned!)

![]() R0g3rF0g
R0g3rF0g
Unlock the Weather Control Monolith.
In the Temple there are 4 Monoliths: 2 on the Left and 2 on the Right. As you progress through the levels, you will be completing the Power Reserves, Archives, Lockdown Systems, Power Grid, Atmospheric Analysis, Synchronous Field, and the North Star Conduit. When you reach the end room of each level, you will interact with the main computer at the far back of the room. Each one of these is connected to being able to turn on the Monoliths. Then follow the path on the right, under this room to a platform that brings you back where Roger is located. When the Monoliths have a sparkly glow you will be able to interact with them as they become available. As you unlock more Monoliths, you will be able to enter more levels noted above. Eventually after you unlock the 7 levels mentioned above, you will be able to unlock the final (4th) Weather Control Monolith.

Core System Monoliths Turned On. 
Core System Monoliths Not Turned On. 
Support Monoliths Not Turned On. 
The 7 main levels to complete before the Weather System Control is accessible. 
Turn on the Weather Control Monolith.


![]() It’s Electric
It’s Electric
Generate 1,000 power in one hit.
Hit a ball and if you hit more targets and bumpers with that single hit, you will generate 1,000 power in one hit.

![]() Let There Be Light
Let There Be Light
Activate the Power Reserves.
By completing the Power Reserves level, you will have interacted with the computer in the final room to activate the ability to turn on the 2nd Monolith.


![]() Too Much Power
Too Much Power
Charge 7 orbs at once.
You will use a Charge Tool by holding down the Charge button and having 7 balls charged at the same time. Where there are areas with multiple balls, you can move around while you have a ball or balls charged to collect more. If there is only a single ball available, you can charge the one ball, move slightly away from where you collected it from. After a few seconds another ball will appear. Repeat this process to get 7 charged balls at the same time.

![]() Ricochet
Ricochet
Hit 20 bumpers with one shot.
Hit a ball and have it hit at least 20 bumpers with the single shot. You will complete this once you find a room with many bumpers that will allow the ball to ricochet off of bumpers without missing another consecutive bumper.


![]() Into the Well
Into the Well
Enter the Creature’s well.
After unlocking the Weather Control Monolith, you will enter the Weather System Control inside the Temple. Once you start to go through it you will come to a room where you need to interact with Roger. He will tell you that the bridge is broken, so this means that you must enter this level by another way. Go outside of the Temple to the Well. Now you can interact with the Well to enter it for the first time. See the pictures below.

Enter the Weather System Control Level. 
Find Roger at the end of a broken Bridge. 
Enter the Well.

![]() Sustained
Sustained
Heal a total of 1,000 health absorbed from anomaly balls.
The Anomaly Balls are the fiery red balls that the Creature fires or the Cannons fire at you. Use the Fan Blade Charge Tool by pressing the Charge button while the fiery red balls are aimed at or near you. This will allow you to collect them. They immediately change to a normal ball that you can use and they give you health if needed. If you have full health this will not count toward the Healing from Lifesteal stat. This is very important on the Synchronous Field and Weather System Control levels. These are the hardest levels in the game as the Creature is trying to hit you or an explosive target to injure you.
Note: You can check how many you have absorbed under the Menu of Settings -> Stats to see your current total of Healing from Lifesteal. Once you have 1,000 under this stat, you will earn this trophy.

Settings: Stats: Healing from Lifesteal.
![]() Stay Clear
Stay Clear
Destroy 100 drones using EMPs
EMPs are the orange star shaped, rotating objects that try to deplete your health. You will hit the ball(s) toward the EMPs to destroy at least 100 of them.
Tip: Use the Folded Edge Axe to hit multiple EMPs that spread and the Dual Blades, as they have emit a red laser aiming line that is great for destroying the linear waves of EMPs.


![]() Old Memories
Old Memories
Find all the lore
There are 29 Memories to collect. In the final room of the first 7 levels there are 4 Logs/Journal Entries to read by interacting with them. There is one in each corner of the area where you turn on the computer for each level. They are always in these same 4 corners! The only one that is not in these locations is the one near a closed door in the first building that leads to the Scavenger’s Hidden Stash. See pictures below.

Near a Closed Door in the 1st Building that Leads to the Hidden Stash. 
Old Memories Trophy.


![]() Back in Business
Back in Business
Unlock the Support Monoliths.
After completing the previous levels, you will be able to interact with the 3rd Monolith to open it. This will allow you to access the Atmospheric Analysis, Synchronous Field, and the North Star Conduit levels.

Activate the Support Monoliths. 
Back in Business Trophy.


![]() There is Nothing
There is Nothing
Try to escape the sandstorm
Exit the Temple/village area and go into the sandstorm. Go by any direction that does not have small stones or wooden stakes.

![]() It’s Been a Long Time
It’s Been a Long Time
Open the temple
The first time you activate the Power Reserves inside the Temple you will earn this trophy. To activate a level, you need to hit a ball against the Structure for that level as shown in the picture below.


![]() Stick Ball
Stick Ball
Let’s play.
Outside of the well area there is a Small Building to the left that you can enter to collect a Baseball Bat. Go to the location where the wooden stakes form a boxed in area in the front of where you collected the Baseball Bat to hit the Ball here to earn this trophy. See ‘Looking Fancy’ trophy description for these pictures.

![]() Little Engineer
Little Engineer
Upgrade your BOT-Core.
After obtaining your first Old Core from the Power Reserves, go into Danielle’s shop to upgrade your BOT-Core. Talk to her and she will give you your second Old Core. See picture below.


![]() Take This
Take This
Find a secret charge tool.
See ‘Looking Fancy’ for more information.

![]() Oh…Shiny!
Oh…Shiny!
Find a secret strike tool.
See ‘Looking Fancy’ for more information.

![]() Helpless
Helpless
Get thrown out of the machine.
After dying for the first time in the Temple/village area, you will be thrown out of the machine (Well).

![]() Moonlighting
Moonlighting
Help Roger mop the floor.
Stand on Roger’s mop that he has on the floor. You will need to swing around for about 10 seconds to earn this trophy.